
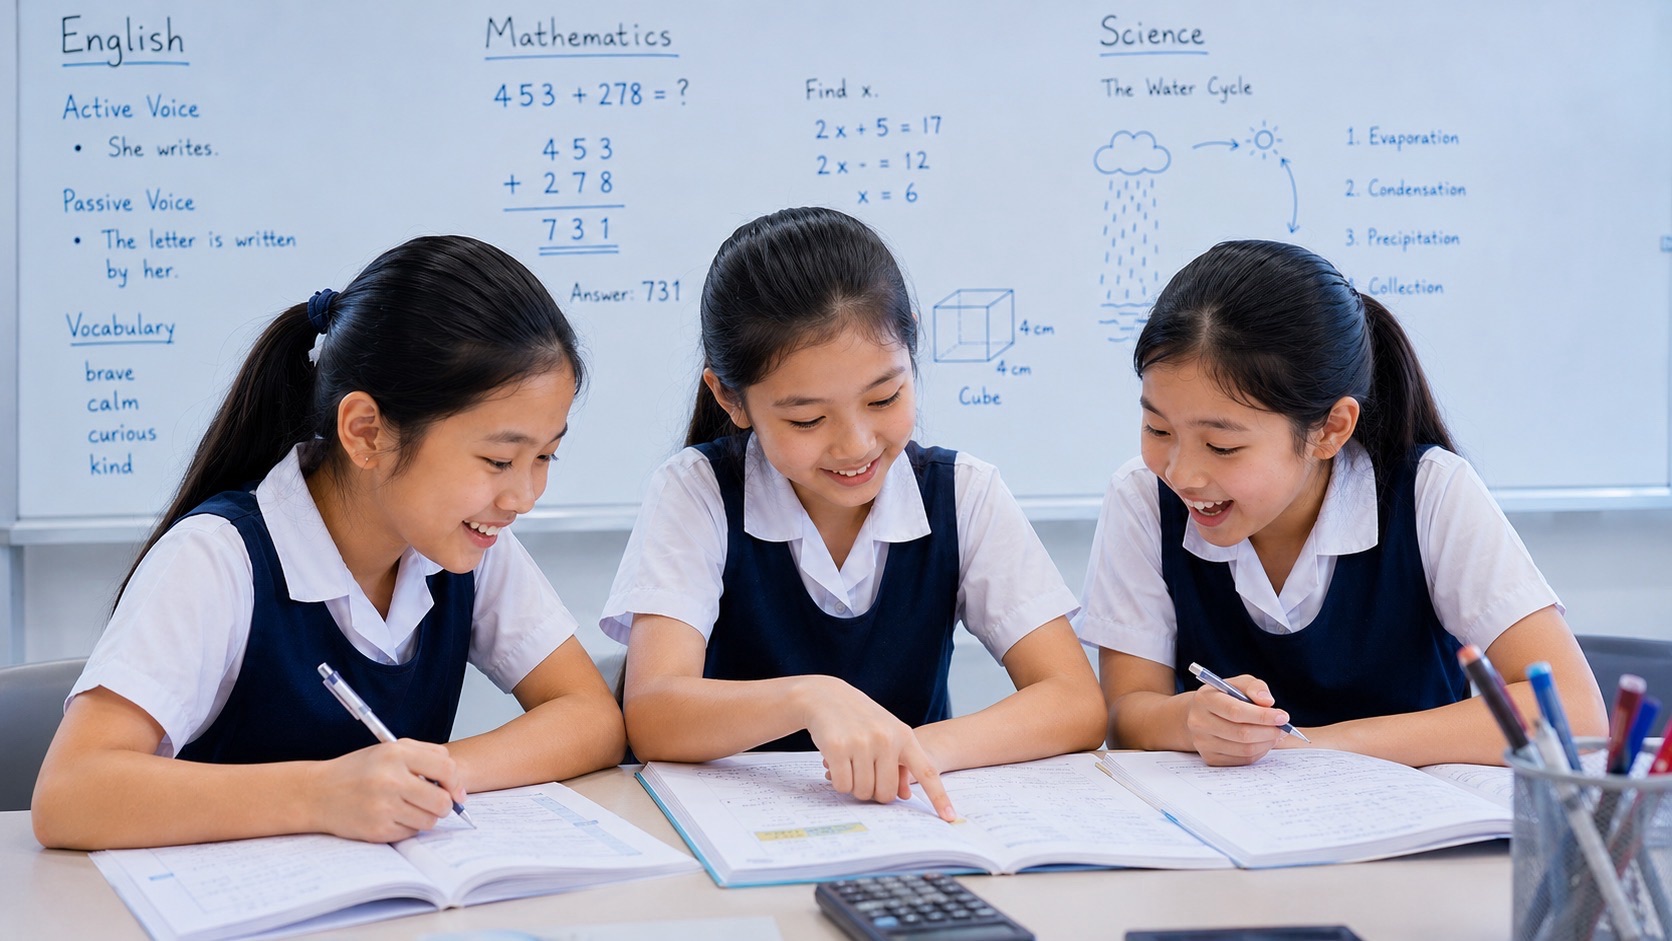
What simple Primary 3 Science experiments can children do at home in Singapore? Start with the safe basics: observe how a seed grows, sort objects by material, compare whether samples absorb water, record which objects float, and use labelled pictures to compare life cycles. A family does not need expensive laboratory equipment to practise observing, comparing, classifying and explaining. This guide provides 24 simple, supervised P3 Science activities with step-by-step instructions, what to record, a model observation and one original question for school-style revision.
These activities follow Singapore MOE Primary 3 Science themes: living and non-living things, classification, diversity of materials, life cycles of plants and animals, and magnets. SEAB does not conduct a national P3 Science examination; schools decide whether and how these process skills appear in their assessments. Nothing here is a guarantee of what will be tested. The most useful home learning experience is a safe, honest investigation that teaches a child to record what actually happened, even when the result differs from the prediction.
- No risky experiments: do not use household mains wiring, strong loose magnets, flames, unknown chemicals, mould cultures or mosquito breeding.
- Use adult supervision: water tests, small items, plants and magnets require sensible controls according to the child’s age and equipment.
- Start with predictions: let the student say what might happen before making an observation.
- Record the result: write the sample, date, test condition and what was seen.
- Use the correct P3 concept: life characteristics, material property, life-cycle stage or magnetic interaction.
- Separate observation from explanation: a result is not automatically proof of the predicted cause.
- End with one new question: change the object or example and ask whether the reasoning still works.
Before You Begin: A Practical Home Safety Policy
A P3 student should not independently handle electrical circuits connected to mains power, lithium button cells, small powerful magnets, sharp blades, hot surfaces, glass shards, unknown wild organisms, mould or chemical cleaners. Small magnets are particularly dangerous if swallowed, especially more than one; keep them away from young children and use only suitable large, securely enclosed magnets under responsible supervision. If an activity requires unsafe improvisation, replace it with a school diagram or a teacher-led demonstration.
Never deliberately breed mosquitoes to learn their life cycles, or culture mould and bacteria in household containers. Singapore families can study these organisms through labelled photographs and official public-health educational materials. When observing plants or animals outdoors, do not collect wild creatures or disturb habitats. A clean shallow tray and large familiar objects can support worthwhile observation without turning revision into an unnecessary hazard.
Adults should also assess practical details that generic worksheets overlook: Is the floor slippery when water spills? Could a child put a small sample in their mouth? Is a torch too bright to shine towards eyes? Could the activity damage electronics or a medical device? Are allergies or sensitivities relevant? Choose paper-and-picture alternatives whenever the safer option teaches the same concept.
Use This Four-Column Observation Log
| Date and sample | Prediction | What actually happened | Science idea / next question |
|---|---|---|---|
| Monday — paper square | Will absorb water | Water darkened the paper | Absorbent in this test; try a plastic sheet |
| Tuesday — floating object | Might float | Remained on surface | Floated in this setup; do not infer waterproofness |
| Wednesday — seedling photo | More leaves than Monday | Two extra leaves visible | Observed growth; repeat at same time |
| Thursday — labelled pole diagram | North–North will repel | Diagram depicts repulsion | Like poles repel; test South–South prediction |
The log is more important than the display of beautiful notes. Make predictions before a test, record the result without editing it to fit the prediction, and distinguish what you observed from what you inferred. If a sample behaves unexpectedly, check whether the conditions changed and try again safely. The aim is not to prove the parent correct; it is to help the student discover what the evidence actually supports.
24 Safe Home Activities for Primary 3 Science
Activity 1: Living and non-living sort
What you need. Four photographs or large picture cards: a seedling, toy car, resting cat and bicycle. Choose an uncluttered work area and check suitability for the child before starting. If equipment or materials are uncertain, replace the hands-on element with teacher-approved photographs or an illustrated worksheet.
What to do. Sort the pictures into living and non-living. Ask the child to give two life characteristics rather than deciding by movement. Ask the child to predict what might happen, then follow the procedure calmly. This teaches the difference between a hypothesis or prediction and an observation, without turning a simple Primary 3 activity into a sophisticated laboratory project.
What to record. Record living: seedling and cat; non-living: toy car and bicycle. The toy may move but does not grow or reproduce biologically. Keep a dated one-line record or a neatly labelled table. An honest record states what was actually seen; it does not change the result to match a textbook example. The parent can prompt by asking, ‘What did you see, and where is the evidence?’
Important safety and misconception check. A toy can be made to look or move like an animal, but appearance is not proof of life. A safe, level-appropriate activity must remain more important than a dramatic demonstration. When a conclusion is too broad, narrow it to the object and conditions tested rather than inventing certainty.
One examination-style follow-up. Would a rooted tree still be living on a day when no leaves visibly moved? Have the pupil answer independently in a complete but concise sentence. If the response is incomplete, return to the observation log, explain the correct P3 concept and present a different example later as a transfer check.
Activity 2: The changing tree journal
What you need. A tree visible from a safe public path or a trusted sequence of photographs. Choose an uncluttered work area and check suitability for the child before starting. If equipment or materials are uncertain, replace the hands-on element with teacher-approved photographs or an illustrated worksheet.
What to do. Observe at two different dates, keeping the observation point consistent if safe. Note visible new leaves, flowers or other changes without touching the tree. Ask the child to predict what might happen, then follow the procedure calmly. This teaches the difference between a hypothesis or prediction and an observation, without turning a simple Primary 3 activity into a sophisticated laboratory project.
What to record. Write dated descriptions such as ‘I saw two new leaves in this part of the plant’ only when those details are genuinely visible. Keep a dated one-line record or a neatly labelled table. An honest record states what was actually seen; it does not change the result to match a textbook example. The parent can prompt by asking, ‘What did you see, and where is the evidence?’
Important safety and misconception check. Do not declare a particular cause of growth from two photographs unless that factor was investigated. A safe, level-appropriate activity must remain more important than a dramatic demonstration. When a conclusion is too broad, narrow it to the object and conditions tested rather than inventing certainty.
One examination-style follow-up. What further observation would help distinguish growth from changes in the camera angle? Have the pupil answer independently in a complete but concise sentence. If the response is incomplete, return to the observation log, explain the correct P3 concept and present a different example later as a transfer check.
Activity 3: A seed’s growth stages
What you need. A clean, suitable bean seed, a small planting container and appropriate care by an adult. Choose an uncluttered work area and check suitability for the child before starting. If equipment or materials are uncertain, replace the hands-on element with teacher-approved photographs or an illustrated worksheet.
What to do. Plant according to safe gardening directions and observe over days. Draw the seed and young plant as development happens. Ask the child to predict what might happen, then follow the procedure calmly. This teaches the difference between a hypothesis or prediction and an observation, without turning a simple Primary 3 activity into a sophisticated laboratory project.
What to record. Record the date when a shoot or leaf becomes visible; do not write that every seed must develop on the same day. Keep a dated one-line record or a neatly labelled table. An honest record states what was actually seen; it does not change the result to match a textbook example. The parent can prompt by asking, ‘What did you see, and where is the evidence?’
Important safety and misconception check. Do not use mouldy seeds, ingest experiment materials or treat failure to sprout as proof that all seeds are non-living. A safe, level-appropriate activity must remain more important than a dramatic demonstration. When a conclusion is too broad, narrow it to the object and conditions tested rather than inventing certainty.
One examination-style follow-up. How does the observed young plant fit the seed → young plant → adult plant sequence? Have the pupil answer independently in a complete but concise sentence. If the response is incomplete, return to the observation log, explain the correct P3 concept and present a different example later as a transfer check.
Activity 4: Living things versus moving objects
What you need. A short video of a toy robot and a labelled photograph of a rooted plant. Choose an uncluttered work area and check suitability for the child before starting. If equipment or materials are uncertain, replace the hands-on element with teacher-approved photographs or an illustrated worksheet.
What to do. Write one claim that movement alone proves nothing about biological life. Compare the robot with the plant’s life processes. Ask the child to predict what might happen, then follow the procedure calmly. This teaches the difference between a hypothesis or prediction and an observation, without turning a simple Primary 3 activity into a sophisticated laboratory project.
What to record. A suitable response is: ‘The robot can move but does not carry out biological growth and reproduction as a living organism.’ Keep a dated one-line record or a neatly labelled table. An honest record states what was actually seen; it does not change the result to match a textbook example. The parent can prompt by asking, ‘What did you see, and where is the evidence?’
Important safety and misconception check. Do not assume every stationary thing is non-living or that all living things move from place to place. A safe, level-appropriate activity must remain more important than a dramatic demonstration. When a conclusion is too broad, narrow it to the object and conditions tested rather than inventing certainty.
One examination-style follow-up. Could a wind-up clock be living because its hands move? Explain. Have the pupil answer independently in a complete but concise sentence. If the response is incomplete, return to the observation log, explain the correct P3 concept and present a different example later as a transfer check.
Activity 5: Sort living groups from pictures
What you need. Four labelled cards: sunflower, butterfly, mushroom and bacterium. Choose an uncluttered work area and check suitability for the child before starting. If equipment or materials are uncertain, replace the hands-on element with teacher-approved photographs or an illustrated worksheet.
What to do. Place them in plants, animals, fungi and bacteria. Ask for a relevant group identity rather than location or size. Ask the child to predict what might happen, then follow the procedure calmly. This teaches the difference between a hypothesis or prediction and an observation, without turning a simple Primary 3 activity into a sophisticated laboratory project.
What to record. Record the four broad P3 groups and which correctly labelled example belongs to each. Keep a dated one-line record or a neatly labelled table. An honest record states what was actually seen; it does not change the result to match a textbook example. The parent can prompt by asking, ‘What did you see, and where is the evidence?’
Important safety and misconception check. Do not handle mould or grow microbes to produce a classification example. A safe, level-appropriate activity must remain more important than a dramatic demonstration. When a conclusion is too broad, narrow it to the object and conditions tested rather than inventing certainty.
One examination-style follow-up. How would a labelled fern be grouped compared with a mushroom? Have the pupil answer independently in a complete but concise sentence. If the response is incomplete, return to the observation log, explain the correct P3 concept and present a different example later as a transfer check.
Activity 6: Flowering or non-flowering
What you need. Labelled images of a hibiscus and a fern. Choose an uncluttered work area and check suitability for the child before starting. If equipment or materials are uncertain, replace the hands-on element with teacher-approved photographs or an illustrated worksheet.
What to do. Compare the broad plant types; write the group name and what information makes the classification reliable. Ask the child to predict what might happen, then follow the procedure calmly. This teaches the difference between a hypothesis or prediction and an observation, without turning a simple Primary 3 activity into a sophisticated laboratory project.
What to record. Hibiscus is a flowering plant; fern is a non-flowering plant. Keep a dated one-line record or a neatly labelled table. An honest record states what was actually seen; it does not change the result to match a textbook example. The parent can prompt by asking, ‘What did you see, and where is the evidence?’
Important safety and misconception check. A photograph without a visible flower does not prove that a known flowering species is non-flowering. A safe, level-appropriate activity must remain more important than a dramatic demonstration. When a conclusion is too broad, narrow it to the object and conditions tested rather than inventing certainty.
One examination-style follow-up. What further information would help if the plant picture was unidentified? Have the pupil answer independently in a complete but concise sentence. If the response is incomplete, return to the observation log, explain the correct P3 concept and present a different example later as a transfer check.
Activity 7: Recognise animal groups
What you need. Picture cards of frog, cat, butterfly, lizard, bird and fish. Choose an uncluttered work area and check suitability for the child before starting. If equipment or materials are uncertain, replace the hands-on element with teacher-approved photographs or an illustrated worksheet.
What to do. Name the broad P3 groups, then ask one paired comparison, such as a bird versus a butterfly. Ask the child to predict what might happen, then follow the procedure calmly. This teaches the difference between a hypothesis or prediction and an observation, without turning a simple Primary 3 activity into a sophisticated laboratory project.
What to record. Record amphibian, mammal, insect, reptile, bird and fish group labels accurately. Keep a dated one-line record or a neatly labelled table. An honest record states what was actually seen; it does not change the result to match a textbook example. The parent can prompt by asking, ‘What did you see, and where is the evidence?’
Important safety and misconception check. Do not classify animals only by whether they swim, walk or fly. A safe, level-appropriate activity must remain more important than a dramatic demonstration. When a conclusion is too broad, narrow it to the object and conditions tested rather than inventing certainty.
One examination-style follow-up. Why does a bird with wings not belong to the insect group? Have the pupil answer independently in a complete but concise sentence. If the response is incomplete, return to the observation log, explain the correct P3 concept and present a different example later as a transfer check.
Activity 8: Leaf observation without picking
What you need. A few naturally fallen clean leaves or clear photographs of different leaves. Choose an uncluttered work area and check suitability for the child before starting. If equipment or materials are uncertain, replace the hands-on element with teacher-approved photographs or an illustrated worksheet.
What to do. Compare visible shapes, edges and sizes using a consistent feature. Sort by that observable feature; do not assume leaf appearance alone determines every plant group. Ask the child to predict what might happen, then follow the procedure calmly. This teaches the difference between a hypothesis or prediction and an observation, without turning a simple Primary 3 activity into a sophisticated laboratory project.
What to record. Record which leaves are longer, wider or have different edges according to the actual samples. Keep a dated one-line record or a neatly labelled table. An honest record states what was actually seen; it does not change the result to match a textbook example. The parent can prompt by asking, ‘What did you see, and where is the evidence?’
Important safety and misconception check. Do not collect unknown plants that could irritate skin or claim leaf shape alone always identifies a species. A safe, level-appropriate activity must remain more important than a dramatic demonstration. When a conclusion is too broad, narrow it to the object and conditions tested rather than inventing certainty.
One examination-style follow-up. Which classification rule did you choose, and does it work for every sample? Have the pupil answer independently in a complete but concise sentence. If the response is incomplete, return to the observation log, explain the correct P3 concept and present a different example later as a transfer check.
Activity 9: Object versus material hunt
What you need. Safe household objects such as a plastic cup, wooden ruler, fabric pouch and rubber band. Choose an uncluttered work area and check suitability for the child before starting. If equipment or materials are uncertain, replace the hands-on element with teacher-approved photographs or an illustrated worksheet.
What to do. Write two columns, object and material. Name which physical item is seen and which substance it is made from. Ask the child to predict what might happen, then follow the procedure calmly. This teaches the difference between a hypothesis or prediction and an observation, without turning a simple Primary 3 activity into a sophisticated laboratory project.
What to record. A cup is an object; plastic is a material if the tested cup is plastic. Keep a dated one-line record or a neatly labelled table. An honest record states what was actually seen; it does not change the result to match a textbook example. The parent can prompt by asking, ‘What did you see, and where is the evidence?’
Important safety and misconception check. Avoid sharp glass objects and do not treat the item’s purpose as the name of its material. A safe, level-appropriate activity must remain more important than a dramatic demonstration. When a conclusion is too broad, narrow it to the object and conditions tested rather than inventing certainty.
One examination-style follow-up. Can a different object be made from the same material? Have the pupil answer independently in a complete but concise sentence. If the response is incomplete, return to the observation log, explain the correct P3 concept and present a different example later as a transfer check.
Activity 10: Flexibility with safe strips
What you need. Adult-prepared, large strips of paper, soft fabric and flexible plastic sheet, without sharp edges. Choose an uncluttered work area and check suitability for the child before starting. If equipment or materials are uncertain, replace the hands-on element with teacher-approved photographs or an illustrated worksheet.
What to do. Bend each gently in the same way and record whether it bends without breaking. Do not pull until pieces snap. Ask the child to predict what might happen, then follow the procedure calmly. This teaches the difference between a hypothesis or prediction and an observation, without turning a simple Primary 3 activity into a sophisticated laboratory project.
What to record. Note the observed flexibility under this simple test, not a numerical measurement that was never taken. Keep a dated one-line record or a neatly labelled table. An honest record states what was actually seen; it does not change the result to match a textbook example. The parent can prompt by asking, ‘What did you see, and where is the evidence?’
Important safety and misconception check. Different dimensions make material comparisons less fair; keep strip sizes comparable where possible. A safe, level-appropriate activity must remain more important than a dramatic demonstration. When a conclusion is too broad, narrow it to the object and conditions tested rather than inventing certainty.
One examination-style follow-up. Which sample is most suitable for a bendable strap under the given observations? Have the pupil answer independently in a complete but concise sentence. If the response is incomplete, return to the observation log, explain the correct P3 concept and present a different example later as a transfer check.
Activity 11: Small-load strength comparison
What you need. Two adult-prepared paper handles of similar size, a light empty paper bag and a few large safe items. Choose an uncluttered work area and check suitability for the child before starting. If equipment or materials are uncertain, replace the hands-on element with teacher-approved photographs or an illustrated worksheet.
What to do. Add the same small load to each in a controlled adult-supervised setup; stop before unsafe tearing or falling objects. Ask the child to predict what might happen, then follow the procedure calmly. This teaches the difference between a hypothesis or prediction and an observation, without turning a simple Primary 3 activity into a sophisticated laboratory project.
What to record. Record which handle remained intact under that particular load. This is evidence for that test condition, not a lifetime guarantee. Keep a dated one-line record or a neatly labelled table. An honest record states what was actually seen; it does not change the result to match a textbook example. The parent can prompt by asking, ‘What did you see, and where is the evidence?’
Important safety and misconception check. Do not use heavy books over feet, fragile items or hanging loads that could fall. A safe, level-appropriate activity must remain more important than a dramatic demonstration. When a conclusion is too broad, narrow it to the object and conditions tested rather than inventing certainty.
One examination-style follow-up. What would make the comparison less fair if one handle were much wider? Have the pupil answer independently in a complete but concise sentence. If the response is incomplete, return to the observation log, explain the correct P3 concept and present a different example later as a transfer check.
Activity 12: Water-absorption drops
What you need. Shallow tray, small pieces of tissue, familiar fabric and adult-prepared flexible plastic sheet; a dropper. Choose an uncluttered work area and check suitability for the child before starting. If equipment or materials are uncertain, replace the hands-on element with teacher-approved photographs or an illustrated worksheet.
What to do. Apply the same small amount of water to each sample and observe whether it is absorbed. Keep the samples clean and dispose of wet materials afterward. Ask the child to predict what might happen, then follow the procedure calmly. This teaches the difference between a hypothesis or prediction and an observation, without turning a simple Primary 3 activity into a sophisticated laboratory project.
What to record. Write ‘water was absorbed’ or ‘water remained on the surface’ for each actual sample. Keep a dated one-line record or a neatly labelled table. An honest record states what was actually seen; it does not change the result to match a textbook example. The parent can prompt by asking, ‘What did you see, and where is the evidence?’
Important safety and misconception check. Do not use liquids other than water or confuse absorption with floating. A safe, level-appropriate activity must remain more important than a dramatic demonstration. When a conclusion is too broad, narrow it to the object and conditions tested rather than inventing certainty.
One examination-style follow-up. Which sample would be more suitable for a rain-cover material based on this test? Have the pupil answer independently in a complete but concise sentence. If the response is incomplete, return to the observation log, explain the correct P3 concept and present a different example later as a transfer check.
Activity 13: Waterproof versus absorbent
What you need. A clean paper sample and a waterproof plastic sample of comparable size, water and a tray. Choose an uncluttered work area and check suitability for the child before starting. If equipment or materials are uncertain, replace the hands-on element with teacher-approved photographs or an illustrated worksheet.
What to do. Compare small drops on each and draw what is visible. Name the property tested by this observation. Ask the child to predict what might happen, then follow the procedure calmly. This teaches the difference between a hypothesis or prediction and an observation, without turning a simple Primary 3 activity into a sophisticated laboratory project.
What to record. A waterproof sample does not absorb water under the test. An absorbent sample takes water in. Keep a dated one-line record or a neatly labelled table. An honest record states what was actually seen; it does not change the result to match a textbook example. The parent can prompt by asking, ‘What did you see, and where is the evidence?’
Important safety and misconception check. Do not conclude anything about how the samples float from this water-drop test. A safe, level-appropriate activity must remain more important than a dramatic demonstration. When a conclusion is too broad, narrow it to the object and conditions tested rather than inventing certainty.
One examination-style follow-up. What separate observation would answer whether a sample floats? Have the pupil answer independently in a complete but concise sentence. If the response is incomplete, return to the observation log, explain the correct P3 concept and present a different example later as a transfer check.
Activity 14: Float or sink safely
What you need. Shallow basin with a little water, large clean plastic toy and wooden sample, plus an adult-approved metal object. Choose an uncluttered work area and check suitability for the child before starting. If equipment or materials are uncertain, replace the hands-on element with teacher-approved photographs or an illustrated worksheet.
What to do. Predict which objects may float or sink, test one at a time and record the actual result. Dry the surrounding surface immediately afterward. Ask the child to predict what might happen, then follow the procedure calmly. This teaches the difference between a hypothesis or prediction and an observation, without turning a simple Primary 3 activity into a sophisticated laboratory project.
What to record. Record for each sample whether it stayed near the surface or sank in the tested conditions. Keep a dated one-line record or a neatly labelled table. An honest record states what was actually seen; it does not change the result to match a textbook example. The parent can prompt by asking, ‘What did you see, and where is the evidence?’
Important safety and misconception check. Do not teach density calculations as a required P3 concept, or make universal claims about every object made of the sample’s material. A safe, level-appropriate activity must remain more important than a dramatic demonstration. When a conclusion is too broad, narrow it to the object and conditions tested rather than inventing certainty.
One examination-style follow-up. Could two objects made of similar material behave differently in a different design? Have the pupil answer independently in a complete but concise sentence. If the response is incomplete, return to the observation log, explain the correct P3 concept and present a different example later as a transfer check.
Activity 15: Read light through materials
What you need. Small low-brightness torch, clean cardboard and thin fabric or transparent plastic held by an adult. Choose an uncluttered work area and check suitability for the child before starting. If equipment or materials are uncertain, replace the hands-on element with teacher-approved photographs or an illustrated worksheet.
What to do. Keep the light source steady and compare whether most, some or no light passes through each material. Never shine it into eyes. Ask the child to predict what might happen, then follow the procedure calmly. This teaches the difference between a hypothesis or prediction and an observation, without turning a simple Primary 3 activity into a sophisticated laboratory project.
What to record. Record plain-language light-transmission observations rather than memorising unrequired advanced labels. Keep a dated one-line record or a neatly labelled table. An honest record states what was actually seen; it does not change the result to match a textbook example. The parent can prompt by asking, ‘What did you see, and where is the evidence?’
Important safety and misconception check. Do not look directly into strong beams or use lasers, flame or hot lamps. A safe, level-appropriate activity must remain more important than a dramatic demonstration. When a conclusion is too broad, narrow it to the object and conditions tested rather than inventing certainty.
One examination-style follow-up. Which sample is suitable for a window and which for blocking most light? Have the pupil answer independently in a complete but concise sentence. If the response is incomplete, return to the observation log, explain the correct P3 concept and present a different example later as a transfer check.
Activity 16: Design a raincoat for a toy
What you need. Picture cards or a paper design of three candidate fabrics with supplied absorption and flexibility results. Choose an uncluttered work area and check suitability for the child before starting. If equipment or materials are uncertain, replace the hands-on element with teacher-approved photographs or an illustrated worksheet.
What to do. Choose the sample that both bends and does not absorb water according to the provided evidence; the task can be done without real wet sewing. Ask the child to predict what might happen, then follow the procedure calmly. This teaches the difference between a hypothesis or prediction and an observation, without turning a simple Primary 3 activity into a sophisticated laboratory project.
What to record. Record two reasons in one sentence: the sample is flexible and waterproof in the hypothetical test. Keep a dated one-line record or a neatly labelled table. An honest record states what was actually seen; it does not change the result to match a textbook example. The parent can prompt by asking, ‘What did you see, and where is the evidence?’
Important safety and misconception check. Do not claim the finished garment is watertight without considering seams and closure design. A safe, level-appropriate activity must remain more important than a dramatic demonstration. When a conclusion is too broad, narrow it to the object and conditions tested rather than inventing certainty.
One examination-style follow-up. What extra test would be needed if the toy’s outer cover had many gaps? Have the pupil answer independently in a complete but concise sentence. If the response is incomplete, return to the observation log, explain the correct P3 concept and present a different example later as a transfer check.
Activity 17: Plant life cycle picture puzzle
What you need. Three large printed or hand-drawn stage cards: seed, young plant and adult flowering plant. Choose an uncluttered work area and check suitability for the child before starting. If equipment or materials are uncertain, replace the hands-on element with teacher-approved photographs or an illustrated worksheet.
What to do. Arrange the cards in order and add arrows. Ask what a new generation would begin with. Ask the child to predict what might happen, then follow the procedure calmly. This teaches the difference between a hypothesis or prediction and an observation, without turning a simple Primary 3 activity into a sophisticated laboratory project.
What to record. Seed → young plant → adult plant; the adult can later produce seeds that start a new generation. Keep a dated one-line record or a neatly labelled table. An honest record states what was actually seen; it does not change the result to match a textbook example. The parent can prompt by asking, ‘What did you see, and where is the evidence?’
Important safety and misconception check. Do not replace the P3 observation stages with detailed P5 reproduction processes. A safe, level-appropriate activity must remain more important than a dramatic demonstration. When a conclusion is too broad, narrow it to the object and conditions tested rather than inventing certainty.
One examination-style follow-up. What would a photograph on Day 5 show that could help document growth? Have the pupil answer independently in a complete but concise sentence. If the response is incomplete, return to the observation log, explain the correct P3 concept and present a different example later as a transfer check.
Activity 18: Compare two insect cycles
What you need. Cards labelled egg, caterpillar, pupa, butterfly; and egg, nymph, grasshopper. Choose an uncluttered work area and check suitability for the child before starting. If equipment or materials are uncertain, replace the hands-on element with teacher-approved photographs or an illustrated worksheet.
What to do. Arrange each life cycle separately. Circle the stage present in the butterfly cycle but absent in the grasshopper cycle. Ask the child to predict what might happen, then follow the procedure calmly. This teaches the difference between a hypothesis or prediction and an observation, without turning a simple Primary 3 activity into a sophisticated laboratory project.
What to record. Butterfly includes pupa; grasshopper does not, and it has a nymph stage. Keep a dated one-line record or a neatly labelled table. An honest record states what was actually seen; it does not change the result to match a textbook example. The parent can prompt by asking, ‘What did you see, and where is the evidence?’
Important safety and misconception check. Do not handle live insects or assume every insect has exactly the same stages. A safe, level-appropriate activity must remain more important than a dramatic demonstration. When a conclusion is too broad, narrow it to the object and conditions tested rather than inventing certainty.
One examination-style follow-up. How would the cockroach compare with the grasshopper? Have the pupil answer independently in a complete but concise sentence. If the response is incomplete, return to the observation log, explain the correct P3 concept and present a different example later as a transfer check.
Activity 19: Chicken, frog and mosquito photo cards
What you need. Teacher-supplied or trusted labelled images of young and adult stages. Choose an uncluttered work area and check suitability for the child before starting. If equipment or materials are uncertain, replace the hands-on element with teacher-approved photographs or an illustrated worksheet.
What to do. Ask the child to put each sequence in order, using arrows and animal-appropriate names. Ask the child to predict what might happen, then follow the procedure calmly. This teaches the difference between a hypothesis or prediction and an observation, without turning a simple Primary 3 activity into a sophisticated laboratory project.
What to record. Chicken: egg, chick, adult. Frog: eggs, tadpole, froglet, adult in a familiar pictured sequence. Mosquito: egg, larva, pupa, adult. Keep a dated one-line record or a neatly labelled table. An honest record states what was actually seen; it does not change the result to match a textbook example. The parent can prompt by asking, ‘What did you see, and where is the evidence?’
Important safety and misconception check. Do not culture or collect mosquito larvae for a home investigation. A safe, level-appropriate activity must remain more important than a dramatic demonstration. When a conclusion is too broad, narrow it to the object and conditions tested rather than inventing certainty.
One examination-style follow-up. What feature makes the young form of a frog unlike the chick stage of a chicken? Have the pupil answer independently in a complete but concise sentence. If the response is incomplete, return to the observation log, explain the correct P3 concept and present a different example later as a transfer check.
Activity 20: Spot an unsupported life-cycle claim
What you need. A card stating ‘All insects have a pupa’ next to labelled butterfly and cockroach cycles. Choose an uncluttered work area and check suitability for the child before starting. If equipment or materials are uncertain, replace the hands-on element with teacher-approved photographs or an illustrated worksheet.
What to do. Have the child decide whether the statement fits both diagrams and explain the contradiction. Ask the child to predict what might happen, then follow the procedure calmly. This teaches the difference between a hypothesis or prediction and an observation, without turning a simple Primary 3 activity into a sophisticated laboratory project.
What to record. It is false because cockroaches have a nymph stage without a pupa, whereas butterflies have a pupa. Keep a dated one-line record or a neatly labelled table. An honest record states what was actually seen; it does not change the result to match a textbook example. The parent can prompt by asking, ‘What did you see, and where is the evidence?’
Important safety and misconception check. Do not mistake a true statement about one example for a rule covering all insects. A safe, level-appropriate activity must remain more important than a dramatic demonstration. When a conclusion is too broad, narrow it to the object and conditions tested rather than inventing certainty.
One examination-style follow-up. Write a corrected sentence that is true for the butterfly alone. Have the pupil answer independently in a complete but concise sentence. If the response is incomplete, return to the observation log, explain the correct P3 concept and present a different example later as a transfer check.
Activity 21: Magnetic-material sort, supervised
What you need. One large securely enclosed classroom magnet and adult-selected large objects or safely retained clips, wood, plastic and ordinary aluminium. Choose an uncluttered work area and check suitability for the child before starting. If equipment or materials are uncertain, replace the hands-on element with teacher-approved photographs or an illustrated worksheet.
What to do. The adult moves the magnet near samples at a comparable distance while the child observes; keep all pieces away from small children. Ask the child to predict what might happen, then follow the procedure calmly. This teaches the difference between a hypothesis or prediction and an observation, without turning a simple Primary 3 activity into a sophisticated laboratory project.
What to record. In ordinary tests iron or suitable steel can be attracted, while wood, plastic and ordinary aluminium are not attracted. Keep a dated one-line record or a neatly labelled table. An honest record states what was actually seen; it does not change the result to match a textbook example. The parent can prompt by asking, ‘What did you see, and where is the evidence?’
Important safety and misconception check. Do not use strong loose magnets, tiny magnet balls or equipment near medical devices and sensitive electronics. A safe, level-appropriate activity must remain more important than a dramatic demonstration. When a conclusion is too broad, narrow it to the object and conditions tested rather than inventing certainty.
One examination-style follow-up. Does attraction alone prove that the object is itself a permanent magnet? Have the pupil answer independently in a complete but concise sentence. If the response is incomplete, return to the observation log, explain the correct P3 concept and present a different example later as a transfer check.
Activity 22: Pole rule paper simulation
What you need. Two paper cards labelled N–S and N–S, with no actual magnets needed. Choose an uncluttered work area and check suitability for the child before starting. If equipment or materials are uncertain, replace the hands-on element with teacher-approved photographs or an illustrated worksheet.
What to do. Place the cards facing north-to-north, then north-to-south, and draw arrows showing expected attraction or repulsion. Ask the child to predict what might happen, then follow the procedure calmly. This teaches the difference between a hypothesis or prediction and an observation, without turning a simple Primary 3 activity into a sophisticated laboratory project.
What to record. Like poles repel; unlike poles attract. The labels determine the expected result in the diagram. Keep a dated one-line record or a neatly labelled table. An honest record states what was actually seen; it does not change the result to match a textbook example. The parent can prompt by asking, ‘What did you see, and where is the evidence?’
Important safety and misconception check. Do not rely on red or blue paint conventions when the actual pole labels are unknown. A safe, level-appropriate activity must remain more important than a dramatic demonstration. When a conclusion is too broad, narrow it to the object and conditions tested rather than inventing certainty.
One examination-style follow-up. What would you draw for south-to-south? Have the pupil answer independently in a complete but concise sentence. If the response is incomplete, return to the observation log, explain the correct P3 concept and present a different example later as a transfer check.
Activity 23: Freely suspended magnet video journal
What you need. A teacher-provided labelled demonstration video or trusted classroom diagram of a freely suspended bar magnet. Choose an uncluttered work area and check suitability for the child before starting. If equipment or materials are uncertain, replace the hands-on element with teacher-approved photographs or an illustrated worksheet.
What to do. Identify the brief swinging movement and the final settled state. Pause at the end to write the resting orientation. Ask the child to predict what might happen, then follow the procedure calmly. This teaches the difference between a hypothesis or prediction and an observation, without turning a simple Primary 3 activity into a sophisticated laboratory project.
What to record. The freely suspended bar magnet comes to rest pointing roughly North–South. Keep a dated one-line record or a neatly labelled table. An honest record states what was actually seen; it does not change the result to match a textbook example. The parent can prompt by asking, ‘What did you see, and where is the evidence?’
Important safety and misconception check. Do not improvise hanging powerful magnets over a child’s head or near electronics. A safe, level-appropriate activity must remain more important than a dramatic demonstration. When a conclusion is too broad, narrow it to the object and conditions tested rather than inventing certainty.
One examination-style follow-up. Why is a still frame taken during the swing weaker evidence of the final direction? Have the pupil answer independently in a complete but concise sentence. If the response is incomplete, return to the observation log, explain the correct P3 concept and present a different example later as a transfer check.
Activity 24: Investigation claim and evidence board
What you need. Four slips labelled prediction, observation, explanation and follow-up question. Choose an uncluttered work area and check suitability for the child before starting. If equipment or materials are uncertain, replace the hands-on element with teacher-approved photographs or an illustrated worksheet.
What to do. After any safe activity, ask the student to sort statements: ‘I think it will float’, ‘It floated’, ‘It stayed near the surface’, ‘Would another shape float?’. Ask the child to predict what might happen, then follow the procedure calmly. This teaches the difference between a hypothesis or prediction and an observation, without turning a simple Primary 3 activity into a sophisticated laboratory project.
What to record. A prediction precedes the test; an observation records the result; an explanation links to the science; a question suggests further investigation. Keep a dated one-line record or a neatly labelled table. An honest record states what was actually seen; it does not change the result to match a textbook example. The parent can prompt by asking, ‘What did you see, and where is the evidence?’
Important safety and misconception check. Do not rewrite the observation when it differs from the prediction. A safe, level-appropriate activity must remain more important than a dramatic demonstration. When a conclusion is too broad, narrow it to the object and conditions tested rather than inventing certainty.
One examination-style follow-up. Given a surprising result, what can you repeat and what should remain comparable? Have the pupil answer independently in a complete but concise sentence. If the response is incomplete, return to the observation log, explain the correct P3 concept and present a different example later as a transfer check.
How to Distinguish a Real Experiment from a Useful Observation Exercise
Not every worthwhile Science activity is an experiment. Sorting photograph cards is classification practice. Comparing two dated pictures is observation practice. Reading a teacher-provided life-cycle diagram is interpretation. Testing two materials under comparable conditions is a simple investigation. These all build scientific literacy, but a parent should not call every activity a controlled experiment merely because it happens at home. The wording should be accurate about what the child actually did.
A good experimental comparison needs a clear question: ‘Does this tested fabric absorb water?’ Then plan what changes and what should remain similar, such as amount of water, sample size and time allowed for observation. A stronger claim requires a meaningful comparison. On the other hand, ‘What do I see on this plant today?’ is an observation, not a test of which factor caused growth. Children who learn the distinction early produce clearer explanations in later Science questions.
A Seven-Day Home Science Revision Plan
- Day 1: living and non-living classification, plus a photo sorting challenge.
- Day 2: object versus material, flexibility and small-load strength observations.
- Day 3: water absorption and float/sink tests using the separate observation headings.
- Day 4: light transmission and a two-property design choice.
- Day 5: flowering-plant growth records and animal life-cycle card comparisons.
- Day 6: safe magnet diagrams or a supervised suitable magnet test.
- Day 7: mixed questions from the observation log, one unfamiliar data table and an explanation of two corrected mistakes.
This schedule is a suggestion, not a promise that seven days guarantees a particular school grade. Families can stretch each day over several sessions if the child needs more time. A student who responds well to drawing may prefer picture sorting; a student who likes verbal explanation may first answer orally and then write one clear sentence. Keep the sessions manageable, protect sleep and allow time to ask questions out of curiosity.
A Better Way to Discuss Mistakes After Home Experiments
Suppose a student predicts that an ordinary plastic cup will sink, but it floats in the tested setup. An unhelpful response is ‘You got it wrong’. A useful response is ‘Our prediction was different from what we observed. What did the cup do in the water? What can we say about this particular test?’ The correction records the actual result, not embarrassment. If the same child then assumes every plastic object will float, ask what additional tests would be needed before making a claim about all plastic objects.
Suppose the child uses a magnet to attract an iron paper clip, then concludes that the clip is a permanent magnet. Point out that suitable iron or steel can be attracted without being a separate permanent magnet. Ask what additional observation, such as repulsion with a known magnet, would distinguish the two possibilities in a simple school demonstration. This discussion strengthens reasoning more effectively than merely telling the child the ‘correct keyword’.
Frequently Asked Questions
Which P3 Science activities can be done with inexpensive home materials?
Safe picture classification, planting and observing a suitable seed, bending prepared strips, comparing water absorption, using a shallow basin for float/sink observations, and labelled magnet diagrams can all work.
Should a P3 child build an electromagnet at home?
There is no need. The syllabus recognises an electrical method, but it is best learned with teacher-approved equipment and supervision. Never connect improvised coils to household mains power.
Can we raise mosquito larvae at home to observe a life cycle?
Do not breed mosquitoes for revision. Use trusted labelled photographs, school diagrams and safe educational materials instead.
Is it safe to grow mould for a P3 classification activity?
Avoid culturing mould or bacteria at home. Use pictures of fungi and bacteria, because exposure to unknown organisms is unnecessary for the learning goal.
What if our experiment produces a result different from the textbook?
Record what actually happened, check whether the conditions or sample differ, and repeat safely if useful. Do not falsify the observation to fit the prediction.
Does floating prove a material is waterproof?
No. Floating or sinking and absorbing water are different observations and properties.
What kinds of magnet are appropriate around young children?
Only age-suitable large, securely enclosed educational magnets used under suitable supervision. Small, strong loose magnets present serious swallowing hazards.
Can pictures and paper simulations count as Science practice?
Yes. Scientific reasoning also includes classification, sequencing, diagram interpretation and explanation; not every task needs a physical experiment.
Are these experiments compulsory for Singapore P3 Science examinations?
No. They are optional MOE-aligned practice activities. Each child’s school sets actual assessment modes and tasks.
How do we know our child has learnt the idea?
Ask the child to explain an unfamiliar but similar problem without notes, cite the relevant observation and correct an earlier misconception independently.
Is there a national SEAB P3 Science practical examination?
No. There is no standalone national SEAB P3 Science paper or practical. Schools set P3 assessments under the MOE curriculum.
What comes after Primary 3 Science?
Primary 4 introduces other topics including matter, light, heat and systems. P3 concepts remain useful foundations for later learning and eventual PSLE revision.
Official Syllabus, School Examples and Next eduKate Reading
- MOE Primary Science Teaching and Learning Syllabus (2023 P3 cohort onwards)
- Valour Primary: P3 Science curriculum and inquiry approach
- P3 Science Process Skills, Data Tables and Fair Tests
- P3 Science Picture and Diagram Questions
- P3 Science 2027 Weighted Assessment Planning
- P3 Science Past-Year Paper Selection Guide
Editorial note: 12 November 2026. These 24 activities are original, optional practice examples, not mandatory MOE experiments or predicted 2027 examination questions. Adult supervision and age-appropriate equipment are essential; follow school safety instructions where applicable.