
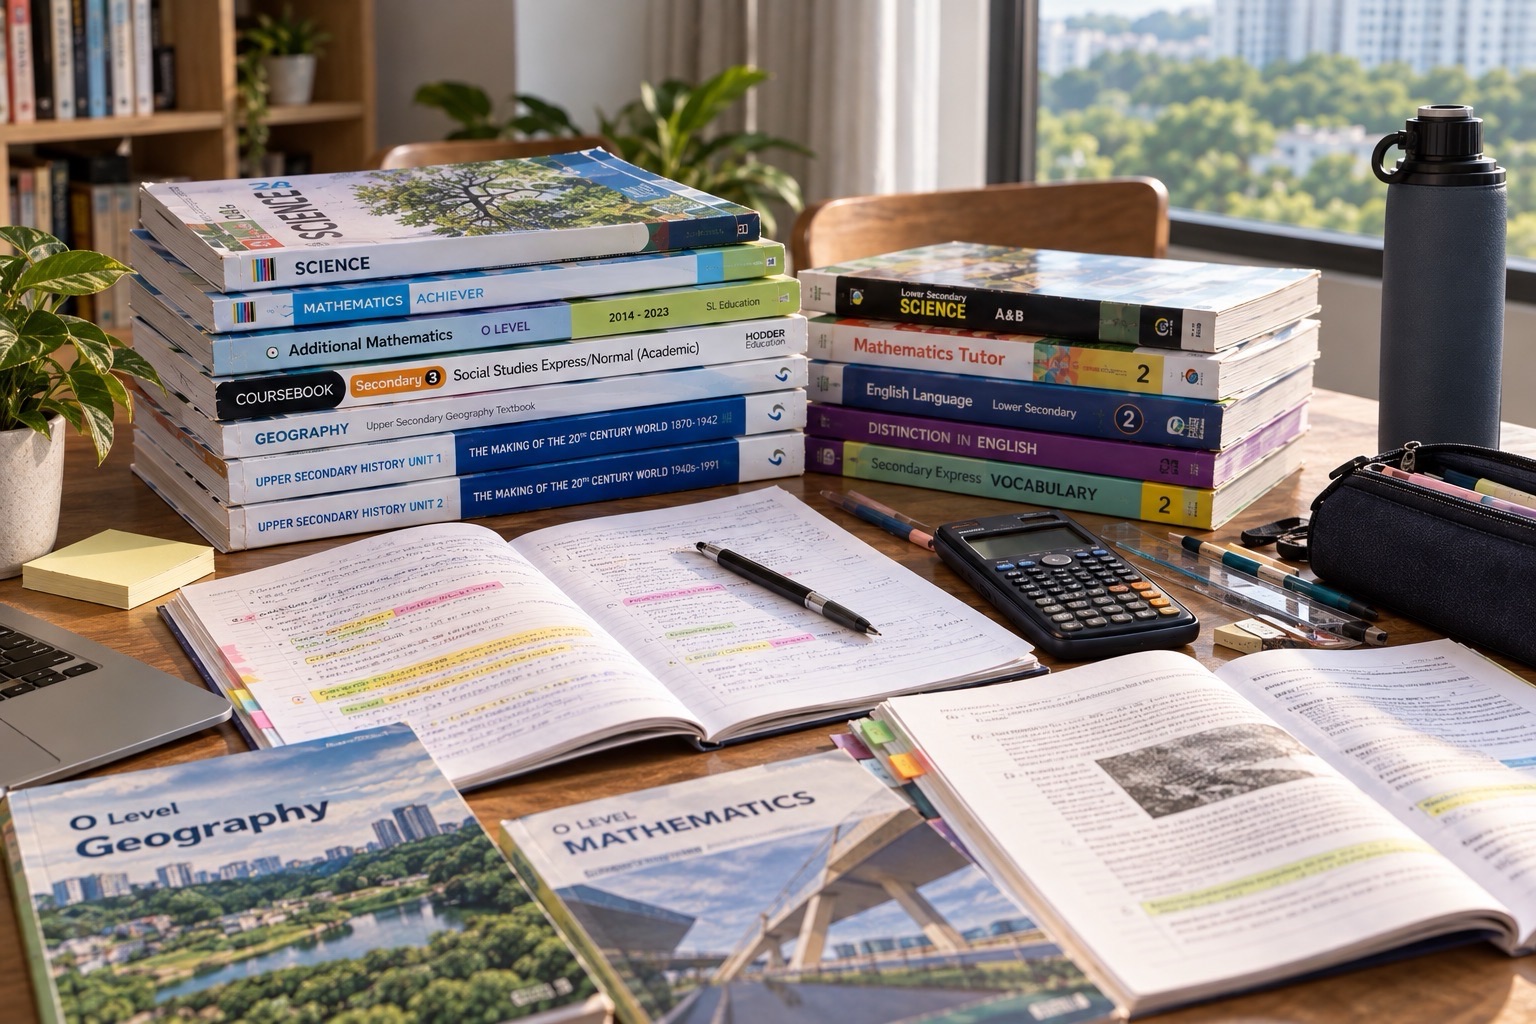
- MOE: G1 Mathematics by secondary level
- SEAB 2027 SEC G1 K110 Mathematics
- SEAB: 2027 K110 Mathematics subject and formulae guidance
- eduKateSG immutable three-pupil tutorial reference
Reader note: This is a personal study-aid method and an original mathematical example bank, not an official examination formula list, a promise of current class opening or a guarantee of marks. Exact syllabus and formula provisions depend on the pupil’s present school work and official graduation year. Confirm teaching availability, fees and placement directly with the centre.
Bring an existing formula notebook or one repeated formula-selection mistake to eduKate Singapore and ask how a tutor would turn it into one concise question–meaning–check card with an independent follow-up.
- Formula substitution and units
- Changing the subject of a formula
- Sense-checking answers
- Calculator entry and checking
- Four-week mastery checks
Official references and reader notes
- MOE: G1 Mathematics by secondary level
- SEAB 2027 SEC G1 K110 Mathematics
- SEAB: 2027 K110 Mathematics subject and formulae guidance
- eduKateSG immutable three-pupil tutorial reference
Reader note: This is a personal study-aid method and an original mathematical example bank, not an official examination formula list, a promise of current class opening or a guarantee of marks. Exact syllabus and formula provisions depend on the pupil’s present school work and official graduation year. Confirm teaching availability, fees and placement directly with the centre.
Bring an existing formula notebook or one repeated formula-selection mistake to eduKate Singapore and ask how a tutor would turn it into one concise question–meaning–check card with an independent follow-up.
- Day one: choose just one current formula and define every symbol.
- Day two: add one short numerical example with correct units.
- Day three: write one misleading use of that formula and explain why it is wrong.
- Day four: solve a changed-number question without looking at the card.
- Day five: review the first error and update the card only if it improves the learner’s next independent decision.
Parents do not need a huge workbook to supervise this process. They can ask, ‘What does each symbol mean?’, ‘What kind of quantity will the answer measure?’ and ‘What changes if one side or input doubles?’ The tutor can provide topic-specific guidance when the parent is unsure. The notebook should stay short enough to be read, retrieved and revised within the child’s school and CCA commitments.
Frequently asked questions
Should a pupil memorise every formula in this guide?
No. Select the current school-required or prerequisite formulas and understand when they apply. Optional later-stage examples should be clearly separated.
Will an exam give a formula sheet?
This depends on the assessment and examination year. Check the relevant official syllabus and teacher instructions rather than assuming all papers supply the same items.
Can one letter mean different things on different cards?
Yes. For example b can mean a triangle’s base or a linear graph’s intercept. Define symbols locally.
What is the most important part of a formula card?
The relationship’s meaning and when it applies, along with one independent way to check the result. A copied equation alone is not evidence of mastery.
How many examples belong on one card?
Often one clear worked example, one warning and one changed-number retest are enough. Adjust to the learner’s needs.
How can a tutor tell whether the notebook helped?
Remove the card, give a changed school-relevant question and ask the pupil to choose, explain, apply and check the correct relation independently.
Continue the Secondary 2 G1 Maths pathway
- Formula substitution and units
- Changing the subject of a formula
- Sense-checking answers
- Calculator entry and checking
- Four-week mastery checks
Official references and reader notes
- MOE: G1 Mathematics by secondary level
- SEAB 2027 SEC G1 K110 Mathematics
- SEAB: 2027 K110 Mathematics subject and formulae guidance
- eduKateSG immutable three-pupil tutorial reference
Reader note: This is a personal study-aid method and an original mathematical example bank, not an official examination formula list, a promise of current class opening or a guarantee of marks. Exact syllabus and formula provisions depend on the pupil’s present school work and official graduation year. Confirm teaching availability, fees and placement directly with the centre.
Bring an existing formula notebook or one repeated formula-selection mistake to eduKate Singapore and ask how a tutor would turn it into one concise question–meaning–check card with an independent follow-up.
- 10 minutes: retrieve one current formula from memory and explain its symbols.
- 20 minutes: derive or visualise one relationship with a diagram or unit model.
- 25 minutes: solve differentiated school-relevant practice independently.
- 15 minutes: discuss one common formula-selection error per learner.
- 10 minutes: write a concise five-line notebook card.
- 10 minutes: set one changed-number delayed retrieval question and explain the next lesson’s focus.
Five manageable home sessions
- Day one: choose just one current formula and define every symbol.
- Day two: add one short numerical example with correct units.
- Day three: write one misleading use of that formula and explain why it is wrong.
- Day four: solve a changed-number question without looking at the card.
- Day five: review the first error and update the card only if it improves the learner’s next independent decision.
Parents do not need a huge workbook to supervise this process. They can ask, ‘What does each symbol mean?’, ‘What kind of quantity will the answer measure?’ and ‘What changes if one side or input doubles?’ The tutor can provide topic-specific guidance when the parent is unsure. The notebook should stay short enough to be read, retrieved and revised within the child’s school and CCA commitments.
Frequently asked questions
Should a pupil memorise every formula in this guide?
No. Select the current school-required or prerequisite formulas and understand when they apply. Optional later-stage examples should be clearly separated.
Will an exam give a formula sheet?
This depends on the assessment and examination year. Check the relevant official syllabus and teacher instructions rather than assuming all papers supply the same items.
Can one letter mean different things on different cards?
Yes. For example b can mean a triangle’s base or a linear graph’s intercept. Define symbols locally.
What is the most important part of a formula card?
The relationship’s meaning and when it applies, along with one independent way to check the result. A copied equation alone is not evidence of mastery.
How many examples belong on one card?
Often one clear worked example, one warning and one changed-number retest are enough. Adjust to the learner’s needs.
How can a tutor tell whether the notebook helped?
Remove the card, give a changed school-relevant question and ask the pupil to choose, explain, apply and check the correct relation independently.
Continue the Secondary 2 G1 Maths pathway
- Formula substitution and units
- Changing the subject of a formula
- Sense-checking answers
- Calculator entry and checking
- Four-week mastery checks
Official references and reader notes
- MOE: G1 Mathematics by secondary level
- SEAB 2027 SEC G1 K110 Mathematics
- SEAB: 2027 K110 Mathematics subject and formulae guidance
- eduKateSG immutable three-pupil tutorial reference
Reader note: This is a personal study-aid method and an original mathematical example bank, not an official examination formula list, a promise of current class opening or a guarantee of marks. Exact syllabus and formula provisions depend on the pupil’s present school work and official graduation year. Confirm teaching availability, fees and placement directly with the centre.
Bring an existing formula notebook or one repeated formula-selection mistake to eduKate Singapore and ask how a tutor would turn it into one concise question–meaning–check card with an independent follow-up.
- How to make a useful formula card
- Current school scope versus optional extensions
- Parts, percentages and ratios
- Distance, time and rates
- Linear equations and straight-line rules
- Rectangle, triangle and trapezium measures
- Circles, arcs and sector extensions
- Cuboids, prisms and cylinders
- Means, frequencies and probability
- Building and retrieving a personal notebook
- A practical three-pupil lesson
- Frequently asked questions
- Official references
Make the card explain a decision, not just a symbol
Start with a question in plain English such as ‘How much material covers the six faces of a closed cuboid?’ Under it, write the appropriate surface-area formula. Put ‘not volume’ beside the formula and define l, w and h. Use one example with units, such as a 2-by-3-by-4 cm cuboid: 2(6+8+12)=52 cm². Then add a later question with altered height. If the student can solve that unseen question without the card, the formula has become a tool instead of a poster.
Do not build an imaginary exam formula sheet
A personal formula notebook is not the same as the official mathematical formulae supplied, if any, in a particular paper. Mark each card as ‘current school topic’, ‘prerequisite to repair’ or ‘optional next-stage bridge’. Verify current teacher instructions and the student’s actual syllabus. For example, circle circumference and area may be used to explain a later sector formula, but a secondary-school parent should not assume every future graduating cohort has exactly the same formula provisions as the 2027 K110 source.
243 original formula notebook demonstrations
This large teaching bank offers examples from which to select a small personal notebook. It is not a request to copy hundreds of cards. The worked numerical examples and mistake prompts are original, with a deliberate separation between a formula’s meaning, a correct use, a misleading shortcut and a later changed-number check. Choose current G1 school-relevant cards first, and ask the pupil to explain the symbols aloud.
Parts, percentages and ratios
In parts, percentages and ratios, a notebook card should name the question that triggers the formula and the quantity it calculates. Read the worked example as one illustration of the relationship, not as fixed numbers to memorise. Pay attention to units, assumptions and a reverse check. If two formulas use the same letter, define that letter again in the local context.
1. Card 1: percentage of a known whole
Card prompt: A fictional total is 160 units; find 5% of it, then state the remaining amount.
Meaning and conditions: Notebook heading: part = percent/100 × original whole. Symbols must be defined: part means the selected quantity, percent is p out of 100, and original whole is the base that the percentage refers to. The note should explicitly ask ‘What is 100% in this question?’ before any multiplication.
One worked example: Part = (5/100)×160=8 units. The rest of the whole is 160−8=152 units. The sum of part and remainder must reconstruct the supplied total.
When this would be wrong: A common formula error is using p as the multiplier instead of p/100, or calculating a percentage of the remainder when the question defined the original whole as the base. A notebook card should show one wrong-base example as a warning.
Check: Check 8+152=160. The selected part is between zero and 160, because the stated percentage is positive and less than 100%.
Later retrieval: For a changed total 320 with the same p%, the part becomes 16. The notebook should prompt this scaling prediction before the exact calculation.
2. Card 2: percentage of a known whole
Card prompt: A fictional total is 260 units; find 10% of it, then state the remaining amount.
Meaning and conditions: Notebook heading: part = percent/100 × original whole. Symbols must be defined: part means the selected quantity, percent is p out of 100, and original whole is the base that the percentage refers to. The note should explicitly ask ‘What is 100% in this question?’ before any multiplication.
One worked example: Part = (10/100)×260=26 units. The rest of the whole is 260−26=234 units. The sum of part and remainder must reconstruct the supplied total.
When this would be wrong: A common formula error is using p as the multiplier instead of p/100, or calculating a percentage of the remainder when the question defined the original whole as the base. A notebook card should show one wrong-base example as a warning.
Check: Check 26+234=260. The selected part is between zero and 260, because the stated percentage is positive and less than 100%.
Later retrieval: For a changed total 520 with the same p%, the part becomes 52. The notebook should prompt this scaling prediction before the exact calculation.
3. Card 3: percentage of a known whole
Card prompt: A fictional total is 360 units; find 12.5% of it, then state the remaining amount.
Meaning and conditions: Notebook heading: part = percent/100 × original whole. Symbols must be defined: part means the selected quantity, percent is p out of 100, and original whole is the base that the percentage refers to. The note should explicitly ask ‘What is 100% in this question?’ before any multiplication.
One worked example: Part = (12.5/100)×360=45 units. The rest of the whole is 360−45=315 units. The sum of part and remainder must reconstruct the supplied total.
When this would be wrong: A common formula error is using p as the multiplier instead of p/100, or calculating a percentage of the remainder when the question defined the original whole as the base. A notebook card should show one wrong-base example as a warning.
Check: Check 45+315=360. The selected part is between zero and 360, because the stated percentage is positive and less than 100%.
Later retrieval: For a changed total 720 with the same p%, the part becomes 90. The notebook should prompt this scaling prediction before the exact calculation.
4. Card 4: percentage of a known whole
Card prompt: A fictional total is 460 units; find 20% of it, then state the remaining amount.
Meaning and conditions: Notebook heading: part = percent/100 × original whole. Symbols must be defined: part means the selected quantity, percent is p out of 100, and original whole is the base that the percentage refers to. The note should explicitly ask ‘What is 100% in this question?’ before any multiplication.
One worked example: Part = (20/100)×460=92 units. The rest of the whole is 460−92=368 units. The sum of part and remainder must reconstruct the supplied total.
When this would be wrong: A common formula error is using p as the multiplier instead of p/100, or calculating a percentage of the remainder when the question defined the original whole as the base. A notebook card should show one wrong-base example as a warning.
Check: Check 92+368=460. The selected part is between zero and 460, because the stated percentage is positive and less than 100%.
Later retrieval: For a changed total 920 with the same p%, the part becomes 184. The notebook should prompt this scaling prediction before the exact calculation.
5. Card 5: percentage of a known whole
Card prompt: A fictional total is 560 units; find 25% of it, then state the remaining amount.
Meaning and conditions: Notebook heading: part = percent/100 × original whole. Symbols must be defined: part means the selected quantity, percent is p out of 100, and original whole is the base that the percentage refers to. The note should explicitly ask ‘What is 100% in this question?’ before any multiplication.
One worked example: Part = (25/100)×560=140 units. The rest of the whole is 560−140=420 units. The sum of part and remainder must reconstruct the supplied total.
When this would be wrong: A common formula error is using p as the multiplier instead of p/100, or calculating a percentage of the remainder when the question defined the original whole as the base. A notebook card should show one wrong-base example as a warning.
Check: Check 140+420=560. The selected part is between zero and 560, because the stated percentage is positive and less than 100%.
Later retrieval: For a changed total 1120 with the same p%, the part becomes 280. The notebook should prompt this scaling prediction before the exact calculation.
6. Card 6: percentage of a known whole
Card prompt: A fictional total is 660 units; find 30% of it, then state the remaining amount.
Meaning and conditions: Notebook heading: part = percent/100 × original whole. Symbols must be defined: part means the selected quantity, percent is p out of 100, and original whole is the base that the percentage refers to. The note should explicitly ask ‘What is 100% in this question?’ before any multiplication.
One worked example: Part = (30/100)×660=198 units. The rest of the whole is 660−198=462 units. The sum of part and remainder must reconstruct the supplied total.
When this would be wrong: A common formula error is using p as the multiplier instead of p/100, or calculating a percentage of the remainder when the question defined the original whole as the base. A notebook card should show one wrong-base example as a warning.
Check: Check 198+462=660. The selected part is between zero and 660, because the stated percentage is positive and less than 100%.
Later retrieval: For a changed total 1320 with the same p%, the part becomes 396. The notebook should prompt this scaling prediction before the exact calculation.
7. Card 7: percentage of a known whole
Card prompt: A fictional total is 760 units; find 40% of it, then state the remaining amount.
Meaning and conditions: Notebook heading: part = percent/100 × original whole. Symbols must be defined: part means the selected quantity, percent is p out of 100, and original whole is the base that the percentage refers to. The note should explicitly ask ‘What is 100% in this question?’ before any multiplication.
One worked example: Part = (40/100)×760=304 units. The rest of the whole is 760−304=456 units. The sum of part and remainder must reconstruct the supplied total.
When this would be wrong: A common formula error is using p as the multiplier instead of p/100, or calculating a percentage of the remainder when the question defined the original whole as the base. A notebook card should show one wrong-base example as a warning.
Check: Check 304+456=760. The selected part is between zero and 760, because the stated percentage is positive and less than 100%.
Later retrieval: For a changed total 1520 with the same p%, the part becomes 608. The notebook should prompt this scaling prediction before the exact calculation.
8. Card 8: percentage of a known whole
Card prompt: A fictional total is 860 units; find 50% of it, then state the remaining amount.
Meaning and conditions: Notebook heading: part = percent/100 × original whole. Symbols must be defined: part means the selected quantity, percent is p out of 100, and original whole is the base that the percentage refers to. The note should explicitly ask ‘What is 100% in this question?’ before any multiplication.
One worked example: Part = (50/100)×860=430 units. The rest of the whole is 860−430=430 units. The sum of part and remainder must reconstruct the supplied total.
When this would be wrong: A common formula error is using p as the multiplier instead of p/100, or calculating a percentage of the remainder when the question defined the original whole as the base. A notebook card should show one wrong-base example as a warning.
Check: Check 430+430=860. The selected part is between zero and 860, because the stated percentage is positive and less than 100%.
Later retrieval: For a changed total 1720 with the same p%, the part becomes 860. The notebook should prompt this scaling prediction before the exact calculation.
9. Card 9: percentage of a known whole
Card prompt: A fictional total is 180 units; find 60% of it, then state the remaining amount.
Meaning and conditions: Notebook heading: part = percent/100 × original whole. Symbols must be defined: part means the selected quantity, percent is p out of 100, and original whole is the base that the percentage refers to. The note should explicitly ask ‘What is 100% in this question?’ before any multiplication.
One worked example: Part = (60/100)×180=108 units. The rest of the whole is 180−108=72 units. The sum of part and remainder must reconstruct the supplied total.
When this would be wrong: A common formula error is using p as the multiplier instead of p/100, or calculating a percentage of the remainder when the question defined the original whole as the base. A notebook card should show one wrong-base example as a warning.
Check: Check 108+72=180. The selected part is between zero and 180, because the stated percentage is positive and less than 100%.
Later retrieval: For a changed total 360 with the same p%, the part becomes 216. The notebook should prompt this scaling prediction before the exact calculation.
10. Card 10: percentage of a known whole
Card prompt: A fictional total is 280 units; find 75% of it, then state the remaining amount.
Meaning and conditions: Notebook heading: part = percent/100 × original whole. Symbols must be defined: part means the selected quantity, percent is p out of 100, and original whole is the base that the percentage refers to. The note should explicitly ask ‘What is 100% in this question?’ before any multiplication.
One worked example: Part = (75/100)×280=210 units. The rest of the whole is 280−210=70 units. The sum of part and remainder must reconstruct the supplied total.
When this would be wrong: A common formula error is using p as the multiplier instead of p/100, or calculating a percentage of the remainder when the question defined the original whole as the base. A notebook card should show one wrong-base example as a warning.
Check: Check 210+70=280. The selected part is between zero and 280, because the stated percentage is positive and less than 100%.
Later retrieval: For a changed total 560 with the same p%, the part becomes 420. The notebook should prompt this scaling prediction before the exact calculation.
11. Card 11: percentage of a known whole
Card prompt: A fictional total is 380 units; find 80% of it, then state the remaining amount.
Meaning and conditions: Notebook heading: part = percent/100 × original whole. Symbols must be defined: part means the selected quantity, percent is p out of 100, and original whole is the base that the percentage refers to. The note should explicitly ask ‘What is 100% in this question?’ before any multiplication.
One worked example: Part = (80/100)×380=304 units. The rest of the whole is 380−304=76 units. The sum of part and remainder must reconstruct the supplied total.
When this would be wrong: A common formula error is using p as the multiplier instead of p/100, or calculating a percentage of the remainder when the question defined the original whole as the base. A notebook card should show one wrong-base example as a warning.
Check: Check 304+76=380. The selected part is between zero and 380, because the stated percentage is positive and less than 100%.
Later retrieval: For a changed total 760 with the same p%, the part becomes 608. The notebook should prompt this scaling prediction before the exact calculation.
12. Card 12: percentage of a known whole
Card prompt: A fictional total is 480 units; find 5% of it, then state the remaining amount.
Meaning and conditions: Notebook heading: part = percent/100 × original whole. Symbols must be defined: part means the selected quantity, percent is p out of 100, and original whole is the base that the percentage refers to. The note should explicitly ask ‘What is 100% in this question?’ before any multiplication.
One worked example: Part = (5/100)×480=24 units. The rest of the whole is 480−24=456 units. The sum of part and remainder must reconstruct the supplied total.
When this would be wrong: A common formula error is using p as the multiplier instead of p/100, or calculating a percentage of the remainder when the question defined the original whole as the base. A notebook card should show one wrong-base example as a warning.
Check: Check 24+456=480. The selected part is between zero and 480, because the stated percentage is positive and less than 100%.
Later retrieval: For a changed total 960 with the same p%, the part becomes 48. The notebook should prompt this scaling prediction before the exact calculation.
13. Card 13: percentage of a known whole
Card prompt: A fictional total is 580 units; find 10% of it, then state the remaining amount.
Meaning and conditions: Notebook heading: part = percent/100 × original whole. Symbols must be defined: part means the selected quantity, percent is p out of 100, and original whole is the base that the percentage refers to. The note should explicitly ask ‘What is 100% in this question?’ before any multiplication.
One worked example: Part = (10/100)×580=58 units. The rest of the whole is 580−58=522 units. The sum of part and remainder must reconstruct the supplied total.
When this would be wrong: A common formula error is using p as the multiplier instead of p/100, or calculating a percentage of the remainder when the question defined the original whole as the base. A notebook card should show one wrong-base example as a warning.
Check: Check 58+522=580. The selected part is between zero and 580, because the stated percentage is positive and less than 100%.
Later retrieval: For a changed total 1160 with the same p%, the part becomes 116. The notebook should prompt this scaling prediction before the exact calculation.
14. Card 14: percentage of a known whole
Card prompt: A fictional total is 680 units; find 12.5% of it, then state the remaining amount.
Meaning and conditions: Notebook heading: part = percent/100 × original whole. Symbols must be defined: part means the selected quantity, percent is p out of 100, and original whole is the base that the percentage refers to. The note should explicitly ask ‘What is 100% in this question?’ before any multiplication.
One worked example: Part = (12.5/100)×680=85 units. The rest of the whole is 680−85=595 units. The sum of part and remainder must reconstruct the supplied total.
When this would be wrong: A common formula error is using p as the multiplier instead of p/100, or calculating a percentage of the remainder when the question defined the original whole as the base. A notebook card should show one wrong-base example as a warning.
Check: Check 85+595=680. The selected part is between zero and 680, because the stated percentage is positive and less than 100%.
Later retrieval: For a changed total 1360 with the same p%, the part becomes 170. The notebook should prompt this scaling prediction before the exact calculation.
15. Card 15: percentage of a known whole
Card prompt: A fictional total is 780 units; find 20% of it, then state the remaining amount.
Meaning and conditions: Notebook heading: part = percent/100 × original whole. Symbols must be defined: part means the selected quantity, percent is p out of 100, and original whole is the base that the percentage refers to. The note should explicitly ask ‘What is 100% in this question?’ before any multiplication.
One worked example: Part = (20/100)×780=156 units. The rest of the whole is 780−156=624 units. The sum of part and remainder must reconstruct the supplied total.
When this would be wrong: A common formula error is using p as the multiplier instead of p/100, or calculating a percentage of the remainder when the question defined the original whole as the base. A notebook card should show one wrong-base example as a warning.
Check: Check 156+624=780. The selected part is between zero and 780, because the stated percentage is positive and less than 100%.
Later retrieval: For a changed total 1560 with the same p%, the part becomes 312. The notebook should prompt this scaling prediction before the exact calculation.
16. Card 16: percentage of a known whole
Card prompt: A fictional total is 880 units; find 25% of it, then state the remaining amount.
Meaning and conditions: Notebook heading: part = percent/100 × original whole. Symbols must be defined: part means the selected quantity, percent is p out of 100, and original whole is the base that the percentage refers to. The note should explicitly ask ‘What is 100% in this question?’ before any multiplication.
One worked example: Part = (25/100)×880=220 units. The rest of the whole is 880−220=660 units. The sum of part and remainder must reconstruct the supplied total.
When this would be wrong: A common formula error is using p as the multiplier instead of p/100, or calculating a percentage of the remainder when the question defined the original whole as the base. A notebook card should show one wrong-base example as a warning.
Check: Check 220+660=880. The selected part is between zero and 880, because the stated percentage is positive and less than 100%.
Later retrieval: For a changed total 1760 with the same p%, the part becomes 440. The notebook should prompt this scaling prediction before the exact calculation.
17. Card 17: percentage of a known whole
Card prompt: A fictional total is 200 units; find 30% of it, then state the remaining amount.
Meaning and conditions: Notebook heading: part = percent/100 × original whole. Symbols must be defined: part means the selected quantity, percent is p out of 100, and original whole is the base that the percentage refers to. The note should explicitly ask ‘What is 100% in this question?’ before any multiplication.
One worked example: Part = (30/100)×200=60 units. The rest of the whole is 200−60=140 units. The sum of part and remainder must reconstruct the supplied total.
When this would be wrong: A common formula error is using p as the multiplier instead of p/100, or calculating a percentage of the remainder when the question defined the original whole as the base. A notebook card should show one wrong-base example as a warning.
Check: Check 60+140=200. The selected part is between zero and 200, because the stated percentage is positive and less than 100%.
Later retrieval: For a changed total 400 with the same p%, the part becomes 120. The notebook should prompt this scaling prediction before the exact calculation.
18. Card 18: percentage of a known whole
Card prompt: A fictional total is 300 units; find 40% of it, then state the remaining amount.
Meaning and conditions: Notebook heading: part = percent/100 × original whole. Symbols must be defined: part means the selected quantity, percent is p out of 100, and original whole is the base that the percentage refers to. The note should explicitly ask ‘What is 100% in this question?’ before any multiplication.
One worked example: Part = (40/100)×300=120 units. The rest of the whole is 300−120=180 units. The sum of part and remainder must reconstruct the supplied total.
When this would be wrong: A common formula error is using p as the multiplier instead of p/100, or calculating a percentage of the remainder when the question defined the original whole as the base. A notebook card should show one wrong-base example as a warning.
Check: Check 120+180=300. The selected part is between zero and 300, because the stated percentage is positive and less than 100%.
Later retrieval: For a changed total 600 with the same p%, the part becomes 240. The notebook should prompt this scaling prediction before the exact calculation.
19. Card 19: percentage of a known whole
Card prompt: A fictional total is 400 units; find 50% of it, then state the remaining amount.
Meaning and conditions: Notebook heading: part = percent/100 × original whole. Symbols must be defined: part means the selected quantity, percent is p out of 100, and original whole is the base that the percentage refers to. The note should explicitly ask ‘What is 100% in this question?’ before any multiplication.
One worked example: Part = (50/100)×400=200 units. The rest of the whole is 400−200=200 units. The sum of part and remainder must reconstruct the supplied total.
When this would be wrong: A common formula error is using p as the multiplier instead of p/100, or calculating a percentage of the remainder when the question defined the original whole as the base. A notebook card should show one wrong-base example as a warning.
Check: Check 200+200=400. The selected part is between zero and 400, because the stated percentage is positive and less than 100%.
Later retrieval: For a changed total 800 with the same p%, the part becomes 400. The notebook should prompt this scaling prediction before the exact calculation.
20. Card 20: percentage of a known whole
Card prompt: A fictional total is 500 units; find 60% of it, then state the remaining amount.
Meaning and conditions: Notebook heading: part = percent/100 × original whole. Symbols must be defined: part means the selected quantity, percent is p out of 100, and original whole is the base that the percentage refers to. The note should explicitly ask ‘What is 100% in this question?’ before any multiplication.
One worked example: Part = (60/100)×500=300 units. The rest of the whole is 500−300=200 units. The sum of part and remainder must reconstruct the supplied total.
When this would be wrong: A common formula error is using p as the multiplier instead of p/100, or calculating a percentage of the remainder when the question defined the original whole as the base. A notebook card should show one wrong-base example as a warning.
Check: Check 300+200=500. The selected part is between zero and 500, because the stated percentage is positive and less than 100%.
Later retrieval: For a changed total 1000 with the same p%, the part becomes 600. The notebook should prompt this scaling prediction before the exact calculation.
21. Card 21: percentage of a known whole
Card prompt: A fictional total is 600 units; find 75% of it, then state the remaining amount.
Meaning and conditions: Notebook heading: part = percent/100 × original whole. Symbols must be defined: part means the selected quantity, percent is p out of 100, and original whole is the base that the percentage refers to. The note should explicitly ask ‘What is 100% in this question?’ before any multiplication.
One worked example: Part = (75/100)×600=450 units. The rest of the whole is 600−450=150 units. The sum of part and remainder must reconstruct the supplied total.
When this would be wrong: A common formula error is using p as the multiplier instead of p/100, or calculating a percentage of the remainder when the question defined the original whole as the base. A notebook card should show one wrong-base example as a warning.
Check: Check 450+150=600. The selected part is between zero and 600, because the stated percentage is positive and less than 100%.
Later retrieval: For a changed total 1200 with the same p%, the part becomes 900. The notebook should prompt this scaling prediction before the exact calculation.
22. Card 22: percentage of a known whole
Card prompt: A fictional total is 700 units; find 80% of it, then state the remaining amount.
Meaning and conditions: Notebook heading: part = percent/100 × original whole. Symbols must be defined: part means the selected quantity, percent is p out of 100, and original whole is the base that the percentage refers to. The note should explicitly ask ‘What is 100% in this question?’ before any multiplication.
One worked example: Part = (80/100)×700=560 units. The rest of the whole is 700−560=140 units. The sum of part and remainder must reconstruct the supplied total.
When this would be wrong: A common formula error is using p as the multiplier instead of p/100, or calculating a percentage of the remainder when the question defined the original whole as the base. A notebook card should show one wrong-base example as a warning.
Check: Check 560+140=700. The selected part is between zero and 700, because the stated percentage is positive and less than 100%.
Later retrieval: For a changed total 1400 with the same p%, the part becomes 1120. The notebook should prompt this scaling prediction before the exact calculation.
23. Card 23: percentage of a known whole
Card prompt: A fictional total is 800 units; find 5% of it, then state the remaining amount.
Meaning and conditions: Notebook heading: part = percent/100 × original whole. Symbols must be defined: part means the selected quantity, percent is p out of 100, and original whole is the base that the percentage refers to. The note should explicitly ask ‘What is 100% in this question?’ before any multiplication.
One worked example: Part = (5/100)×800=40 units. The rest of the whole is 800−40=760 units. The sum of part and remainder must reconstruct the supplied total.
When this would be wrong: A common formula error is using p as the multiplier instead of p/100, or calculating a percentage of the remainder when the question defined the original whole as the base. A notebook card should show one wrong-base example as a warning.
Check: Check 40+760=800. The selected part is between zero and 800, because the stated percentage is positive and less than 100%.
Later retrieval: For a changed total 1600 with the same p%, the part becomes 80. The notebook should prompt this scaling prediction before the exact calculation.
24. Card 24: percentage of a known whole
Card prompt: A fictional total is 900 units; find 10% of it, then state the remaining amount.
Meaning and conditions: Notebook heading: part = percent/100 × original whole. Symbols must be defined: part means the selected quantity, percent is p out of 100, and original whole is the base that the percentage refers to. The note should explicitly ask ‘What is 100% in this question?’ before any multiplication.
One worked example: Part = (10/100)×900=90 units. The rest of the whole is 900−90=810 units. The sum of part and remainder must reconstruct the supplied total.
When this would be wrong: A common formula error is using p as the multiplier instead of p/100, or calculating a percentage of the remainder when the question defined the original whole as the base. A notebook card should show one wrong-base example as a warning.
Check: Check 90+810=900. The selected part is between zero and 900, because the stated percentage is positive and less than 100%.
Later retrieval: For a changed total 1800 with the same p%, the part becomes 180. The notebook should prompt this scaling prediction before the exact calculation.
25. Card 25: percentage of a known whole
Card prompt: A fictional total is 220 units; find 12.5% of it, then state the remaining amount.
Meaning and conditions: Notebook heading: part = percent/100 × original whole. Symbols must be defined: part means the selected quantity, percent is p out of 100, and original whole is the base that the percentage refers to. The note should explicitly ask ‘What is 100% in this question?’ before any multiplication.
One worked example: Part = (12.5/100)×220=27.5 units. The rest of the whole is 220−27.5=192.5 units. The sum of part and remainder must reconstruct the supplied total.
When this would be wrong: A common formula error is using p as the multiplier instead of p/100, or calculating a percentage of the remainder when the question defined the original whole as the base. A notebook card should show one wrong-base example as a warning.
Check: Check 27.5+192.5=220. The selected part is between zero and 220, because the stated percentage is positive and less than 100%.
Later retrieval: For a changed total 440 with the same p%, the part becomes 55. The notebook should prompt this scaling prediction before the exact calculation.
26. Card 26: percentage of a known whole
Card prompt: A fictional total is 320 units; find 20% of it, then state the remaining amount.
Meaning and conditions: Notebook heading: part = percent/100 × original whole. Symbols must be defined: part means the selected quantity, percent is p out of 100, and original whole is the base that the percentage refers to. The note should explicitly ask ‘What is 100% in this question?’ before any multiplication.
One worked example: Part = (20/100)×320=64 units. The rest of the whole is 320−64=256 units. The sum of part and remainder must reconstruct the supplied total.
When this would be wrong: A common formula error is using p as the multiplier instead of p/100, or calculating a percentage of the remainder when the question defined the original whole as the base. A notebook card should show one wrong-base example as a warning.
Check: Check 64+256=320. The selected part is between zero and 320, because the stated percentage is positive and less than 100%.
Later retrieval: For a changed total 640 with the same p%, the part becomes 128. The notebook should prompt this scaling prediction before the exact calculation.
27. Card 27: percentage of a known whole
Card prompt: A fictional total is 420 units; find 25% of it, then state the remaining amount.
Meaning and conditions: Notebook heading: part = percent/100 × original whole. Symbols must be defined: part means the selected quantity, percent is p out of 100, and original whole is the base that the percentage refers to. The note should explicitly ask ‘What is 100% in this question?’ before any multiplication.
One worked example: Part = (25/100)×420=105 units. The rest of the whole is 420−105=315 units. The sum of part and remainder must reconstruct the supplied total.
When this would be wrong: A common formula error is using p as the multiplier instead of p/100, or calculating a percentage of the remainder when the question defined the original whole as the base. A notebook card should show one wrong-base example as a warning.
Check: Check 105+315=420. The selected part is between zero and 420, because the stated percentage is positive and less than 100%.
Later retrieval: For a changed total 840 with the same p%, the part becomes 210. The notebook should prompt this scaling prediction before the exact calculation.
28. Card 28: percentage of a known whole
Card prompt: A fictional total is 520 units; find 30% of it, then state the remaining amount.
Meaning and conditions: Notebook heading: part = percent/100 × original whole. Symbols must be defined: part means the selected quantity, percent is p out of 100, and original whole is the base that the percentage refers to. The note should explicitly ask ‘What is 100% in this question?’ before any multiplication.
One worked example: Part = (30/100)×520=156 units. The rest of the whole is 520−156=364 units. The sum of part and remainder must reconstruct the supplied total.
When this would be wrong: A common formula error is using p as the multiplier instead of p/100, or calculating a percentage of the remainder when the question defined the original whole as the base. A notebook card should show one wrong-base example as a warning.
Check: Check 156+364=520. The selected part is between zero and 520, because the stated percentage is positive and less than 100%.
Later retrieval: For a changed total 1040 with the same p%, the part becomes 312. The notebook should prompt this scaling prediction before the exact calculation.
29. Card 29: percentage of a known whole
Card prompt: A fictional total is 620 units; find 40% of it, then state the remaining amount.
Meaning and conditions: Notebook heading: part = percent/100 × original whole. Symbols must be defined: part means the selected quantity, percent is p out of 100, and original whole is the base that the percentage refers to. The note should explicitly ask ‘What is 100% in this question?’ before any multiplication.
One worked example: Part = (40/100)×620=248 units. The rest of the whole is 620−248=372 units. The sum of part and remainder must reconstruct the supplied total.
When this would be wrong: A common formula error is using p as the multiplier instead of p/100, or calculating a percentage of the remainder when the question defined the original whole as the base. A notebook card should show one wrong-base example as a warning.
Check: Check 248+372=620. The selected part is between zero and 620, because the stated percentage is positive and less than 100%.
Later retrieval: For a changed total 1240 with the same p%, the part becomes 496. The notebook should prompt this scaling prediction before the exact calculation.
Distance, time and rates
In distance, time and rates, a notebook card should name the question that triggers the formula and the quantity it calculates. Read the worked example as one illustration of the relationship, not as fixed numbers to memorise. Pay attention to units, assumptions and a reverse check. If two formulas use the same letter, define that letter again in the local context.
30. Card 1: average rate with units
Card prompt: A hypothetical journey covers 12 km in 2 hours. What formula gives average speed, and what are the speed units?
Meaning and conditions: Notebook heading: average speed = total distance / total elapsed time. Label distance in km and time in hours. The quotient therefore has km/h as its unit. The formula describes the whole interval’s average; it does not prove that the speed was constant throughout.
One worked example: Average speed=12/2=6 km/h. This is an exact fraction 12/2 km/h if a rounded display is not requested. To find distance at a stated constant model rate, rearrange as distance=speed×time.
When this would be wrong: Swapping numerator and denominator yields h/km, not km/h. Another error is dividing by minutes but labelling the result km/h. The notebook should put units alongside all symbols, not just the numerical answer.
Check: Reverse-check: the unrounded average speed multiplied by 2 hours reproduces 12 km. Dimensional units also cancel correctly: (km/h)×h=km.
Later retrieval: If the journey lasted 5 hours at the same hypothetical constant rate, distance would be 30 km. This is a model extension, not an observation about a real trip.
31. Card 2: average rate with units
Card prompt: A hypothetical journey covers 19 km in 7 hours. What formula gives average speed, and what are the speed units?
Meaning and conditions: Notebook heading: average speed = total distance / total elapsed time. Label distance in km and time in hours. The quotient therefore has km/h as its unit. The formula describes the whole interval’s average; it does not prove that the speed was constant throughout.
One worked example: Average speed=19/7=2.714286 km/h. This is an exact fraction 19/7 km/h if a rounded display is not requested. To find distance at a stated constant model rate, rearrange as distance=speed×time.
When this would be wrong: Swapping numerator and denominator yields h/km, not km/h. Another error is dividing by minutes but labelling the result km/h. The notebook should put units alongside all symbols, not just the numerical answer.
Check: Reverse-check: the unrounded average speed multiplied by 7 hours reproduces 19 km. Dimensional units also cancel correctly: (km/h)×h=km.
Later retrieval: If the journey lasted 10 hours at the same hypothetical constant rate, distance would be 27.142857 km. This is a model extension, not an observation about a real trip.
32. Card 3: average rate with units
Card prompt: A hypothetical journey covers 26 km in 12 hours. What formula gives average speed, and what are the speed units?
Meaning and conditions: Notebook heading: average speed = total distance / total elapsed time. Label distance in km and time in hours. The quotient therefore has km/h as its unit. The formula describes the whole interval’s average; it does not prove that the speed was constant throughout.
One worked example: Average speed=26/12=2.166667 km/h. This is an exact fraction 26/12 km/h if a rounded display is not requested. To find distance at a stated constant model rate, rearrange as distance=speed×time.
When this would be wrong: Swapping numerator and denominator yields h/km, not km/h. Another error is dividing by minutes but labelling the result km/h. The notebook should put units alongside all symbols, not just the numerical answer.
Check: Reverse-check: the unrounded average speed multiplied by 12 hours reproduces 26 km. Dimensional units also cancel correctly: (km/h)×h=km.
Later retrieval: If the journey lasted 15 hours at the same hypothetical constant rate, distance would be 32.5 km. This is a model extension, not an observation about a real trip.
33. Card 4: average rate with units
Card prompt: A hypothetical journey covers 33 km in 17 hours. What formula gives average speed, and what are the speed units?
Meaning and conditions: Notebook heading: average speed = total distance / total elapsed time. Label distance in km and time in hours. The quotient therefore has km/h as its unit. The formula describes the whole interval’s average; it does not prove that the speed was constant throughout.
One worked example: Average speed=33/17=1.941176 km/h. This is an exact fraction 33/17 km/h if a rounded display is not requested. To find distance at a stated constant model rate, rearrange as distance=speed×time.
When this would be wrong: Swapping numerator and denominator yields h/km, not km/h. Another error is dividing by minutes but labelling the result km/h. The notebook should put units alongside all symbols, not just the numerical answer.
Check: Reverse-check: the unrounded average speed multiplied by 17 hours reproduces 33 km. Dimensional units also cancel correctly: (km/h)×h=km.
Later retrieval: If the journey lasted 20 hours at the same hypothetical constant rate, distance would be 38.823529 km. This is a model extension, not an observation about a real trip.
34. Card 5: average rate with units
Card prompt: A hypothetical journey covers 40 km in 22 hours. What formula gives average speed, and what are the speed units?
Meaning and conditions: Notebook heading: average speed = total distance / total elapsed time. Label distance in km and time in hours. The quotient therefore has km/h as its unit. The formula describes the whole interval’s average; it does not prove that the speed was constant throughout.
One worked example: Average speed=40/22=1.818182 km/h. This is an exact fraction 40/22 km/h if a rounded display is not requested. To find distance at a stated constant model rate, rearrange as distance=speed×time.
When this would be wrong: Swapping numerator and denominator yields h/km, not km/h. Another error is dividing by minutes but labelling the result km/h. The notebook should put units alongside all symbols, not just the numerical answer.
Check: Reverse-check: the unrounded average speed multiplied by 22 hours reproduces 40 km. Dimensional units also cancel correctly: (km/h)×h=km.
Later retrieval: If the journey lasted 25 hours at the same hypothetical constant rate, distance would be 45.454545 km. This is a model extension, not an observation about a real trip.
35. Card 6: average rate with units
Card prompt: A hypothetical journey covers 47 km in 6 hours. What formula gives average speed, and what are the speed units?
Meaning and conditions: Notebook heading: average speed = total distance / total elapsed time. Label distance in km and time in hours. The quotient therefore has km/h as its unit. The formula describes the whole interval’s average; it does not prove that the speed was constant throughout.
One worked example: Average speed=47/6=7.833333 km/h. This is an exact fraction 47/6 km/h if a rounded display is not requested. To find distance at a stated constant model rate, rearrange as distance=speed×time.
When this would be wrong: Swapping numerator and denominator yields h/km, not km/h. Another error is dividing by minutes but labelling the result km/h. The notebook should put units alongside all symbols, not just the numerical answer.
Check: Reverse-check: the unrounded average speed multiplied by 6 hours reproduces 47 km. Dimensional units also cancel correctly: (km/h)×h=km.
Later retrieval: If the journey lasted 9 hours at the same hypothetical constant rate, distance would be 70.5 km. This is a model extension, not an observation about a real trip.
36. Card 7: average rate with units
Card prompt: A hypothetical journey covers 54 km in 11 hours. What formula gives average speed, and what are the speed units?
Meaning and conditions: Notebook heading: average speed = total distance / total elapsed time. Label distance in km and time in hours. The quotient therefore has km/h as its unit. The formula describes the whole interval’s average; it does not prove that the speed was constant throughout.
One worked example: Average speed=54/11=4.909091 km/h. This is an exact fraction 54/11 km/h if a rounded display is not requested. To find distance at a stated constant model rate, rearrange as distance=speed×time.
When this would be wrong: Swapping numerator and denominator yields h/km, not km/h. Another error is dividing by minutes but labelling the result km/h. The notebook should put units alongside all symbols, not just the numerical answer.
Check: Reverse-check: the unrounded average speed multiplied by 11 hours reproduces 54 km. Dimensional units also cancel correctly: (km/h)×h=km.
Later retrieval: If the journey lasted 14 hours at the same hypothetical constant rate, distance would be 68.727273 km. This is a model extension, not an observation about a real trip.
37. Card 8: average rate with units
Card prompt: A hypothetical journey covers 61 km in 16 hours. What formula gives average speed, and what are the speed units?
Meaning and conditions: Notebook heading: average speed = total distance / total elapsed time. Label distance in km and time in hours. The quotient therefore has km/h as its unit. The formula describes the whole interval’s average; it does not prove that the speed was constant throughout.
One worked example: Average speed=61/16=3.8125 km/h. This is an exact fraction 61/16 km/h if a rounded display is not requested. To find distance at a stated constant model rate, rearrange as distance=speed×time.
When this would be wrong: Swapping numerator and denominator yields h/km, not km/h. Another error is dividing by minutes but labelling the result km/h. The notebook should put units alongside all symbols, not just the numerical answer.
Check: Reverse-check: the unrounded average speed multiplied by 16 hours reproduces 61 km. Dimensional units also cancel correctly: (km/h)×h=km.
Later retrieval: If the journey lasted 19 hours at the same hypothetical constant rate, distance would be 72.4375 km. This is a model extension, not an observation about a real trip.
38. Card 9: average rate with units
Card prompt: A hypothetical journey covers 68 km in 21 hours. What formula gives average speed, and what are the speed units?
Meaning and conditions: Notebook heading: average speed = total distance / total elapsed time. Label distance in km and time in hours. The quotient therefore has km/h as its unit. The formula describes the whole interval’s average; it does not prove that the speed was constant throughout.
One worked example: Average speed=68/21=3.238095 km/h. This is an exact fraction 68/21 km/h if a rounded display is not requested. To find distance at a stated constant model rate, rearrange as distance=speed×time.
When this would be wrong: Swapping numerator and denominator yields h/km, not km/h. Another error is dividing by minutes but labelling the result km/h. The notebook should put units alongside all symbols, not just the numerical answer.
Check: Reverse-check: the unrounded average speed multiplied by 21 hours reproduces 68 km. Dimensional units also cancel correctly: (km/h)×h=km.
Later retrieval: If the journey lasted 24 hours at the same hypothetical constant rate, distance would be 77.714286 km. This is a model extension, not an observation about a real trip.
39. Card 10: average rate with units
Card prompt: A hypothetical journey covers 75 km in 5 hours. What formula gives average speed, and what are the speed units?
Meaning and conditions: Notebook heading: average speed = total distance / total elapsed time. Label distance in km and time in hours. The quotient therefore has km/h as its unit. The formula describes the whole interval’s average; it does not prove that the speed was constant throughout.
One worked example: Average speed=75/5=15 km/h. This is an exact fraction 75/5 km/h if a rounded display is not requested. To find distance at a stated constant model rate, rearrange as distance=speed×time.
When this would be wrong: Swapping numerator and denominator yields h/km, not km/h. Another error is dividing by minutes but labelling the result km/h. The notebook should put units alongside all symbols, not just the numerical answer.
Check: Reverse-check: the unrounded average speed multiplied by 5 hours reproduces 75 km. Dimensional units also cancel correctly: (km/h)×h=km.
Later retrieval: If the journey lasted 8 hours at the same hypothetical constant rate, distance would be 120 km. This is a model extension, not an observation about a real trip.
40. Card 11: average rate with units
Card prompt: A hypothetical journey covers 82 km in 10 hours. What formula gives average speed, and what are the speed units?
Meaning and conditions: Notebook heading: average speed = total distance / total elapsed time. Label distance in km and time in hours. The quotient therefore has km/h as its unit. The formula describes the whole interval’s average; it does not prove that the speed was constant throughout.
One worked example: Average speed=82/10=8.2 km/h. This is an exact fraction 82/10 km/h if a rounded display is not requested. To find distance at a stated constant model rate, rearrange as distance=speed×time.
When this would be wrong: Swapping numerator and denominator yields h/km, not km/h. Another error is dividing by minutes but labelling the result km/h. The notebook should put units alongside all symbols, not just the numerical answer.
Check: Reverse-check: the unrounded average speed multiplied by 10 hours reproduces 82 km. Dimensional units also cancel correctly: (km/h)×h=km.
Later retrieval: If the journey lasted 13 hours at the same hypothetical constant rate, distance would be 106.6 km. This is a model extension, not an observation about a real trip.
41. Card 12: average rate with units
Card prompt: A hypothetical journey covers 89 km in 15 hours. What formula gives average speed, and what are the speed units?
Meaning and conditions: Notebook heading: average speed = total distance / total elapsed time. Label distance in km and time in hours. The quotient therefore has km/h as its unit. The formula describes the whole interval’s average; it does not prove that the speed was constant throughout.
One worked example: Average speed=89/15=5.933333 km/h. This is an exact fraction 89/15 km/h if a rounded display is not requested. To find distance at a stated constant model rate, rearrange as distance=speed×time.
When this would be wrong: Swapping numerator and denominator yields h/km, not km/h. Another error is dividing by minutes but labelling the result km/h. The notebook should put units alongside all symbols, not just the numerical answer.
Check: Reverse-check: the unrounded average speed multiplied by 15 hours reproduces 89 km. Dimensional units also cancel correctly: (km/h)×h=km.
Later retrieval: If the journey lasted 18 hours at the same hypothetical constant rate, distance would be 106.8 km. This is a model extension, not an observation about a real trip.
42. Card 13: average rate with units
Card prompt: A hypothetical journey covers 96 km in 20 hours. What formula gives average speed, and what are the speed units?
Meaning and conditions: Notebook heading: average speed = total distance / total elapsed time. Label distance in km and time in hours. The quotient therefore has km/h as its unit. The formula describes the whole interval’s average; it does not prove that the speed was constant throughout.
One worked example: Average speed=96/20=4.8 km/h. This is an exact fraction 96/20 km/h if a rounded display is not requested. To find distance at a stated constant model rate, rearrange as distance=speed×time.
When this would be wrong: Swapping numerator and denominator yields h/km, not km/h. Another error is dividing by minutes but labelling the result km/h. The notebook should put units alongside all symbols, not just the numerical answer.
Check: Reverse-check: the unrounded average speed multiplied by 20 hours reproduces 96 km. Dimensional units also cancel correctly: (km/h)×h=km.
Later retrieval: If the journey lasted 23 hours at the same hypothetical constant rate, distance would be 110.4 km. This is a model extension, not an observation about a real trip.
43. Card 14: average rate with units
Card prompt: A hypothetical journey covers 103 km in 4 hours. What formula gives average speed, and what are the speed units?
Meaning and conditions: Notebook heading: average speed = total distance / total elapsed time. Label distance in km and time in hours. The quotient therefore has km/h as its unit. The formula describes the whole interval’s average; it does not prove that the speed was constant throughout.
One worked example: Average speed=103/4=25.75 km/h. This is an exact fraction 103/4 km/h if a rounded display is not requested. To find distance at a stated constant model rate, rearrange as distance=speed×time.
When this would be wrong: Swapping numerator and denominator yields h/km, not km/h. Another error is dividing by minutes but labelling the result km/h. The notebook should put units alongside all symbols, not just the numerical answer.
Check: Reverse-check: the unrounded average speed multiplied by 4 hours reproduces 103 km. Dimensional units also cancel correctly: (km/h)×h=km.
Later retrieval: If the journey lasted 7 hours at the same hypothetical constant rate, distance would be 180.25 km. This is a model extension, not an observation about a real trip.
44. Card 15: average rate with units
Card prompt: A hypothetical journey covers 110 km in 9 hours. What formula gives average speed, and what are the speed units?
Meaning and conditions: Notebook heading: average speed = total distance / total elapsed time. Label distance in km and time in hours. The quotient therefore has km/h as its unit. The formula describes the whole interval’s average; it does not prove that the speed was constant throughout.
One worked example: Average speed=110/9=12.222222 km/h. This is an exact fraction 110/9 km/h if a rounded display is not requested. To find distance at a stated constant model rate, rearrange as distance=speed×time.
When this would be wrong: Swapping numerator and denominator yields h/km, not km/h. Another error is dividing by minutes but labelling the result km/h. The notebook should put units alongside all symbols, not just the numerical answer.
Check: Reverse-check: the unrounded average speed multiplied by 9 hours reproduces 110 km. Dimensional units also cancel correctly: (km/h)×h=km.
Later retrieval: If the journey lasted 12 hours at the same hypothetical constant rate, distance would be 146.666667 km. This is a model extension, not an observation about a real trip.
45. Card 16: average rate with units
Card prompt: A hypothetical journey covers 117 km in 14 hours. What formula gives average speed, and what are the speed units?
Meaning and conditions: Notebook heading: average speed = total distance / total elapsed time. Label distance in km and time in hours. The quotient therefore has km/h as its unit. The formula describes the whole interval’s average; it does not prove that the speed was constant throughout.
One worked example: Average speed=117/14=8.357143 km/h. This is an exact fraction 117/14 km/h if a rounded display is not requested. To find distance at a stated constant model rate, rearrange as distance=speed×time.
When this would be wrong: Swapping numerator and denominator yields h/km, not km/h. Another error is dividing by minutes but labelling the result km/h. The notebook should put units alongside all symbols, not just the numerical answer.
Check: Reverse-check: the unrounded average speed multiplied by 14 hours reproduces 117 km. Dimensional units also cancel correctly: (km/h)×h=km.
Later retrieval: If the journey lasted 17 hours at the same hypothetical constant rate, distance would be 142.071429 km. This is a model extension, not an observation about a real trip.
46. Card 17: average rate with units
Card prompt: A hypothetical journey covers 124 km in 19 hours. What formula gives average speed, and what are the speed units?
Meaning and conditions: Notebook heading: average speed = total distance / total elapsed time. Label distance in km and time in hours. The quotient therefore has km/h as its unit. The formula describes the whole interval’s average; it does not prove that the speed was constant throughout.
One worked example: Average speed=124/19=6.526316 km/h. This is an exact fraction 124/19 km/h if a rounded display is not requested. To find distance at a stated constant model rate, rearrange as distance=speed×time.
When this would be wrong: Swapping numerator and denominator yields h/km, not km/h. Another error is dividing by minutes but labelling the result km/h. The notebook should put units alongside all symbols, not just the numerical answer.
Check: Reverse-check: the unrounded average speed multiplied by 19 hours reproduces 124 km. Dimensional units also cancel correctly: (km/h)×h=km.
Later retrieval: If the journey lasted 22 hours at the same hypothetical constant rate, distance would be 143.578947 km. This is a model extension, not an observation about a real trip.
47. Card 18: average rate with units
Card prompt: A hypothetical journey covers 131 km in 3 hours. What formula gives average speed, and what are the speed units?
Meaning and conditions: Notebook heading: average speed = total distance / total elapsed time. Label distance in km and time in hours. The quotient therefore has km/h as its unit. The formula describes the whole interval’s average; it does not prove that the speed was constant throughout.
One worked example: Average speed=131/3=43.666667 km/h. This is an exact fraction 131/3 km/h if a rounded display is not requested. To find distance at a stated constant model rate, rearrange as distance=speed×time.
When this would be wrong: Swapping numerator and denominator yields h/km, not km/h. Another error is dividing by minutes but labelling the result km/h. The notebook should put units alongside all symbols, not just the numerical answer.
Check: Reverse-check: the unrounded average speed multiplied by 3 hours reproduces 131 km. Dimensional units also cancel correctly: (km/h)×h=km.
Later retrieval: If the journey lasted 6 hours at the same hypothetical constant rate, distance would be 262 km. This is a model extension, not an observation about a real trip.
48. Card 19: average rate with units
Card prompt: A hypothetical journey covers 138 km in 8 hours. What formula gives average speed, and what are the speed units?
Meaning and conditions: Notebook heading: average speed = total distance / total elapsed time. Label distance in km and time in hours. The quotient therefore has km/h as its unit. The formula describes the whole interval’s average; it does not prove that the speed was constant throughout.
One worked example: Average speed=138/8=17.25 km/h. This is an exact fraction 138/8 km/h if a rounded display is not requested. To find distance at a stated constant model rate, rearrange as distance=speed×time.
When this would be wrong: Swapping numerator and denominator yields h/km, not km/h. Another error is dividing by minutes but labelling the result km/h. The notebook should put units alongside all symbols, not just the numerical answer.
Check: Reverse-check: the unrounded average speed multiplied by 8 hours reproduces 138 km. Dimensional units also cancel correctly: (km/h)×h=km.
Later retrieval: If the journey lasted 11 hours at the same hypothetical constant rate, distance would be 189.75 km. This is a model extension, not an observation about a real trip.
49. Card 20: average rate with units
Card prompt: A hypothetical journey covers 145 km in 13 hours. What formula gives average speed, and what are the speed units?
Meaning and conditions: Notebook heading: average speed = total distance / total elapsed time. Label distance in km and time in hours. The quotient therefore has km/h as its unit. The formula describes the whole interval’s average; it does not prove that the speed was constant throughout.
One worked example: Average speed=145/13=11.153846 km/h. This is an exact fraction 145/13 km/h if a rounded display is not requested. To find distance at a stated constant model rate, rearrange as distance=speed×time.
When this would be wrong: Swapping numerator and denominator yields h/km, not km/h. Another error is dividing by minutes but labelling the result km/h. The notebook should put units alongside all symbols, not just the numerical answer.
Check: Reverse-check: the unrounded average speed multiplied by 13 hours reproduces 145 km. Dimensional units also cancel correctly: (km/h)×h=km.
Later retrieval: If the journey lasted 16 hours at the same hypothetical constant rate, distance would be 178.461538 km. This is a model extension, not an observation about a real trip.
50. Card 21: average rate with units
Card prompt: A hypothetical journey covers 12 km in 18 hours. What formula gives average speed, and what are the speed units?
Meaning and conditions: Notebook heading: average speed = total distance / total elapsed time. Label distance in km and time in hours. The quotient therefore has km/h as its unit. The formula describes the whole interval’s average; it does not prove that the speed was constant throughout.
One worked example: Average speed=12/18=0.666667 km/h. This is an exact fraction 12/18 km/h if a rounded display is not requested. To find distance at a stated constant model rate, rearrange as distance=speed×time.
When this would be wrong: Swapping numerator and denominator yields h/km, not km/h. Another error is dividing by minutes but labelling the result km/h. The notebook should put units alongside all symbols, not just the numerical answer.
Check: Reverse-check: the unrounded average speed multiplied by 18 hours reproduces 12 km. Dimensional units also cancel correctly: (km/h)×h=km.
Later retrieval: If the journey lasted 21 hours at the same hypothetical constant rate, distance would be 14 km. This is a model extension, not an observation about a real trip.
51. Card 22: average rate with units
Card prompt: A hypothetical journey covers 19 km in 2 hours. What formula gives average speed, and what are the speed units?
Meaning and conditions: Notebook heading: average speed = total distance / total elapsed time. Label distance in km and time in hours. The quotient therefore has km/h as its unit. The formula describes the whole interval’s average; it does not prove that the speed was constant throughout.
One worked example: Average speed=19/2=9.5 km/h. This is an exact fraction 19/2 km/h if a rounded display is not requested. To find distance at a stated constant model rate, rearrange as distance=speed×time.
When this would be wrong: Swapping numerator and denominator yields h/km, not km/h. Another error is dividing by minutes but labelling the result km/h. The notebook should put units alongside all symbols, not just the numerical answer.
Check: Reverse-check: the unrounded average speed multiplied by 2 hours reproduces 19 km. Dimensional units also cancel correctly: (km/h)×h=km.
Later retrieval: If the journey lasted 5 hours at the same hypothetical constant rate, distance would be 47.5 km. This is a model extension, not an observation about a real trip.
52. Card 23: average rate with units
Card prompt: A hypothetical journey covers 26 km in 7 hours. What formula gives average speed, and what are the speed units?
Meaning and conditions: Notebook heading: average speed = total distance / total elapsed time. Label distance in km and time in hours. The quotient therefore has km/h as its unit. The formula describes the whole interval’s average; it does not prove that the speed was constant throughout.
One worked example: Average speed=26/7=3.714286 km/h. This is an exact fraction 26/7 km/h if a rounded display is not requested. To find distance at a stated constant model rate, rearrange as distance=speed×time.
When this would be wrong: Swapping numerator and denominator yields h/km, not km/h. Another error is dividing by minutes but labelling the result km/h. The notebook should put units alongside all symbols, not just the numerical answer.
Check: Reverse-check: the unrounded average speed multiplied by 7 hours reproduces 26 km. Dimensional units also cancel correctly: (km/h)×h=km.
Later retrieval: If the journey lasted 10 hours at the same hypothetical constant rate, distance would be 37.142857 km. This is a model extension, not an observation about a real trip.
53. Card 24: average rate with units
Card prompt: A hypothetical journey covers 33 km in 12 hours. What formula gives average speed, and what are the speed units?
Meaning and conditions: Notebook heading: average speed = total distance / total elapsed time. Label distance in km and time in hours. The quotient therefore has km/h as its unit. The formula describes the whole interval’s average; it does not prove that the speed was constant throughout.
One worked example: Average speed=33/12=2.75 km/h. This is an exact fraction 33/12 km/h if a rounded display is not requested. To find distance at a stated constant model rate, rearrange as distance=speed×time.
When this would be wrong: Swapping numerator and denominator yields h/km, not km/h. Another error is dividing by minutes but labelling the result km/h. The notebook should put units alongside all symbols, not just the numerical answer.
Check: Reverse-check: the unrounded average speed multiplied by 12 hours reproduces 33 km. Dimensional units also cancel correctly: (km/h)×h=km.
Later retrieval: If the journey lasted 15 hours at the same hypothetical constant rate, distance would be 41.25 km. This is a model extension, not an observation about a real trip.
54. Card 25: average rate with units
Card prompt: A hypothetical journey covers 40 km in 17 hours. What formula gives average speed, and what are the speed units?
Meaning and conditions: Notebook heading: average speed = total distance / total elapsed time. Label distance in km and time in hours. The quotient therefore has km/h as its unit. The formula describes the whole interval’s average; it does not prove that the speed was constant throughout.
One worked example: Average speed=40/17=2.352941 km/h. This is an exact fraction 40/17 km/h if a rounded display is not requested. To find distance at a stated constant model rate, rearrange as distance=speed×time.
When this would be wrong: Swapping numerator and denominator yields h/km, not km/h. Another error is dividing by minutes but labelling the result km/h. The notebook should put units alongside all symbols, not just the numerical answer.
Check: Reverse-check: the unrounded average speed multiplied by 17 hours reproduces 40 km. Dimensional units also cancel correctly: (km/h)×h=km.
Later retrieval: If the journey lasted 20 hours at the same hypothetical constant rate, distance would be 47.058824 km. This is a model extension, not an observation about a real trip.
55. Card 26: average rate with units
Card prompt: A hypothetical journey covers 47 km in 22 hours. What formula gives average speed, and what are the speed units?
Meaning and conditions: Notebook heading: average speed = total distance / total elapsed time. Label distance in km and time in hours. The quotient therefore has km/h as its unit. The formula describes the whole interval’s average; it does not prove that the speed was constant throughout.
One worked example: Average speed=47/22=2.136364 km/h. This is an exact fraction 47/22 km/h if a rounded display is not requested. To find distance at a stated constant model rate, rearrange as distance=speed×time.
When this would be wrong: Swapping numerator and denominator yields h/km, not km/h. Another error is dividing by minutes but labelling the result km/h. The notebook should put units alongside all symbols, not just the numerical answer.
Check: Reverse-check: the unrounded average speed multiplied by 22 hours reproduces 47 km. Dimensional units also cancel correctly: (km/h)×h=km.
Later retrieval: If the journey lasted 25 hours at the same hypothetical constant rate, distance would be 53.409091 km. This is a model extension, not an observation about a real trip.
56. Card 27: average rate with units
Card prompt: A hypothetical journey covers 54 km in 6 hours. What formula gives average speed, and what are the speed units?
Meaning and conditions: Notebook heading: average speed = total distance / total elapsed time. Label distance in km and time in hours. The quotient therefore has km/h as its unit. The formula describes the whole interval’s average; it does not prove that the speed was constant throughout.
One worked example: Average speed=54/6=9 km/h. This is an exact fraction 54/6 km/h if a rounded display is not requested. To find distance at a stated constant model rate, rearrange as distance=speed×time.
When this would be wrong: Swapping numerator and denominator yields h/km, not km/h. Another error is dividing by minutes but labelling the result km/h. The notebook should put units alongside all symbols, not just the numerical answer.
Check: Reverse-check: the unrounded average speed multiplied by 6 hours reproduces 54 km. Dimensional units also cancel correctly: (km/h)×h=km.
Later retrieval: If the journey lasted 9 hours at the same hypothetical constant rate, distance would be 81 km. This is a model extension, not an observation about a real trip.
Linear equations and straight-line rules
In linear equations and straight-line rules, a notebook card should name the question that triggers the formula and the quantity it calculates. Read the worked example as one illustration of the relationship, not as fixed numbers to memorise. Pay attention to units, assumptions and a reverse check. If two formulas use the same letter, define that letter again in the local context.
57. Card 1: read and use y=mx+b
Card prompt: A straight-line rule is y=-5x−11. Find y when x=-8, then name its gradient and y-intercept.
Meaning and conditions: Notebook heading: linear rule y=mx+b. Here m is the gradient, the change in y per +1 x-unit. The number b is the y-value at x=0. A negative m means the line falls to the right; it does not guarantee every output is negative. This card should include a simple two-column input–output check.
One worked example: Substitute x=-8: y=-5×(-8)+(-11)=29. Gradient is -5. The vertical-axis intercept is the point (0,-11). These are different mathematical quantities, even though they appear in the same short formula.
When this would be wrong: A learner may treat b=-11 as the gradient and m=-5 as the starting output. Another may omit brackets around negative input -8, changing the result. The notebook should include a ‘read before substituting’ reminder.
Check: At x=-7, output is 24, a change of -5; at x=0, output is -11. These checks verify the roles of m and b independently of one substituted answer.
Later retrieval: Change only the intercept by +4. The new rule shifts all outputs up by four but preserves gradient -5. Ask which quantity in the notebook formula was changed.
58. Card 2: read and use y=mx+b
Card prompt: A straight-line rule is y=-3x−8. Find y when x=-1, then name its gradient and y-intercept.
Meaning and conditions: Notebook heading: linear rule y=mx+b. Here m is the gradient, the change in y per +1 x-unit. The number b is the y-value at x=0. A negative m means the line falls to the right; it does not guarantee every output is negative. This card should include a simple two-column input–output check.
One worked example: Substitute x=-1: y=-3×(-1)+(-8)=-5. Gradient is -3. The vertical-axis intercept is the point (0,-8). These are different mathematical quantities, even though they appear in the same short formula.
When this would be wrong: A learner may treat b=-8 as the gradient and m=-3 as the starting output. Another may omit brackets around negative input -1, changing the result. The notebook should include a ‘read before substituting’ reminder.
Check: At x=0, output is -8, a change of -3; at x=0, output is -8. These checks verify the roles of m and b independently of one substituted answer.
Later retrieval: Change only the intercept by +4. The new rule shifts all outputs up by four but preserves gradient -3. Ask which quantity in the notebook formula was changed.
59. Card 3: read and use y=mx+b
Card prompt: A straight-line rule is y=-2x−5. Find y when x=6, then name its gradient and y-intercept.
Meaning and conditions: Notebook heading: linear rule y=mx+b. Here m is the gradient, the change in y per +1 x-unit. The number b is the y-value at x=0. A negative m means the line falls to the right; it does not guarantee every output is negative. This card should include a simple two-column input–output check.
One worked example: Substitute x=6: y=-2×(6)+(-5)=-17. Gradient is -2. The vertical-axis intercept is the point (0,-5). These are different mathematical quantities, even though they appear in the same short formula.
When this would be wrong: A learner may treat b=-5 as the gradient and m=-2 as the starting output. Another may omit brackets around negative input 6, changing the result. The notebook should include a ‘read before substituting’ reminder.
Check: At x=7, output is -19, a change of -2; at x=0, output is -5. These checks verify the roles of m and b independently of one substituted answer.
Later retrieval: Change only the intercept by +4. The new rule shifts all outputs up by four but preserves gradient -2. Ask which quantity in the notebook formula was changed.
60. Card 4: read and use y=mx+b
Card prompt: A straight-line rule is y=-1x−2. Find y when x=-4, then name its gradient and y-intercept.
Meaning and conditions: Notebook heading: linear rule y=mx+b. Here m is the gradient, the change in y per +1 x-unit. The number b is the y-value at x=0. A negative m means the line falls to the right; it does not guarantee every output is negative. This card should include a simple two-column input–output check.
One worked example: Substitute x=-4: y=-1×(-4)+(-2)=2. Gradient is -1. The vertical-axis intercept is the point (0,-2). These are different mathematical quantities, even though they appear in the same short formula.
When this would be wrong: A learner may treat b=-2 as the gradient and m=-1 as the starting output. Another may omit brackets around negative input -4, changing the result. The notebook should include a ‘read before substituting’ reminder.
Check: At x=-3, output is 1, a change of -1; at x=0, output is -2. These checks verify the roles of m and b independently of one substituted answer.
Later retrieval: Change only the intercept by +4. The new rule shifts all outputs up by four but preserves gradient -1. Ask which quantity in the notebook formula was changed.
61. Card 5: read and use y=mx+b
Card prompt: A straight-line rule is y=1x+1. Find y when x=3, then name its gradient and y-intercept.
Meaning and conditions: Notebook heading: linear rule y=mx+b. Here m is the gradient, the change in y per +1 x-unit. The number b is the y-value at x=0. A negative m means the line falls to the right; it does not guarantee every output is negative. This card should include a simple two-column input–output check.
One worked example: Substitute x=3: y=1×(3)+(1)=4. Gradient is 1. The vertical-axis intercept is the point (0,1). These are different mathematical quantities, even though they appear in the same short formula.
When this would be wrong: A learner may treat b=1 as the gradient and m=1 as the starting output. Another may omit brackets around negative input 3, changing the result. The notebook should include a ‘read before substituting’ reminder.
Check: At x=4, output is 5, a change of 1; at x=0, output is 1. These checks verify the roles of m and b independently of one substituted answer.
Later retrieval: Change only the intercept by +4. The new rule shifts all outputs up by four but preserves gradient 1. Ask which quantity in the notebook formula was changed.
62. Card 6: read and use y=mx+b
Card prompt: A straight-line rule is y=2x+4. Find y when x=-7, then name its gradient and y-intercept.
Meaning and conditions: Notebook heading: linear rule y=mx+b. Here m is the gradient, the change in y per +1 x-unit. The number b is the y-value at x=0. A negative m means the line falls to the right; it does not guarantee every output is negative. This card should include a simple two-column input–output check.
One worked example: Substitute x=-7: y=2×(-7)+(4)=-10. Gradient is 2. The vertical-axis intercept is the point (0,4). These are different mathematical quantities, even though they appear in the same short formula.
When this would be wrong: A learner may treat b=4 as the gradient and m=2 as the starting output. Another may omit brackets around negative input -7, changing the result. The notebook should include a ‘read before substituting’ reminder.
Check: At x=-6, output is -8, a change of 2; at x=0, output is 4. These checks verify the roles of m and b independently of one substituted answer.
Later retrieval: Change only the intercept by +4. The new rule shifts all outputs up by four but preserves gradient 2. Ask which quantity in the notebook formula was changed.
63. Card 7: read and use y=mx+b
Card prompt: A straight-line rule is y=3x+7. Find y when x=0, then name its gradient and y-intercept.
Meaning and conditions: Notebook heading: linear rule y=mx+b. Here m is the gradient, the change in y per +1 x-unit. The number b is the y-value at x=0. A negative m means the line falls to the right; it does not guarantee every output is negative. This card should include a simple two-column input–output check.
One worked example: Substitute x=0: y=3×(0)+(7)=7. Gradient is 3. The vertical-axis intercept is the point (0,7). These are different mathematical quantities, even though they appear in the same short formula.
When this would be wrong: A learner may treat b=7 as the gradient and m=3 as the starting output. Another may omit brackets around negative input 0, changing the result. The notebook should include a ‘read before substituting’ reminder.
Check: At x=1, output is 10, a change of 3; at x=0, output is 7. These checks verify the roles of m and b independently of one substituted answer.
Later retrieval: Change only the intercept by +4. The new rule shifts all outputs up by four but preserves gradient 3. Ask which quantity in the notebook formula was changed.
64. Card 8: read and use y=mx+b
Card prompt: A straight-line rule is y=4x+10. Find y when x=7, then name its gradient and y-intercept.
Meaning and conditions: Notebook heading: linear rule y=mx+b. Here m is the gradient, the change in y per +1 x-unit. The number b is the y-value at x=0. A negative m means the line falls to the right; it does not guarantee every output is negative. This card should include a simple two-column input–output check.
One worked example: Substitute x=7: y=4×(7)+(10)=38. Gradient is 4. The vertical-axis intercept is the point (0,10). These are different mathematical quantities, even though they appear in the same short formula.
When this would be wrong: A learner may treat b=10 as the gradient and m=4 as the starting output. Another may omit brackets around negative input 7, changing the result. The notebook should include a ‘read before substituting’ reminder.
Check: At x=8, output is 42, a change of 4; at x=0, output is 10. These checks verify the roles of m and b independently of one substituted answer.
Later retrieval: Change only the intercept by +4. The new rule shifts all outputs up by four but preserves gradient 4. Ask which quantity in the notebook formula was changed.
65. Card 9: read and use y=mx+b
Card prompt: A straight-line rule is y=5x−10. Find y when x=-3, then name its gradient and y-intercept.
Meaning and conditions: Notebook heading: linear rule y=mx+b. Here m is the gradient, the change in y per +1 x-unit. The number b is the y-value at x=0. A negative m means the line falls to the right; it does not guarantee every output is negative. This card should include a simple two-column input–output check.
One worked example: Substitute x=-3: y=5×(-3)+(-10)=-25. Gradient is 5. The vertical-axis intercept is the point (0,-10). These are different mathematical quantities, even though they appear in the same short formula.
When this would be wrong: A learner may treat b=-10 as the gradient and m=5 as the starting output. Another may omit brackets around negative input -3, changing the result. The notebook should include a ‘read before substituting’ reminder.
Check: At x=-2, output is -20, a change of 5; at x=0, output is -10. These checks verify the roles of m and b independently of one substituted answer.
Later retrieval: Change only the intercept by +4. The new rule shifts all outputs up by four but preserves gradient 5. Ask which quantity in the notebook formula was changed.
66. Card 10: read and use y=mx+b
Card prompt: A straight-line rule is y=-5x−7. Find y when x=4, then name its gradient and y-intercept.
Meaning and conditions: Notebook heading: linear rule y=mx+b. Here m is the gradient, the change in y per +1 x-unit. The number b is the y-value at x=0. A negative m means the line falls to the right; it does not guarantee every output is negative. This card should include a simple two-column input–output check.
One worked example: Substitute x=4: y=-5×(4)+(-7)=-27. Gradient is -5. The vertical-axis intercept is the point (0,-7). These are different mathematical quantities, even though they appear in the same short formula.
When this would be wrong: A learner may treat b=-7 as the gradient and m=-5 as the starting output. Another may omit brackets around negative input 4, changing the result. The notebook should include a ‘read before substituting’ reminder.
Check: At x=5, output is -32, a change of -5; at x=0, output is -7. These checks verify the roles of m and b independently of one substituted answer.
Later retrieval: Change only the intercept by +4. The new rule shifts all outputs up by four but preserves gradient -5. Ask which quantity in the notebook formula was changed.
67. Card 11: read and use y=mx+b
Card prompt: A straight-line rule is y=-3x−4. Find y when x=-6, then name its gradient and y-intercept.
Meaning and conditions: Notebook heading: linear rule y=mx+b. Here m is the gradient, the change in y per +1 x-unit. The number b is the y-value at x=0. A negative m means the line falls to the right; it does not guarantee every output is negative. This card should include a simple two-column input–output check.
One worked example: Substitute x=-6: y=-3×(-6)+(-4)=14. Gradient is -3. The vertical-axis intercept is the point (0,-4). These are different mathematical quantities, even though they appear in the same short formula.
When this would be wrong: A learner may treat b=-4 as the gradient and m=-3 as the starting output. Another may omit brackets around negative input -6, changing the result. The notebook should include a ‘read before substituting’ reminder.
Check: At x=-5, output is 11, a change of -3; at x=0, output is -4. These checks verify the roles of m and b independently of one substituted answer.
Later retrieval: Change only the intercept by +4. The new rule shifts all outputs up by four but preserves gradient -3. Ask which quantity in the notebook formula was changed.
68. Card 12: read and use y=mx+b
Card prompt: A straight-line rule is y=-2x−1. Find y when x=1, then name its gradient and y-intercept.
Meaning and conditions: Notebook heading: linear rule y=mx+b. Here m is the gradient, the change in y per +1 x-unit. The number b is the y-value at x=0. A negative m means the line falls to the right; it does not guarantee every output is negative. This card should include a simple two-column input–output check.
One worked example: Substitute x=1: y=-2×(1)+(-1)=-3. Gradient is -2. The vertical-axis intercept is the point (0,-1). These are different mathematical quantities, even though they appear in the same short formula.
When this would be wrong: A learner may treat b=-1 as the gradient and m=-2 as the starting output. Another may omit brackets around negative input 1, changing the result. The notebook should include a ‘read before substituting’ reminder.
Check: At x=2, output is -5, a change of -2; at x=0, output is -1. These checks verify the roles of m and b independently of one substituted answer.
Later retrieval: Change only the intercept by +4. The new rule shifts all outputs up by four but preserves gradient -2. Ask which quantity in the notebook formula was changed.
69. Card 13: read and use y=mx+b
Card prompt: A straight-line rule is y=-1x+2. Find y when x=8, then name its gradient and y-intercept.
Meaning and conditions: Notebook heading: linear rule y=mx+b. Here m is the gradient, the change in y per +1 x-unit. The number b is the y-value at x=0. A negative m means the line falls to the right; it does not guarantee every output is negative. This card should include a simple two-column input–output check.
One worked example: Substitute x=8: y=-1×(8)+(2)=-6. Gradient is -1. The vertical-axis intercept is the point (0,2). These are different mathematical quantities, even though they appear in the same short formula.
When this would be wrong: A learner may treat b=2 as the gradient and m=-1 as the starting output. Another may omit brackets around negative input 8, changing the result. The notebook should include a ‘read before substituting’ reminder.
Check: At x=9, output is -7, a change of -1; at x=0, output is 2. These checks verify the roles of m and b independently of one substituted answer.
Later retrieval: Change only the intercept by +4. The new rule shifts all outputs up by four but preserves gradient -1. Ask which quantity in the notebook formula was changed.
70. Card 14: read and use y=mx+b
Card prompt: A straight-line rule is y=1x+5. Find y when x=-2, then name its gradient and y-intercept.
Meaning and conditions: Notebook heading: linear rule y=mx+b. Here m is the gradient, the change in y per +1 x-unit. The number b is the y-value at x=0. A negative m means the line falls to the right; it does not guarantee every output is negative. This card should include a simple two-column input–output check.
One worked example: Substitute x=-2: y=1×(-2)+(5)=3. Gradient is 1. The vertical-axis intercept is the point (0,5). These are different mathematical quantities, even though they appear in the same short formula.
When this would be wrong: A learner may treat b=5 as the gradient and m=1 as the starting output. Another may omit brackets around negative input -2, changing the result. The notebook should include a ‘read before substituting’ reminder.
Check: At x=-1, output is 4, a change of 1; at x=0, output is 5. These checks verify the roles of m and b independently of one substituted answer.
Later retrieval: Change only the intercept by +4. The new rule shifts all outputs up by four but preserves gradient 1. Ask which quantity in the notebook formula was changed.
71. Card 15: read and use y=mx+b
Card prompt: A straight-line rule is y=2x+8. Find y when x=5, then name its gradient and y-intercept.
Meaning and conditions: Notebook heading: linear rule y=mx+b. Here m is the gradient, the change in y per +1 x-unit. The number b is the y-value at x=0. A negative m means the line falls to the right; it does not guarantee every output is negative. This card should include a simple two-column input–output check.
One worked example: Substitute x=5: y=2×(5)+(8)=18. Gradient is 2. The vertical-axis intercept is the point (0,8). These are different mathematical quantities, even though they appear in the same short formula.
When this would be wrong: A learner may treat b=8 as the gradient and m=2 as the starting output. Another may omit brackets around negative input 5, changing the result. The notebook should include a ‘read before substituting’ reminder.
Check: At x=6, output is 20, a change of 2; at x=0, output is 8. These checks verify the roles of m and b independently of one substituted answer.
Later retrieval: Change only the intercept by +4. The new rule shifts all outputs up by four but preserves gradient 2. Ask which quantity in the notebook formula was changed.
72. Card 16: read and use y=mx+b
Card prompt: A straight-line rule is y=3x+11. Find y when x=-5, then name its gradient and y-intercept.
Meaning and conditions: Notebook heading: linear rule y=mx+b. Here m is the gradient, the change in y per +1 x-unit. The number b is the y-value at x=0. A negative m means the line falls to the right; it does not guarantee every output is negative. This card should include a simple two-column input–output check.
One worked example: Substitute x=-5: y=3×(-5)+(11)=-4. Gradient is 3. The vertical-axis intercept is the point (0,11). These are different mathematical quantities, even though they appear in the same short formula.
When this would be wrong: A learner may treat b=11 as the gradient and m=3 as the starting output. Another may omit brackets around negative input -5, changing the result. The notebook should include a ‘read before substituting’ reminder.
Check: At x=-4, output is -1, a change of 3; at x=0, output is 11. These checks verify the roles of m and b independently of one substituted answer.
Later retrieval: Change only the intercept by +4. The new rule shifts all outputs up by four but preserves gradient 3. Ask which quantity in the notebook formula was changed.
73. Card 17: read and use y=mx+b
Card prompt: A straight-line rule is y=4x−9. Find y when x=2, then name its gradient and y-intercept.
Meaning and conditions: Notebook heading: linear rule y=mx+b. Here m is the gradient, the change in y per +1 x-unit. The number b is the y-value at x=0. A negative m means the line falls to the right; it does not guarantee every output is negative. This card should include a simple two-column input–output check.
One worked example: Substitute x=2: y=4×(2)+(-9)=-1. Gradient is 4. The vertical-axis intercept is the point (0,-9). These are different mathematical quantities, even though they appear in the same short formula.
When this would be wrong: A learner may treat b=-9 as the gradient and m=4 as the starting output. Another may omit brackets around negative input 2, changing the result. The notebook should include a ‘read before substituting’ reminder.
Check: At x=3, output is 3, a change of 4; at x=0, output is -9. These checks verify the roles of m and b independently of one substituted answer.
Later retrieval: Change only the intercept by +4. The new rule shifts all outputs up by four but preserves gradient 4. Ask which quantity in the notebook formula was changed.
74. Card 18: read and use y=mx+b
Card prompt: A straight-line rule is y=5x−6. Find y when x=-8, then name its gradient and y-intercept.
Meaning and conditions: Notebook heading: linear rule y=mx+b. Here m is the gradient, the change in y per +1 x-unit. The number b is the y-value at x=0. A negative m means the line falls to the right; it does not guarantee every output is negative. This card should include a simple two-column input–output check.
One worked example: Substitute x=-8: y=5×(-8)+(-6)=-46. Gradient is 5. The vertical-axis intercept is the point (0,-6). These are different mathematical quantities, even though they appear in the same short formula.
When this would be wrong: A learner may treat b=-6 as the gradient and m=5 as the starting output. Another may omit brackets around negative input -8, changing the result. The notebook should include a ‘read before substituting’ reminder.
Check: At x=-7, output is -41, a change of 5; at x=0, output is -6. These checks verify the roles of m and b independently of one substituted answer.
Later retrieval: Change only the intercept by +4. The new rule shifts all outputs up by four but preserves gradient 5. Ask which quantity in the notebook formula was changed.
75. Card 19: read and use y=mx+b
Card prompt: A straight-line rule is y=-5x−3. Find y when x=-1, then name its gradient and y-intercept.
Meaning and conditions: Notebook heading: linear rule y=mx+b. Here m is the gradient, the change in y per +1 x-unit. The number b is the y-value at x=0. A negative m means the line falls to the right; it does not guarantee every output is negative. This card should include a simple two-column input–output check.
One worked example: Substitute x=-1: y=-5×(-1)+(-3)=2. Gradient is -5. The vertical-axis intercept is the point (0,-3). These are different mathematical quantities, even though they appear in the same short formula.
When this would be wrong: A learner may treat b=-3 as the gradient and m=-5 as the starting output. Another may omit brackets around negative input -1, changing the result. The notebook should include a ‘read before substituting’ reminder.
Check: At x=0, output is -3, a change of -5; at x=0, output is -3. These checks verify the roles of m and b independently of one substituted answer.
Later retrieval: Change only the intercept by +4. The new rule shifts all outputs up by four but preserves gradient -5. Ask which quantity in the notebook formula was changed.
76. Card 20: read and use y=mx+b
Card prompt: A straight-line rule is y=-3x+0. Find y when x=6, then name its gradient and y-intercept.
Meaning and conditions: Notebook heading: linear rule y=mx+b. Here m is the gradient, the change in y per +1 x-unit. The number b is the y-value at x=0. A negative m means the line falls to the right; it does not guarantee every output is negative. This card should include a simple two-column input–output check.
One worked example: Substitute x=6: y=-3×(6)+(0)=-18. Gradient is -3. The vertical-axis intercept is the point (0,0). These are different mathematical quantities, even though they appear in the same short formula.
When this would be wrong: A learner may treat b=0 as the gradient and m=-3 as the starting output. Another may omit brackets around negative input 6, changing the result. The notebook should include a ‘read before substituting’ reminder.
Check: At x=7, output is -21, a change of -3; at x=0, output is 0. These checks verify the roles of m and b independently of one substituted answer.
Later retrieval: Change only the intercept by +4. The new rule shifts all outputs up by four but preserves gradient -3. Ask which quantity in the notebook formula was changed.
77. Card 21: read and use y=mx+b
Card prompt: A straight-line rule is y=-2x+3. Find y when x=-4, then name its gradient and y-intercept.
Meaning and conditions: Notebook heading: linear rule y=mx+b. Here m is the gradient, the change in y per +1 x-unit. The number b is the y-value at x=0. A negative m means the line falls to the right; it does not guarantee every output is negative. This card should include a simple two-column input–output check.
One worked example: Substitute x=-4: y=-2×(-4)+(3)=11. Gradient is -2. The vertical-axis intercept is the point (0,3). These are different mathematical quantities, even though they appear in the same short formula.
When this would be wrong: A learner may treat b=3 as the gradient and m=-2 as the starting output. Another may omit brackets around negative input -4, changing the result. The notebook should include a ‘read before substituting’ reminder.
Check: At x=-3, output is 9, a change of -2; at x=0, output is 3. These checks verify the roles of m and b independently of one substituted answer.
Later retrieval: Change only the intercept by +4. The new rule shifts all outputs up by four but preserves gradient -2. Ask which quantity in the notebook formula was changed.
78. Card 22: read and use y=mx+b
Card prompt: A straight-line rule is y=-1x+6. Find y when x=3, then name its gradient and y-intercept.
Meaning and conditions: Notebook heading: linear rule y=mx+b. Here m is the gradient, the change in y per +1 x-unit. The number b is the y-value at x=0. A negative m means the line falls to the right; it does not guarantee every output is negative. This card should include a simple two-column input–output check.
One worked example: Substitute x=3: y=-1×(3)+(6)=3. Gradient is -1. The vertical-axis intercept is the point (0,6). These are different mathematical quantities, even though they appear in the same short formula.
When this would be wrong: A learner may treat b=6 as the gradient and m=-1 as the starting output. Another may omit brackets around negative input 3, changing the result. The notebook should include a ‘read before substituting’ reminder.
Check: At x=4, output is 2, a change of -1; at x=0, output is 6. These checks verify the roles of m and b independently of one substituted answer.
Later retrieval: Change only the intercept by +4. The new rule shifts all outputs up by four but preserves gradient -1. Ask which quantity in the notebook formula was changed.
79. Card 23: read and use y=mx+b
Card prompt: A straight-line rule is y=1x+9. Find y when x=-7, then name its gradient and y-intercept.
Meaning and conditions: Notebook heading: linear rule y=mx+b. Here m is the gradient, the change in y per +1 x-unit. The number b is the y-value at x=0. A negative m means the line falls to the right; it does not guarantee every output is negative. This card should include a simple two-column input–output check.
One worked example: Substitute x=-7: y=1×(-7)+(9)=2. Gradient is 1. The vertical-axis intercept is the point (0,9). These are different mathematical quantities, even though they appear in the same short formula.
When this would be wrong: A learner may treat b=9 as the gradient and m=1 as the starting output. Another may omit brackets around negative input -7, changing the result. The notebook should include a ‘read before substituting’ reminder.
Check: At x=-6, output is 3, a change of 1; at x=0, output is 9. These checks verify the roles of m and b independently of one substituted answer.
Later retrieval: Change only the intercept by +4. The new rule shifts all outputs up by four but preserves gradient 1. Ask which quantity in the notebook formula was changed.
80. Card 24: read and use y=mx+b
Card prompt: A straight-line rule is y=2x−11. Find y when x=0, then name its gradient and y-intercept.
Meaning and conditions: Notebook heading: linear rule y=mx+b. Here m is the gradient, the change in y per +1 x-unit. The number b is the y-value at x=0. A negative m means the line falls to the right; it does not guarantee every output is negative. This card should include a simple two-column input–output check.
One worked example: Substitute x=0: y=2×(0)+(-11)=-11. Gradient is 2. The vertical-axis intercept is the point (0,-11). These are different mathematical quantities, even though they appear in the same short formula.
When this would be wrong: A learner may treat b=-11 as the gradient and m=2 as the starting output. Another may omit brackets around negative input 0, changing the result. The notebook should include a ‘read before substituting’ reminder.
Check: At x=1, output is -9, a change of 2; at x=0, output is -11. These checks verify the roles of m and b independently of one substituted answer.
Later retrieval: Change only the intercept by +4. The new rule shifts all outputs up by four but preserves gradient 2. Ask which quantity in the notebook formula was changed.
81. Card 25: read and use y=mx+b
Card prompt: A straight-line rule is y=3x−8. Find y when x=7, then name its gradient and y-intercept.
Meaning and conditions: Notebook heading: linear rule y=mx+b. Here m is the gradient, the change in y per +1 x-unit. The number b is the y-value at x=0. A negative m means the line falls to the right; it does not guarantee every output is negative. This card should include a simple two-column input–output check.
One worked example: Substitute x=7: y=3×(7)+(-8)=13. Gradient is 3. The vertical-axis intercept is the point (0,-8). These are different mathematical quantities, even though they appear in the same short formula.
When this would be wrong: A learner may treat b=-8 as the gradient and m=3 as the starting output. Another may omit brackets around negative input 7, changing the result. The notebook should include a ‘read before substituting’ reminder.
Check: At x=8, output is 16, a change of 3; at x=0, output is -8. These checks verify the roles of m and b independently of one substituted answer.
Later retrieval: Change only the intercept by +4. The new rule shifts all outputs up by four but preserves gradient 3. Ask which quantity in the notebook formula was changed.
82. Card 26: read and use y=mx+b
Card prompt: A straight-line rule is y=4x−5. Find y when x=-3, then name its gradient and y-intercept.
Meaning and conditions: Notebook heading: linear rule y=mx+b. Here m is the gradient, the change in y per +1 x-unit. The number b is the y-value at x=0. A negative m means the line falls to the right; it does not guarantee every output is negative. This card should include a simple two-column input–output check.
One worked example: Substitute x=-3: y=4×(-3)+(-5)=-17. Gradient is 4. The vertical-axis intercept is the point (0,-5). These are different mathematical quantities, even though they appear in the same short formula.
When this would be wrong: A learner may treat b=-5 as the gradient and m=4 as the starting output. Another may omit brackets around negative input -3, changing the result. The notebook should include a ‘read before substituting’ reminder.
Check: At x=-2, output is -13, a change of 4; at x=0, output is -5. These checks verify the roles of m and b independently of one substituted answer.
Later retrieval: Change only the intercept by +4. The new rule shifts all outputs up by four but preserves gradient 4. Ask which quantity in the notebook formula was changed.
83. Card 27: read and use y=mx+b
Card prompt: A straight-line rule is y=5x−2. Find y when x=4, then name its gradient and y-intercept.
Meaning and conditions: Notebook heading: linear rule y=mx+b. Here m is the gradient, the change in y per +1 x-unit. The number b is the y-value at x=0. A negative m means the line falls to the right; it does not guarantee every output is negative. This card should include a simple two-column input–output check.
One worked example: Substitute x=4: y=5×(4)+(-2)=18. Gradient is 5. The vertical-axis intercept is the point (0,-2). These are different mathematical quantities, even though they appear in the same short formula.
When this would be wrong: A learner may treat b=-2 as the gradient and m=5 as the starting output. Another may omit brackets around negative input 4, changing the result. The notebook should include a ‘read before substituting’ reminder.
Check: At x=5, output is 23, a change of 5; at x=0, output is -2. These checks verify the roles of m and b independently of one substituted answer.
Later retrieval: Change only the intercept by +4. The new rule shifts all outputs up by four but preserves gradient 5. Ask which quantity in the notebook formula was changed.
84. Card 28: read and use y=mx+b
Card prompt: A straight-line rule is y=-5x+1. Find y when x=-6, then name its gradient and y-intercept.
Meaning and conditions: Notebook heading: linear rule y=mx+b. Here m is the gradient, the change in y per +1 x-unit. The number b is the y-value at x=0. A negative m means the line falls to the right; it does not guarantee every output is negative. This card should include a simple two-column input–output check.
One worked example: Substitute x=-6: y=-5×(-6)+(1)=31. Gradient is -5. The vertical-axis intercept is the point (0,1). These are different mathematical quantities, even though they appear in the same short formula.
When this would be wrong: A learner may treat b=1 as the gradient and m=-5 as the starting output. Another may omit brackets around negative input -6, changing the result. The notebook should include a ‘read before substituting’ reminder.
Check: At x=-5, output is 26, a change of -5; at x=0, output is 1. These checks verify the roles of m and b independently of one substituted answer.
Later retrieval: Change only the intercept by +4. The new rule shifts all outputs up by four but preserves gradient -5. Ask which quantity in the notebook formula was changed.
85. Card 29: read and use y=mx+b
Card prompt: A straight-line rule is y=-3x+4. Find y when x=1, then name its gradient and y-intercept.
Meaning and conditions: Notebook heading: linear rule y=mx+b. Here m is the gradient, the change in y per +1 x-unit. The number b is the y-value at x=0. A negative m means the line falls to the right; it does not guarantee every output is negative. This card should include a simple two-column input–output check.
One worked example: Substitute x=1: y=-3×(1)+(4)=1. Gradient is -3. The vertical-axis intercept is the point (0,4). These are different mathematical quantities, even though they appear in the same short formula.
When this would be wrong: A learner may treat b=4 as the gradient and m=-3 as the starting output. Another may omit brackets around negative input 1, changing the result. The notebook should include a ‘read before substituting’ reminder.
Check: At x=2, output is -2, a change of -3; at x=0, output is 4. These checks verify the roles of m and b independently of one substituted answer.
Later retrieval: Change only the intercept by +4. The new rule shifts all outputs up by four but preserves gradient -3. Ask which quantity in the notebook formula was changed.
Rectangle, triangle and trapezium measures
In rectangle, triangle and trapezium measures, a notebook card should name the question that triggers the formula and the quantity it calculates. Read the worked example as one illustration of the relationship, not as fixed numbers to memorise. Pay attention to units, assumptions and a reverse check. If two formulas use the same letter, define that letter again in the local context.
86. Card 1: choose the plane measure requested
Card prompt: A rectangular diagram has length 3 cm and width 2 cm. Find perimeter and area. A separate triangle has base 3 cm and perpendicular height 2 cm; find its area.
Meaning and conditions: A good notebook has separate labelled cards: rectangle perimeter P=2(l+w), rectangle area A=lw, triangle area A=½bh. The symbol b on the triangle card means base, while on another card it might mean a graph intercept. The notebook must define symbols locally rather than assume all letters mean the same thing everywhere.
One worked example: Rectangle perimeter=2(3+2)=10 cm. Rectangle area=3×2=6 cm². Triangle area=½×3×2=3 cm². The triangle’s height is perpendicular to its chosen base.
When this would be wrong: Applying A=lw to a perimeter question gives the wrong physical quantity. Using a slanted triangle side without perpendicularity proof is another modelling error. Unit checks—cm versus cm²—should appear prominently on the card.
Check: Trace the rectangle’s four sides for 10 cm and count an 3-by-2 square grid for 6 cm². For the triangle, two congruent copies make a base-by-height parallelogram or rectangle under suitable arrangement, confirming the half factor.
Later retrieval: Doubling both sides of the rectangle doubles its perimeter to 20 cm but quadruples area to 24 cm². Explain the different scaling as part of retrieval.
87. Card 2: choose the plane measure requested
Card prompt: A rectangular diagram has length 6 cm and width 9 cm. Find perimeter and area. A separate triangle has base 6 cm and perpendicular height 7 cm; find its area.
Meaning and conditions: A good notebook has separate labelled cards: rectangle perimeter P=2(l+w), rectangle area A=lw, triangle area A=½bh. The symbol b on the triangle card means base, while on another card it might mean a graph intercept. The notebook must define symbols locally rather than assume all letters mean the same thing everywhere.
One worked example: Rectangle perimeter=2(6+9)=30 cm. Rectangle area=6×9=54 cm². Triangle area=½×6×7=21 cm². The triangle’s height is perpendicular to its chosen base.
When this would be wrong: Applying A=lw to a perimeter question gives the wrong physical quantity. Using a slanted triangle side without perpendicularity proof is another modelling error. Unit checks—cm versus cm²—should appear prominently on the card.
Check: Trace the rectangle’s four sides for 30 cm and count an 6-by-9 square grid for 54 cm². For the triangle, two congruent copies make a base-by-height parallelogram or rectangle under suitable arrangement, confirming the half factor.
Later retrieval: Doubling both sides of the rectangle doubles its perimeter to 60 cm but quadruples area to 216 cm². Explain the different scaling as part of retrieval.
88. Card 3: choose the plane measure requested
Card prompt: A rectangular diagram has length 9 cm and width 16 cm. Find perimeter and area. A separate triangle has base 9 cm and perpendicular height 12 cm; find its area.
Meaning and conditions: A good notebook has separate labelled cards: rectangle perimeter P=2(l+w), rectangle area A=lw, triangle area A=½bh. The symbol b on the triangle card means base, while on another card it might mean a graph intercept. The notebook must define symbols locally rather than assume all letters mean the same thing everywhere.
One worked example: Rectangle perimeter=2(9+16)=50 cm. Rectangle area=9×16=144 cm². Triangle area=½×9×12=54 cm². The triangle’s height is perpendicular to its chosen base.
When this would be wrong: Applying A=lw to a perimeter question gives the wrong physical quantity. Using a slanted triangle side without perpendicularity proof is another modelling error. Unit checks—cm versus cm²—should appear prominently on the card.
Check: Trace the rectangle’s four sides for 50 cm and count an 9-by-16 square grid for 144 cm². For the triangle, two congruent copies make a base-by-height parallelogram or rectangle under suitable arrangement, confirming the half factor.
Later retrieval: Doubling both sides of the rectangle doubles its perimeter to 100 cm but quadruples area to 576 cm². Explain the different scaling as part of retrieval.
89. Card 4: choose the plane measure requested
Card prompt: A rectangular diagram has length 12 cm and width 4 cm. Find perimeter and area. A separate triangle has base 12 cm and perpendicular height 17 cm; find its area.
Meaning and conditions: A good notebook has separate labelled cards: rectangle perimeter P=2(l+w), rectangle area A=lw, triangle area A=½bh. The symbol b on the triangle card means base, while on another card it might mean a graph intercept. The notebook must define symbols locally rather than assume all letters mean the same thing everywhere.
One worked example: Rectangle perimeter=2(12+4)=32 cm. Rectangle area=12×4=48 cm². Triangle area=½×12×17=102 cm². The triangle’s height is perpendicular to its chosen base.
When this would be wrong: Applying A=lw to a perimeter question gives the wrong physical quantity. Using a slanted triangle side without perpendicularity proof is another modelling error. Unit checks—cm versus cm²—should appear prominently on the card.
Check: Trace the rectangle’s four sides for 32 cm and count an 12-by-4 square grid for 48 cm². For the triangle, two congruent copies make a base-by-height parallelogram or rectangle under suitable arrangement, confirming the half factor.
Later retrieval: Doubling both sides of the rectangle doubles its perimeter to 64 cm but quadruples area to 192 cm². Explain the different scaling as part of retrieval.
90. Card 5: choose the plane measure requested
Card prompt: A rectangular diagram has length 15 cm and width 11 cm. Find perimeter and area. A separate triangle has base 15 cm and perpendicular height 22 cm; find its area.
Meaning and conditions: A good notebook has separate labelled cards: rectangle perimeter P=2(l+w), rectangle area A=lw, triangle area A=½bh. The symbol b on the triangle card means base, while on another card it might mean a graph intercept. The notebook must define symbols locally rather than assume all letters mean the same thing everywhere.
One worked example: Rectangle perimeter=2(15+11)=52 cm. Rectangle area=15×11=165 cm². Triangle area=½×15×22=165 cm². The triangle’s height is perpendicular to its chosen base.
When this would be wrong: Applying A=lw to a perimeter question gives the wrong physical quantity. Using a slanted triangle side without perpendicularity proof is another modelling error. Unit checks—cm versus cm²—should appear prominently on the card.
Check: Trace the rectangle’s four sides for 52 cm and count an 15-by-11 square grid for 165 cm². For the triangle, two congruent copies make a base-by-height parallelogram or rectangle under suitable arrangement, confirming the half factor.
Later retrieval: Doubling both sides of the rectangle doubles its perimeter to 104 cm but quadruples area to 660 cm². Explain the different scaling as part of retrieval.
91. Card 6: choose the plane measure requested
Card prompt: A rectangular diagram has length 18 cm and width 18 cm. Find perimeter and area. A separate triangle has base 18 cm and perpendicular height 4 cm; find its area.
Meaning and conditions: A good notebook has separate labelled cards: rectangle perimeter P=2(l+w), rectangle area A=lw, triangle area A=½bh. The symbol b on the triangle card means base, while on another card it might mean a graph intercept. The notebook must define symbols locally rather than assume all letters mean the same thing everywhere.
One worked example: Rectangle perimeter=2(18+18)=72 cm. Rectangle area=18×18=324 cm². Triangle area=½×18×4=36 cm². The triangle’s height is perpendicular to its chosen base.
When this would be wrong: Applying A=lw to a perimeter question gives the wrong physical quantity. Using a slanted triangle side without perpendicularity proof is another modelling error. Unit checks—cm versus cm²—should appear prominently on the card.
Check: Trace the rectangle’s four sides for 72 cm and count an 18-by-18 square grid for 324 cm². For the triangle, two congruent copies make a base-by-height parallelogram or rectangle under suitable arrangement, confirming the half factor.
Later retrieval: Doubling both sides of the rectangle doubles its perimeter to 144 cm but quadruples area to 1296 cm². Explain the different scaling as part of retrieval.
92. Card 7: choose the plane measure requested
Card prompt: A rectangular diagram has length 21 cm and width 6 cm. Find perimeter and area. A separate triangle has base 21 cm and perpendicular height 9 cm; find its area.
Meaning and conditions: A good notebook has separate labelled cards: rectangle perimeter P=2(l+w), rectangle area A=lw, triangle area A=½bh. The symbol b on the triangle card means base, while on another card it might mean a graph intercept. The notebook must define symbols locally rather than assume all letters mean the same thing everywhere.
One worked example: Rectangle perimeter=2(21+6)=54 cm. Rectangle area=21×6=126 cm². Triangle area=½×21×9=94.5 cm². The triangle’s height is perpendicular to its chosen base.
When this would be wrong: Applying A=lw to a perimeter question gives the wrong physical quantity. Using a slanted triangle side without perpendicularity proof is another modelling error. Unit checks—cm versus cm²—should appear prominently on the card.
Check: Trace the rectangle’s four sides for 54 cm and count an 21-by-6 square grid for 126 cm². For the triangle, two congruent copies make a base-by-height parallelogram or rectangle under suitable arrangement, confirming the half factor.
Later retrieval: Doubling both sides of the rectangle doubles its perimeter to 108 cm but quadruples area to 504 cm². Explain the different scaling as part of retrieval.
93. Card 8: choose the plane measure requested
Card prompt: A rectangular diagram has length 24 cm and width 13 cm. Find perimeter and area. A separate triangle has base 24 cm and perpendicular height 14 cm; find its area.
Meaning and conditions: A good notebook has separate labelled cards: rectangle perimeter P=2(l+w), rectangle area A=lw, triangle area A=½bh. The symbol b on the triangle card means base, while on another card it might mean a graph intercept. The notebook must define symbols locally rather than assume all letters mean the same thing everywhere.
One worked example: Rectangle perimeter=2(24+13)=74 cm. Rectangle area=24×13=312 cm². Triangle area=½×24×14=168 cm². The triangle’s height is perpendicular to its chosen base.
When this would be wrong: Applying A=lw to a perimeter question gives the wrong physical quantity. Using a slanted triangle side without perpendicularity proof is another modelling error. Unit checks—cm versus cm²—should appear prominently on the card.
Check: Trace the rectangle’s four sides for 74 cm and count an 24-by-13 square grid for 312 cm². For the triangle, two congruent copies make a base-by-height parallelogram or rectangle under suitable arrangement, confirming the half factor.
Later retrieval: Doubling both sides of the rectangle doubles its perimeter to 148 cm but quadruples area to 1248 cm². Explain the different scaling as part of retrieval.
94. Card 9: choose the plane measure requested
Card prompt: A rectangular diagram has length 27 cm and width 20 cm. Find perimeter and area. A separate triangle has base 27 cm and perpendicular height 19 cm; find its area.
Meaning and conditions: A good notebook has separate labelled cards: rectangle perimeter P=2(l+w), rectangle area A=lw, triangle area A=½bh. The symbol b on the triangle card means base, while on another card it might mean a graph intercept. The notebook must define symbols locally rather than assume all letters mean the same thing everywhere.
One worked example: Rectangle perimeter=2(27+20)=94 cm. Rectangle area=27×20=540 cm². Triangle area=½×27×19=256.5 cm². The triangle’s height is perpendicular to its chosen base.
When this would be wrong: Applying A=lw to a perimeter question gives the wrong physical quantity. Using a slanted triangle side without perpendicularity proof is another modelling error. Unit checks—cm versus cm²—should appear prominently on the card.
Check: Trace the rectangle’s four sides for 94 cm and count an 27-by-20 square grid for 540 cm². For the triangle, two congruent copies make a base-by-height parallelogram or rectangle under suitable arrangement, confirming the half factor.
Later retrieval: Doubling both sides of the rectangle doubles its perimeter to 188 cm but quadruples area to 2160 cm². Explain the different scaling as part of retrieval.
95. Card 10: choose the plane measure requested
Card prompt: A rectangular diagram has length 3 cm and width 8 cm. Find perimeter and area. A separate triangle has base 3 cm and perpendicular height 24 cm; find its area.
Meaning and conditions: A good notebook has separate labelled cards: rectangle perimeter P=2(l+w), rectangle area A=lw, triangle area A=½bh. The symbol b on the triangle card means base, while on another card it might mean a graph intercept. The notebook must define symbols locally rather than assume all letters mean the same thing everywhere.
One worked example: Rectangle perimeter=2(3+8)=22 cm. Rectangle area=3×8=24 cm². Triangle area=½×3×24=36 cm². The triangle’s height is perpendicular to its chosen base.
When this would be wrong: Applying A=lw to a perimeter question gives the wrong physical quantity. Using a slanted triangle side without perpendicularity proof is another modelling error. Unit checks—cm versus cm²—should appear prominently on the card.
Check: Trace the rectangle’s four sides for 22 cm and count an 3-by-8 square grid for 24 cm². For the triangle, two congruent copies make a base-by-height parallelogram or rectangle under suitable arrangement, confirming the half factor.
Later retrieval: Doubling both sides of the rectangle doubles its perimeter to 44 cm but quadruples area to 96 cm². Explain the different scaling as part of retrieval.
96. Card 11: choose the plane measure requested
Card prompt: A rectangular diagram has length 6 cm and width 15 cm. Find perimeter and area. A separate triangle has base 6 cm and perpendicular height 6 cm; find its area.
Meaning and conditions: A good notebook has separate labelled cards: rectangle perimeter P=2(l+w), rectangle area A=lw, triangle area A=½bh. The symbol b on the triangle card means base, while on another card it might mean a graph intercept. The notebook must define symbols locally rather than assume all letters mean the same thing everywhere.
One worked example: Rectangle perimeter=2(6+15)=42 cm. Rectangle area=6×15=90 cm². Triangle area=½×6×6=18 cm². The triangle’s height is perpendicular to its chosen base.
When this would be wrong: Applying A=lw to a perimeter question gives the wrong physical quantity. Using a slanted triangle side without perpendicularity proof is another modelling error. Unit checks—cm versus cm²—should appear prominently on the card.
Check: Trace the rectangle’s four sides for 42 cm and count an 6-by-15 square grid for 90 cm². For the triangle, two congruent copies make a base-by-height parallelogram or rectangle under suitable arrangement, confirming the half factor.
Later retrieval: Doubling both sides of the rectangle doubles its perimeter to 84 cm but quadruples area to 360 cm². Explain the different scaling as part of retrieval.
97. Card 12: choose the plane measure requested
Card prompt: A rectangular diagram has length 9 cm and width 3 cm. Find perimeter and area. A separate triangle has base 9 cm and perpendicular height 11 cm; find its area.
Meaning and conditions: A good notebook has separate labelled cards: rectangle perimeter P=2(l+w), rectangle area A=lw, triangle area A=½bh. The symbol b on the triangle card means base, while on another card it might mean a graph intercept. The notebook must define symbols locally rather than assume all letters mean the same thing everywhere.
One worked example: Rectangle perimeter=2(9+3)=24 cm. Rectangle area=9×3=27 cm². Triangle area=½×9×11=49.5 cm². The triangle’s height is perpendicular to its chosen base.
When this would be wrong: Applying A=lw to a perimeter question gives the wrong physical quantity. Using a slanted triangle side without perpendicularity proof is another modelling error. Unit checks—cm versus cm²—should appear prominently on the card.
Check: Trace the rectangle’s four sides for 24 cm and count an 9-by-3 square grid for 27 cm². For the triangle, two congruent copies make a base-by-height parallelogram or rectangle under suitable arrangement, confirming the half factor.
Later retrieval: Doubling both sides of the rectangle doubles its perimeter to 48 cm but quadruples area to 108 cm². Explain the different scaling as part of retrieval.
98. Card 13: choose the plane measure requested
Card prompt: A rectangular diagram has length 12 cm and width 10 cm. Find perimeter and area. A separate triangle has base 12 cm and perpendicular height 16 cm; find its area.
Meaning and conditions: A good notebook has separate labelled cards: rectangle perimeter P=2(l+w), rectangle area A=lw, triangle area A=½bh. The symbol b on the triangle card means base, while on another card it might mean a graph intercept. The notebook must define symbols locally rather than assume all letters mean the same thing everywhere.
One worked example: Rectangle perimeter=2(12+10)=44 cm. Rectangle area=12×10=120 cm². Triangle area=½×12×16=96 cm². The triangle’s height is perpendicular to its chosen base.
When this would be wrong: Applying A=lw to a perimeter question gives the wrong physical quantity. Using a slanted triangle side without perpendicularity proof is another modelling error. Unit checks—cm versus cm²—should appear prominently on the card.
Check: Trace the rectangle’s four sides for 44 cm and count an 12-by-10 square grid for 120 cm². For the triangle, two congruent copies make a base-by-height parallelogram or rectangle under suitable arrangement, confirming the half factor.
Later retrieval: Doubling both sides of the rectangle doubles its perimeter to 88 cm but quadruples area to 480 cm². Explain the different scaling as part of retrieval.
99. Card 14: choose the plane measure requested
Card prompt: A rectangular diagram has length 15 cm and width 17 cm. Find perimeter and area. A separate triangle has base 15 cm and perpendicular height 21 cm; find its area.
Meaning and conditions: A good notebook has separate labelled cards: rectangle perimeter P=2(l+w), rectangle area A=lw, triangle area A=½bh. The symbol b on the triangle card means base, while on another card it might mean a graph intercept. The notebook must define symbols locally rather than assume all letters mean the same thing everywhere.
One worked example: Rectangle perimeter=2(15+17)=64 cm. Rectangle area=15×17=255 cm². Triangle area=½×15×21=157.5 cm². The triangle’s height is perpendicular to its chosen base.
When this would be wrong: Applying A=lw to a perimeter question gives the wrong physical quantity. Using a slanted triangle side without perpendicularity proof is another modelling error. Unit checks—cm versus cm²—should appear prominently on the card.
Check: Trace the rectangle’s four sides for 64 cm and count an 15-by-17 square grid for 255 cm². For the triangle, two congruent copies make a base-by-height parallelogram or rectangle under suitable arrangement, confirming the half factor.
Later retrieval: Doubling both sides of the rectangle doubles its perimeter to 128 cm but quadruples area to 1020 cm². Explain the different scaling as part of retrieval.
100. Card 15: choose the plane measure requested
Card prompt: A rectangular diagram has length 18 cm and width 5 cm. Find perimeter and area. A separate triangle has base 18 cm and perpendicular height 3 cm; find its area.
Meaning and conditions: A good notebook has separate labelled cards: rectangle perimeter P=2(l+w), rectangle area A=lw, triangle area A=½bh. The symbol b on the triangle card means base, while on another card it might mean a graph intercept. The notebook must define symbols locally rather than assume all letters mean the same thing everywhere.
One worked example: Rectangle perimeter=2(18+5)=46 cm. Rectangle area=18×5=90 cm². Triangle area=½×18×3=27 cm². The triangle’s height is perpendicular to its chosen base.
When this would be wrong: Applying A=lw to a perimeter question gives the wrong physical quantity. Using a slanted triangle side without perpendicularity proof is another modelling error. Unit checks—cm versus cm²—should appear prominently on the card.
Check: Trace the rectangle’s four sides for 46 cm and count an 18-by-5 square grid for 90 cm². For the triangle, two congruent copies make a base-by-height parallelogram or rectangle under suitable arrangement, confirming the half factor.
Later retrieval: Doubling both sides of the rectangle doubles its perimeter to 92 cm but quadruples area to 360 cm². Explain the different scaling as part of retrieval.
101. Card 16: choose the plane measure requested
Card prompt: A rectangular diagram has length 21 cm and width 12 cm. Find perimeter and area. A separate triangle has base 21 cm and perpendicular height 8 cm; find its area.
Meaning and conditions: A good notebook has separate labelled cards: rectangle perimeter P=2(l+w), rectangle area A=lw, triangle area A=½bh. The symbol b on the triangle card means base, while on another card it might mean a graph intercept. The notebook must define symbols locally rather than assume all letters mean the same thing everywhere.
One worked example: Rectangle perimeter=2(21+12)=66 cm. Rectangle area=21×12=252 cm². Triangle area=½×21×8=84 cm². The triangle’s height is perpendicular to its chosen base.
When this would be wrong: Applying A=lw to a perimeter question gives the wrong physical quantity. Using a slanted triangle side without perpendicularity proof is another modelling error. Unit checks—cm versus cm²—should appear prominently on the card.
Check: Trace the rectangle’s four sides for 66 cm and count an 21-by-12 square grid for 252 cm². For the triangle, two congruent copies make a base-by-height parallelogram or rectangle under suitable arrangement, confirming the half factor.
Later retrieval: Doubling both sides of the rectangle doubles its perimeter to 132 cm but quadruples area to 1008 cm². Explain the different scaling as part of retrieval.
102. Card 17: choose the plane measure requested
Card prompt: A rectangular diagram has length 24 cm and width 19 cm. Find perimeter and area. A separate triangle has base 24 cm and perpendicular height 13 cm; find its area.
Meaning and conditions: A good notebook has separate labelled cards: rectangle perimeter P=2(l+w), rectangle area A=lw, triangle area A=½bh. The symbol b on the triangle card means base, while on another card it might mean a graph intercept. The notebook must define symbols locally rather than assume all letters mean the same thing everywhere.
One worked example: Rectangle perimeter=2(24+19)=86 cm. Rectangle area=24×19=456 cm². Triangle area=½×24×13=156 cm². The triangle’s height is perpendicular to its chosen base.
When this would be wrong: Applying A=lw to a perimeter question gives the wrong physical quantity. Using a slanted triangle side without perpendicularity proof is another modelling error. Unit checks—cm versus cm²—should appear prominently on the card.
Check: Trace the rectangle’s four sides for 86 cm and count an 24-by-19 square grid for 456 cm². For the triangle, two congruent copies make a base-by-height parallelogram or rectangle under suitable arrangement, confirming the half factor.
Later retrieval: Doubling both sides of the rectangle doubles its perimeter to 172 cm but quadruples area to 1824 cm². Explain the different scaling as part of retrieval.
103. Card 18: choose the plane measure requested
Card prompt: A rectangular diagram has length 27 cm and width 7 cm. Find perimeter and area. A separate triangle has base 27 cm and perpendicular height 18 cm; find its area.
Meaning and conditions: A good notebook has separate labelled cards: rectangle perimeter P=2(l+w), rectangle area A=lw, triangle area A=½bh. The symbol b on the triangle card means base, while on another card it might mean a graph intercept. The notebook must define symbols locally rather than assume all letters mean the same thing everywhere.
One worked example: Rectangle perimeter=2(27+7)=68 cm. Rectangle area=27×7=189 cm². Triangle area=½×27×18=243 cm². The triangle’s height is perpendicular to its chosen base.
When this would be wrong: Applying A=lw to a perimeter question gives the wrong physical quantity. Using a slanted triangle side without perpendicularity proof is another modelling error. Unit checks—cm versus cm²—should appear prominently on the card.
Check: Trace the rectangle’s four sides for 68 cm and count an 27-by-7 square grid for 189 cm². For the triangle, two congruent copies make a base-by-height parallelogram or rectangle under suitable arrangement, confirming the half factor.
Later retrieval: Doubling both sides of the rectangle doubles its perimeter to 136 cm but quadruples area to 756 cm². Explain the different scaling as part of retrieval.
104. Card 19: choose the plane measure requested
Card prompt: A rectangular diagram has length 3 cm and width 14 cm. Find perimeter and area. A separate triangle has base 3 cm and perpendicular height 23 cm; find its area.
Meaning and conditions: A good notebook has separate labelled cards: rectangle perimeter P=2(l+w), rectangle area A=lw, triangle area A=½bh. The symbol b on the triangle card means base, while on another card it might mean a graph intercept. The notebook must define symbols locally rather than assume all letters mean the same thing everywhere.
One worked example: Rectangle perimeter=2(3+14)=34 cm. Rectangle area=3×14=42 cm². Triangle area=½×3×23=34.5 cm². The triangle’s height is perpendicular to its chosen base.
When this would be wrong: Applying A=lw to a perimeter question gives the wrong physical quantity. Using a slanted triangle side without perpendicularity proof is another modelling error. Unit checks—cm versus cm²—should appear prominently on the card.
Check: Trace the rectangle’s four sides for 34 cm and count an 3-by-14 square grid for 42 cm². For the triangle, two congruent copies make a base-by-height parallelogram or rectangle under suitable arrangement, confirming the half factor.
Later retrieval: Doubling both sides of the rectangle doubles its perimeter to 68 cm but quadruples area to 168 cm². Explain the different scaling as part of retrieval.
105. Card 20: choose the plane measure requested
Card prompt: A rectangular diagram has length 6 cm and width 2 cm. Find perimeter and area. A separate triangle has base 6 cm and perpendicular height 5 cm; find its area.
Meaning and conditions: A good notebook has separate labelled cards: rectangle perimeter P=2(l+w), rectangle area A=lw, triangle area A=½bh. The symbol b on the triangle card means base, while on another card it might mean a graph intercept. The notebook must define symbols locally rather than assume all letters mean the same thing everywhere.
One worked example: Rectangle perimeter=2(6+2)=16 cm. Rectangle area=6×2=12 cm². Triangle area=½×6×5=15 cm². The triangle’s height is perpendicular to its chosen base.
When this would be wrong: Applying A=lw to a perimeter question gives the wrong physical quantity. Using a slanted triangle side without perpendicularity proof is another modelling error. Unit checks—cm versus cm²—should appear prominently on the card.
Check: Trace the rectangle’s four sides for 16 cm and count an 6-by-2 square grid for 12 cm². For the triangle, two congruent copies make a base-by-height parallelogram or rectangle under suitable arrangement, confirming the half factor.
Later retrieval: Doubling both sides of the rectangle doubles its perimeter to 32 cm but quadruples area to 48 cm². Explain the different scaling as part of retrieval.
106. Card 21: choose the plane measure requested
Card prompt: A rectangular diagram has length 9 cm and width 9 cm. Find perimeter and area. A separate triangle has base 9 cm and perpendicular height 10 cm; find its area.
Meaning and conditions: A good notebook has separate labelled cards: rectangle perimeter P=2(l+w), rectangle area A=lw, triangle area A=½bh. The symbol b on the triangle card means base, while on another card it might mean a graph intercept. The notebook must define symbols locally rather than assume all letters mean the same thing everywhere.
One worked example: Rectangle perimeter=2(9+9)=36 cm. Rectangle area=9×9=81 cm². Triangle area=½×9×10=45 cm². The triangle’s height is perpendicular to its chosen base.
When this would be wrong: Applying A=lw to a perimeter question gives the wrong physical quantity. Using a slanted triangle side without perpendicularity proof is another modelling error. Unit checks—cm versus cm²—should appear prominently on the card.
Check: Trace the rectangle’s four sides for 36 cm and count an 9-by-9 square grid for 81 cm². For the triangle, two congruent copies make a base-by-height parallelogram or rectangle under suitable arrangement, confirming the half factor.
Later retrieval: Doubling both sides of the rectangle doubles its perimeter to 72 cm but quadruples area to 324 cm². Explain the different scaling as part of retrieval.
107. Card 22: choose the plane measure requested
Card prompt: A rectangular diagram has length 12 cm and width 16 cm. Find perimeter and area. A separate triangle has base 12 cm and perpendicular height 15 cm; find its area.
Meaning and conditions: A good notebook has separate labelled cards: rectangle perimeter P=2(l+w), rectangle area A=lw, triangle area A=½bh. The symbol b on the triangle card means base, while on another card it might mean a graph intercept. The notebook must define symbols locally rather than assume all letters mean the same thing everywhere.
One worked example: Rectangle perimeter=2(12+16)=56 cm. Rectangle area=12×16=192 cm². Triangle area=½×12×15=90 cm². The triangle’s height is perpendicular to its chosen base.
When this would be wrong: Applying A=lw to a perimeter question gives the wrong physical quantity. Using a slanted triangle side without perpendicularity proof is another modelling error. Unit checks—cm versus cm²—should appear prominently on the card.
Check: Trace the rectangle’s four sides for 56 cm and count an 12-by-16 square grid for 192 cm². For the triangle, two congruent copies make a base-by-height parallelogram or rectangle under suitable arrangement, confirming the half factor.
Later retrieval: Doubling both sides of the rectangle doubles its perimeter to 112 cm but quadruples area to 768 cm². Explain the different scaling as part of retrieval.
108. Card 23: choose the plane measure requested
Card prompt: A rectangular diagram has length 15 cm and width 4 cm. Find perimeter and area. A separate triangle has base 15 cm and perpendicular height 20 cm; find its area.
Meaning and conditions: A good notebook has separate labelled cards: rectangle perimeter P=2(l+w), rectangle area A=lw, triangle area A=½bh. The symbol b on the triangle card means base, while on another card it might mean a graph intercept. The notebook must define symbols locally rather than assume all letters mean the same thing everywhere.
One worked example: Rectangle perimeter=2(15+4)=38 cm. Rectangle area=15×4=60 cm². Triangle area=½×15×20=150 cm². The triangle’s height is perpendicular to its chosen base.
When this would be wrong: Applying A=lw to a perimeter question gives the wrong physical quantity. Using a slanted triangle side without perpendicularity proof is another modelling error. Unit checks—cm versus cm²—should appear prominently on the card.
Check: Trace the rectangle’s four sides for 38 cm and count an 15-by-4 square grid for 60 cm². For the triangle, two congruent copies make a base-by-height parallelogram or rectangle under suitable arrangement, confirming the half factor.
Later retrieval: Doubling both sides of the rectangle doubles its perimeter to 76 cm but quadruples area to 240 cm². Explain the different scaling as part of retrieval.
109. Card 24: choose the plane measure requested
Card prompt: A rectangular diagram has length 18 cm and width 11 cm. Find perimeter and area. A separate triangle has base 18 cm and perpendicular height 2 cm; find its area.
Meaning and conditions: A good notebook has separate labelled cards: rectangle perimeter P=2(l+w), rectangle area A=lw, triangle area A=½bh. The symbol b on the triangle card means base, while on another card it might mean a graph intercept. The notebook must define symbols locally rather than assume all letters mean the same thing everywhere.
One worked example: Rectangle perimeter=2(18+11)=58 cm. Rectangle area=18×11=198 cm². Triangle area=½×18×2=18 cm². The triangle’s height is perpendicular to its chosen base.
When this would be wrong: Applying A=lw to a perimeter question gives the wrong physical quantity. Using a slanted triangle side without perpendicularity proof is another modelling error. Unit checks—cm versus cm²—should appear prominently on the card.
Check: Trace the rectangle’s four sides for 58 cm and count an 18-by-11 square grid for 198 cm². For the triangle, two congruent copies make a base-by-height parallelogram or rectangle under suitable arrangement, confirming the half factor.
Later retrieval: Doubling both sides of the rectangle doubles its perimeter to 116 cm but quadruples area to 792 cm². Explain the different scaling as part of retrieval.
110. Card 25: choose the plane measure requested
Card prompt: A rectangular diagram has length 21 cm and width 18 cm. Find perimeter and area. A separate triangle has base 21 cm and perpendicular height 7 cm; find its area.
Meaning and conditions: A good notebook has separate labelled cards: rectangle perimeter P=2(l+w), rectangle area A=lw, triangle area A=½bh. The symbol b on the triangle card means base, while on another card it might mean a graph intercept. The notebook must define symbols locally rather than assume all letters mean the same thing everywhere.
One worked example: Rectangle perimeter=2(21+18)=78 cm. Rectangle area=21×18=378 cm². Triangle area=½×21×7=73.5 cm². The triangle’s height is perpendicular to its chosen base.
When this would be wrong: Applying A=lw to a perimeter question gives the wrong physical quantity. Using a slanted triangle side without perpendicularity proof is another modelling error. Unit checks—cm versus cm²—should appear prominently on the card.
Check: Trace the rectangle’s four sides for 78 cm and count an 21-by-18 square grid for 378 cm². For the triangle, two congruent copies make a base-by-height parallelogram or rectangle under suitable arrangement, confirming the half factor.
Later retrieval: Doubling both sides of the rectangle doubles its perimeter to 156 cm but quadruples area to 1512 cm². Explain the different scaling as part of retrieval.
111. Card 26: choose the plane measure requested
Card prompt: A rectangular diagram has length 24 cm and width 6 cm. Find perimeter and area. A separate triangle has base 24 cm and perpendicular height 12 cm; find its area.
Meaning and conditions: A good notebook has separate labelled cards: rectangle perimeter P=2(l+w), rectangle area A=lw, triangle area A=½bh. The symbol b on the triangle card means base, while on another card it might mean a graph intercept. The notebook must define symbols locally rather than assume all letters mean the same thing everywhere.
One worked example: Rectangle perimeter=2(24+6)=60 cm. Rectangle area=24×6=144 cm². Triangle area=½×24×12=144 cm². The triangle’s height is perpendicular to its chosen base.
When this would be wrong: Applying A=lw to a perimeter question gives the wrong physical quantity. Using a slanted triangle side without perpendicularity proof is another modelling error. Unit checks—cm versus cm²—should appear prominently on the card.
Check: Trace the rectangle’s four sides for 60 cm and count an 24-by-6 square grid for 144 cm². For the triangle, two congruent copies make a base-by-height parallelogram or rectangle under suitable arrangement, confirming the half factor.
Later retrieval: Doubling both sides of the rectangle doubles its perimeter to 120 cm but quadruples area to 576 cm². Explain the different scaling as part of retrieval.
112. Card 27: choose the plane measure requested
Card prompt: A rectangular diagram has length 27 cm and width 13 cm. Find perimeter and area. A separate triangle has base 27 cm and perpendicular height 17 cm; find its area.
Meaning and conditions: A good notebook has separate labelled cards: rectangle perimeter P=2(l+w), rectangle area A=lw, triangle area A=½bh. The symbol b on the triangle card means base, while on another card it might mean a graph intercept. The notebook must define symbols locally rather than assume all letters mean the same thing everywhere.
One worked example: Rectangle perimeter=2(27+13)=80 cm. Rectangle area=27×13=351 cm². Triangle area=½×27×17=229.5 cm². The triangle’s height is perpendicular to its chosen base.
When this would be wrong: Applying A=lw to a perimeter question gives the wrong physical quantity. Using a slanted triangle side without perpendicularity proof is another modelling error. Unit checks—cm versus cm²—should appear prominently on the card.
Check: Trace the rectangle’s four sides for 80 cm and count an 27-by-13 square grid for 351 cm². For the triangle, two congruent copies make a base-by-height parallelogram or rectangle under suitable arrangement, confirming the half factor.
Later retrieval: Doubling both sides of the rectangle doubles its perimeter to 160 cm but quadruples area to 1404 cm². Explain the different scaling as part of retrieval.
113. Card 28: choose the plane measure requested
Card prompt: A rectangular diagram has length 3 cm and width 20 cm. Find perimeter and area. A separate triangle has base 3 cm and perpendicular height 22 cm; find its area.
Meaning and conditions: A good notebook has separate labelled cards: rectangle perimeter P=2(l+w), rectangle area A=lw, triangle area A=½bh. The symbol b on the triangle card means base, while on another card it might mean a graph intercept. The notebook must define symbols locally rather than assume all letters mean the same thing everywhere.
One worked example: Rectangle perimeter=2(3+20)=46 cm. Rectangle area=3×20=60 cm². Triangle area=½×3×22=33 cm². The triangle’s height is perpendicular to its chosen base.
When this would be wrong: Applying A=lw to a perimeter question gives the wrong physical quantity. Using a slanted triangle side without perpendicularity proof is another modelling error. Unit checks—cm versus cm²—should appear prominently on the card.
Check: Trace the rectangle’s four sides for 46 cm and count an 3-by-20 square grid for 60 cm². For the triangle, two congruent copies make a base-by-height parallelogram or rectangle under suitable arrangement, confirming the half factor.
Later retrieval: Doubling both sides of the rectangle doubles its perimeter to 92 cm but quadruples area to 240 cm². Explain the different scaling as part of retrieval.
114. Card 29: choose the plane measure requested
Card prompt: A rectangular diagram has length 6 cm and width 8 cm. Find perimeter and area. A separate triangle has base 6 cm and perpendicular height 4 cm; find its area.
Meaning and conditions: A good notebook has separate labelled cards: rectangle perimeter P=2(l+w), rectangle area A=lw, triangle area A=½bh. The symbol b on the triangle card means base, while on another card it might mean a graph intercept. The notebook must define symbols locally rather than assume all letters mean the same thing everywhere.
One worked example: Rectangle perimeter=2(6+8)=28 cm. Rectangle area=6×8=48 cm². Triangle area=½×6×4=12 cm². The triangle’s height is perpendicular to its chosen base.
When this would be wrong: Applying A=lw to a perimeter question gives the wrong physical quantity. Using a slanted triangle side without perpendicularity proof is another modelling error. Unit checks—cm versus cm²—should appear prominently on the card.
Check: Trace the rectangle’s four sides for 28 cm and count an 6-by-8 square grid for 48 cm². For the triangle, two congruent copies make a base-by-height parallelogram or rectangle under suitable arrangement, confirming the half factor.
Later retrieval: Doubling both sides of the rectangle doubles its perimeter to 56 cm but quadruples area to 192 cm². Explain the different scaling as part of retrieval.
Circles, arcs and sector extensions
In circles, arcs and sector extensions, a notebook card should name the question that triggers the formula and the quantity it calculates. Read the worked example as one illustration of the relationship, not as fixed numbers to memorise. Pay attention to units, assumptions and a reverse check. If two formulas use the same letter, define that letter again in the local context.
115. Card 1: circle first, optional sector later
Card prompt: A circle has radius 2 cm. Calculate its exact full circumference and area. For an optional later-stage G1 extension, a central-angle sector measures 30°; describe its arc and sector area as fractions of the whole.
Meaning and conditions: Notebook heading one: circumference=2πr with length units; circle area=πr² with square units. Only after those are secure, a later-stage sector card can state arc=(θ/360)×2πr and sector area=(θ/360)×πr² for θ in degrees. This is not a claim that every current Secondary 2 G1 class is testing sectors.
One worked example: The complete circumference is 4π cm; the complete area is 4π cm². Sector share 30/360 produces arc (30/360)×4π cm≈1.047198 cm and sector area (30/360)×4π cm²≈1.047198 cm².
When this would be wrong: Using πr² for a curved arc, or 2πr for a covered surface, swaps two physical dimensions. Using diameter as radius in an area calculation causes a fourfold error. The notebook should show a circle with centre, radius and perimeter traced separately.
Check: Each sector amount is 30/360 of its respective full-circle quantity; multiplying by 360/30 would reconstruct the full circumference or full area. The units cm and cm² must remain distinct.
Later retrieval: If radius doubles, circumference doubles to 8π cm, while full area quadruples to 16π cm². The same linear-versus-square scaling applies to sector arc and sector area at unchanged angle.
116. Card 2: circle first, optional sector later
Card prompt: A circle has radius 7 cm. Calculate its exact full circumference and area. For an optional later-stage G1 extension, a central-angle sector measures 45°; describe its arc and sector area as fractions of the whole.
Meaning and conditions: Notebook heading one: circumference=2πr with length units; circle area=πr² with square units. Only after those are secure, a later-stage sector card can state arc=(θ/360)×2πr and sector area=(θ/360)×πr² for θ in degrees. This is not a claim that every current Secondary 2 G1 class is testing sectors.
One worked example: The complete circumference is 14π cm; the complete area is 49π cm². Sector share 45/360 produces arc (45/360)×14π cm≈5.497787 cm and sector area (45/360)×49π cm²≈19.242255 cm².
When this would be wrong: Using πr² for a curved arc, or 2πr for a covered surface, swaps two physical dimensions. Using diameter as radius in an area calculation causes a fourfold error. The notebook should show a circle with centre, radius and perimeter traced separately.
Check: Each sector amount is 45/360 of its respective full-circle quantity; multiplying by 360/45 would reconstruct the full circumference or full area. The units cm and cm² must remain distinct.
Later retrieval: If radius doubles, circumference doubles to 28π cm, while full area quadruples to 196π cm². The same linear-versus-square scaling applies to sector arc and sector area at unchanged angle.
117. Card 3: circle first, optional sector later
Card prompt: A circle has radius 12 cm. Calculate its exact full circumference and area. For an optional later-stage G1 extension, a central-angle sector measures 60°; describe its arc and sector area as fractions of the whole.
Meaning and conditions: Notebook heading one: circumference=2πr with length units; circle area=πr² with square units. Only after those are secure, a later-stage sector card can state arc=(θ/360)×2πr and sector area=(θ/360)×πr² for θ in degrees. This is not a claim that every current Secondary 2 G1 class is testing sectors.
One worked example: The complete circumference is 24π cm; the complete area is 144π cm². Sector share 60/360 produces arc (60/360)×24π cm≈12.566371 cm and sector area (60/360)×144π cm²≈75.398224 cm².
When this would be wrong: Using πr² for a curved arc, or 2πr for a covered surface, swaps two physical dimensions. Using diameter as radius in an area calculation causes a fourfold error. The notebook should show a circle with centre, radius and perimeter traced separately.
Check: Each sector amount is 60/360 of its respective full-circle quantity; multiplying by 360/60 would reconstruct the full circumference or full area. The units cm and cm² must remain distinct.
Later retrieval: If radius doubles, circumference doubles to 48π cm, while full area quadruples to 576π cm². The same linear-versus-square scaling applies to sector arc and sector area at unchanged angle.
118. Card 4: circle first, optional sector later
Card prompt: A circle has radius 17 cm. Calculate its exact full circumference and area. For an optional later-stage G1 extension, a central-angle sector measures 72°; describe its arc and sector area as fractions of the whole.
Meaning and conditions: Notebook heading one: circumference=2πr with length units; circle area=πr² with square units. Only after those are secure, a later-stage sector card can state arc=(θ/360)×2πr and sector area=(θ/360)×πr² for θ in degrees. This is not a claim that every current Secondary 2 G1 class is testing sectors.
One worked example: The complete circumference is 34π cm; the complete area is 289π cm². Sector share 72/360 produces arc (72/360)×34π cm≈21.36283 cm and sector area (72/360)×289π cm²≈181.584055 cm².
When this would be wrong: Using πr² for a curved arc, or 2πr for a covered surface, swaps two physical dimensions. Using diameter as radius in an area calculation causes a fourfold error. The notebook should show a circle with centre, radius and perimeter traced separately.
Check: Each sector amount is 72/360 of its respective full-circle quantity; multiplying by 360/72 would reconstruct the full circumference or full area. The units cm and cm² must remain distinct.
Later retrieval: If radius doubles, circumference doubles to 68π cm, while full area quadruples to 1156π cm². The same linear-versus-square scaling applies to sector arc and sector area at unchanged angle.
119. Card 5: circle first, optional sector later
Card prompt: A circle has radius 3 cm. Calculate its exact full circumference and area. For an optional later-stage G1 extension, a central-angle sector measures 90°; describe its arc and sector area as fractions of the whole.
Meaning and conditions: Notebook heading one: circumference=2πr with length units; circle area=πr² with square units. Only after those are secure, a later-stage sector card can state arc=(θ/360)×2πr and sector area=(θ/360)×πr² for θ in degrees. This is not a claim that every current Secondary 2 G1 class is testing sectors.
One worked example: The complete circumference is 6π cm; the complete area is 9π cm². Sector share 90/360 produces arc (90/360)×6π cm≈4.712389 cm and sector area (90/360)×9π cm²≈7.068583 cm².
When this would be wrong: Using πr² for a curved arc, or 2πr for a covered surface, swaps two physical dimensions. Using diameter as radius in an area calculation causes a fourfold error. The notebook should show a circle with centre, radius and perimeter traced separately.
Check: Each sector amount is 90/360 of its respective full-circle quantity; multiplying by 360/90 would reconstruct the full circumference or full area. The units cm and cm² must remain distinct.
Later retrieval: If radius doubles, circumference doubles to 12π cm, while full area quadruples to 36π cm². The same linear-versus-square scaling applies to sector arc and sector area at unchanged angle.
120. Card 6: circle first, optional sector later
Card prompt: A circle has radius 8 cm. Calculate its exact full circumference and area. For an optional later-stage G1 extension, a central-angle sector measures 120°; describe its arc and sector area as fractions of the whole.
Meaning and conditions: Notebook heading one: circumference=2πr with length units; circle area=πr² with square units. Only after those are secure, a later-stage sector card can state arc=(θ/360)×2πr and sector area=(θ/360)×πr² for θ in degrees. This is not a claim that every current Secondary 2 G1 class is testing sectors.
One worked example: The complete circumference is 16π cm; the complete area is 64π cm². Sector share 120/360 produces arc (120/360)×16π cm≈16.755161 cm and sector area (120/360)×64π cm²≈67.020643 cm².
When this would be wrong: Using πr² for a curved arc, or 2πr for a covered surface, swaps two physical dimensions. Using diameter as radius in an area calculation causes a fourfold error. The notebook should show a circle with centre, radius and perimeter traced separately.
Check: Each sector amount is 120/360 of its respective full-circle quantity; multiplying by 360/120 would reconstruct the full circumference or full area. The units cm and cm² must remain distinct.
Later retrieval: If radius doubles, circumference doubles to 32π cm, while full area quadruples to 256π cm². The same linear-versus-square scaling applies to sector arc and sector area at unchanged angle.
121. Card 7: circle first, optional sector later
Card prompt: A circle has radius 13 cm. Calculate its exact full circumference and area. For an optional later-stage G1 extension, a central-angle sector measures 135°; describe its arc and sector area as fractions of the whole.
Meaning and conditions: Notebook heading one: circumference=2πr with length units; circle area=πr² with square units. Only after those are secure, a later-stage sector card can state arc=(θ/360)×2πr and sector area=(θ/360)×πr² for θ in degrees. This is not a claim that every current Secondary 2 G1 class is testing sectors.
One worked example: The complete circumference is 26π cm; the complete area is 169π cm². Sector share 135/360 produces arc (135/360)×26π cm≈30.630528 cm and sector area (135/360)×169π cm²≈199.098434 cm².
When this would be wrong: Using πr² for a curved arc, or 2πr for a covered surface, swaps two physical dimensions. Using diameter as radius in an area calculation causes a fourfold error. The notebook should show a circle with centre, radius and perimeter traced separately.
Check: Each sector amount is 135/360 of its respective full-circle quantity; multiplying by 360/135 would reconstruct the full circumference or full area. The units cm and cm² must remain distinct.
Later retrieval: If radius doubles, circumference doubles to 52π cm, while full area quadruples to 676π cm². The same linear-versus-square scaling applies to sector arc and sector area at unchanged angle.
122. Card 8: circle first, optional sector later
Card prompt: A circle has radius 18 cm. Calculate its exact full circumference and area. For an optional later-stage G1 extension, a central-angle sector measures 150°; describe its arc and sector area as fractions of the whole.
Meaning and conditions: Notebook heading one: circumference=2πr with length units; circle area=πr² with square units. Only after those are secure, a later-stage sector card can state arc=(θ/360)×2πr and sector area=(θ/360)×πr² for θ in degrees. This is not a claim that every current Secondary 2 G1 class is testing sectors.
One worked example: The complete circumference is 36π cm; the complete area is 324π cm². Sector share 150/360 produces arc (150/360)×36π cm≈47.12389 cm and sector area (150/360)×324π cm²≈424.115008 cm².
When this would be wrong: Using πr² for a curved arc, or 2πr for a covered surface, swaps two physical dimensions. Using diameter as radius in an area calculation causes a fourfold error. The notebook should show a circle with centre, radius and perimeter traced separately.
Check: Each sector amount is 150/360 of its respective full-circle quantity; multiplying by 360/150 would reconstruct the full circumference or full area. The units cm and cm² must remain distinct.
Later retrieval: If radius doubles, circumference doubles to 72π cm, while full area quadruples to 1296π cm². The same linear-versus-square scaling applies to sector arc and sector area at unchanged angle.
123. Card 9: circle first, optional sector later
Card prompt: A circle has radius 4 cm. Calculate its exact full circumference and area. For an optional later-stage G1 extension, a central-angle sector measures 180°; describe its arc and sector area as fractions of the whole.
Meaning and conditions: Notebook heading one: circumference=2πr with length units; circle area=πr² with square units. Only after those are secure, a later-stage sector card can state arc=(θ/360)×2πr and sector area=(θ/360)×πr² for θ in degrees. This is not a claim that every current Secondary 2 G1 class is testing sectors.
One worked example: The complete circumference is 8π cm; the complete area is 16π cm². Sector share 180/360 produces arc (180/360)×8π cm≈12.566371 cm and sector area (180/360)×16π cm²≈25.132741 cm².
When this would be wrong: Using πr² for a curved arc, or 2πr for a covered surface, swaps two physical dimensions. Using diameter as radius in an area calculation causes a fourfold error. The notebook should show a circle with centre, radius and perimeter traced separately.
Check: Each sector amount is 180/360 of its respective full-circle quantity; multiplying by 360/180 would reconstruct the full circumference or full area. The units cm and cm² must remain distinct.
Later retrieval: If radius doubles, circumference doubles to 16π cm, while full area quadruples to 64π cm². The same linear-versus-square scaling applies to sector arc and sector area at unchanged angle.
124. Card 10: circle first, optional sector later
Card prompt: A circle has radius 9 cm. Calculate its exact full circumference and area. For an optional later-stage G1 extension, a central-angle sector measures 240°; describe its arc and sector area as fractions of the whole.
Meaning and conditions: Notebook heading one: circumference=2πr with length units; circle area=πr² with square units. Only after those are secure, a later-stage sector card can state arc=(θ/360)×2πr and sector area=(θ/360)×πr² for θ in degrees. This is not a claim that every current Secondary 2 G1 class is testing sectors.
One worked example: The complete circumference is 18π cm; the complete area is 81π cm². Sector share 240/360 produces arc (240/360)×18π cm≈37.699112 cm and sector area (240/360)×81π cm²≈169.646003 cm².
When this would be wrong: Using πr² for a curved arc, or 2πr for a covered surface, swaps two physical dimensions. Using diameter as radius in an area calculation causes a fourfold error. The notebook should show a circle with centre, radius and perimeter traced separately.
Check: Each sector amount is 240/360 of its respective full-circle quantity; multiplying by 360/240 would reconstruct the full circumference or full area. The units cm and cm² must remain distinct.
Later retrieval: If radius doubles, circumference doubles to 36π cm, while full area quadruples to 324π cm². The same linear-versus-square scaling applies to sector arc and sector area at unchanged angle.
125. Card 11: circle first, optional sector later
Card prompt: A circle has radius 14 cm. Calculate its exact full circumference and area. For an optional later-stage G1 extension, a central-angle sector measures 30°; describe its arc and sector area as fractions of the whole.
Meaning and conditions: Notebook heading one: circumference=2πr with length units; circle area=πr² with square units. Only after those are secure, a later-stage sector card can state arc=(θ/360)×2πr and sector area=(θ/360)×πr² for θ in degrees. This is not a claim that every current Secondary 2 G1 class is testing sectors.
One worked example: The complete circumference is 28π cm; the complete area is 196π cm². Sector share 30/360 produces arc (30/360)×28π cm≈7.330383 cm and sector area (30/360)×196π cm²≈51.31268 cm².
When this would be wrong: Using πr² for a curved arc, or 2πr for a covered surface, swaps two physical dimensions. Using diameter as radius in an area calculation causes a fourfold error. The notebook should show a circle with centre, radius and perimeter traced separately.
Check: Each sector amount is 30/360 of its respective full-circle quantity; multiplying by 360/30 would reconstruct the full circumference or full area. The units cm and cm² must remain distinct.
Later retrieval: If radius doubles, circumference doubles to 56π cm, while full area quadruples to 784π cm². The same linear-versus-square scaling applies to sector arc and sector area at unchanged angle.
126. Card 12: circle first, optional sector later
Card prompt: A circle has radius 19 cm. Calculate its exact full circumference and area. For an optional later-stage G1 extension, a central-angle sector measures 45°; describe its arc and sector area as fractions of the whole.
Meaning and conditions: Notebook heading one: circumference=2πr with length units; circle area=πr² with square units. Only after those are secure, a later-stage sector card can state arc=(θ/360)×2πr and sector area=(θ/360)×πr² for θ in degrees. This is not a claim that every current Secondary 2 G1 class is testing sectors.
One worked example: The complete circumference is 38π cm; the complete area is 361π cm². Sector share 45/360 produces arc (45/360)×38π cm≈14.922565 cm and sector area (45/360)×361π cm²≈141.764368 cm².
When this would be wrong: Using πr² for a curved arc, or 2πr for a covered surface, swaps two physical dimensions. Using diameter as radius in an area calculation causes a fourfold error. The notebook should show a circle with centre, radius and perimeter traced separately.
Check: Each sector amount is 45/360 of its respective full-circle quantity; multiplying by 360/45 would reconstruct the full circumference or full area. The units cm and cm² must remain distinct.
Later retrieval: If radius doubles, circumference doubles to 76π cm, while full area quadruples to 1444π cm². The same linear-versus-square scaling applies to sector arc and sector area at unchanged angle.
127. Card 13: circle first, optional sector later
Card prompt: A circle has radius 5 cm. Calculate its exact full circumference and area. For an optional later-stage G1 extension, a central-angle sector measures 60°; describe its arc and sector area as fractions of the whole.
Meaning and conditions: Notebook heading one: circumference=2πr with length units; circle area=πr² with square units. Only after those are secure, a later-stage sector card can state arc=(θ/360)×2πr and sector area=(θ/360)×πr² for θ in degrees. This is not a claim that every current Secondary 2 G1 class is testing sectors.
One worked example: The complete circumference is 10π cm; the complete area is 25π cm². Sector share 60/360 produces arc (60/360)×10π cm≈5.235988 cm and sector area (60/360)×25π cm²≈13.089969 cm².
When this would be wrong: Using πr² for a curved arc, or 2πr for a covered surface, swaps two physical dimensions. Using diameter as radius in an area calculation causes a fourfold error. The notebook should show a circle with centre, radius and perimeter traced separately.
Check: Each sector amount is 60/360 of its respective full-circle quantity; multiplying by 360/60 would reconstruct the full circumference or full area. The units cm and cm² must remain distinct.
Later retrieval: If radius doubles, circumference doubles to 20π cm, while full area quadruples to 100π cm². The same linear-versus-square scaling applies to sector arc and sector area at unchanged angle.
128. Card 14: circle first, optional sector later
Card prompt: A circle has radius 10 cm. Calculate its exact full circumference and area. For an optional later-stage G1 extension, a central-angle sector measures 72°; describe its arc and sector area as fractions of the whole.
Meaning and conditions: Notebook heading one: circumference=2πr with length units; circle area=πr² with square units. Only after those are secure, a later-stage sector card can state arc=(θ/360)×2πr and sector area=(θ/360)×πr² for θ in degrees. This is not a claim that every current Secondary 2 G1 class is testing sectors.
One worked example: The complete circumference is 20π cm; the complete area is 100π cm². Sector share 72/360 produces arc (72/360)×20π cm≈12.566371 cm and sector area (72/360)×100π cm²≈62.831853 cm².
When this would be wrong: Using πr² for a curved arc, or 2πr for a covered surface, swaps two physical dimensions. Using diameter as radius in an area calculation causes a fourfold error. The notebook should show a circle with centre, radius and perimeter traced separately.
Check: Each sector amount is 72/360 of its respective full-circle quantity; multiplying by 360/72 would reconstruct the full circumference or full area. The units cm and cm² must remain distinct.
Later retrieval: If radius doubles, circumference doubles to 40π cm, while full area quadruples to 400π cm². The same linear-versus-square scaling applies to sector arc and sector area at unchanged angle.
129. Card 15: circle first, optional sector later
Card prompt: A circle has radius 15 cm. Calculate its exact full circumference and area. For an optional later-stage G1 extension, a central-angle sector measures 90°; describe its arc and sector area as fractions of the whole.
Meaning and conditions: Notebook heading one: circumference=2πr with length units; circle area=πr² with square units. Only after those are secure, a later-stage sector card can state arc=(θ/360)×2πr and sector area=(θ/360)×πr² for θ in degrees. This is not a claim that every current Secondary 2 G1 class is testing sectors.
One worked example: The complete circumference is 30π cm; the complete area is 225π cm². Sector share 90/360 produces arc (90/360)×30π cm≈23.561945 cm and sector area (90/360)×225π cm²≈176.714587 cm².
When this would be wrong: Using πr² for a curved arc, or 2πr for a covered surface, swaps two physical dimensions. Using diameter as radius in an area calculation causes a fourfold error. The notebook should show a circle with centre, radius and perimeter traced separately.
Check: Each sector amount is 90/360 of its respective full-circle quantity; multiplying by 360/90 would reconstruct the full circumference or full area. The units cm and cm² must remain distinct.
Later retrieval: If radius doubles, circumference doubles to 60π cm, while full area quadruples to 900π cm². The same linear-versus-square scaling applies to sector arc and sector area at unchanged angle.
130. Card 16: circle first, optional sector later
Card prompt: A circle has radius 20 cm. Calculate its exact full circumference and area. For an optional later-stage G1 extension, a central-angle sector measures 120°; describe its arc and sector area as fractions of the whole.
Meaning and conditions: Notebook heading one: circumference=2πr with length units; circle area=πr² with square units. Only after those are secure, a later-stage sector card can state arc=(θ/360)×2πr and sector area=(θ/360)×πr² for θ in degrees. This is not a claim that every current Secondary 2 G1 class is testing sectors.
One worked example: The complete circumference is 40π cm; the complete area is 400π cm². Sector share 120/360 produces arc (120/360)×40π cm≈41.887902 cm and sector area (120/360)×400π cm²≈418.87902 cm².
When this would be wrong: Using πr² for a curved arc, or 2πr for a covered surface, swaps two physical dimensions. Using diameter as radius in an area calculation causes a fourfold error. The notebook should show a circle with centre, radius and perimeter traced separately.
Check: Each sector amount is 120/360 of its respective full-circle quantity; multiplying by 360/120 would reconstruct the full circumference or full area. The units cm and cm² must remain distinct.
Later retrieval: If radius doubles, circumference doubles to 80π cm, while full area quadruples to 1600π cm². The same linear-versus-square scaling applies to sector arc and sector area at unchanged angle.
131. Card 17: circle first, optional sector later
Card prompt: A circle has radius 6 cm. Calculate its exact full circumference and area. For an optional later-stage G1 extension, a central-angle sector measures 135°; describe its arc and sector area as fractions of the whole.
Meaning and conditions: Notebook heading one: circumference=2πr with length units; circle area=πr² with square units. Only after those are secure, a later-stage sector card can state arc=(θ/360)×2πr and sector area=(θ/360)×πr² for θ in degrees. This is not a claim that every current Secondary 2 G1 class is testing sectors.
One worked example: The complete circumference is 12π cm; the complete area is 36π cm². Sector share 135/360 produces arc (135/360)×12π cm≈14.137167 cm and sector area (135/360)×36π cm²≈42.411501 cm².
When this would be wrong: Using πr² for a curved arc, or 2πr for a covered surface, swaps two physical dimensions. Using diameter as radius in an area calculation causes a fourfold error. The notebook should show a circle with centre, radius and perimeter traced separately.
Check: Each sector amount is 135/360 of its respective full-circle quantity; multiplying by 360/135 would reconstruct the full circumference or full area. The units cm and cm² must remain distinct.
Later retrieval: If radius doubles, circumference doubles to 24π cm, while full area quadruples to 144π cm². The same linear-versus-square scaling applies to sector arc and sector area at unchanged angle.
132. Card 18: circle first, optional sector later
Card prompt: A circle has radius 11 cm. Calculate its exact full circumference and area. For an optional later-stage G1 extension, a central-angle sector measures 150°; describe its arc and sector area as fractions of the whole.
Meaning and conditions: Notebook heading one: circumference=2πr with length units; circle area=πr² with square units. Only after those are secure, a later-stage sector card can state arc=(θ/360)×2πr and sector area=(θ/360)×πr² for θ in degrees. This is not a claim that every current Secondary 2 G1 class is testing sectors.
One worked example: The complete circumference is 22π cm; the complete area is 121π cm². Sector share 150/360 produces arc (150/360)×22π cm≈28.797933 cm and sector area (150/360)×121π cm²≈158.38863 cm².
When this would be wrong: Using πr² for a curved arc, or 2πr for a covered surface, swaps two physical dimensions. Using diameter as radius in an area calculation causes a fourfold error. The notebook should show a circle with centre, radius and perimeter traced separately.
Check: Each sector amount is 150/360 of its respective full-circle quantity; multiplying by 360/150 would reconstruct the full circumference or full area. The units cm and cm² must remain distinct.
Later retrieval: If radius doubles, circumference doubles to 44π cm, while full area quadruples to 484π cm². The same linear-versus-square scaling applies to sector arc and sector area at unchanged angle.
133. Card 19: circle first, optional sector later
Card prompt: A circle has radius 16 cm. Calculate its exact full circumference and area. For an optional later-stage G1 extension, a central-angle sector measures 180°; describe its arc and sector area as fractions of the whole.
Meaning and conditions: Notebook heading one: circumference=2πr with length units; circle area=πr² with square units. Only after those are secure, a later-stage sector card can state arc=(θ/360)×2πr and sector area=(θ/360)×πr² for θ in degrees. This is not a claim that every current Secondary 2 G1 class is testing sectors.
One worked example: The complete circumference is 32π cm; the complete area is 256π cm². Sector share 180/360 produces arc (180/360)×32π cm≈50.265482 cm and sector area (180/360)×256π cm²≈402.12386 cm².
When this would be wrong: Using πr² for a curved arc, or 2πr for a covered surface, swaps two physical dimensions. Using diameter as radius in an area calculation causes a fourfold error. The notebook should show a circle with centre, radius and perimeter traced separately.
Check: Each sector amount is 180/360 of its respective full-circle quantity; multiplying by 360/180 would reconstruct the full circumference or full area. The units cm and cm² must remain distinct.
Later retrieval: If radius doubles, circumference doubles to 64π cm, while full area quadruples to 1024π cm². The same linear-versus-square scaling applies to sector arc and sector area at unchanged angle.
134. Card 20: circle first, optional sector later
Card prompt: A circle has radius 2 cm. Calculate its exact full circumference and area. For an optional later-stage G1 extension, a central-angle sector measures 240°; describe its arc and sector area as fractions of the whole.
Meaning and conditions: Notebook heading one: circumference=2πr with length units; circle area=πr² with square units. Only after those are secure, a later-stage sector card can state arc=(θ/360)×2πr and sector area=(θ/360)×πr² for θ in degrees. This is not a claim that every current Secondary 2 G1 class is testing sectors.
One worked example: The complete circumference is 4π cm; the complete area is 4π cm². Sector share 240/360 produces arc (240/360)×4π cm≈8.37758 cm and sector area (240/360)×4π cm²≈8.37758 cm².
When this would be wrong: Using πr² for a curved arc, or 2πr for a covered surface, swaps two physical dimensions. Using diameter as radius in an area calculation causes a fourfold error. The notebook should show a circle with centre, radius and perimeter traced separately.
Check: Each sector amount is 240/360 of its respective full-circle quantity; multiplying by 360/240 would reconstruct the full circumference or full area. The units cm and cm² must remain distinct.
Later retrieval: If radius doubles, circumference doubles to 8π cm, while full area quadruples to 16π cm². The same linear-versus-square scaling applies to sector arc and sector area at unchanged angle.
135. Card 21: circle first, optional sector later
Card prompt: A circle has radius 7 cm. Calculate its exact full circumference and area. For an optional later-stage G1 extension, a central-angle sector measures 30°; describe its arc and sector area as fractions of the whole.
Meaning and conditions: Notebook heading one: circumference=2πr with length units; circle area=πr² with square units. Only after those are secure, a later-stage sector card can state arc=(θ/360)×2πr and sector area=(θ/360)×πr² for θ in degrees. This is not a claim that every current Secondary 2 G1 class is testing sectors.
One worked example: The complete circumference is 14π cm; the complete area is 49π cm². Sector share 30/360 produces arc (30/360)×14π cm≈3.665191 cm and sector area (30/360)×49π cm²≈12.82817 cm².
When this would be wrong: Using πr² for a curved arc, or 2πr for a covered surface, swaps two physical dimensions. Using diameter as radius in an area calculation causes a fourfold error. The notebook should show a circle with centre, radius and perimeter traced separately.
Check: Each sector amount is 30/360 of its respective full-circle quantity; multiplying by 360/30 would reconstruct the full circumference or full area. The units cm and cm² must remain distinct.
Later retrieval: If radius doubles, circumference doubles to 28π cm, while full area quadruples to 196π cm². The same linear-versus-square scaling applies to sector arc and sector area at unchanged angle.
136. Card 22: circle first, optional sector later
Card prompt: A circle has radius 12 cm. Calculate its exact full circumference and area. For an optional later-stage G1 extension, a central-angle sector measures 45°; describe its arc and sector area as fractions of the whole.
Meaning and conditions: Notebook heading one: circumference=2πr with length units; circle area=πr² with square units. Only after those are secure, a later-stage sector card can state arc=(θ/360)×2πr and sector area=(θ/360)×πr² for θ in degrees. This is not a claim that every current Secondary 2 G1 class is testing sectors.
One worked example: The complete circumference is 24π cm; the complete area is 144π cm². Sector share 45/360 produces arc (45/360)×24π cm≈9.424778 cm and sector area (45/360)×144π cm²≈56.548668 cm².
When this would be wrong: Using πr² for a curved arc, or 2πr for a covered surface, swaps two physical dimensions. Using diameter as radius in an area calculation causes a fourfold error. The notebook should show a circle with centre, radius and perimeter traced separately.
Check: Each sector amount is 45/360 of its respective full-circle quantity; multiplying by 360/45 would reconstruct the full circumference or full area. The units cm and cm² must remain distinct.
Later retrieval: If radius doubles, circumference doubles to 48π cm, while full area quadruples to 576π cm². The same linear-versus-square scaling applies to sector arc and sector area at unchanged angle.
137. Card 23: circle first, optional sector later
Card prompt: A circle has radius 17 cm. Calculate its exact full circumference and area. For an optional later-stage G1 extension, a central-angle sector measures 60°; describe its arc and sector area as fractions of the whole.
Meaning and conditions: Notebook heading one: circumference=2πr with length units; circle area=πr² with square units. Only after those are secure, a later-stage sector card can state arc=(θ/360)×2πr and sector area=(θ/360)×πr² for θ in degrees. This is not a claim that every current Secondary 2 G1 class is testing sectors.
One worked example: The complete circumference is 34π cm; the complete area is 289π cm². Sector share 60/360 produces arc (60/360)×34π cm≈17.802358 cm and sector area (60/360)×289π cm²≈151.320046 cm².
When this would be wrong: Using πr² for a curved arc, or 2πr for a covered surface, swaps two physical dimensions. Using diameter as radius in an area calculation causes a fourfold error. The notebook should show a circle with centre, radius and perimeter traced separately.
Check: Each sector amount is 60/360 of its respective full-circle quantity; multiplying by 360/60 would reconstruct the full circumference or full area. The units cm and cm² must remain distinct.
Later retrieval: If radius doubles, circumference doubles to 68π cm, while full area quadruples to 1156π cm². The same linear-versus-square scaling applies to sector arc and sector area at unchanged angle.
138. Card 24: circle first, optional sector later
Card prompt: A circle has radius 3 cm. Calculate its exact full circumference and area. For an optional later-stage G1 extension, a central-angle sector measures 72°; describe its arc and sector area as fractions of the whole.
Meaning and conditions: Notebook heading one: circumference=2πr with length units; circle area=πr² with square units. Only after those are secure, a later-stage sector card can state arc=(θ/360)×2πr and sector area=(θ/360)×πr² for θ in degrees. This is not a claim that every current Secondary 2 G1 class is testing sectors.
One worked example: The complete circumference is 6π cm; the complete area is 9π cm². Sector share 72/360 produces arc (72/360)×6π cm≈3.769911 cm and sector area (72/360)×9π cm²≈5.654867 cm².
When this would be wrong: Using πr² for a curved arc, or 2πr for a covered surface, swaps two physical dimensions. Using diameter as radius in an area calculation causes a fourfold error. The notebook should show a circle with centre, radius and perimeter traced separately.
Check: Each sector amount is 72/360 of its respective full-circle quantity; multiplying by 360/72 would reconstruct the full circumference or full area. The units cm and cm² must remain distinct.
Later retrieval: If radius doubles, circumference doubles to 12π cm, while full area quadruples to 36π cm². The same linear-versus-square scaling applies to sector arc and sector area at unchanged angle.
139. Card 25: circle first, optional sector later
Card prompt: A circle has radius 8 cm. Calculate its exact full circumference and area. For an optional later-stage G1 extension, a central-angle sector measures 90°; describe its arc and sector area as fractions of the whole.
Meaning and conditions: Notebook heading one: circumference=2πr with length units; circle area=πr² with square units. Only after those are secure, a later-stage sector card can state arc=(θ/360)×2πr and sector area=(θ/360)×πr² for θ in degrees. This is not a claim that every current Secondary 2 G1 class is testing sectors.
One worked example: The complete circumference is 16π cm; the complete area is 64π cm². Sector share 90/360 produces arc (90/360)×16π cm≈12.566371 cm and sector area (90/360)×64π cm²≈50.265482 cm².
When this would be wrong: Using πr² for a curved arc, or 2πr for a covered surface, swaps two physical dimensions. Using diameter as radius in an area calculation causes a fourfold error. The notebook should show a circle with centre, radius and perimeter traced separately.
Check: Each sector amount is 90/360 of its respective full-circle quantity; multiplying by 360/90 would reconstruct the full circumference or full area. The units cm and cm² must remain distinct.
Later retrieval: If radius doubles, circumference doubles to 32π cm, while full area quadruples to 256π cm². The same linear-versus-square scaling applies to sector arc and sector area at unchanged angle.
140. Card 26: circle first, optional sector later
Card prompt: A circle has radius 13 cm. Calculate its exact full circumference and area. For an optional later-stage G1 extension, a central-angle sector measures 120°; describe its arc and sector area as fractions of the whole.
Meaning and conditions: Notebook heading one: circumference=2πr with length units; circle area=πr² with square units. Only after those are secure, a later-stage sector card can state arc=(θ/360)×2πr and sector area=(θ/360)×πr² for θ in degrees. This is not a claim that every current Secondary 2 G1 class is testing sectors.
One worked example: The complete circumference is 26π cm; the complete area is 169π cm². Sector share 120/360 produces arc (120/360)×26π cm≈27.227136 cm and sector area (120/360)×169π cm²≈176.976386 cm².
When this would be wrong: Using πr² for a curved arc, or 2πr for a covered surface, swaps two physical dimensions. Using diameter as radius in an area calculation causes a fourfold error. The notebook should show a circle with centre, radius and perimeter traced separately.
Check: Each sector amount is 120/360 of its respective full-circle quantity; multiplying by 360/120 would reconstruct the full circumference or full area. The units cm and cm² must remain distinct.
Later retrieval: If radius doubles, circumference doubles to 52π cm, while full area quadruples to 676π cm². The same linear-versus-square scaling applies to sector arc and sector area at unchanged angle.
141. Card 27: circle first, optional sector later
Card prompt: A circle has radius 18 cm. Calculate its exact full circumference and area. For an optional later-stage G1 extension, a central-angle sector measures 135°; describe its arc and sector area as fractions of the whole.
Meaning and conditions: Notebook heading one: circumference=2πr with length units; circle area=πr² with square units. Only after those are secure, a later-stage sector card can state arc=(θ/360)×2πr and sector area=(θ/360)×πr² for θ in degrees. This is not a claim that every current Secondary 2 G1 class is testing sectors.
One worked example: The complete circumference is 36π cm; the complete area is 324π cm². Sector share 135/360 produces arc (135/360)×36π cm≈42.411501 cm and sector area (135/360)×324π cm²≈381.703507 cm².
When this would be wrong: Using πr² for a curved arc, or 2πr for a covered surface, swaps two physical dimensions. Using diameter as radius in an area calculation causes a fourfold error. The notebook should show a circle with centre, radius and perimeter traced separately.
Check: Each sector amount is 135/360 of its respective full-circle quantity; multiplying by 360/135 would reconstruct the full circumference or full area. The units cm and cm² must remain distinct.
Later retrieval: If radius doubles, circumference doubles to 72π cm, while full area quadruples to 1296π cm². The same linear-versus-square scaling applies to sector arc and sector area at unchanged angle.
142. Card 28: circle first, optional sector later
Card prompt: A circle has radius 4 cm. Calculate its exact full circumference and area. For an optional later-stage G1 extension, a central-angle sector measures 150°; describe its arc and sector area as fractions of the whole.
Meaning and conditions: Notebook heading one: circumference=2πr with length units; circle area=πr² with square units. Only after those are secure, a later-stage sector card can state arc=(θ/360)×2πr and sector area=(θ/360)×πr² for θ in degrees. This is not a claim that every current Secondary 2 G1 class is testing sectors.
One worked example: The complete circumference is 8π cm; the complete area is 16π cm². Sector share 150/360 produces arc (150/360)×8π cm≈10.471976 cm and sector area (150/360)×16π cm²≈20.943951 cm².
When this would be wrong: Using πr² for a curved arc, or 2πr for a covered surface, swaps two physical dimensions. Using diameter as radius in an area calculation causes a fourfold error. The notebook should show a circle with centre, radius and perimeter traced separately.
Check: Each sector amount is 150/360 of its respective full-circle quantity; multiplying by 360/150 would reconstruct the full circumference or full area. The units cm and cm² must remain distinct.
Later retrieval: If radius doubles, circumference doubles to 16π cm, while full area quadruples to 64π cm². The same linear-versus-square scaling applies to sector arc and sector area at unchanged angle.
Cuboids, prisms and cylinders
In cuboids, prisms and cylinders, a notebook card should name the question that triggers the formula and the quantity it calculates. Read the worked example as one illustration of the relationship, not as fixed numbers to memorise. Pay attention to units, assumptions and a reverse check. If two formulas use the same letter, define that letter again in the local context.
143. Card 1: cuboid volume versus surface area
Card prompt: An ideal closed cuboid has dimensions 3 cm × 2 cm × 4 cm. Use a formula notebook to find its volume and total area of the six outside faces, and check their different units.
Meaning and conditions: Notebook card: cuboid volume=length×width×height, which multiplies three lengths and yields cm³. A separate card says closed cuboid surface area=2(lw+lh+wh) for all six faces, yielding cm². The two formulas describe interior space versus exterior covering.
One worked example: Volume=3×2×4=24 cm³. Surface area=2(6+12+8)=52 cm². A net would show two matching faces of each dimension pair, explaining the factor two.
When this would be wrong: A child who uses 24 as an area or 52 as a volume has chosen a formula for a different quantity. An open-top box would also lack one exterior face, so the closed-box card does not automatically apply to every container.
Check: For volume, divide by one known dimension to recover an area, then by another to recover the remaining length. For surface area, sum all six face areas directly; the result must match 52.
Later retrieval: If only height increased to 5 cm, volume would rise by 6 cm³ while total surface area would rise by 2(3+2)=10 cm². A useful notebook includes this changed-dimension explanation.
144. Card 2: cuboid volume versus surface area
Card prompt: An ideal closed cuboid has dimensions 6 cm × 7 cm × 11 cm. Use a formula notebook to find its volume and total area of the six outside faces, and check their different units.
Meaning and conditions: Notebook card: cuboid volume=length×width×height, which multiplies three lengths and yields cm³. A separate card says closed cuboid surface area=2(lw+lh+wh) for all six faces, yielding cm². The two formulas describe interior space versus exterior covering.
One worked example: Volume=6×7×11=462 cm³. Surface area=2(42+66+77)=370 cm². A net would show two matching faces of each dimension pair, explaining the factor two.
When this would be wrong: A child who uses 462 as an area or 370 as a volume has chosen a formula for a different quantity. An open-top box would also lack one exterior face, so the closed-box card does not automatically apply to every container.
Check: For volume, divide by one known dimension to recover an area, then by another to recover the remaining length. For surface area, sum all six face areas directly; the result must match 370.
Later retrieval: If only height increased to 12 cm, volume would rise by 42 cm³ while total surface area would rise by 2(6+7)=26 cm². A useful notebook includes this changed-dimension explanation.
145. Card 3: cuboid volume versus surface area
Card prompt: An ideal closed cuboid has dimensions 9 cm × 12 cm × 4 cm. Use a formula notebook to find its volume and total area of the six outside faces, and check their different units.
Meaning and conditions: Notebook card: cuboid volume=length×width×height, which multiplies three lengths and yields cm³. A separate card says closed cuboid surface area=2(lw+lh+wh) for all six faces, yielding cm². The two formulas describe interior space versus exterior covering.
One worked example: Volume=9×12×4=432 cm³. Surface area=2(108+36+48)=384 cm². A net would show two matching faces of each dimension pair, explaining the factor two.
When this would be wrong: A child who uses 432 as an area or 384 as a volume has chosen a formula for a different quantity. An open-top box would also lack one exterior face, so the closed-box card does not automatically apply to every container.
Check: For volume, divide by one known dimension to recover an area, then by another to recover the remaining length. For surface area, sum all six face areas directly; the result must match 384.
Later retrieval: If only height increased to 5 cm, volume would rise by 108 cm³ while total surface area would rise by 2(9+12)=42 cm². A useful notebook includes this changed-dimension explanation.
146. Card 4: cuboid volume versus surface area
Card prompt: An ideal closed cuboid has dimensions 12 cm × 4 cm × 11 cm. Use a formula notebook to find its volume and total area of the six outside faces, and check their different units.
Meaning and conditions: Notebook card: cuboid volume=length×width×height, which multiplies three lengths and yields cm³. A separate card says closed cuboid surface area=2(lw+lh+wh) for all six faces, yielding cm². The two formulas describe interior space versus exterior covering.
One worked example: Volume=12×4×11=528 cm³. Surface area=2(48+132+44)=448 cm². A net would show two matching faces of each dimension pair, explaining the factor two.
When this would be wrong: A child who uses 528 as an area or 448 as a volume has chosen a formula for a different quantity. An open-top box would also lack one exterior face, so the closed-box card does not automatically apply to every container.
Check: For volume, divide by one known dimension to recover an area, then by another to recover the remaining length. For surface area, sum all six face areas directly; the result must match 448.
Later retrieval: If only height increased to 12 cm, volume would rise by 48 cm³ while total surface area would rise by 2(12+4)=32 cm². A useful notebook includes this changed-dimension explanation.
147. Card 5: cuboid volume versus surface area
Card prompt: An ideal closed cuboid has dimensions 15 cm × 9 cm × 4 cm. Use a formula notebook to find its volume and total area of the six outside faces, and check their different units.
Meaning and conditions: Notebook card: cuboid volume=length×width×height, which multiplies three lengths and yields cm³. A separate card says closed cuboid surface area=2(lw+lh+wh) for all six faces, yielding cm². The two formulas describe interior space versus exterior covering.
One worked example: Volume=15×9×4=540 cm³. Surface area=2(135+60+36)=462 cm². A net would show two matching faces of each dimension pair, explaining the factor two.
When this would be wrong: A child who uses 540 as an area or 462 as a volume has chosen a formula for a different quantity. An open-top box would also lack one exterior face, so the closed-box card does not automatically apply to every container.
Check: For volume, divide by one known dimension to recover an area, then by another to recover the remaining length. For surface area, sum all six face areas directly; the result must match 462.
Later retrieval: If only height increased to 5 cm, volume would rise by 135 cm³ while total surface area would rise by 2(15+9)=48 cm². A useful notebook includes this changed-dimension explanation.
148. Card 6: cuboid volume versus surface area
Card prompt: An ideal closed cuboid has dimensions 3 cm × 14 cm × 11 cm. Use a formula notebook to find its volume and total area of the six outside faces, and check their different units.
Meaning and conditions: Notebook card: cuboid volume=length×width×height, which multiplies three lengths and yields cm³. A separate card says closed cuboid surface area=2(lw+lh+wh) for all six faces, yielding cm². The two formulas describe interior space versus exterior covering.
One worked example: Volume=3×14×11=462 cm³. Surface area=2(42+33+154)=458 cm². A net would show two matching faces of each dimension pair, explaining the factor two.
When this would be wrong: A child who uses 462 as an area or 458 as a volume has chosen a formula for a different quantity. An open-top box would also lack one exterior face, so the closed-box card does not automatically apply to every container.
Check: For volume, divide by one known dimension to recover an area, then by another to recover the remaining length. For surface area, sum all six face areas directly; the result must match 458.
Later retrieval: If only height increased to 12 cm, volume would rise by 42 cm³ while total surface area would rise by 2(3+14)=34 cm². A useful notebook includes this changed-dimension explanation.
149. Card 7: cuboid volume versus surface area
Card prompt: An ideal closed cuboid has dimensions 6 cm × 6 cm × 4 cm. Use a formula notebook to find its volume and total area of the six outside faces, and check their different units.
Meaning and conditions: Notebook card: cuboid volume=length×width×height, which multiplies three lengths and yields cm³. A separate card says closed cuboid surface area=2(lw+lh+wh) for all six faces, yielding cm². The two formulas describe interior space versus exterior covering.
One worked example: Volume=6×6×4=144 cm³. Surface area=2(36+24+24)=168 cm². A net would show two matching faces of each dimension pair, explaining the factor two.
When this would be wrong: A child who uses 144 as an area or 168 as a volume has chosen a formula for a different quantity. An open-top box would also lack one exterior face, so the closed-box card does not automatically apply to every container.
Check: For volume, divide by one known dimension to recover an area, then by another to recover the remaining length. For surface area, sum all six face areas directly; the result must match 168.
Later retrieval: If only height increased to 5 cm, volume would rise by 36 cm³ while total surface area would rise by 2(6+6)=24 cm². A useful notebook includes this changed-dimension explanation.
150. Card 8: cuboid volume versus surface area
Card prompt: An ideal closed cuboid has dimensions 9 cm × 11 cm × 11 cm. Use a formula notebook to find its volume and total area of the six outside faces, and check their different units.
Meaning and conditions: Notebook card: cuboid volume=length×width×height, which multiplies three lengths and yields cm³. A separate card says closed cuboid surface area=2(lw+lh+wh) for all six faces, yielding cm². The two formulas describe interior space versus exterior covering.
One worked example: Volume=9×11×11=1089 cm³. Surface area=2(99+99+121)=638 cm². A net would show two matching faces of each dimension pair, explaining the factor two.
When this would be wrong: A child who uses 1089 as an area or 638 as a volume has chosen a formula for a different quantity. An open-top box would also lack one exterior face, so the closed-box card does not automatically apply to every container.
Check: For volume, divide by one known dimension to recover an area, then by another to recover the remaining length. For surface area, sum all six face areas directly; the result must match 638.
Later retrieval: If only height increased to 12 cm, volume would rise by 99 cm³ while total surface area would rise by 2(9+11)=40 cm². A useful notebook includes this changed-dimension explanation.
151. Card 9: cuboid volume versus surface area
Card prompt: An ideal closed cuboid has dimensions 12 cm × 3 cm × 4 cm. Use a formula notebook to find its volume and total area of the six outside faces, and check their different units.
Meaning and conditions: Notebook card: cuboid volume=length×width×height, which multiplies three lengths and yields cm³. A separate card says closed cuboid surface area=2(lw+lh+wh) for all six faces, yielding cm². The two formulas describe interior space versus exterior covering.
One worked example: Volume=12×3×4=144 cm³. Surface area=2(36+48+12)=192 cm². A net would show two matching faces of each dimension pair, explaining the factor two.
When this would be wrong: A child who uses 144 as an area or 192 as a volume has chosen a formula for a different quantity. An open-top box would also lack one exterior face, so the closed-box card does not automatically apply to every container.
Check: For volume, divide by one known dimension to recover an area, then by another to recover the remaining length. For surface area, sum all six face areas directly; the result must match 192.
Later retrieval: If only height increased to 5 cm, volume would rise by 36 cm³ while total surface area would rise by 2(12+3)=30 cm². A useful notebook includes this changed-dimension explanation.
152. Card 10: cuboid volume versus surface area
Card prompt: An ideal closed cuboid has dimensions 15 cm × 8 cm × 11 cm. Use a formula notebook to find its volume and total area of the six outside faces, and check their different units.
Meaning and conditions: Notebook card: cuboid volume=length×width×height, which multiplies three lengths and yields cm³. A separate card says closed cuboid surface area=2(lw+lh+wh) for all six faces, yielding cm². The two formulas describe interior space versus exterior covering.
One worked example: Volume=15×8×11=1320 cm³. Surface area=2(120+165+88)=746 cm². A net would show two matching faces of each dimension pair, explaining the factor two.
When this would be wrong: A child who uses 1320 as an area or 746 as a volume has chosen a formula for a different quantity. An open-top box would also lack one exterior face, so the closed-box card does not automatically apply to every container.
Check: For volume, divide by one known dimension to recover an area, then by another to recover the remaining length. For surface area, sum all six face areas directly; the result must match 746.
Later retrieval: If only height increased to 12 cm, volume would rise by 120 cm³ while total surface area would rise by 2(15+8)=46 cm². A useful notebook includes this changed-dimension explanation.
153. Card 11: cuboid volume versus surface area
Card prompt: An ideal closed cuboid has dimensions 3 cm × 13 cm × 4 cm. Use a formula notebook to find its volume and total area of the six outside faces, and check their different units.
Meaning and conditions: Notebook card: cuboid volume=length×width×height, which multiplies three lengths and yields cm³. A separate card says closed cuboid surface area=2(lw+lh+wh) for all six faces, yielding cm². The two formulas describe interior space versus exterior covering.
One worked example: Volume=3×13×4=156 cm³. Surface area=2(39+12+52)=206 cm². A net would show two matching faces of each dimension pair, explaining the factor two.
When this would be wrong: A child who uses 156 as an area or 206 as a volume has chosen a formula for a different quantity. An open-top box would also lack one exterior face, so the closed-box card does not automatically apply to every container.
Check: For volume, divide by one known dimension to recover an area, then by another to recover the remaining length. For surface area, sum all six face areas directly; the result must match 206.
Later retrieval: If only height increased to 5 cm, volume would rise by 39 cm³ while total surface area would rise by 2(3+13)=32 cm². A useful notebook includes this changed-dimension explanation.
154. Card 12: cuboid volume versus surface area
Card prompt: An ideal closed cuboid has dimensions 6 cm × 5 cm × 11 cm. Use a formula notebook to find its volume and total area of the six outside faces, and check their different units.
Meaning and conditions: Notebook card: cuboid volume=length×width×height, which multiplies three lengths and yields cm³. A separate card says closed cuboid surface area=2(lw+lh+wh) for all six faces, yielding cm². The two formulas describe interior space versus exterior covering.
One worked example: Volume=6×5×11=330 cm³. Surface area=2(30+66+55)=302 cm². A net would show two matching faces of each dimension pair, explaining the factor two.
When this would be wrong: A child who uses 330 as an area or 302 as a volume has chosen a formula for a different quantity. An open-top box would also lack one exterior face, so the closed-box card does not automatically apply to every container.
Check: For volume, divide by one known dimension to recover an area, then by another to recover the remaining length. For surface area, sum all six face areas directly; the result must match 302.
Later retrieval: If only height increased to 12 cm, volume would rise by 30 cm³ while total surface area would rise by 2(6+5)=22 cm². A useful notebook includes this changed-dimension explanation.
155. Card 13: cuboid volume versus surface area
Card prompt: An ideal closed cuboid has dimensions 9 cm × 10 cm × 4 cm. Use a formula notebook to find its volume and total area of the six outside faces, and check their different units.
Meaning and conditions: Notebook card: cuboid volume=length×width×height, which multiplies three lengths and yields cm³. A separate card says closed cuboid surface area=2(lw+lh+wh) for all six faces, yielding cm². The two formulas describe interior space versus exterior covering.
One worked example: Volume=9×10×4=360 cm³. Surface area=2(90+36+40)=332 cm². A net would show two matching faces of each dimension pair, explaining the factor two.
When this would be wrong: A child who uses 360 as an area or 332 as a volume has chosen a formula for a different quantity. An open-top box would also lack one exterior face, so the closed-box card does not automatically apply to every container.
Check: For volume, divide by one known dimension to recover an area, then by another to recover the remaining length. For surface area, sum all six face areas directly; the result must match 332.
Later retrieval: If only height increased to 5 cm, volume would rise by 90 cm³ while total surface area would rise by 2(9+10)=38 cm². A useful notebook includes this changed-dimension explanation.
156. Card 14: cuboid volume versus surface area
Card prompt: An ideal closed cuboid has dimensions 12 cm × 2 cm × 11 cm. Use a formula notebook to find its volume and total area of the six outside faces, and check their different units.
Meaning and conditions: Notebook card: cuboid volume=length×width×height, which multiplies three lengths and yields cm³. A separate card says closed cuboid surface area=2(lw+lh+wh) for all six faces, yielding cm². The two formulas describe interior space versus exterior covering.
One worked example: Volume=12×2×11=264 cm³. Surface area=2(24+132+22)=356 cm². A net would show two matching faces of each dimension pair, explaining the factor two.
When this would be wrong: A child who uses 264 as an area or 356 as a volume has chosen a formula for a different quantity. An open-top box would also lack one exterior face, so the closed-box card does not automatically apply to every container.
Check: For volume, divide by one known dimension to recover an area, then by another to recover the remaining length. For surface area, sum all six face areas directly; the result must match 356.
Later retrieval: If only height increased to 12 cm, volume would rise by 24 cm³ while total surface area would rise by 2(12+2)=28 cm². A useful notebook includes this changed-dimension explanation.
157. Card 15: cuboid volume versus surface area
Card prompt: An ideal closed cuboid has dimensions 15 cm × 7 cm × 4 cm. Use a formula notebook to find its volume and total area of the six outside faces, and check their different units.
Meaning and conditions: Notebook card: cuboid volume=length×width×height, which multiplies three lengths and yields cm³. A separate card says closed cuboid surface area=2(lw+lh+wh) for all six faces, yielding cm². The two formulas describe interior space versus exterior covering.
One worked example: Volume=15×7×4=420 cm³. Surface area=2(105+60+28)=386 cm². A net would show two matching faces of each dimension pair, explaining the factor two.
When this would be wrong: A child who uses 420 as an area or 386 as a volume has chosen a formula for a different quantity. An open-top box would also lack one exterior face, so the closed-box card does not automatically apply to every container.
Check: For volume, divide by one known dimension to recover an area, then by another to recover the remaining length. For surface area, sum all six face areas directly; the result must match 386.
Later retrieval: If only height increased to 5 cm, volume would rise by 105 cm³ while total surface area would rise by 2(15+7)=44 cm². A useful notebook includes this changed-dimension explanation.
158. Card 16: cuboid volume versus surface area
Card prompt: An ideal closed cuboid has dimensions 3 cm × 12 cm × 11 cm. Use a formula notebook to find its volume and total area of the six outside faces, and check their different units.
Meaning and conditions: Notebook card: cuboid volume=length×width×height, which multiplies three lengths and yields cm³. A separate card says closed cuboid surface area=2(lw+lh+wh) for all six faces, yielding cm². The two formulas describe interior space versus exterior covering.
One worked example: Volume=3×12×11=396 cm³. Surface area=2(36+33+132)=402 cm². A net would show two matching faces of each dimension pair, explaining the factor two.
When this would be wrong: A child who uses 396 as an area or 402 as a volume has chosen a formula for a different quantity. An open-top box would also lack one exterior face, so the closed-box card does not automatically apply to every container.
Check: For volume, divide by one known dimension to recover an area, then by another to recover the remaining length. For surface area, sum all six face areas directly; the result must match 402.
Later retrieval: If only height increased to 12 cm, volume would rise by 36 cm³ while total surface area would rise by 2(3+12)=30 cm². A useful notebook includes this changed-dimension explanation.
159. Card 17: cuboid volume versus surface area
Card prompt: An ideal closed cuboid has dimensions 6 cm × 4 cm × 4 cm. Use a formula notebook to find its volume and total area of the six outside faces, and check their different units.
Meaning and conditions: Notebook card: cuboid volume=length×width×height, which multiplies three lengths and yields cm³. A separate card says closed cuboid surface area=2(lw+lh+wh) for all six faces, yielding cm². The two formulas describe interior space versus exterior covering.
One worked example: Volume=6×4×4=96 cm³. Surface area=2(24+24+16)=128 cm². A net would show two matching faces of each dimension pair, explaining the factor two.
When this would be wrong: A child who uses 96 as an area or 128 as a volume has chosen a formula for a different quantity. An open-top box would also lack one exterior face, so the closed-box card does not automatically apply to every container.
Check: For volume, divide by one known dimension to recover an area, then by another to recover the remaining length. For surface area, sum all six face areas directly; the result must match 128.
Later retrieval: If only height increased to 5 cm, volume would rise by 24 cm³ while total surface area would rise by 2(6+4)=20 cm². A useful notebook includes this changed-dimension explanation.
160. Card 18: cuboid volume versus surface area
Card prompt: An ideal closed cuboid has dimensions 9 cm × 9 cm × 11 cm. Use a formula notebook to find its volume and total area of the six outside faces, and check their different units.
Meaning and conditions: Notebook card: cuboid volume=length×width×height, which multiplies three lengths and yields cm³. A separate card says closed cuboid surface area=2(lw+lh+wh) for all six faces, yielding cm². The two formulas describe interior space versus exterior covering.
One worked example: Volume=9×9×11=891 cm³. Surface area=2(81+99+99)=558 cm². A net would show two matching faces of each dimension pair, explaining the factor two.
When this would be wrong: A child who uses 891 as an area or 558 as a volume has chosen a formula for a different quantity. An open-top box would also lack one exterior face, so the closed-box card does not automatically apply to every container.
Check: For volume, divide by one known dimension to recover an area, then by another to recover the remaining length. For surface area, sum all six face areas directly; the result must match 558.
Later retrieval: If only height increased to 12 cm, volume would rise by 81 cm³ while total surface area would rise by 2(9+9)=36 cm². A useful notebook includes this changed-dimension explanation.
161. Card 19: cuboid volume versus surface area
Card prompt: An ideal closed cuboid has dimensions 12 cm × 14 cm × 4 cm. Use a formula notebook to find its volume and total area of the six outside faces, and check their different units.
Meaning and conditions: Notebook card: cuboid volume=length×width×height, which multiplies three lengths and yields cm³. A separate card says closed cuboid surface area=2(lw+lh+wh) for all six faces, yielding cm². The two formulas describe interior space versus exterior covering.
One worked example: Volume=12×14×4=672 cm³. Surface area=2(168+48+56)=544 cm². A net would show two matching faces of each dimension pair, explaining the factor two.
When this would be wrong: A child who uses 672 as an area or 544 as a volume has chosen a formula for a different quantity. An open-top box would also lack one exterior face, so the closed-box card does not automatically apply to every container.
Check: For volume, divide by one known dimension to recover an area, then by another to recover the remaining length. For surface area, sum all six face areas directly; the result must match 544.
Later retrieval: If only height increased to 5 cm, volume would rise by 168 cm³ while total surface area would rise by 2(12+14)=52 cm². A useful notebook includes this changed-dimension explanation.
162. Card 20: cuboid volume versus surface area
Card prompt: An ideal closed cuboid has dimensions 15 cm × 6 cm × 11 cm. Use a formula notebook to find its volume and total area of the six outside faces, and check their different units.
Meaning and conditions: Notebook card: cuboid volume=length×width×height, which multiplies three lengths and yields cm³. A separate card says closed cuboid surface area=2(lw+lh+wh) for all six faces, yielding cm². The two formulas describe interior space versus exterior covering.
One worked example: Volume=15×6×11=990 cm³. Surface area=2(90+165+66)=642 cm². A net would show two matching faces of each dimension pair, explaining the factor two.
When this would be wrong: A child who uses 990 as an area or 642 as a volume has chosen a formula for a different quantity. An open-top box would also lack one exterior face, so the closed-box card does not automatically apply to every container.
Check: For volume, divide by one known dimension to recover an area, then by another to recover the remaining length. For surface area, sum all six face areas directly; the result must match 642.
Later retrieval: If only height increased to 12 cm, volume would rise by 90 cm³ while total surface area would rise by 2(15+6)=42 cm². A useful notebook includes this changed-dimension explanation.
163. Card 21: cuboid volume versus surface area
Card prompt: An ideal closed cuboid has dimensions 3 cm × 11 cm × 4 cm. Use a formula notebook to find its volume and total area of the six outside faces, and check their different units.
Meaning and conditions: Notebook card: cuboid volume=length×width×height, which multiplies three lengths and yields cm³. A separate card says closed cuboid surface area=2(lw+lh+wh) for all six faces, yielding cm². The two formulas describe interior space versus exterior covering.
One worked example: Volume=3×11×4=132 cm³. Surface area=2(33+12+44)=178 cm². A net would show two matching faces of each dimension pair, explaining the factor two.
When this would be wrong: A child who uses 132 as an area or 178 as a volume has chosen a formula for a different quantity. An open-top box would also lack one exterior face, so the closed-box card does not automatically apply to every container.
Check: For volume, divide by one known dimension to recover an area, then by another to recover the remaining length. For surface area, sum all six face areas directly; the result must match 178.
Later retrieval: If only height increased to 5 cm, volume would rise by 33 cm³ while total surface area would rise by 2(3+11)=28 cm². A useful notebook includes this changed-dimension explanation.
164. Card 22: cuboid volume versus surface area
Card prompt: An ideal closed cuboid has dimensions 6 cm × 3 cm × 11 cm. Use a formula notebook to find its volume and total area of the six outside faces, and check their different units.
Meaning and conditions: Notebook card: cuboid volume=length×width×height, which multiplies three lengths and yields cm³. A separate card says closed cuboid surface area=2(lw+lh+wh) for all six faces, yielding cm². The two formulas describe interior space versus exterior covering.
One worked example: Volume=6×3×11=198 cm³. Surface area=2(18+66+33)=234 cm². A net would show two matching faces of each dimension pair, explaining the factor two.
When this would be wrong: A child who uses 198 as an area or 234 as a volume has chosen a formula for a different quantity. An open-top box would also lack one exterior face, so the closed-box card does not automatically apply to every container.
Check: For volume, divide by one known dimension to recover an area, then by another to recover the remaining length. For surface area, sum all six face areas directly; the result must match 234.
Later retrieval: If only height increased to 12 cm, volume would rise by 18 cm³ while total surface area would rise by 2(6+3)=18 cm². A useful notebook includes this changed-dimension explanation.
165. Card 23: cuboid volume versus surface area
Card prompt: An ideal closed cuboid has dimensions 9 cm × 8 cm × 4 cm. Use a formula notebook to find its volume and total area of the six outside faces, and check their different units.
Meaning and conditions: Notebook card: cuboid volume=length×width×height, which multiplies three lengths and yields cm³. A separate card says closed cuboid surface area=2(lw+lh+wh) for all six faces, yielding cm². The two formulas describe interior space versus exterior covering.
One worked example: Volume=9×8×4=288 cm³. Surface area=2(72+36+32)=280 cm². A net would show two matching faces of each dimension pair, explaining the factor two.
When this would be wrong: A child who uses 288 as an area or 280 as a volume has chosen a formula for a different quantity. An open-top box would also lack one exterior face, so the closed-box card does not automatically apply to every container.
Check: For volume, divide by one known dimension to recover an area, then by another to recover the remaining length. For surface area, sum all six face areas directly; the result must match 280.
Later retrieval: If only height increased to 5 cm, volume would rise by 72 cm³ while total surface area would rise by 2(9+8)=34 cm². A useful notebook includes this changed-dimension explanation.
166. Card 24: cuboid volume versus surface area
Card prompt: An ideal closed cuboid has dimensions 12 cm × 13 cm × 11 cm. Use a formula notebook to find its volume and total area of the six outside faces, and check their different units.
Meaning and conditions: Notebook card: cuboid volume=length×width×height, which multiplies three lengths and yields cm³. A separate card says closed cuboid surface area=2(lw+lh+wh) for all six faces, yielding cm². The two formulas describe interior space versus exterior covering.
One worked example: Volume=12×13×11=1716 cm³. Surface area=2(156+132+143)=862 cm². A net would show two matching faces of each dimension pair, explaining the factor two.
When this would be wrong: A child who uses 1716 as an area or 862 as a volume has chosen a formula for a different quantity. An open-top box would also lack one exterior face, so the closed-box card does not automatically apply to every container.
Check: For volume, divide by one known dimension to recover an area, then by another to recover the remaining length. For surface area, sum all six face areas directly; the result must match 862.
Later retrieval: If only height increased to 12 cm, volume would rise by 156 cm³ while total surface area would rise by 2(12+13)=50 cm². A useful notebook includes this changed-dimension explanation.
167. Card 25: cuboid volume versus surface area
Card prompt: An ideal closed cuboid has dimensions 15 cm × 5 cm × 4 cm. Use a formula notebook to find its volume and total area of the six outside faces, and check their different units.
Meaning and conditions: Notebook card: cuboid volume=length×width×height, which multiplies three lengths and yields cm³. A separate card says closed cuboid surface area=2(lw+lh+wh) for all six faces, yielding cm². The two formulas describe interior space versus exterior covering.
One worked example: Volume=15×5×4=300 cm³. Surface area=2(75+60+20)=310 cm². A net would show two matching faces of each dimension pair, explaining the factor two.
When this would be wrong: A child who uses 300 as an area or 310 as a volume has chosen a formula for a different quantity. An open-top box would also lack one exterior face, so the closed-box card does not automatically apply to every container.
Check: For volume, divide by one known dimension to recover an area, then by another to recover the remaining length. For surface area, sum all six face areas directly; the result must match 310.
Later retrieval: If only height increased to 5 cm, volume would rise by 75 cm³ while total surface area would rise by 2(15+5)=40 cm². A useful notebook includes this changed-dimension explanation.
168. Card 26: cuboid volume versus surface area
Card prompt: An ideal closed cuboid has dimensions 3 cm × 10 cm × 11 cm. Use a formula notebook to find its volume and total area of the six outside faces, and check their different units.
Meaning and conditions: Notebook card: cuboid volume=length×width×height, which multiplies three lengths and yields cm³. A separate card says closed cuboid surface area=2(lw+lh+wh) for all six faces, yielding cm². The two formulas describe interior space versus exterior covering.
One worked example: Volume=3×10×11=330 cm³. Surface area=2(30+33+110)=346 cm². A net would show two matching faces of each dimension pair, explaining the factor two.
When this would be wrong: A child who uses 330 as an area or 346 as a volume has chosen a formula for a different quantity. An open-top box would also lack one exterior face, so the closed-box card does not automatically apply to every container.
Check: For volume, divide by one known dimension to recover an area, then by another to recover the remaining length. For surface area, sum all six face areas directly; the result must match 346.
Later retrieval: If only height increased to 12 cm, volume would rise by 30 cm³ while total surface area would rise by 2(3+10)=26 cm². A useful notebook includes this changed-dimension explanation.
169. Card 27: cuboid volume versus surface area
Card prompt: An ideal closed cuboid has dimensions 6 cm × 2 cm × 4 cm. Use a formula notebook to find its volume and total area of the six outside faces, and check their different units.
Meaning and conditions: Notebook card: cuboid volume=length×width×height, which multiplies three lengths and yields cm³. A separate card says closed cuboid surface area=2(lw+lh+wh) for all six faces, yielding cm². The two formulas describe interior space versus exterior covering.
One worked example: Volume=6×2×4=48 cm³. Surface area=2(12+24+8)=88 cm². A net would show two matching faces of each dimension pair, explaining the factor two.
When this would be wrong: A child who uses 48 as an area or 88 as a volume has chosen a formula for a different quantity. An open-top box would also lack one exterior face, so the closed-box card does not automatically apply to every container.
Check: For volume, divide by one known dimension to recover an area, then by another to recover the remaining length. For surface area, sum all six face areas directly; the result must match 88.
Later retrieval: If only height increased to 5 cm, volume would rise by 12 cm³ while total surface area would rise by 2(6+2)=16 cm². A useful notebook includes this changed-dimension explanation.
170. Card 28: cuboid volume versus surface area
Card prompt: An ideal closed cuboid has dimensions 9 cm × 7 cm × 11 cm. Use a formula notebook to find its volume and total area of the six outside faces, and check their different units.
Meaning and conditions: Notebook card: cuboid volume=length×width×height, which multiplies three lengths and yields cm³. A separate card says closed cuboid surface area=2(lw+lh+wh) for all six faces, yielding cm². The two formulas describe interior space versus exterior covering.
One worked example: Volume=9×7×11=693 cm³. Surface area=2(63+99+77)=478 cm². A net would show two matching faces of each dimension pair, explaining the factor two.
When this would be wrong: A child who uses 693 as an area or 478 as a volume has chosen a formula for a different quantity. An open-top box would also lack one exterior face, so the closed-box card does not automatically apply to every container.
Check: For volume, divide by one known dimension to recover an area, then by another to recover the remaining length. For surface area, sum all six face areas directly; the result must match 478.
Later retrieval: If only height increased to 12 cm, volume would rise by 63 cm³ while total surface area would rise by 2(9+7)=32 cm². A useful notebook includes this changed-dimension explanation.
Means, frequencies and probability
In means, frequencies and probability, a notebook card should name the question that triggers the formula and the quantity it calculates. Read the worked example as one illustration of the relationship, not as fixed numbers to memorise. Pay attention to units, assumptions and a reverse check. If two formulas use the same letter, define that letter again in the local context.
171. Card 1: weighted mean from frequencies
Card prompt: An exact-value table contains score 2 with frequency 1, and score 3 with frequency 2. Find the mean using the appropriate formula and identify what each symbol represents.
Meaning and conditions: Notebook heading: mean = total of all observations / number of observations. For a value–frequency table, total is Σ(value×frequency); count is Σfrequency. Explain the sigma notation in ordinary words if it is unfamiliar: multiply each value by how many times it occurs, add those contributions and divide by all observed entries.
One worked example: Total score=2×1+3×2=8. Total frequency=1+2=3. Mean=8/3≈2.666667. This differs from simply averaging the two printed score labels when their frequencies differ.
When this would be wrong: Dividing (2+3) by two pretends the two distinct score values occur equally often. A formula card that forgets the frequency column cannot reconstruct the true dataset mean.
Check: The unrounded fraction 8/3 lies between 2 and 3 and multiplying it by 3 restores the total score 8. If a display rounds, expect a small residual in a numeric check.
Later retrieval: If one extra observation of value 3 is added, total becomes 11 across 4 observations. New mean is (11)/(4)≈2.75. Record the changed denominator, not just the new numerator.
172. Card 2: weighted mean from frequencies
Card prompt: An exact-value table contains score 5 with frequency 8, and score 8 with frequency 3. Find the mean using the appropriate formula and identify what each symbol represents.
Meaning and conditions: Notebook heading: mean = total of all observations / number of observations. For a value–frequency table, total is Σ(value×frequency); count is Σfrequency. Explain the sigma notation in ordinary words if it is unfamiliar: multiply each value by how many times it occurs, add those contributions and divide by all observed entries.
One worked example: Total score=5×8+8×3=64. Total frequency=8+3=11. Mean=64/11≈5.818182. This differs from simply averaging the two printed score labels when their frequencies differ.
When this would be wrong: Dividing (5+8) by two pretends the two distinct score values occur equally often. A formula card that forgets the frequency column cannot reconstruct the true dataset mean.
Check: The unrounded fraction 64/11 lies between 5 and 8 and multiplying it by 11 restores the total score 64. If a display rounds, expect a small residual in a numeric check.
Later retrieval: If one extra observation of value 8 is added, total becomes 72 across 12 observations. New mean is (72)/(12)≈6. Record the changed denominator, not just the new numerator.
173. Card 3: weighted mean from frequencies
Card prompt: An exact-value table contains score 8 with frequency 6, and score 13 with frequency 4. Find the mean using the appropriate formula and identify what each symbol represents.
Meaning and conditions: Notebook heading: mean = total of all observations / number of observations. For a value–frequency table, total is Σ(value×frequency); count is Σfrequency. Explain the sigma notation in ordinary words if it is unfamiliar: multiply each value by how many times it occurs, add those contributions and divide by all observed entries.
One worked example: Total score=8×6+13×4=100. Total frequency=6+4=10. Mean=100/10≈10. This differs from simply averaging the two printed score labels when their frequencies differ.
When this would be wrong: Dividing (8+13) by two pretends the two distinct score values occur equally often. A formula card that forgets the frequency column cannot reconstruct the true dataset mean.
Check: The unrounded fraction 100/10 lies between 8 and 13 and multiplying it by 10 restores the total score 100. If a display rounds, expect a small residual in a numeric check.
Later retrieval: If one extra observation of value 13 is added, total becomes 113 across 11 observations. New mean is (113)/(11)≈10.272727. Record the changed denominator, not just the new numerator.
174. Card 4: weighted mean from frequencies
Card prompt: An exact-value table contains score 11 with frequency 4, and score 5 with frequency 5. Find the mean using the appropriate formula and identify what each symbol represents.
Meaning and conditions: Notebook heading: mean = total of all observations / number of observations. For a value–frequency table, total is Σ(value×frequency); count is Σfrequency. Explain the sigma notation in ordinary words if it is unfamiliar: multiply each value by how many times it occurs, add those contributions and divide by all observed entries.
One worked example: Total score=11×4+5×5=69. Total frequency=4+5=9. Mean=69/9≈7.666667. This differs from simply averaging the two printed score labels when their frequencies differ.
When this would be wrong: Dividing (11+5) by two pretends the two distinct score values occur equally often. A formula card that forgets the frequency column cannot reconstruct the true dataset mean.
Check: The unrounded fraction 69/9 lies between 5 and 11 and multiplying it by 9 restores the total score 69. If a display rounds, expect a small residual in a numeric check.
Later retrieval: If one extra observation of value 5 is added, total becomes 74 across 10 observations. New mean is (74)/(10)≈7.4. Record the changed denominator, not just the new numerator.
175. Card 5: weighted mean from frequencies
Card prompt: An exact-value table contains score 3 with frequency 2, and score 10 with frequency 6. Find the mean using the appropriate formula and identify what each symbol represents.
Meaning and conditions: Notebook heading: mean = total of all observations / number of observations. For a value–frequency table, total is Σ(value×frequency); count is Σfrequency. Explain the sigma notation in ordinary words if it is unfamiliar: multiply each value by how many times it occurs, add those contributions and divide by all observed entries.
One worked example: Total score=3×2+10×6=66. Total frequency=2+6=8. Mean=66/8≈8.25. This differs from simply averaging the two printed score labels when their frequencies differ.
When this would be wrong: Dividing (3+10) by two pretends the two distinct score values occur equally often. A formula card that forgets the frequency column cannot reconstruct the true dataset mean.
Check: The unrounded fraction 66/8 lies between 3 and 10 and multiplying it by 8 restores the total score 66. If a display rounds, expect a small residual in a numeric check.
Later retrieval: If one extra observation of value 10 is added, total becomes 76 across 9 observations. New mean is (76)/(9)≈8.444444. Record the changed denominator, not just the new numerator.
176. Card 6: weighted mean from frequencies
Card prompt: An exact-value table contains score 6 with frequency 9, and score 15 with frequency 7. Find the mean using the appropriate formula and identify what each symbol represents.
Meaning and conditions: Notebook heading: mean = total of all observations / number of observations. For a value–frequency table, total is Σ(value×frequency); count is Σfrequency. Explain the sigma notation in ordinary words if it is unfamiliar: multiply each value by how many times it occurs, add those contributions and divide by all observed entries.
One worked example: Total score=6×9+15×7=159. Total frequency=9+7=16. Mean=159/16≈9.9375. This differs from simply averaging the two printed score labels when their frequencies differ.
When this would be wrong: Dividing (6+15) by two pretends the two distinct score values occur equally often. A formula card that forgets the frequency column cannot reconstruct the true dataset mean.
Check: The unrounded fraction 159/16 lies between 6 and 15 and multiplying it by 16 restores the total score 159. If a display rounds, expect a small residual in a numeric check.
Later retrieval: If one extra observation of value 15 is added, total becomes 174 across 17 observations. New mean is (174)/(17)≈10.235294. Record the changed denominator, not just the new numerator.
177. Card 7: weighted mean from frequencies
Card prompt: An exact-value table contains score 9 with frequency 7, and score 7 with frequency 8. Find the mean using the appropriate formula and identify what each symbol represents.
Meaning and conditions: Notebook heading: mean = total of all observations / number of observations. For a value–frequency table, total is Σ(value×frequency); count is Σfrequency. Explain the sigma notation in ordinary words if it is unfamiliar: multiply each value by how many times it occurs, add those contributions and divide by all observed entries.
One worked example: Total score=9×7+7×8=119. Total frequency=7+8=15. Mean=119/15≈7.933333. This differs from simply averaging the two printed score labels when their frequencies differ.
When this would be wrong: Dividing (9+7) by two pretends the two distinct score values occur equally often. A formula card that forgets the frequency column cannot reconstruct the true dataset mean.
Check: The unrounded fraction 119/15 lies between 7 and 9 and multiplying it by 15 restores the total score 119. If a display rounds, expect a small residual in a numeric check.
Later retrieval: If one extra observation of value 7 is added, total becomes 126 across 16 observations. New mean is (126)/(16)≈7.875. Record the changed denominator, not just the new numerator.
178. Card 8: weighted mean from frequencies
Card prompt: An exact-value table contains score 12 with frequency 5, and score 12 with frequency 9. Find the mean using the appropriate formula and identify what each symbol represents.
Meaning and conditions: Notebook heading: mean = total of all observations / number of observations. For a value–frequency table, total is Σ(value×frequency); count is Σfrequency. Explain the sigma notation in ordinary words if it is unfamiliar: multiply each value by how many times it occurs, add those contributions and divide by all observed entries.
One worked example: Total score=12×5+12×9=168. Total frequency=5+9=14. Mean=168/14≈12. This differs from simply averaging the two printed score labels when their frequencies differ.
When this would be wrong: Dividing (12+12) by two pretends the two distinct score values occur equally often. A formula card that forgets the frequency column cannot reconstruct the true dataset mean.
Check: The unrounded fraction 168/14 lies between 12 and 12 and multiplying it by 14 restores the total score 168. If a display rounds, expect a small residual in a numeric check.
Later retrieval: If one extra observation of value 12 is added, total becomes 180 across 15 observations. New mean is (180)/(15)≈12. Record the changed denominator, not just the new numerator.
179. Card 9: weighted mean from frequencies
Card prompt: An exact-value table contains score 4 with frequency 3, and score 4 with frequency 10. Find the mean using the appropriate formula and identify what each symbol represents.
Meaning and conditions: Notebook heading: mean = total of all observations / number of observations. For a value–frequency table, total is Σ(value×frequency); count is Σfrequency. Explain the sigma notation in ordinary words if it is unfamiliar: multiply each value by how many times it occurs, add those contributions and divide by all observed entries.
One worked example: Total score=4×3+4×10=52. Total frequency=3+10=13. Mean=52/13≈4. This differs from simply averaging the two printed score labels when their frequencies differ.
When this would be wrong: Dividing (4+4) by two pretends the two distinct score values occur equally often. A formula card that forgets the frequency column cannot reconstruct the true dataset mean.
Check: The unrounded fraction 52/13 lies between 4 and 4 and multiplying it by 13 restores the total score 52. If a display rounds, expect a small residual in a numeric check.
Later retrieval: If one extra observation of value 4 is added, total becomes 56 across 14 observations. New mean is (56)/(14)≈4. Record the changed denominator, not just the new numerator.
180. Card 10: weighted mean from frequencies
Card prompt: An exact-value table contains score 7 with frequency 1, and score 9 with frequency 11. Find the mean using the appropriate formula and identify what each symbol represents.
Meaning and conditions: Notebook heading: mean = total of all observations / number of observations. For a value–frequency table, total is Σ(value×frequency); count is Σfrequency. Explain the sigma notation in ordinary words if it is unfamiliar: multiply each value by how many times it occurs, add those contributions and divide by all observed entries.
One worked example: Total score=7×1+9×11=106. Total frequency=1+11=12. Mean=106/12≈8.833333. This differs from simply averaging the two printed score labels when their frequencies differ.
When this would be wrong: Dividing (7+9) by two pretends the two distinct score values occur equally often. A formula card that forgets the frequency column cannot reconstruct the true dataset mean.
Check: The unrounded fraction 106/12 lies between 7 and 9 and multiplying it by 12 restores the total score 106. If a display rounds, expect a small residual in a numeric check.
Later retrieval: If one extra observation of value 9 is added, total becomes 115 across 13 observations. New mean is (115)/(13)≈8.846154. Record the changed denominator, not just the new numerator.
181. Card 11: weighted mean from frequencies
Card prompt: An exact-value table contains score 10 with frequency 8, and score 14 with frequency 2. Find the mean using the appropriate formula and identify what each symbol represents.
Meaning and conditions: Notebook heading: mean = total of all observations / number of observations. For a value–frequency table, total is Σ(value×frequency); count is Σfrequency. Explain the sigma notation in ordinary words if it is unfamiliar: multiply each value by how many times it occurs, add those contributions and divide by all observed entries.
One worked example: Total score=10×8+14×2=108. Total frequency=8+2=10. Mean=108/10≈10.8. This differs from simply averaging the two printed score labels when their frequencies differ.
When this would be wrong: Dividing (10+14) by two pretends the two distinct score values occur equally often. A formula card that forgets the frequency column cannot reconstruct the true dataset mean.
Check: The unrounded fraction 108/10 lies between 10 and 14 and multiplying it by 10 restores the total score 108. If a display rounds, expect a small residual in a numeric check.
Later retrieval: If one extra observation of value 14 is added, total becomes 122 across 11 observations. New mean is (122)/(11)≈11.090909. Record the changed denominator, not just the new numerator.
182. Card 12: weighted mean from frequencies
Card prompt: An exact-value table contains score 2 with frequency 6, and score 6 with frequency 3. Find the mean using the appropriate formula and identify what each symbol represents.
Meaning and conditions: Notebook heading: mean = total of all observations / number of observations. For a value–frequency table, total is Σ(value×frequency); count is Σfrequency. Explain the sigma notation in ordinary words if it is unfamiliar: multiply each value by how many times it occurs, add those contributions and divide by all observed entries.
One worked example: Total score=2×6+6×3=30. Total frequency=6+3=9. Mean=30/9≈3.333333. This differs from simply averaging the two printed score labels when their frequencies differ.
When this would be wrong: Dividing (2+6) by two pretends the two distinct score values occur equally often. A formula card that forgets the frequency column cannot reconstruct the true dataset mean.
Check: The unrounded fraction 30/9 lies between 2 and 6 and multiplying it by 9 restores the total score 30. If a display rounds, expect a small residual in a numeric check.
Later retrieval: If one extra observation of value 6 is added, total becomes 36 across 10 observations. New mean is (36)/(10)≈3.6. Record the changed denominator, not just the new numerator.
183. Card 13: weighted mean from frequencies
Card prompt: An exact-value table contains score 5 with frequency 4, and score 11 with frequency 4. Find the mean using the appropriate formula and identify what each symbol represents.
Meaning and conditions: Notebook heading: mean = total of all observations / number of observations. For a value–frequency table, total is Σ(value×frequency); count is Σfrequency. Explain the sigma notation in ordinary words if it is unfamiliar: multiply each value by how many times it occurs, add those contributions and divide by all observed entries.
One worked example: Total score=5×4+11×4=64. Total frequency=4+4=8. Mean=64/8≈8. This differs from simply averaging the two printed score labels when their frequencies differ.
When this would be wrong: Dividing (5+11) by two pretends the two distinct score values occur equally often. A formula card that forgets the frequency column cannot reconstruct the true dataset mean.
Check: The unrounded fraction 64/8 lies between 5 and 11 and multiplying it by 8 restores the total score 64. If a display rounds, expect a small residual in a numeric check.
Later retrieval: If one extra observation of value 11 is added, total becomes 75 across 9 observations. New mean is (75)/(9)≈8.333333. Record the changed denominator, not just the new numerator.
184. Card 14: weighted mean from frequencies
Card prompt: An exact-value table contains score 8 with frequency 2, and score 3 with frequency 5. Find the mean using the appropriate formula and identify what each symbol represents.
Meaning and conditions: Notebook heading: mean = total of all observations / number of observations. For a value–frequency table, total is Σ(value×frequency); count is Σfrequency. Explain the sigma notation in ordinary words if it is unfamiliar: multiply each value by how many times it occurs, add those contributions and divide by all observed entries.
One worked example: Total score=8×2+3×5=31. Total frequency=2+5=7. Mean=31/7≈4.428571. This differs from simply averaging the two printed score labels when their frequencies differ.
When this would be wrong: Dividing (8+3) by two pretends the two distinct score values occur equally often. A formula card that forgets the frequency column cannot reconstruct the true dataset mean.
Check: The unrounded fraction 31/7 lies between 3 and 8 and multiplying it by 7 restores the total score 31. If a display rounds, expect a small residual in a numeric check.
Later retrieval: If one extra observation of value 3 is added, total becomes 34 across 8 observations. New mean is (34)/(8)≈4.25. Record the changed denominator, not just the new numerator.
185. Card 15: weighted mean from frequencies
Card prompt: An exact-value table contains score 11 with frequency 9, and score 8 with frequency 6. Find the mean using the appropriate formula and identify what each symbol represents.
Meaning and conditions: Notebook heading: mean = total of all observations / number of observations. For a value–frequency table, total is Σ(value×frequency); count is Σfrequency. Explain the sigma notation in ordinary words if it is unfamiliar: multiply each value by how many times it occurs, add those contributions and divide by all observed entries.
One worked example: Total score=11×9+8×6=147. Total frequency=9+6=15. Mean=147/15≈9.8. This differs from simply averaging the two printed score labels when their frequencies differ.
When this would be wrong: Dividing (11+8) by two pretends the two distinct score values occur equally often. A formula card that forgets the frequency column cannot reconstruct the true dataset mean.
Check: The unrounded fraction 147/15 lies between 8 and 11 and multiplying it by 15 restores the total score 147. If a display rounds, expect a small residual in a numeric check.
Later retrieval: If one extra observation of value 8 is added, total becomes 155 across 16 observations. New mean is (155)/(16)≈9.6875. Record the changed denominator, not just the new numerator.
186. Card 16: weighted mean from frequencies
Card prompt: An exact-value table contains score 3 with frequency 7, and score 13 with frequency 7. Find the mean using the appropriate formula and identify what each symbol represents.
Meaning and conditions: Notebook heading: mean = total of all observations / number of observations. For a value–frequency table, total is Σ(value×frequency); count is Σfrequency. Explain the sigma notation in ordinary words if it is unfamiliar: multiply each value by how many times it occurs, add those contributions and divide by all observed entries.
One worked example: Total score=3×7+13×7=112. Total frequency=7+7=14. Mean=112/14≈8. This differs from simply averaging the two printed score labels when their frequencies differ.
When this would be wrong: Dividing (3+13) by two pretends the two distinct score values occur equally often. A formula card that forgets the frequency column cannot reconstruct the true dataset mean.
Check: The unrounded fraction 112/14 lies between 3 and 13 and multiplying it by 14 restores the total score 112. If a display rounds, expect a small residual in a numeric check.
Later retrieval: If one extra observation of value 13 is added, total becomes 125 across 15 observations. New mean is (125)/(15)≈8.333333. Record the changed denominator, not just the new numerator.
187. Card 17: weighted mean from frequencies
Card prompt: An exact-value table contains score 6 with frequency 5, and score 5 with frequency 8. Find the mean using the appropriate formula and identify what each symbol represents.
Meaning and conditions: Notebook heading: mean = total of all observations / number of observations. For a value–frequency table, total is Σ(value×frequency); count is Σfrequency. Explain the sigma notation in ordinary words if it is unfamiliar: multiply each value by how many times it occurs, add those contributions and divide by all observed entries.
One worked example: Total score=6×5+5×8=70. Total frequency=5+8=13. Mean=70/13≈5.384615. This differs from simply averaging the two printed score labels when their frequencies differ.
When this would be wrong: Dividing (6+5) by two pretends the two distinct score values occur equally often. A formula card that forgets the frequency column cannot reconstruct the true dataset mean.
Check: The unrounded fraction 70/13 lies between 5 and 6 and multiplying it by 13 restores the total score 70. If a display rounds, expect a small residual in a numeric check.
Later retrieval: If one extra observation of value 5 is added, total becomes 75 across 14 observations. New mean is (75)/(14)≈5.357143. Record the changed denominator, not just the new numerator.
188. Card 18: weighted mean from frequencies
Card prompt: An exact-value table contains score 9 with frequency 3, and score 10 with frequency 9. Find the mean using the appropriate formula and identify what each symbol represents.
Meaning and conditions: Notebook heading: mean = total of all observations / number of observations. For a value–frequency table, total is Σ(value×frequency); count is Σfrequency. Explain the sigma notation in ordinary words if it is unfamiliar: multiply each value by how many times it occurs, add those contributions and divide by all observed entries.
One worked example: Total score=9×3+10×9=117. Total frequency=3+9=12. Mean=117/12≈9.75. This differs from simply averaging the two printed score labels when their frequencies differ.
When this would be wrong: Dividing (9+10) by two pretends the two distinct score values occur equally often. A formula card that forgets the frequency column cannot reconstruct the true dataset mean.
Check: The unrounded fraction 117/12 lies between 9 and 10 and multiplying it by 12 restores the total score 117. If a display rounds, expect a small residual in a numeric check.
Later retrieval: If one extra observation of value 10 is added, total becomes 127 across 13 observations. New mean is (127)/(13)≈9.769231. Record the changed denominator, not just the new numerator.
189. Card 19: weighted mean from frequencies
Card prompt: An exact-value table contains score 12 with frequency 1, and score 15 with frequency 10. Find the mean using the appropriate formula and identify what each symbol represents.
Meaning and conditions: Notebook heading: mean = total of all observations / number of observations. For a value–frequency table, total is Σ(value×frequency); count is Σfrequency. Explain the sigma notation in ordinary words if it is unfamiliar: multiply each value by how many times it occurs, add those contributions and divide by all observed entries.
One worked example: Total score=12×1+15×10=162. Total frequency=1+10=11. Mean=162/11≈14.727273. This differs from simply averaging the two printed score labels when their frequencies differ.
When this would be wrong: Dividing (12+15) by two pretends the two distinct score values occur equally often. A formula card that forgets the frequency column cannot reconstruct the true dataset mean.
Check: The unrounded fraction 162/11 lies between 12 and 15 and multiplying it by 11 restores the total score 162. If a display rounds, expect a small residual in a numeric check.
Later retrieval: If one extra observation of value 15 is added, total becomes 177 across 12 observations. New mean is (177)/(12)≈14.75. Record the changed denominator, not just the new numerator.
190. Card 20: weighted mean from frequencies
Card prompt: An exact-value table contains score 4 with frequency 8, and score 7 with frequency 11. Find the mean using the appropriate formula and identify what each symbol represents.
Meaning and conditions: Notebook heading: mean = total of all observations / number of observations. For a value–frequency table, total is Σ(value×frequency); count is Σfrequency. Explain the sigma notation in ordinary words if it is unfamiliar: multiply each value by how many times it occurs, add those contributions and divide by all observed entries.
One worked example: Total score=4×8+7×11=109. Total frequency=8+11=19. Mean=109/19≈5.736842. This differs from simply averaging the two printed score labels when their frequencies differ.
When this would be wrong: Dividing (4+7) by two pretends the two distinct score values occur equally often. A formula card that forgets the frequency column cannot reconstruct the true dataset mean.
Check: The unrounded fraction 109/19 lies between 4 and 7 and multiplying it by 19 restores the total score 109. If a display rounds, expect a small residual in a numeric check.
Later retrieval: If one extra observation of value 7 is added, total becomes 116 across 20 observations. New mean is (116)/(20)≈5.8. Record the changed denominator, not just the new numerator.
191. Card 21: weighted mean from frequencies
Card prompt: An exact-value table contains score 7 with frequency 6, and score 12 with frequency 2. Find the mean using the appropriate formula and identify what each symbol represents.
Meaning and conditions: Notebook heading: mean = total of all observations / number of observations. For a value–frequency table, total is Σ(value×frequency); count is Σfrequency. Explain the sigma notation in ordinary words if it is unfamiliar: multiply each value by how many times it occurs, add those contributions and divide by all observed entries.
One worked example: Total score=7×6+12×2=66. Total frequency=6+2=8. Mean=66/8≈8.25. This differs from simply averaging the two printed score labels when their frequencies differ.
When this would be wrong: Dividing (7+12) by two pretends the two distinct score values occur equally often. A formula card that forgets the frequency column cannot reconstruct the true dataset mean.
Check: The unrounded fraction 66/8 lies between 7 and 12 and multiplying it by 8 restores the total score 66. If a display rounds, expect a small residual in a numeric check.
Later retrieval: If one extra observation of value 12 is added, total becomes 78 across 9 observations. New mean is (78)/(9)≈8.666667. Record the changed denominator, not just the new numerator.
192. Card 22: weighted mean from frequencies
Card prompt: An exact-value table contains score 10 with frequency 4, and score 4 with frequency 3. Find the mean using the appropriate formula and identify what each symbol represents.
Meaning and conditions: Notebook heading: mean = total of all observations / number of observations. For a value–frequency table, total is Σ(value×frequency); count is Σfrequency. Explain the sigma notation in ordinary words if it is unfamiliar: multiply each value by how many times it occurs, add those contributions and divide by all observed entries.
One worked example: Total score=10×4+4×3=52. Total frequency=4+3=7. Mean=52/7≈7.428571. This differs from simply averaging the two printed score labels when their frequencies differ.
When this would be wrong: Dividing (10+4) by two pretends the two distinct score values occur equally often. A formula card that forgets the frequency column cannot reconstruct the true dataset mean.
Check: The unrounded fraction 52/7 lies between 4 and 10 and multiplying it by 7 restores the total score 52. If a display rounds, expect a small residual in a numeric check.
Later retrieval: If one extra observation of value 4 is added, total becomes 56 across 8 observations. New mean is (56)/(8)≈7. Record the changed denominator, not just the new numerator.
193. Card 23: weighted mean from frequencies
Card prompt: An exact-value table contains score 2 with frequency 2, and score 9 with frequency 4. Find the mean using the appropriate formula and identify what each symbol represents.
Meaning and conditions: Notebook heading: mean = total of all observations / number of observations. For a value–frequency table, total is Σ(value×frequency); count is Σfrequency. Explain the sigma notation in ordinary words if it is unfamiliar: multiply each value by how many times it occurs, add those contributions and divide by all observed entries.
One worked example: Total score=2×2+9×4=40. Total frequency=2+4=6. Mean=40/6≈6.666667. This differs from simply averaging the two printed score labels when their frequencies differ.
When this would be wrong: Dividing (2+9) by two pretends the two distinct score values occur equally often. A formula card that forgets the frequency column cannot reconstruct the true dataset mean.
Check: The unrounded fraction 40/6 lies between 2 and 9 and multiplying it by 6 restores the total score 40. If a display rounds, expect a small residual in a numeric check.
Later retrieval: If one extra observation of value 9 is added, total becomes 49 across 7 observations. New mean is (49)/(7)≈7. Record the changed denominator, not just the new numerator.
194. Card 24: weighted mean from frequencies
Card prompt: An exact-value table contains score 5 with frequency 9, and score 14 with frequency 5. Find the mean using the appropriate formula and identify what each symbol represents.
Meaning and conditions: Notebook heading: mean = total of all observations / number of observations. For a value–frequency table, total is Σ(value×frequency); count is Σfrequency. Explain the sigma notation in ordinary words if it is unfamiliar: multiply each value by how many times it occurs, add those contributions and divide by all observed entries.
One worked example: Total score=5×9+14×5=115. Total frequency=9+5=14. Mean=115/14≈8.214286. This differs from simply averaging the two printed score labels when their frequencies differ.
When this would be wrong: Dividing (5+14) by two pretends the two distinct score values occur equally often. A formula card that forgets the frequency column cannot reconstruct the true dataset mean.
Check: The unrounded fraction 115/14 lies between 5 and 14 and multiplying it by 14 restores the total score 115. If a display rounds, expect a small residual in a numeric check.
Later retrieval: If one extra observation of value 14 is added, total becomes 129 across 15 observations. New mean is (129)/(15)≈8.6. Record the changed denominator, not just the new numerator.
195. Card 25: weighted mean from frequencies
Card prompt: An exact-value table contains score 8 with frequency 7, and score 6 with frequency 6. Find the mean using the appropriate formula and identify what each symbol represents.
Meaning and conditions: Notebook heading: mean = total of all observations / number of observations. For a value–frequency table, total is Σ(value×frequency); count is Σfrequency. Explain the sigma notation in ordinary words if it is unfamiliar: multiply each value by how many times it occurs, add those contributions and divide by all observed entries.
One worked example: Total score=8×7+6×6=92. Total frequency=7+6=13. Mean=92/13≈7.076923. This differs from simply averaging the two printed score labels when their frequencies differ.
When this would be wrong: Dividing (8+6) by two pretends the two distinct score values occur equally often. A formula card that forgets the frequency column cannot reconstruct the true dataset mean.
Check: The unrounded fraction 92/13 lies between 6 and 8 and multiplying it by 13 restores the total score 92. If a display rounds, expect a small residual in a numeric check.
Later retrieval: If one extra observation of value 6 is added, total becomes 98 across 14 observations. New mean is (98)/(14)≈7. Record the changed denominator, not just the new numerator.
196. Card 26: weighted mean from frequencies
Card prompt: An exact-value table contains score 11 with frequency 5, and score 11 with frequency 7. Find the mean using the appropriate formula and identify what each symbol represents.
Meaning and conditions: Notebook heading: mean = total of all observations / number of observations. For a value–frequency table, total is Σ(value×frequency); count is Σfrequency. Explain the sigma notation in ordinary words if it is unfamiliar: multiply each value by how many times it occurs, add those contributions and divide by all observed entries.
One worked example: Total score=11×5+11×7=132. Total frequency=5+7=12. Mean=132/12≈11. This differs from simply averaging the two printed score labels when their frequencies differ.
When this would be wrong: Dividing (11+11) by two pretends the two distinct score values occur equally often. A formula card that forgets the frequency column cannot reconstruct the true dataset mean.
Check: The unrounded fraction 132/12 lies between 11 and 11 and multiplying it by 12 restores the total score 132. If a display rounds, expect a small residual in a numeric check.
Later retrieval: If one extra observation of value 11 is added, total becomes 143 across 13 observations. New mean is (143)/(13)≈11. Record the changed denominator, not just the new numerator.
197. Card 27: weighted mean from frequencies
Card prompt: An exact-value table contains score 3 with frequency 3, and score 3 with frequency 8. Find the mean using the appropriate formula and identify what each symbol represents.
Meaning and conditions: Notebook heading: mean = total of all observations / number of observations. For a value–frequency table, total is Σ(value×frequency); count is Σfrequency. Explain the sigma notation in ordinary words if it is unfamiliar: multiply each value by how many times it occurs, add those contributions and divide by all observed entries.
One worked example: Total score=3×3+3×8=33. Total frequency=3+8=11. Mean=33/11≈3. This differs from simply averaging the two printed score labels when their frequencies differ.
When this would be wrong: Dividing (3+3) by two pretends the two distinct score values occur equally often. A formula card that forgets the frequency column cannot reconstruct the true dataset mean.
Check: The unrounded fraction 33/11 lies between 3 and 3 and multiplying it by 11 restores the total score 33. If a display rounds, expect a small residual in a numeric check.
Later retrieval: If one extra observation of value 3 is added, total becomes 36 across 12 observations. New mean is (36)/(12)≈3. Record the changed denominator, not just the new numerator.
Building and retrieving a personal notebook
In building and retrieving a personal notebook, a notebook card should name the question that triggers the formula and the quantity it calculates. Read the worked example as one illustration of the relationship, not as fixed numbers to memorise. Pay attention to units, assumptions and a reverse check. If two formulas use the same letter, define that letter again in the local context.
198. Write one question at the top of each card
Card prompt: A formula notebook entry simply says ‘area = base times height’. Is that enough?
Meaning and conditions: A practical formula notebook should explain the question type, the symbols and their units, and the assumptions that make the relationship valid. A card is for understanding and later retrieval, not simply for decorating a page with equations.
One worked example: Not for every shape. Identify whether the shape is a rectangle, parallelogram or triangle and what ‘height’ means, then write the correct formula with a sketch.
When this would be wrong: A generic card can encourage using bh for a triangle when ½bh is required.
Check: Make the card’s first line a question like ‘Area of which figure?’.
Later retrieval: Write a changed-number practice prompt beside this rule and hide the full working. On the next suitable day, ask the pupil to choose the correct relationship independently and to explain one condition or limit. Make the card’s first line a question like ‘Area of which figure?’.
199. Define every symbol locally
Card prompt: A card uses b in y=mx+b and A=½bh. Does b have one fixed meaning?
Meaning and conditions: A practical formula notebook should explain the question type, the symbols and their units, and the assumptions that make the relationship valid. A card is for understanding and later retrieval, not simply for decorating a page with equations.
One worked example: No. In a line rule b is often y-intercept; in triangle area it is base length. The heading and definitions provide context.
When this would be wrong: Letters do not carry one universal meaning across all mathematics.
Check: Write ‘b=intercept’ and ‘b=base’ on their respective cards.
Later retrieval: Write a changed-number practice prompt beside this rule and hide the full working. On the next suitable day, ask the pupil to choose the correct relationship independently and to explain one condition or limit. Write ‘b=intercept’ and ‘b=base’ on their respective cards.
200. Show one worked example, not ten copied ones
Card prompt: A card contains 12 identical substituted answers. Is that necessary?
Meaning and conditions: A practical formula notebook should explain the question type, the symbols and their units, and the assumptions that make the relationship valid. A card is for understanding and later retrieval, not simply for decorating a page with equations.
One worked example: Not usually. One carefully explained example and one changed-number retrieval prompt can be more useful.
When this would be wrong: Copying many steps may become a page-count goal instead of understanding.
Check: Cover the worked example and attempt a changed case.
Later retrieval: Write a changed-number practice prompt beside this rule and hide the full working. On the next suitable day, ask the pupil to choose the correct relationship independently and to explain one condition or limit. Cover the worked example and attempt a changed case.
201. Add a dimensional check
Card prompt: A formula card for volume shows 4×3×2=24 but no unit. What should be written?
Meaning and conditions: A practical formula notebook should explain the question type, the symbols and their units, and the assumptions that make the relationship valid. A card is for understanding and later retrieval, not simply for decorating a page with equations.
One worked example: If inputs are centimetres, output is 24 cm³; the three length factors create cubic units.
When this would be wrong: An unlabelled numerical result may be confused with surface area.
Check: Use cm³ beside volume and cm² beside surface area.
Later retrieval: Write a changed-number practice prompt beside this rule and hide the full working. On the next suitable day, ask the pupil to choose the correct relationship independently and to explain one condition or limit. Use cm³ beside volume and cm² beside surface area.
202. Record the condition under which a formula works
Card prompt: A speed formula card states d=st without saying speed is constant. Is it always a real journey law?
Meaning and conditions: A practical formula notebook should explain the question type, the symbols and their units, and the assumptions that make the relationship valid. A card is for understanding and later retrieval, not simply for decorating a page with equations.
One worked example: The equation can describe distance from a constant speed s over time t, while average speed uses total distance/time. State the model assumption.
When this would be wrong: Using a constant-rate formula for variable instantaneous speed without qualification can mislead.
Check: Label ‘constant speed model’ or ‘average over interval’.
Later retrieval: Write a changed-number practice prompt beside this rule and hide the full working. On the next suitable day, ask the pupil to choose the correct relationship independently and to explain one condition or limit. Label ‘constant speed model’ or ‘average over interval’.
203. Distinguish exact and approximate results
Card prompt: A circle-area card writes π=3.14. Should it say exactly equal?
Meaning and conditions: A practical formula notebook should explain the question type, the symbols and their units, and the assumptions that make the relationship valid. A card is for understanding and later retrieval, not simply for decorating a page with equations.
One worked example: No. π is an exact constant and 3.14 is an approximation. Keep π until requested final rounding.
When this would be wrong: Premature rounding can affect multiple later calculation steps.
Check: Use the ≈ sign with decimal approximations.
Later retrieval: Write a changed-number practice prompt beside this rule and hide the full working. On the next suitable day, ask the pupil to choose the correct relationship independently and to explain one condition or limit. Use the ≈ sign with decimal approximations.
204. Make a reverse-check line
Card prompt: A card says rectangle area=A=lw. How can the student check a calculated width?
Meaning and conditions: A practical formula notebook should explain the question type, the symbols and their units, and the assumptions that make the relationship valid. A card is for understanding and later retrieval, not simply for decorating a page with equations.
One worked example: Multiply the recovered width by the stated length and reproduce the original area.
When this would be wrong: Remembering a formula does not guarantee that it was rearranged or applied correctly.
Check: Write ‘check: length×found width=given area’.
Later retrieval: Write a changed-number practice prompt beside this rule and hide the full working. On the next suitable day, ask the pupil to choose the correct relationship independently and to explain one condition or limit. Write ‘check: length×found width=given area’.
205. Separately label derived versus supplied formulae
Card prompt: A note includes a later-stage sector formula but the school’s current chapter only covers circle area. How should it be labelled?
Meaning and conditions: A practical formula notebook should explain the question type, the symbols and their units, and the assumptions that make the relationship valid. A card is for understanding and later retrieval, not simply for decorating a page with equations.
One worked example: Mark ‘optional next-stage extension’ and keep current school-required concepts clearly separated.
When this would be wrong: Treating all online formula examples as examinable this term can confuse the pupil.
Check: Keep a ‘current school topic’ column.
Later retrieval: Write a changed-number practice prompt beside this rule and hide the full working. On the next suitable day, ask the pupil to choose the correct relationship independently and to explain one condition or limit. Keep a ‘current school topic’ column.
206. Formula names should be descriptive
Card prompt: A card heading simply says ‘Formula 7’. Is that helpful for retrieval?
Meaning and conditions: A practical formula notebook should explain the question type, the symbols and their units, and the assumptions that make the relationship valid. A card is for understanding and later retrieval, not simply for decorating a page with equations.
One worked example: A heading such as ‘Perimeter of a rectangle’ states the problem type and output.
When this would be wrong: Number-only headings make a pupil rely on positional memory.
Check: Ask the learner to name the formula from a question with no formula number.
Later retrieval: Write a changed-number practice prompt beside this rule and hide the full working. On the next suitable day, ask the pupil to choose the correct relationship independently and to explain one condition or limit. Ask the learner to name the formula from a question with no formula number.
207. One small sketch can explain a factor
Card prompt: Why does triangle area have ½?
Meaning and conditions: A practical formula notebook should explain the question type, the symbols and their units, and the assumptions that make the relationship valid. A card is for understanding and later retrieval, not simply for decorating a page with equations.
One worked example: Two congruent copies of a triangle can form a corresponding parallelogram with base b and perpendicular height h, explaining half of bh.
When this would be wrong: Memorising ‘divide by two’ without a shape picture can lead to using it on every polygon.
Check: Draw a base and perpendicular height to show the two-copy argument.
Later retrieval: Write a changed-number practice prompt beside this rule and hide the full working. On the next suitable day, ask the pupil to choose the correct relationship independently and to explain one condition or limit. Draw a base and perpendicular height to show the two-copy argument.
208. Do not substitute before identifying the requested unknown
Card prompt: A question asks for height but a formula notebook only has A=½bh. What is the first step?
Meaning and conditions: A practical formula notebook should explain the question type, the symbols and their units, and the assumptions that make the relationship valid. A card is for understanding and later retrieval, not simply for decorating a page with equations.
One worked example: Identify h as unknown and rearrange or use inverse steps before putting numbers in.
When this would be wrong: Substituting all values randomly without knowing which symbol is unknown may result in wrong formula entry.
Check: Write ‘unknown: h; inputs: area and base’.
Later retrieval: Write a changed-number practice prompt beside this rule and hide the full working. On the next suitable day, ask the pupil to choose the correct relationship independently and to explain one condition or limit. Write ‘unknown: h; inputs: area and base’.
209. Not every ratio is part of a whole
Card prompt: A card says share = part/other×total for A:B. Is it generally correct?
Meaning and conditions: A practical formula notebook should explain the question type, the symbols and their units, and the assumptions that make the relationship valid. A card is for understanding and later retrieval, not simply for decorating a page with equations.
One worked example: No. If A:B=a:b, A/whole=a/(a+b), not a/b.
When this would be wrong: A part-to-part ratio differs from a part-to-whole fraction.
Check: Write both quantities and count combined ratio parts.
Later retrieval: Write a changed-number practice prompt beside this rule and hide the full working. On the next suitable day, ask the pupil to choose the correct relationship independently and to explain one condition or limit. Write both quantities and count combined ratio parts.
210. Formula selection comes before arithmetic
Card prompt: A rectangle question asks for outside edging length. Should the student use A=lw?
Meaning and conditions: A practical formula notebook should explain the question type, the symbols and their units, and the assumptions that make the relationship valid. A card is for understanding and later retrieval, not simply for decorating a page with equations.
One worked example: No. Use perimeter P=2(l+w), because edging follows boundary length.
When this would be wrong: Formula recall without interpreting the requested quantity can cause systematic errors.
Check: Underline ‘edging’ and predict length units.
Later retrieval: Write a changed-number practice prompt beside this rule and hide the full working. On the next suitable day, ask the pupil to choose the correct relationship independently and to explain one condition or limit. Underline ‘edging’ and predict length units.
211. A formula card should not assert a grade guarantee
Card prompt: Does completing a personal notebook guarantee a top SEC grade?
Meaning and conditions: A practical formula notebook should explain the question type, the symbols and their units, and the assumptions that make the relationship valid. A card is for understanding and later retrieval, not simply for decorating a page with equations.
One worked example: No. A notebook can support retrieval and error checking but does not by itself measure all skills or future examination performance.
When this would be wrong: Turning a study aid into a promise exceeds the evidence.
Check: Use unseen school-aligned questions to assess progress.
Later retrieval: Write a changed-number practice prompt beside this rule and hide the full working. On the next suitable day, ask the pupil to choose the correct relationship independently and to explain one condition or limit. Use unseen school-aligned questions to assess progress.
212. Separate the source and the student’s explanation
Card prompt: The notebook copies a teacher-issued formula. What additional note helps?
Meaning and conditions: A practical formula notebook should explain the question type, the symbols and their units, and the assumptions that make the relationship valid. A card is for understanding and later retrieval, not simply for decorating a page with equations.
One worked example: Add the student’s own explanation of what each symbol measures and one original example, while respecting the source.
When this would be wrong: A copied formula without meaning may not transfer to new stories.
Check: Explain the unit of every input aloud.
Later retrieval: Write a changed-number practice prompt beside this rule and hide the full working. On the next suitable day, ask the pupil to choose the correct relationship independently and to explain one condition or limit. Explain the unit of every input aloud.
213. A notebook should be revised after a mistake
Card prompt: A pupil repeatedly confuses circumference and area. What should change?
Meaning and conditions: A practical formula notebook should explain the question type, the symbols and their units, and the assumptions that make the relationship valid. A card is for understanding and later retrieval, not simply for decorating a page with equations.
One worked example: Add a short ‘length around / region inside’ contrast with cm and cm², then retest using new radii.
When this would be wrong: Copying the same two formulas without identifying the confusion leaves the gap unaddressed.
Check: Compare an exact perimeter and an area with their separate units.
Later retrieval: Write a changed-number practice prompt beside this rule and hide the full working. On the next suitable day, ask the pupil to choose the correct relationship independently and to explain one condition or limit. Compare an exact perimeter and an area with their separate units.
214. Formula cards may include algebraic derivations
Card prompt: A card says y=mx+b and gives y=11 at x=2 with m=3. What is b?
Meaning and conditions: A practical formula notebook should explain the question type, the symbols and their units, and the assumptions that make the relationship valid. A card is for understanding and later retrieval, not simply for decorating a page with equations.
One worked example: b=11−3×2=5. A short rearrangement demonstrates the symbol’s role.
When this would be wrong: Declaring b=11 treats the observed output as the intercept.
Check: Substitute x=0 into y=3x+5.
Later retrieval: Write a changed-number practice prompt beside this rule and hide the full working. On the next suitable day, ask the pupil to choose the correct relationship independently and to explain one condition or limit. Substitute x=0 into y=3x+5.
215. One formula can produce many outputs
Card prompt: Does A=lw mean every rectangle with length five has equal area?
Meaning and conditions: A practical formula notebook should explain the question type, the symbols and their units, and the assumptions that make the relationship valid. A card is for understanding and later retrieval, not simply for decorating a page with equations.
One worked example: No. Width also matters. The formula is a relation, not a fixed numeric answer.
When this would be wrong: Treating one known variable as enough information creates guesses.
Check: 5×2 and 5×4 yield different areas.
Later retrieval: Write a changed-number practice prompt beside this rule and hide the full working. On the next suitable day, ask the pupil to choose the correct relationship independently and to explain one condition or limit. 5×2 and 5×4 yield different areas.
216. A volume unit card should distinguish litres
Card prompt: What is the useful link from cm³ to mL?
Meaning and conditions: A practical formula notebook should explain the question type, the symbols and their units, and the assumptions that make the relationship valid. A card is for understanding and later retrieval, not simply for decorating a page with equations.
One worked example: 1 cm³=1 mL and 1,000 mL=1 L. It is a volume conversion, not a square-area conversion.
When this would be wrong: Confusing cm² with mL changes dimensions.
Check: Convert 2,500 cm³ to 2.5 L.
Later retrieval: Write a changed-number practice prompt beside this rule and hide the full working. On the next suitable day, ask the pupil to choose the correct relationship independently and to explain one condition or limit. Convert 2,500 cm³ to 2.5 L.
217. Keep a worked example small and correct
Card prompt: A card includes a long worked problem with one incorrect sign. Should it remain?
Meaning and conditions: A practical formula notebook should explain the question type, the symbols and their units, and the assumptions that make the relationship valid. A card is for understanding and later retrieval, not simply for decorating a page with equations.
One worked example: No. Correct the first invalid transformation before treating the card as a reusable reference.
When this would be wrong: A neat-looking incorrect example can reinforce an error across future practice.
Check: Substitute the answer into the original expression.
Later retrieval: Write a changed-number practice prompt beside this rule and hide the full working. On the next suitable day, ask the pupil to choose the correct relationship independently and to explain one condition or limit. Substitute the answer into the original expression.
218. Use both forward and reverse questions
Card prompt: A child can find price after a 20% discount but not original price from the sale price. What should be added?
Meaning and conditions: A practical formula notebook should explain the question type, the symbols and their units, and the assumptions that make the relationship valid. A card is for understanding and later retrieval, not simply for decorating a page with equations.
One worked example: A reverse card: sale=0.8×original, hence original=sale/0.8.
When this would be wrong: One-way memorisation may not show relational understanding.
Check: A $72 sale at 20% off comes from $90.
Later retrieval: Write a changed-number practice prompt beside this rule and hide the full working. On the next suitable day, ask the pupil to choose the correct relationship independently and to explain one condition or limit. A $72 sale at 20% off comes from $90.
219. Include a boundary and sign check
Card prompt: The formula gives P(event)=7/6. What should the pupil notice?
Meaning and conditions: A practical formula notebook should explain the question type, the symbols and their units, and the assumptions that make the relationship valid. A card is for understanding and later retrieval, not simply for decorating a page with equations.
One worked example: A probability cannot exceed one. Check numerator count and denominator of sample space.
When this would be wrong: A device display does not certify a probability model.
Check: Return to 0≤P≤1.
Later retrieval: Write a changed-number practice prompt beside this rule and hide the full working. On the next suitable day, ask the pupil to choose the correct relationship independently and to explain one condition or limit. Return to 0≤P≤1.
220. Mark formulas by prerequisite
Card prompt: A later quadratic rule uses negative squaring but the learner struggles with signed multiplication. What next?
Meaning and conditions: A practical formula notebook should explain the question type, the symbols and their units, and the assumptions that make the relationship valid. A card is for understanding and later retrieval, not simply for decorating a page with equations.
One worked example: Repair signed arithmetic before adding the advanced formula. The notebook’s order should follow actual prerequisite needs.
When this would be wrong: An advanced formula may amplify an earlier weakness.
Check: Complete a changed negative-number question independently first.
Later retrieval: Write a changed-number practice prompt beside this rule and hide the full working. On the next suitable day, ask the pupil to choose the correct relationship independently and to explain one condition or limit. Complete a changed negative-number question independently first.
221. Use one card for a mistaken unit conversion
Card prompt: How should cm² to m² be noted?
Meaning and conditions: A practical formula notebook should explain the question type, the symbols and their units, and the assumptions that make the relationship valid. A card is for understanding and later retrieval, not simply for decorating a page with equations.
One worked example: 1 m²=10,000 cm² because 100 cm along two dimensions gives 100² square centimetres.
When this would be wrong: Writing 1 m²=100 cm² uses a length factor only once.
Check: Reverse convert 2 m² to 20,000 cm².
Later retrieval: Write a changed-number practice prompt beside this rule and hide the full working. On the next suitable day, ask the pupil to choose the correct relationship independently and to explain one condition or limit. Reverse convert 2 m² to 20,000 cm².
222. Use one card for a cubic conversion
Card prompt: How should cm³ to m³ be noted?
Meaning and conditions: A practical formula notebook should explain the question type, the symbols and their units, and the assumptions that make the relationship valid. A card is for understanding and later retrieval, not simply for decorating a page with equations.
One worked example: 1 m³=1,000,000 cm³ because 100³ cubic centimetres fill the metre cube.
When this would be wrong: Area conversion factor 10,000 is not sufficient for volume.
Check: 0.01 m³ is 10,000 cm³.
Later retrieval: Write a changed-number practice prompt beside this rule and hide the full working. On the next suitable day, ask the pupil to choose the correct relationship independently and to explain one condition or limit. 0.01 m³ is 10,000 cm³.
223. A formula does not fix ambiguous diagram labels
Card prompt: A triangle diagram gives a slanted side seven but no perpendicular height. Can A=½×base×7 always be used?
Meaning and conditions: A practical formula notebook should explain the question type, the symbols and their units, and the assumptions that make the relationship valid. A card is for understanding and later retrieval, not simply for decorating a page with equations.
One worked example: No. The seven must be perpendicular height to the chosen base for that substitution.
When this would be wrong: Assuming any vertex-to-edge side is the altitude changes area.
Check: Look for a right-angle marker or statement.
Later retrieval: Write a changed-number practice prompt beside this rule and hide the full working. On the next suitable day, ask the pupil to choose the correct relationship independently and to explain one condition or limit. Look for a right-angle marker or statement.
224. A calculator reminder belongs beside a grouped formula
Card prompt: A mean card says sum readings divided by count. What entry reminder helps?
Meaning and conditions: A practical formula notebook should explain the question type, the symbols and their units, and the assumptions that make the relationship valid. A card is for understanding and later retrieval, not simply for decorating a page with equations.
One worked example: Use parentheses around the entire sum before dividing, for example (3+5+7)/3.
When this would be wrong: Typing 3+5+7/3 divides only the last term under standard precedence.
Check: Mean of three, five and seven is five.
Later retrieval: Write a changed-number practice prompt beside this rule and hide the full working. On the next suitable day, ask the pupil to choose the correct relationship independently and to explain one condition or limit. Mean of three, five and seven is five.
225. Syllabus year and paper rules must be verified
Card prompt: Is a formula seen on a 2027 K110 source automatically the exact supplied formula sheet for a future cohort?
Meaning and conditions: A practical formula notebook should explain the question type, the symbols and their units, and the assumptions that make the relationship valid. A card is for understanding and later retrieval, not simply for decorating a page with equations.
One worked example: No. The exam’s own year and instructions govern. Keep source date and use school guidance.
When this would be wrong: Assuming a later or different cohort uses identical paper provisions can mislead.
Check: Consult the actual official syllabus and paper materials for the student’s year.
Later retrieval: Write a changed-number practice prompt beside this rule and hide the full working. On the next suitable day, ask the pupil to choose the correct relationship independently and to explain one condition or limit. Consult the actual official syllabus and paper materials for the student’s year.
226. Formula without context can be misleading
Card prompt: Is the line ‘P=2πr’ enough to know what P measures?
Meaning and conditions: A practical formula notebook should explain the question type, the symbols and their units, and the assumptions that make the relationship valid. A card is for understanding and later retrieval, not simply for decorating a page with equations.
One worked example: Only if labelled: here it could represent circle perimeter/circumference for radius r. Definitions prevent ambiguity.
When this would be wrong: A symbol like P can elsewhere mean probability or payment.
Check: Write ‘circumference (cm)’ above the formula.
Later retrieval: Write a changed-number practice prompt beside this rule and hide the full working. On the next suitable day, ask the pupil to choose the correct relationship independently and to explain one condition or limit. Write ‘circumference (cm)’ above the formula.
227. Use errors as notebook prompts
Card prompt: A pupil loses the minus in y=−2x+3. What note helps?
Meaning and conditions: A practical formula notebook should explain the question type, the symbols and their units, and the assumptions that make the relationship valid. A card is for understanding and later retrieval, not simply for decorating a page with equations.
One worked example: Add a signed-substitution example with x=−4, yielding y=11, and a first-error reminder.
When this would be wrong: An extra generic formula page would not target the sign issue.
Check: Check −2(−4)=+8.
Later retrieval: Write a changed-number practice prompt beside this rule and hide the full working. On the next suitable day, ask the pupil to choose the correct relationship independently and to explain one condition or limit. Check −2(−4)=+8.
228. Model assumption belongs with direct proportion
Card prompt: A cost model C=kn assumes what?
Meaning and conditions: A practical formula notebook should explain the question type, the symbols and their units, and the assumptions that make the relationship valid. A card is for understanding and later retrieval, not simply for decorating a page with equations.
One worked example: No fixed fee and constant per-item rate k over the stated range. With a fixed charge, C=F+kn instead.
When this would be wrong: Misclassifying a fixed-fee line as direct proportion can distort ratios.
Check: Check value at n=0.
Later retrieval: Write a changed-number practice prompt beside this rule and hide the full working. On the next suitable day, ask the pupil to choose the correct relationship independently and to explain one condition or limit. Check value at n=0.
229. A good notebook remains short enough to retrieve
Card prompt: Should a pupil copy every worked example in a 40,000-word guide into one notebook?
Meaning and conditions: A practical formula notebook should explain the question type, the symbols and their units, and the assumptions that make the relationship valid. A card is for understanding and later retrieval, not simply for decorating a page with equations.
One worked example: No. Select the current formula, a definition, one meaningful example, one common mistake and one changed-number retest.
When this would be wrong: Large repetitive notebooks can become difficult to use in revision.
Check: Aim for a concise card that can be explained without the model.
Later retrieval: Write a changed-number practice prompt beside this rule and hide the full working. On the next suitable day, ask the pupil to choose the correct relationship independently and to explain one condition or limit. Aim for a concise card that can be explained without the model.
230. Classify the units on a graph rule
Card prompt: A line uses time seconds horizontally and distance centimetres vertically. What are units of m in y=mx+b?
Meaning and conditions: A practical formula notebook should explain the question type, the symbols and their units, and the assumptions that make the relationship valid. A card is for understanding and later retrieval, not simply for decorating a page with equations.
One worked example: cm/s for the gradient; b has cm units for starting distance.
When this would be wrong: Treating m as unitless loses physical meaning.
Check: Rise centimetres divided by run seconds.
Later retrieval: Write a changed-number practice prompt beside this rule and hide the full working. On the next suitable day, ask the pupil to choose the correct relationship independently and to explain one condition or limit. Rise centimetres divided by run seconds.
231. One card cannot replace the teacher’s examples
Card prompt: A school teacher uses a specific diagram convention. Should a student discard it for an internet notebook?
Meaning and conditions: A practical formula notebook should explain the question type, the symbols and their units, and the assumptions that make the relationship valid. A card is for understanding and later retrieval, not simply for decorating a page with equations.
One worked example: No. Use the actual school terminology and teacher instructions; a personal card is a supplementary explanation.
When this would be wrong: Conflicting diagram labels can confuse otherwise valid knowledge.
Check: Match the source and requested notation.
Later retrieval: Write a changed-number practice prompt beside this rule and hide the full working. On the next suitable day, ask the pupil to choose the correct relationship independently and to explain one condition or limit. Match the source and requested notation.
232. Use an explanation of why formula applies
Card prompt: A prism volume card says V=Ah. What does A mean?
Meaning and conditions: A practical formula notebook should explain the question type, the symbols and their units, and the assumptions that make the relationship valid. A card is for understanding and later retrieval, not simply for decorating a page with equations.
One worked example: Area of the uniform cross-section perpendicular to the prism length/height h; it must be appropriately defined.
When this would be wrong: Using arbitrary side area instead of base or cross-sectional area changes volume.
Check: If A=12 cm² and h=5 cm, volume is 60 cm³.
Later retrieval: Write a changed-number practice prompt beside this rule and hide the full working. On the next suitable day, ask the pupil to choose the correct relationship independently and to explain one condition or limit. If A=12 cm² and h=5 cm, volume is 60 cm³.
233. A notebook is a learning aid, not an assessment record
Card prompt: A pupil has a complete neat formula card but cannot solve one unseen question. Is the topic mastered?
Meaning and conditions: A practical formula notebook should explain the question type, the symbols and their units, and the assumptions that make the relationship valid. A card is for understanding and later retrieval, not simply for decorating a page with equations.
One worked example: Not demonstrated. A changed independent question is needed to test actual use.
When this would be wrong: Neat presentation can conceal uncertain method selection.
Check: Record first-error and delayed retest separately.
Later retrieval: Write a changed-number practice prompt beside this rule and hide the full working. On the next suitable day, ask the pupil to choose the correct relationship independently and to explain one condition or limit. Record first-error and delayed retest separately.
234. The same formula may be written equivalently
Card prompt: Are P=2(l+w) and P=2l+2w equivalent for a rectangle?
Meaning and conditions: A practical formula notebook should explain the question type, the symbols and their units, and the assumptions that make the relationship valid. A card is for understanding and later retrieval, not simply for decorating a page with equations.
One worked example: Yes. Distribution makes them identical expressions.
When this would be wrong: Treating differently formatted formulas as different physical laws.
Check: Substitute l=3,w=4 to get fourteen both ways.
Later retrieval: Write a changed-number practice prompt beside this rule and hide the full working. On the next suitable day, ask the pupil to choose the correct relationship independently and to explain one condition or limit. Substitute l=3,w=4 to get fourteen both ways.
235. A ratio card can contain an explicit unknown unit
Card prompt: If a:b=2:3 and total is 40, what does one part equal?
Meaning and conditions: A practical formula notebook should explain the question type, the symbols and their units, and the assumptions that make the relationship valid. A card is for understanding and later retrieval, not simply for decorating a page with equations.
One worked example: Five equal parts total forty, so one part eight; shares sixteen and twenty-four.
When this would be wrong: Interpreting ratio labels as actual item counts ignores scale.
Check: 16+24=40 and 16:24=2:3.
Later retrieval: Write a changed-number practice prompt beside this rule and hide the full working. On the next suitable day, ask the pupil to choose the correct relationship independently and to explain one condition or limit. 16+24=40 and 16:24=2:3.
236. An equation formula cannot be divided by zero
Card prompt: In x=(y−b)/m, what restriction matters?
Meaning and conditions: A practical formula notebook should explain the question type, the symbols and their units, and the assumptions that make the relationship valid. A card is for understanding and later retrieval, not simply for decorating a page with equations.
One worked example: m≠0. If m=0, the line is constant y=b and x is not uniquely determined from y=b.
When this would be wrong: Blind division by zero is invalid.
Check: State the coefficient before isolating a variable.
Later retrieval: Write a changed-number practice prompt beside this rule and hide the full working. On the next suitable day, ask the pupil to choose the correct relationship independently and to explain one condition or limit. State the coefficient before isolating a variable.
237. Diagram-based understanding survives lost memory
Card prompt: If a pupil forgets trapezium area formula, what model can rebuild it?
Meaning and conditions: A practical formula notebook should explain the question type, the symbols and their units, and the assumptions that make the relationship valid. A card is for understanding and later retrieval, not simply for decorating a page with equations.
One worked example: Two copies of the trapezium can form a parallelogram with base equal to sum of the parallel sides and the same height, so A=½(a+b)h.
When this would be wrong: Trying an unrelated perimeter formula as a guess is not justified.
Check: Check for a=4,b=6,h=3, area fifteen.
Later retrieval: Write a changed-number practice prompt beside this rule and hide the full working. On the next suitable day, ask the pupil to choose the correct relationship independently and to explain one condition or limit. Check for a=4,b=6,h=3, area fifteen.
238. Retrieve a rule before reading the card
Card prompt: Why hide a formula’s answer during practice?
Meaning and conditions: A practical formula notebook should explain the question type, the symbols and their units, and the assumptions that make the relationship valid. A card is for understanding and later retrieval, not simply for decorating a page with equations.
One worked example: To test whether the learner can recall and choose the relationship independently rather than merely recognise a familiar display.
When this would be wrong: Constant visible models can create false fluency.
Check: Show the card after the attempt, then retest with changed quantities.
Later retrieval: Write a changed-number practice prompt beside this rule and hide the full working. On the next suitable day, ask the pupil to choose the correct relationship independently and to explain one condition or limit. Show the card after the attempt, then retest with changed quantities.
239. Prioritise the next school chapter
Card prompt: A notebook contains arcs, cylinders and advanced identities, but school is teaching linear equations. What should be revised?
Meaning and conditions: A practical formula notebook should explain the question type, the symbols and their units, and the assumptions that make the relationship valid. A card is for understanding and later retrieval, not simply for decorating a page with equations.
One worked example: Prioritise the current linear-equation prerequisites and relevant teacher-issued materials; reserve optional extensions separately.
When this would be wrong: A long list of hard formulas is not automatically better preparation.
Check: Choose the school-relevant card and one changed equation.
Later retrieval: Write a changed-number practice prompt beside this rule and hide the full working. On the next suitable day, ask the pupil to choose the correct relationship independently and to explain one condition or limit. Choose the school-relevant card and one changed equation.
240. Use a reverse denominator check
Card prompt: A fraction card has A=(b+c)/d. What should be entered?
Meaning and conditions: A practical formula notebook should explain the question type, the symbols and their units, and the assumptions that make the relationship valid. A card is for understanding and later retrieval, not simply for decorating a page with equations.
One worked example: Group the numerator (b+c) and divide the whole sum by nonzero d.
When this would be wrong: Typing b+c/d divides only c under ordinary precedence.
Check: For b=2,c=4,d=3, result two.
Later retrieval: Write a changed-number practice prompt beside this rule and hide the full working. On the next suitable day, ask the pupil to choose the correct relationship independently and to explain one condition or limit. For b=2,c=4,d=3, result two.
241. Record one source without claiming completeness
Card prompt: The notebook cites MOE G1 and 2027 K110. Is it an official complete formula list for all future cohorts?
Meaning and conditions: A practical formula notebook should explain the question type, the symbols and their units, and the assumptions that make the relationship valid. A card is for understanding and later retrieval, not simply for decorating a page with equations.
One worked example: No. It is a self-made learning aid; official exam documents and school guidance control exact requirements.
When this would be wrong: Calling a personal notebook the examination’s official list would be misleading.
Check: Compare against the correct syllabus year and teacher notes.
Later retrieval: Write a changed-number practice prompt beside this rule and hide the full working. On the next suitable day, ask the pupil to choose the correct relationship independently and to explain one condition or limit. Compare against the correct syllabus year and teacher notes.
242. Use a mini glossary
Card prompt: What is the difference between h in triangle area and h in a time-height graph?
Meaning and conditions: A practical formula notebook should explain the question type, the symbols and their units, and the assumptions that make the relationship valid. A card is for understanding and later retrieval, not simply for decorating a page with equations.
One worked example: They may denote perpendicular height of a triangle versus vertical dependent quantity or coordinate; notation is contextual.
When this would be wrong: One letter can have different mathematical roles between chapters.
Check: Define h in the local card.
Later retrieval: Write a changed-number practice prompt beside this rule and hide the full working. On the next suitable day, ask the pupil to choose the correct relationship independently and to explain one condition or limit. Define h in the local card.
243. A useful final page lists next steps
Card prompt: What should the end of a small notebook contain?
Meaning and conditions: A practical formula notebook should explain the question type, the symbols and their units, and the assumptions that make the relationship valid. A card is for understanding and later retrieval, not simply for decorating a page with equations.
One worked example: A short list of secure formulas, first-error reminders and one or two unmastered school-relevant relationships to retest.
When this would be wrong: A large static formula catalogue with no retrieval plan may not support progress.
Check: Update after each genuine changed-number check.
Later retrieval: Write a changed-number practice prompt beside this rule and hide the full working. On the next suitable day, ask the pupil to choose the correct relationship independently and to explain one condition or limit. Update after each genuine changed-number check.
What a three-pupil tutorial could do with these cards
The unchanged eduKateSG Clementi small-group Maths reference describes 90-minute tutorials for up to three students near Sixth Avenue MRT. A suitable G1 lesson could have one student build a rate card with units, another distinguish area from perimeter, and a third explain a graph rule. The teacher can check understanding by hiding the card and asking for the correct formula on an unseen question. The format reference does not establish a current class vacancy or guarantee grades.
- 10 minutes: retrieve one current formula from memory and explain its symbols.
- 20 minutes: derive or visualise one relationship with a diagram or unit model.
- 25 minutes: solve differentiated school-relevant practice independently.
- 15 minutes: discuss one common formula-selection error per learner.
- 10 minutes: write a concise five-line notebook card.
- 10 minutes: set one changed-number delayed retrieval question and explain the next lesson’s focus.
Five manageable home sessions
- Day one: choose just one current formula and define every symbol.
- Day two: add one short numerical example with correct units.
- Day three: write one misleading use of that formula and explain why it is wrong.
- Day four: solve a changed-number question without looking at the card.
- Day five: review the first error and update the card only if it improves the learner’s next independent decision.
Parents do not need a huge workbook to supervise this process. They can ask, ‘What does each symbol mean?’, ‘What kind of quantity will the answer measure?’ and ‘What changes if one side or input doubles?’ The tutor can provide topic-specific guidance when the parent is unsure. The notebook should stay short enough to be read, retrieved and revised within the child’s school and CCA commitments.
Frequently asked questions
Should a pupil memorise every formula in this guide?
No. Select the current school-required or prerequisite formulas and understand when they apply. Optional later-stage examples should be clearly separated.
Will an exam give a formula sheet?
This depends on the assessment and examination year. Check the relevant official syllabus and teacher instructions rather than assuming all papers supply the same items.
Can one letter mean different things on different cards?
Yes. For example b can mean a triangle’s base or a linear graph’s intercept. Define symbols locally.
What is the most important part of a formula card?
The relationship’s meaning and when it applies, along with one independent way to check the result. A copied equation alone is not evidence of mastery.
How many examples belong on one card?
Often one clear worked example, one warning and one changed-number retest are enough. Adjust to the learner’s needs.
How can a tutor tell whether the notebook helped?
Remove the card, give a changed school-relevant question and ask the pupil to choose, explain, apply and check the correct relation independently.
Continue the Secondary 2 G1 Maths pathway
- Formula substitution and units
- Changing the subject of a formula
- Sense-checking answers
- Calculator entry and checking
- Four-week mastery checks
Official references and reader notes
- MOE: G1 Mathematics by secondary level
- SEAB 2027 SEC G1 K110 Mathematics
- SEAB: 2027 K110 Mathematics subject and formulae guidance
- eduKateSG immutable three-pupil tutorial reference
Reader note: This is a personal study-aid method and an original mathematical example bank, not an official examination formula list, a promise of current class opening or a guarantee of marks. Exact syllabus and formula provisions depend on the pupil’s present school work and official graduation year. Confirm teaching availability, fees and placement directly with the centre.
Bring an existing formula notebook or one repeated formula-selection mistake to eduKate Singapore and ask how a tutor would turn it into one concise question–meaning–check card with an independent follow-up.
- Question type: ‘Find the area of a triangle’, ‘Find average speed’ or ‘Find a percentage of an original whole’.
- Meaning: write the formula and define every symbol with its unit; state any restrictions such as nonzero denominator.
- One solved example: use manageable numbers and explain the choice of formula, not just the substitution.
- One common wrong use: for example, the slanted side is not automatically the triangle’s perpendicular height.
- One changed-number retrieval: cover the model and use the formula later on a new question without being told which card to open.
This guide is for parents exploring a Secondary 2 G1 Mathematics tutor in Bukit Timah. It is different from a formula-substitution catalogue: the goal is a personal, concise, usable reference for the child’s actual learning gaps. MOE’s G1 Secondary Two content includes algebraic formulas, rates, graphs, mensuration and data analysis. The published 2027 SEC Mathematics K110 syllabus is relevant to its graduating cohort; paper-specific formula provision and permitted aids must be checked for the student’s actual examination year. Not every extension included here is an immediate Secondary Two school topic.
Choose a formula card
- How to make a useful formula card
- Current school scope versus optional extensions
- Parts, percentages and ratios
- Distance, time and rates
- Linear equations and straight-line rules
- Rectangle, triangle and trapezium measures
- Circles, arcs and sector extensions
- Cuboids, prisms and cylinders
- Means, frequencies and probability
- Building and retrieving a personal notebook
- A practical three-pupil lesson
- Frequently asked questions
- Official references
Make the card explain a decision, not just a symbol
Start with a question in plain English such as ‘How much material covers the six faces of a closed cuboid?’ Under it, write the appropriate surface-area formula. Put ‘not volume’ beside the formula and define l, w and h. Use one example with units, such as a 2-by-3-by-4 cm cuboid: 2(6+8+12)=52 cm². Then add a later question with altered height. If the student can solve that unseen question without the card, the formula has become a tool instead of a poster.
Do not build an imaginary exam formula sheet
A personal formula notebook is not the same as the official mathematical formulae supplied, if any, in a particular paper. Mark each card as ‘current school topic’, ‘prerequisite to repair’ or ‘optional next-stage bridge’. Verify current teacher instructions and the student’s actual syllabus. For example, circle circumference and area may be used to explain a later sector formula, but a secondary-school parent should not assume every future graduating cohort has exactly the same formula provisions as the 2027 K110 source.
243 original formula notebook demonstrations
This large teaching bank offers examples from which to select a small personal notebook. It is not a request to copy hundreds of cards. The worked numerical examples and mistake prompts are original, with a deliberate separation between a formula’s meaning, a correct use, a misleading shortcut and a later changed-number check. Choose current G1 school-relevant cards first, and ask the pupil to explain the symbols aloud.
Parts, percentages and ratios
In parts, percentages and ratios, a notebook card should name the question that triggers the formula and the quantity it calculates. Read the worked example as one illustration of the relationship, not as fixed numbers to memorise. Pay attention to units, assumptions and a reverse check. If two formulas use the same letter, define that letter again in the local context.
1. Card 1: percentage of a known whole
Card prompt: A fictional total is 160 units; find 5% of it, then state the remaining amount.
Meaning and conditions: Notebook heading: part = percent/100 × original whole. Symbols must be defined: part means the selected quantity, percent is p out of 100, and original whole is the base that the percentage refers to. The note should explicitly ask ‘What is 100% in this question?’ before any multiplication.
One worked example: Part = (5/100)×160=8 units. The rest of the whole is 160−8=152 units. The sum of part and remainder must reconstruct the supplied total.
When this would be wrong: A common formula error is using p as the multiplier instead of p/100, or calculating a percentage of the remainder when the question defined the original whole as the base. A notebook card should show one wrong-base example as a warning.
Check: Check 8+152=160. The selected part is between zero and 160, because the stated percentage is positive and less than 100%.
Later retrieval: For a changed total 320 with the same p%, the part becomes 16. The notebook should prompt this scaling prediction before the exact calculation.
2. Card 2: percentage of a known whole
Card prompt: A fictional total is 260 units; find 10% of it, then state the remaining amount.
Meaning and conditions: Notebook heading: part = percent/100 × original whole. Symbols must be defined: part means the selected quantity, percent is p out of 100, and original whole is the base that the percentage refers to. The note should explicitly ask ‘What is 100% in this question?’ before any multiplication.
One worked example: Part = (10/100)×260=26 units. The rest of the whole is 260−26=234 units. The sum of part and remainder must reconstruct the supplied total.
When this would be wrong: A common formula error is using p as the multiplier instead of p/100, or calculating a percentage of the remainder when the question defined the original whole as the base. A notebook card should show one wrong-base example as a warning.
Check: Check 26+234=260. The selected part is between zero and 260, because the stated percentage is positive and less than 100%.
Later retrieval: For a changed total 520 with the same p%, the part becomes 52. The notebook should prompt this scaling prediction before the exact calculation.
3. Card 3: percentage of a known whole
Card prompt: A fictional total is 360 units; find 12.5% of it, then state the remaining amount.
Meaning and conditions: Notebook heading: part = percent/100 × original whole. Symbols must be defined: part means the selected quantity, percent is p out of 100, and original whole is the base that the percentage refers to. The note should explicitly ask ‘What is 100% in this question?’ before any multiplication.
One worked example: Part = (12.5/100)×360=45 units. The rest of the whole is 360−45=315 units. The sum of part and remainder must reconstruct the supplied total.
When this would be wrong: A common formula error is using p as the multiplier instead of p/100, or calculating a percentage of the remainder when the question defined the original whole as the base. A notebook card should show one wrong-base example as a warning.
Check: Check 45+315=360. The selected part is between zero and 360, because the stated percentage is positive and less than 100%.
Later retrieval: For a changed total 720 with the same p%, the part becomes 90. The notebook should prompt this scaling prediction before the exact calculation.
4. Card 4: percentage of a known whole
Card prompt: A fictional total is 460 units; find 20% of it, then state the remaining amount.
Meaning and conditions: Notebook heading: part = percent/100 × original whole. Symbols must be defined: part means the selected quantity, percent is p out of 100, and original whole is the base that the percentage refers to. The note should explicitly ask ‘What is 100% in this question?’ before any multiplication.
One worked example: Part = (20/100)×460=92 units. The rest of the whole is 460−92=368 units. The sum of part and remainder must reconstruct the supplied total.
When this would be wrong: A common formula error is using p as the multiplier instead of p/100, or calculating a percentage of the remainder when the question defined the original whole as the base. A notebook card should show one wrong-base example as a warning.
Check: Check 92+368=460. The selected part is between zero and 460, because the stated percentage is positive and less than 100%.
Later retrieval: For a changed total 920 with the same p%, the part becomes 184. The notebook should prompt this scaling prediction before the exact calculation.
5. Card 5: percentage of a known whole
Card prompt: A fictional total is 560 units; find 25% of it, then state the remaining amount.
Meaning and conditions: Notebook heading: part = percent/100 × original whole. Symbols must be defined: part means the selected quantity, percent is p out of 100, and original whole is the base that the percentage refers to. The note should explicitly ask ‘What is 100% in this question?’ before any multiplication.
One worked example: Part = (25/100)×560=140 units. The rest of the whole is 560−140=420 units. The sum of part and remainder must reconstruct the supplied total.
When this would be wrong: A common formula error is using p as the multiplier instead of p/100, or calculating a percentage of the remainder when the question defined the original whole as the base. A notebook card should show one wrong-base example as a warning.
Check: Check 140+420=560. The selected part is between zero and 560, because the stated percentage is positive and less than 100%.
Later retrieval: For a changed total 1120 with the same p%, the part becomes 280. The notebook should prompt this scaling prediction before the exact calculation.
6. Card 6: percentage of a known whole
Card prompt: A fictional total is 660 units; find 30% of it, then state the remaining amount.
Meaning and conditions: Notebook heading: part = percent/100 × original whole. Symbols must be defined: part means the selected quantity, percent is p out of 100, and original whole is the base that the percentage refers to. The note should explicitly ask ‘What is 100% in this question?’ before any multiplication.
One worked example: Part = (30/100)×660=198 units. The rest of the whole is 660−198=462 units. The sum of part and remainder must reconstruct the supplied total.
When this would be wrong: A common formula error is using p as the multiplier instead of p/100, or calculating a percentage of the remainder when the question defined the original whole as the base. A notebook card should show one wrong-base example as a warning.
Check: Check 198+462=660. The selected part is between zero and 660, because the stated percentage is positive and less than 100%.
Later retrieval: For a changed total 1320 with the same p%, the part becomes 396. The notebook should prompt this scaling prediction before the exact calculation.
7. Card 7: percentage of a known whole
Card prompt: A fictional total is 760 units; find 40% of it, then state the remaining amount.
Meaning and conditions: Notebook heading: part = percent/100 × original whole. Symbols must be defined: part means the selected quantity, percent is p out of 100, and original whole is the base that the percentage refers to. The note should explicitly ask ‘What is 100% in this question?’ before any multiplication.
One worked example: Part = (40/100)×760=304 units. The rest of the whole is 760−304=456 units. The sum of part and remainder must reconstruct the supplied total.
When this would be wrong: A common formula error is using p as the multiplier instead of p/100, or calculating a percentage of the remainder when the question defined the original whole as the base. A notebook card should show one wrong-base example as a warning.
Check: Check 304+456=760. The selected part is between zero and 760, because the stated percentage is positive and less than 100%.
Later retrieval: For a changed total 1520 with the same p%, the part becomes 608. The notebook should prompt this scaling prediction before the exact calculation.
8. Card 8: percentage of a known whole
Card prompt: A fictional total is 860 units; find 50% of it, then state the remaining amount.
Meaning and conditions: Notebook heading: part = percent/100 × original whole. Symbols must be defined: part means the selected quantity, percent is p out of 100, and original whole is the base that the percentage refers to. The note should explicitly ask ‘What is 100% in this question?’ before any multiplication.
One worked example: Part = (50/100)×860=430 units. The rest of the whole is 860−430=430 units. The sum of part and remainder must reconstruct the supplied total.
When this would be wrong: A common formula error is using p as the multiplier instead of p/100, or calculating a percentage of the remainder when the question defined the original whole as the base. A notebook card should show one wrong-base example as a warning.
Check: Check 430+430=860. The selected part is between zero and 860, because the stated percentage is positive and less than 100%.
Later retrieval: For a changed total 1720 with the same p%, the part becomes 860. The notebook should prompt this scaling prediction before the exact calculation.
9. Card 9: percentage of a known whole
Card prompt: A fictional total is 180 units; find 60% of it, then state the remaining amount.
Meaning and conditions: Notebook heading: part = percent/100 × original whole. Symbols must be defined: part means the selected quantity, percent is p out of 100, and original whole is the base that the percentage refers to. The note should explicitly ask ‘What is 100% in this question?’ before any multiplication.
One worked example: Part = (60/100)×180=108 units. The rest of the whole is 180−108=72 units. The sum of part and remainder must reconstruct the supplied total.
When this would be wrong: A common formula error is using p as the multiplier instead of p/100, or calculating a percentage of the remainder when the question defined the original whole as the base. A notebook card should show one wrong-base example as a warning.
Check: Check 108+72=180. The selected part is between zero and 180, because the stated percentage is positive and less than 100%.
Later retrieval: For a changed total 360 with the same p%, the part becomes 216. The notebook should prompt this scaling prediction before the exact calculation.
10. Card 10: percentage of a known whole
Card prompt: A fictional total is 280 units; find 75% of it, then state the remaining amount.
Meaning and conditions: Notebook heading: part = percent/100 × original whole. Symbols must be defined: part means the selected quantity, percent is p out of 100, and original whole is the base that the percentage refers to. The note should explicitly ask ‘What is 100% in this question?’ before any multiplication.
One worked example: Part = (75/100)×280=210 units. The rest of the whole is 280−210=70 units. The sum of part and remainder must reconstruct the supplied total.
When this would be wrong: A common formula error is using p as the multiplier instead of p/100, or calculating a percentage of the remainder when the question defined the original whole as the base. A notebook card should show one wrong-base example as a warning.
Check: Check 210+70=280. The selected part is between zero and 280, because the stated percentage is positive and less than 100%.
Later retrieval: For a changed total 560 with the same p%, the part becomes 420. The notebook should prompt this scaling prediction before the exact calculation.
11. Card 11: percentage of a known whole
Card prompt: A fictional total is 380 units; find 80% of it, then state the remaining amount.
Meaning and conditions: Notebook heading: part = percent/100 × original whole. Symbols must be defined: part means the selected quantity, percent is p out of 100, and original whole is the base that the percentage refers to. The note should explicitly ask ‘What is 100% in this question?’ before any multiplication.
One worked example: Part = (80/100)×380=304 units. The rest of the whole is 380−304=76 units. The sum of part and remainder must reconstruct the supplied total.
When this would be wrong: A common formula error is using p as the multiplier instead of p/100, or calculating a percentage of the remainder when the question defined the original whole as the base. A notebook card should show one wrong-base example as a warning.
Check: Check 304+76=380. The selected part is between zero and 380, because the stated percentage is positive and less than 100%.
Later retrieval: For a changed total 760 with the same p%, the part becomes 608. The notebook should prompt this scaling prediction before the exact calculation.
12. Card 12: percentage of a known whole
Card prompt: A fictional total is 480 units; find 5% of it, then state the remaining amount.
Meaning and conditions: Notebook heading: part = percent/100 × original whole. Symbols must be defined: part means the selected quantity, percent is p out of 100, and original whole is the base that the percentage refers to. The note should explicitly ask ‘What is 100% in this question?’ before any multiplication.
One worked example: Part = (5/100)×480=24 units. The rest of the whole is 480−24=456 units. The sum of part and remainder must reconstruct the supplied total.
When this would be wrong: A common formula error is using p as the multiplier instead of p/100, or calculating a percentage of the remainder when the question defined the original whole as the base. A notebook card should show one wrong-base example as a warning.
Check: Check 24+456=480. The selected part is between zero and 480, because the stated percentage is positive and less than 100%.
Later retrieval: For a changed total 960 with the same p%, the part becomes 48. The notebook should prompt this scaling prediction before the exact calculation.
13. Card 13: percentage of a known whole
Card prompt: A fictional total is 580 units; find 10% of it, then state the remaining amount.
Meaning and conditions: Notebook heading: part = percent/100 × original whole. Symbols must be defined: part means the selected quantity, percent is p out of 100, and original whole is the base that the percentage refers to. The note should explicitly ask ‘What is 100% in this question?’ before any multiplication.
One worked example: Part = (10/100)×580=58 units. The rest of the whole is 580−58=522 units. The sum of part and remainder must reconstruct the supplied total.
When this would be wrong: A common formula error is using p as the multiplier instead of p/100, or calculating a percentage of the remainder when the question defined the original whole as the base. A notebook card should show one wrong-base example as a warning.
Check: Check 58+522=580. The selected part is between zero and 580, because the stated percentage is positive and less than 100%.
Later retrieval: For a changed total 1160 with the same p%, the part becomes 116. The notebook should prompt this scaling prediction before the exact calculation.
14. Card 14: percentage of a known whole
Card prompt: A fictional total is 680 units; find 12.5% of it, then state the remaining amount.
Meaning and conditions: Notebook heading: part = percent/100 × original whole. Symbols must be defined: part means the selected quantity, percent is p out of 100, and original whole is the base that the percentage refers to. The note should explicitly ask ‘What is 100% in this question?’ before any multiplication.
One worked example: Part = (12.5/100)×680=85 units. The rest of the whole is 680−85=595 units. The sum of part and remainder must reconstruct the supplied total.
When this would be wrong: A common formula error is using p as the multiplier instead of p/100, or calculating a percentage of the remainder when the question defined the original whole as the base. A notebook card should show one wrong-base example as a warning.
Check: Check 85+595=680. The selected part is between zero and 680, because the stated percentage is positive and less than 100%.
Later retrieval: For a changed total 1360 with the same p%, the part becomes 170. The notebook should prompt this scaling prediction before the exact calculation.
15. Card 15: percentage of a known whole
Card prompt: A fictional total is 780 units; find 20% of it, then state the remaining amount.
Meaning and conditions: Notebook heading: part = percent/100 × original whole. Symbols must be defined: part means the selected quantity, percent is p out of 100, and original whole is the base that the percentage refers to. The note should explicitly ask ‘What is 100% in this question?’ before any multiplication.
One worked example: Part = (20/100)×780=156 units. The rest of the whole is 780−156=624 units. The sum of part and remainder must reconstruct the supplied total.
When this would be wrong: A common formula error is using p as the multiplier instead of p/100, or calculating a percentage of the remainder when the question defined the original whole as the base. A notebook card should show one wrong-base example as a warning.
Check: Check 156+624=780. The selected part is between zero and 780, because the stated percentage is positive and less than 100%.
Later retrieval: For a changed total 1560 with the same p%, the part becomes 312. The notebook should prompt this scaling prediction before the exact calculation.
16. Card 16: percentage of a known whole
Card prompt: A fictional total is 880 units; find 25% of it, then state the remaining amount.
Meaning and conditions: Notebook heading: part = percent/100 × original whole. Symbols must be defined: part means the selected quantity, percent is p out of 100, and original whole is the base that the percentage refers to. The note should explicitly ask ‘What is 100% in this question?’ before any multiplication.
One worked example: Part = (25/100)×880=220 units. The rest of the whole is 880−220=660 units. The sum of part and remainder must reconstruct the supplied total.
When this would be wrong: A common formula error is using p as the multiplier instead of p/100, or calculating a percentage of the remainder when the question defined the original whole as the base. A notebook card should show one wrong-base example as a warning.
Check: Check 220+660=880. The selected part is between zero and 880, because the stated percentage is positive and less than 100%.
Later retrieval: For a changed total 1760 with the same p%, the part becomes 440. The notebook should prompt this scaling prediction before the exact calculation.
17. Card 17: percentage of a known whole
Card prompt: A fictional total is 200 units; find 30% of it, then state the remaining amount.
Meaning and conditions: Notebook heading: part = percent/100 × original whole. Symbols must be defined: part means the selected quantity, percent is p out of 100, and original whole is the base that the percentage refers to. The note should explicitly ask ‘What is 100% in this question?’ before any multiplication.
One worked example: Part = (30/100)×200=60 units. The rest of the whole is 200−60=140 units. The sum of part and remainder must reconstruct the supplied total.
When this would be wrong: A common formula error is using p as the multiplier instead of p/100, or calculating a percentage of the remainder when the question defined the original whole as the base. A notebook card should show one wrong-base example as a warning.
Check: Check 60+140=200. The selected part is between zero and 200, because the stated percentage is positive and less than 100%.
Later retrieval: For a changed total 400 with the same p%, the part becomes 120. The notebook should prompt this scaling prediction before the exact calculation.
18. Card 18: percentage of a known whole
Card prompt: A fictional total is 300 units; find 40% of it, then state the remaining amount.
Meaning and conditions: Notebook heading: part = percent/100 × original whole. Symbols must be defined: part means the selected quantity, percent is p out of 100, and original whole is the base that the percentage refers to. The note should explicitly ask ‘What is 100% in this question?’ before any multiplication.
One worked example: Part = (40/100)×300=120 units. The rest of the whole is 300−120=180 units. The sum of part and remainder must reconstruct the supplied total.
When this would be wrong: A common formula error is using p as the multiplier instead of p/100, or calculating a percentage of the remainder when the question defined the original whole as the base. A notebook card should show one wrong-base example as a warning.
Check: Check 120+180=300. The selected part is between zero and 300, because the stated percentage is positive and less than 100%.
Later retrieval: For a changed total 600 with the same p%, the part becomes 240. The notebook should prompt this scaling prediction before the exact calculation.
19. Card 19: percentage of a known whole
Card prompt: A fictional total is 400 units; find 50% of it, then state the remaining amount.
Meaning and conditions: Notebook heading: part = percent/100 × original whole. Symbols must be defined: part means the selected quantity, percent is p out of 100, and original whole is the base that the percentage refers to. The note should explicitly ask ‘What is 100% in this question?’ before any multiplication.
One worked example: Part = (50/100)×400=200 units. The rest of the whole is 400−200=200 units. The sum of part and remainder must reconstruct the supplied total.
When this would be wrong: A common formula error is using p as the multiplier instead of p/100, or calculating a percentage of the remainder when the question defined the original whole as the base. A notebook card should show one wrong-base example as a warning.
Check: Check 200+200=400. The selected part is between zero and 400, because the stated percentage is positive and less than 100%.
Later retrieval: For a changed total 800 with the same p%, the part becomes 400. The notebook should prompt this scaling prediction before the exact calculation.
20. Card 20: percentage of a known whole
Card prompt: A fictional total is 500 units; find 60% of it, then state the remaining amount.
Meaning and conditions: Notebook heading: part = percent/100 × original whole. Symbols must be defined: part means the selected quantity, percent is p out of 100, and original whole is the base that the percentage refers to. The note should explicitly ask ‘What is 100% in this question?’ before any multiplication.
One worked example: Part = (60/100)×500=300 units. The rest of the whole is 500−300=200 units. The sum of part and remainder must reconstruct the supplied total.
When this would be wrong: A common formula error is using p as the multiplier instead of p/100, or calculating a percentage of the remainder when the question defined the original whole as the base. A notebook card should show one wrong-base example as a warning.
Check: Check 300+200=500. The selected part is between zero and 500, because the stated percentage is positive and less than 100%.
Later retrieval: For a changed total 1000 with the same p%, the part becomes 600. The notebook should prompt this scaling prediction before the exact calculation.
21. Card 21: percentage of a known whole
Card prompt: A fictional total is 600 units; find 75% of it, then state the remaining amount.
Meaning and conditions: Notebook heading: part = percent/100 × original whole. Symbols must be defined: part means the selected quantity, percent is p out of 100, and original whole is the base that the percentage refers to. The note should explicitly ask ‘What is 100% in this question?’ before any multiplication.
One worked example: Part = (75/100)×600=450 units. The rest of the whole is 600−450=150 units. The sum of part and remainder must reconstruct the supplied total.
When this would be wrong: A common formula error is using p as the multiplier instead of p/100, or calculating a percentage of the remainder when the question defined the original whole as the base. A notebook card should show one wrong-base example as a warning.
Check: Check 450+150=600. The selected part is between zero and 600, because the stated percentage is positive and less than 100%.
Later retrieval: For a changed total 1200 with the same p%, the part becomes 900. The notebook should prompt this scaling prediction before the exact calculation.
22. Card 22: percentage of a known whole
Card prompt: A fictional total is 700 units; find 80% of it, then state the remaining amount.
Meaning and conditions: Notebook heading: part = percent/100 × original whole. Symbols must be defined: part means the selected quantity, percent is p out of 100, and original whole is the base that the percentage refers to. The note should explicitly ask ‘What is 100% in this question?’ before any multiplication.
One worked example: Part = (80/100)×700=560 units. The rest of the whole is 700−560=140 units. The sum of part and remainder must reconstruct the supplied total.
When this would be wrong: A common formula error is using p as the multiplier instead of p/100, or calculating a percentage of the remainder when the question defined the original whole as the base. A notebook card should show one wrong-base example as a warning.
Check: Check 560+140=700. The selected part is between zero and 700, because the stated percentage is positive and less than 100%.
Later retrieval: For a changed total 1400 with the same p%, the part becomes 1120. The notebook should prompt this scaling prediction before the exact calculation.
23. Card 23: percentage of a known whole
Card prompt: A fictional total is 800 units; find 5% of it, then state the remaining amount.
Meaning and conditions: Notebook heading: part = percent/100 × original whole. Symbols must be defined: part means the selected quantity, percent is p out of 100, and original whole is the base that the percentage refers to. The note should explicitly ask ‘What is 100% in this question?’ before any multiplication.
One worked example: Part = (5/100)×800=40 units. The rest of the whole is 800−40=760 units. The sum of part and remainder must reconstruct the supplied total.
When this would be wrong: A common formula error is using p as the multiplier instead of p/100, or calculating a percentage of the remainder when the question defined the original whole as the base. A notebook card should show one wrong-base example as a warning.
Check: Check 40+760=800. The selected part is between zero and 800, because the stated percentage is positive and less than 100%.
Later retrieval: For a changed total 1600 with the same p%, the part becomes 80. The notebook should prompt this scaling prediction before the exact calculation.
24. Card 24: percentage of a known whole
Card prompt: A fictional total is 900 units; find 10% of it, then state the remaining amount.
Meaning and conditions: Notebook heading: part = percent/100 × original whole. Symbols must be defined: part means the selected quantity, percent is p out of 100, and original whole is the base that the percentage refers to. The note should explicitly ask ‘What is 100% in this question?’ before any multiplication.
One worked example: Part = (10/100)×900=90 units. The rest of the whole is 900−90=810 units. The sum of part and remainder must reconstruct the supplied total.
When this would be wrong: A common formula error is using p as the multiplier instead of p/100, or calculating a percentage of the remainder when the question defined the original whole as the base. A notebook card should show one wrong-base example as a warning.
Check: Check 90+810=900. The selected part is between zero and 900, because the stated percentage is positive and less than 100%.
Later retrieval: For a changed total 1800 with the same p%, the part becomes 180. The notebook should prompt this scaling prediction before the exact calculation.
25. Card 25: percentage of a known whole
Card prompt: A fictional total is 220 units; find 12.5% of it, then state the remaining amount.
Meaning and conditions: Notebook heading: part = percent/100 × original whole. Symbols must be defined: part means the selected quantity, percent is p out of 100, and original whole is the base that the percentage refers to. The note should explicitly ask ‘What is 100% in this question?’ before any multiplication.
One worked example: Part = (12.5/100)×220=27.5 units. The rest of the whole is 220−27.5=192.5 units. The sum of part and remainder must reconstruct the supplied total.
When this would be wrong: A common formula error is using p as the multiplier instead of p/100, or calculating a percentage of the remainder when the question defined the original whole as the base. A notebook card should show one wrong-base example as a warning.
Check: Check 27.5+192.5=220. The selected part is between zero and 220, because the stated percentage is positive and less than 100%.
Later retrieval: For a changed total 440 with the same p%, the part becomes 55. The notebook should prompt this scaling prediction before the exact calculation.
26. Card 26: percentage of a known whole
Card prompt: A fictional total is 320 units; find 20% of it, then state the remaining amount.
Meaning and conditions: Notebook heading: part = percent/100 × original whole. Symbols must be defined: part means the selected quantity, percent is p out of 100, and original whole is the base that the percentage refers to. The note should explicitly ask ‘What is 100% in this question?’ before any multiplication.
One worked example: Part = (20/100)×320=64 units. The rest of the whole is 320−64=256 units. The sum of part and remainder must reconstruct the supplied total.
When this would be wrong: A common formula error is using p as the multiplier instead of p/100, or calculating a percentage of the remainder when the question defined the original whole as the base. A notebook card should show one wrong-base example as a warning.
Check: Check 64+256=320. The selected part is between zero and 320, because the stated percentage is positive and less than 100%.
Later retrieval: For a changed total 640 with the same p%, the part becomes 128. The notebook should prompt this scaling prediction before the exact calculation.
27. Card 27: percentage of a known whole
Card prompt: A fictional total is 420 units; find 25% of it, then state the remaining amount.
Meaning and conditions: Notebook heading: part = percent/100 × original whole. Symbols must be defined: part means the selected quantity, percent is p out of 100, and original whole is the base that the percentage refers to. The note should explicitly ask ‘What is 100% in this question?’ before any multiplication.
One worked example: Part = (25/100)×420=105 units. The rest of the whole is 420−105=315 units. The sum of part and remainder must reconstruct the supplied total.
When this would be wrong: A common formula error is using p as the multiplier instead of p/100, or calculating a percentage of the remainder when the question defined the original whole as the base. A notebook card should show one wrong-base example as a warning.
Check: Check 105+315=420. The selected part is between zero and 420, because the stated percentage is positive and less than 100%.
Later retrieval: For a changed total 840 with the same p%, the part becomes 210. The notebook should prompt this scaling prediction before the exact calculation.
28. Card 28: percentage of a known whole
Card prompt: A fictional total is 520 units; find 30% of it, then state the remaining amount.
Meaning and conditions: Notebook heading: part = percent/100 × original whole. Symbols must be defined: part means the selected quantity, percent is p out of 100, and original whole is the base that the percentage refers to. The note should explicitly ask ‘What is 100% in this question?’ before any multiplication.
One worked example: Part = (30/100)×520=156 units. The rest of the whole is 520−156=364 units. The sum of part and remainder must reconstruct the supplied total.
When this would be wrong: A common formula error is using p as the multiplier instead of p/100, or calculating a percentage of the remainder when the question defined the original whole as the base. A notebook card should show one wrong-base example as a warning.
Check: Check 156+364=520. The selected part is between zero and 520, because the stated percentage is positive and less than 100%.
Later retrieval: For a changed total 1040 with the same p%, the part becomes 312. The notebook should prompt this scaling prediction before the exact calculation.
29. Card 29: percentage of a known whole
Card prompt: A fictional total is 620 units; find 40% of it, then state the remaining amount.
Meaning and conditions: Notebook heading: part = percent/100 × original whole. Symbols must be defined: part means the selected quantity, percent is p out of 100, and original whole is the base that the percentage refers to. The note should explicitly ask ‘What is 100% in this question?’ before any multiplication.
One worked example: Part = (40/100)×620=248 units. The rest of the whole is 620−248=372 units. The sum of part and remainder must reconstruct the supplied total.
When this would be wrong: A common formula error is using p as the multiplier instead of p/100, or calculating a percentage of the remainder when the question defined the original whole as the base. A notebook card should show one wrong-base example as a warning.
Check: Check 248+372=620. The selected part is between zero and 620, because the stated percentage is positive and less than 100%.
Later retrieval: For a changed total 1240 with the same p%, the part becomes 496. The notebook should prompt this scaling prediction before the exact calculation.
Distance, time and rates
In distance, time and rates, a notebook card should name the question that triggers the formula and the quantity it calculates. Read the worked example as one illustration of the relationship, not as fixed numbers to memorise. Pay attention to units, assumptions and a reverse check. If two formulas use the same letter, define that letter again in the local context.
30. Card 1: average rate with units
Card prompt: A hypothetical journey covers 12 km in 2 hours. What formula gives average speed, and what are the speed units?
Meaning and conditions: Notebook heading: average speed = total distance / total elapsed time. Label distance in km and time in hours. The quotient therefore has km/h as its unit. The formula describes the whole interval’s average; it does not prove that the speed was constant throughout.
One worked example: Average speed=12/2=6 km/h. This is an exact fraction 12/2 km/h if a rounded display is not requested. To find distance at a stated constant model rate, rearrange as distance=speed×time.
When this would be wrong: Swapping numerator and denominator yields h/km, not km/h. Another error is dividing by minutes but labelling the result km/h. The notebook should put units alongside all symbols, not just the numerical answer.
Check: Reverse-check: the unrounded average speed multiplied by 2 hours reproduces 12 km. Dimensional units also cancel correctly: (km/h)×h=km.
Later retrieval: If the journey lasted 5 hours at the same hypothetical constant rate, distance would be 30 km. This is a model extension, not an observation about a real trip.
31. Card 2: average rate with units
Card prompt: A hypothetical journey covers 19 km in 7 hours. What formula gives average speed, and what are the speed units?
Meaning and conditions: Notebook heading: average speed = total distance / total elapsed time. Label distance in km and time in hours. The quotient therefore has km/h as its unit. The formula describes the whole interval’s average; it does not prove that the speed was constant throughout.
One worked example: Average speed=19/7=2.714286 km/h. This is an exact fraction 19/7 km/h if a rounded display is not requested. To find distance at a stated constant model rate, rearrange as distance=speed×time.
When this would be wrong: Swapping numerator and denominator yields h/km, not km/h. Another error is dividing by minutes but labelling the result km/h. The notebook should put units alongside all symbols, not just the numerical answer.
Check: Reverse-check: the unrounded average speed multiplied by 7 hours reproduces 19 km. Dimensional units also cancel correctly: (km/h)×h=km.
Later retrieval: If the journey lasted 10 hours at the same hypothetical constant rate, distance would be 27.142857 km. This is a model extension, not an observation about a real trip.
32. Card 3: average rate with units
Card prompt: A hypothetical journey covers 26 km in 12 hours. What formula gives average speed, and what are the speed units?
Meaning and conditions: Notebook heading: average speed = total distance / total elapsed time. Label distance in km and time in hours. The quotient therefore has km/h as its unit. The formula describes the whole interval’s average; it does not prove that the speed was constant throughout.
One worked example: Average speed=26/12=2.166667 km/h. This is an exact fraction 26/12 km/h if a rounded display is not requested. To find distance at a stated constant model rate, rearrange as distance=speed×time.
When this would be wrong: Swapping numerator and denominator yields h/km, not km/h. Another error is dividing by minutes but labelling the result km/h. The notebook should put units alongside all symbols, not just the numerical answer.
Check: Reverse-check: the unrounded average speed multiplied by 12 hours reproduces 26 km. Dimensional units also cancel correctly: (km/h)×h=km.
Later retrieval: If the journey lasted 15 hours at the same hypothetical constant rate, distance would be 32.5 km. This is a model extension, not an observation about a real trip.
33. Card 4: average rate with units
Card prompt: A hypothetical journey covers 33 km in 17 hours. What formula gives average speed, and what are the speed units?
Meaning and conditions: Notebook heading: average speed = total distance / total elapsed time. Label distance in km and time in hours. The quotient therefore has km/h as its unit. The formula describes the whole interval’s average; it does not prove that the speed was constant throughout.
One worked example: Average speed=33/17=1.941176 km/h. This is an exact fraction 33/17 km/h if a rounded display is not requested. To find distance at a stated constant model rate, rearrange as distance=speed×time.
When this would be wrong: Swapping numerator and denominator yields h/km, not km/h. Another error is dividing by minutes but labelling the result km/h. The notebook should put units alongside all symbols, not just the numerical answer.
Check: Reverse-check: the unrounded average speed multiplied by 17 hours reproduces 33 km. Dimensional units also cancel correctly: (km/h)×h=km.
Later retrieval: If the journey lasted 20 hours at the same hypothetical constant rate, distance would be 38.823529 km. This is a model extension, not an observation about a real trip.
34. Card 5: average rate with units
Card prompt: A hypothetical journey covers 40 km in 22 hours. What formula gives average speed, and what are the speed units?
Meaning and conditions: Notebook heading: average speed = total distance / total elapsed time. Label distance in km and time in hours. The quotient therefore has km/h as its unit. The formula describes the whole interval’s average; it does not prove that the speed was constant throughout.
One worked example: Average speed=40/22=1.818182 km/h. This is an exact fraction 40/22 km/h if a rounded display is not requested. To find distance at a stated constant model rate, rearrange as distance=speed×time.
When this would be wrong: Swapping numerator and denominator yields h/km, not km/h. Another error is dividing by minutes but labelling the result km/h. The notebook should put units alongside all symbols, not just the numerical answer.
Check: Reverse-check: the unrounded average speed multiplied by 22 hours reproduces 40 km. Dimensional units also cancel correctly: (km/h)×h=km.
Later retrieval: If the journey lasted 25 hours at the same hypothetical constant rate, distance would be 45.454545 km. This is a model extension, not an observation about a real trip.
35. Card 6: average rate with units
Card prompt: A hypothetical journey covers 47 km in 6 hours. What formula gives average speed, and what are the speed units?
Meaning and conditions: Notebook heading: average speed = total distance / total elapsed time. Label distance in km and time in hours. The quotient therefore has km/h as its unit. The formula describes the whole interval’s average; it does not prove that the speed was constant throughout.
One worked example: Average speed=47/6=7.833333 km/h. This is an exact fraction 47/6 km/h if a rounded display is not requested. To find distance at a stated constant model rate, rearrange as distance=speed×time.
When this would be wrong: Swapping numerator and denominator yields h/km, not km/h. Another error is dividing by minutes but labelling the result km/h. The notebook should put units alongside all symbols, not just the numerical answer.
Check: Reverse-check: the unrounded average speed multiplied by 6 hours reproduces 47 km. Dimensional units also cancel correctly: (km/h)×h=km.
Later retrieval: If the journey lasted 9 hours at the same hypothetical constant rate, distance would be 70.5 km. This is a model extension, not an observation about a real trip.
36. Card 7: average rate with units
Card prompt: A hypothetical journey covers 54 km in 11 hours. What formula gives average speed, and what are the speed units?
Meaning and conditions: Notebook heading: average speed = total distance / total elapsed time. Label distance in km and time in hours. The quotient therefore has km/h as its unit. The formula describes the whole interval’s average; it does not prove that the speed was constant throughout.
One worked example: Average speed=54/11=4.909091 km/h. This is an exact fraction 54/11 km/h if a rounded display is not requested. To find distance at a stated constant model rate, rearrange as distance=speed×time.
When this would be wrong: Swapping numerator and denominator yields h/km, not km/h. Another error is dividing by minutes but labelling the result km/h. The notebook should put units alongside all symbols, not just the numerical answer.
Check: Reverse-check: the unrounded average speed multiplied by 11 hours reproduces 54 km. Dimensional units also cancel correctly: (km/h)×h=km.
Later retrieval: If the journey lasted 14 hours at the same hypothetical constant rate, distance would be 68.727273 km. This is a model extension, not an observation about a real trip.
37. Card 8: average rate with units
Card prompt: A hypothetical journey covers 61 km in 16 hours. What formula gives average speed, and what are the speed units?
Meaning and conditions: Notebook heading: average speed = total distance / total elapsed time. Label distance in km and time in hours. The quotient therefore has km/h as its unit. The formula describes the whole interval’s average; it does not prove that the speed was constant throughout.
One worked example: Average speed=61/16=3.8125 km/h. This is an exact fraction 61/16 km/h if a rounded display is not requested. To find distance at a stated constant model rate, rearrange as distance=speed×time.
When this would be wrong: Swapping numerator and denominator yields h/km, not km/h. Another error is dividing by minutes but labelling the result km/h. The notebook should put units alongside all symbols, not just the numerical answer.
Check: Reverse-check: the unrounded average speed multiplied by 16 hours reproduces 61 km. Dimensional units also cancel correctly: (km/h)×h=km.
Later retrieval: If the journey lasted 19 hours at the same hypothetical constant rate, distance would be 72.4375 km. This is a model extension, not an observation about a real trip.
38. Card 9: average rate with units
Card prompt: A hypothetical journey covers 68 km in 21 hours. What formula gives average speed, and what are the speed units?
Meaning and conditions: Notebook heading: average speed = total distance / total elapsed time. Label distance in km and time in hours. The quotient therefore has km/h as its unit. The formula describes the whole interval’s average; it does not prove that the speed was constant throughout.
One worked example: Average speed=68/21=3.238095 km/h. This is an exact fraction 68/21 km/h if a rounded display is not requested. To find distance at a stated constant model rate, rearrange as distance=speed×time.
When this would be wrong: Swapping numerator and denominator yields h/km, not km/h. Another error is dividing by minutes but labelling the result km/h. The notebook should put units alongside all symbols, not just the numerical answer.
Check: Reverse-check: the unrounded average speed multiplied by 21 hours reproduces 68 km. Dimensional units also cancel correctly: (km/h)×h=km.
Later retrieval: If the journey lasted 24 hours at the same hypothetical constant rate, distance would be 77.714286 km. This is a model extension, not an observation about a real trip.
39. Card 10: average rate with units
Card prompt: A hypothetical journey covers 75 km in 5 hours. What formula gives average speed, and what are the speed units?
Meaning and conditions: Notebook heading: average speed = total distance / total elapsed time. Label distance in km and time in hours. The quotient therefore has km/h as its unit. The formula describes the whole interval’s average; it does not prove that the speed was constant throughout.
One worked example: Average speed=75/5=15 km/h. This is an exact fraction 75/5 km/h if a rounded display is not requested. To find distance at a stated constant model rate, rearrange as distance=speed×time.
When this would be wrong: Swapping numerator and denominator yields h/km, not km/h. Another error is dividing by minutes but labelling the result km/h. The notebook should put units alongside all symbols, not just the numerical answer.
Check: Reverse-check: the unrounded average speed multiplied by 5 hours reproduces 75 km. Dimensional units also cancel correctly: (km/h)×h=km.
Later retrieval: If the journey lasted 8 hours at the same hypothetical constant rate, distance would be 120 km. This is a model extension, not an observation about a real trip.
40. Card 11: average rate with units
Card prompt: A hypothetical journey covers 82 km in 10 hours. What formula gives average speed, and what are the speed units?
Meaning and conditions: Notebook heading: average speed = total distance / total elapsed time. Label distance in km and time in hours. The quotient therefore has km/h as its unit. The formula describes the whole interval’s average; it does not prove that the speed was constant throughout.
One worked example: Average speed=82/10=8.2 km/h. This is an exact fraction 82/10 km/h if a rounded display is not requested. To find distance at a stated constant model rate, rearrange as distance=speed×time.
When this would be wrong: Swapping numerator and denominator yields h/km, not km/h. Another error is dividing by minutes but labelling the result km/h. The notebook should put units alongside all symbols, not just the numerical answer.
Check: Reverse-check: the unrounded average speed multiplied by 10 hours reproduces 82 km. Dimensional units also cancel correctly: (km/h)×h=km.
Later retrieval: If the journey lasted 13 hours at the same hypothetical constant rate, distance would be 106.6 km. This is a model extension, not an observation about a real trip.
41. Card 12: average rate with units
Card prompt: A hypothetical journey covers 89 km in 15 hours. What formula gives average speed, and what are the speed units?
Meaning and conditions: Notebook heading: average speed = total distance / total elapsed time. Label distance in km and time in hours. The quotient therefore has km/h as its unit. The formula describes the whole interval’s average; it does not prove that the speed was constant throughout.
One worked example: Average speed=89/15=5.933333 km/h. This is an exact fraction 89/15 km/h if a rounded display is not requested. To find distance at a stated constant model rate, rearrange as distance=speed×time.
When this would be wrong: Swapping numerator and denominator yields h/km, not km/h. Another error is dividing by minutes but labelling the result km/h. The notebook should put units alongside all symbols, not just the numerical answer.
Check: Reverse-check: the unrounded average speed multiplied by 15 hours reproduces 89 km. Dimensional units also cancel correctly: (km/h)×h=km.
Later retrieval: If the journey lasted 18 hours at the same hypothetical constant rate, distance would be 106.8 km. This is a model extension, not an observation about a real trip.
42. Card 13: average rate with units
Card prompt: A hypothetical journey covers 96 km in 20 hours. What formula gives average speed, and what are the speed units?
Meaning and conditions: Notebook heading: average speed = total distance / total elapsed time. Label distance in km and time in hours. The quotient therefore has km/h as its unit. The formula describes the whole interval’s average; it does not prove that the speed was constant throughout.
One worked example: Average speed=96/20=4.8 km/h. This is an exact fraction 96/20 km/h if a rounded display is not requested. To find distance at a stated constant model rate, rearrange as distance=speed×time.
When this would be wrong: Swapping numerator and denominator yields h/km, not km/h. Another error is dividing by minutes but labelling the result km/h. The notebook should put units alongside all symbols, not just the numerical answer.
Check: Reverse-check: the unrounded average speed multiplied by 20 hours reproduces 96 km. Dimensional units also cancel correctly: (km/h)×h=km.
Later retrieval: If the journey lasted 23 hours at the same hypothetical constant rate, distance would be 110.4 km. This is a model extension, not an observation about a real trip.
43. Card 14: average rate with units
Card prompt: A hypothetical journey covers 103 km in 4 hours. What formula gives average speed, and what are the speed units?
Meaning and conditions: Notebook heading: average speed = total distance / total elapsed time. Label distance in km and time in hours. The quotient therefore has km/h as its unit. The formula describes the whole interval’s average; it does not prove that the speed was constant throughout.
One worked example: Average speed=103/4=25.75 km/h. This is an exact fraction 103/4 km/h if a rounded display is not requested. To find distance at a stated constant model rate, rearrange as distance=speed×time.
When this would be wrong: Swapping numerator and denominator yields h/km, not km/h. Another error is dividing by minutes but labelling the result km/h. The notebook should put units alongside all symbols, not just the numerical answer.
Check: Reverse-check: the unrounded average speed multiplied by 4 hours reproduces 103 km. Dimensional units also cancel correctly: (km/h)×h=km.
Later retrieval: If the journey lasted 7 hours at the same hypothetical constant rate, distance would be 180.25 km. This is a model extension, not an observation about a real trip.
44. Card 15: average rate with units
Card prompt: A hypothetical journey covers 110 km in 9 hours. What formula gives average speed, and what are the speed units?
Meaning and conditions: Notebook heading: average speed = total distance / total elapsed time. Label distance in km and time in hours. The quotient therefore has km/h as its unit. The formula describes the whole interval’s average; it does not prove that the speed was constant throughout.
One worked example: Average speed=110/9=12.222222 km/h. This is an exact fraction 110/9 km/h if a rounded display is not requested. To find distance at a stated constant model rate, rearrange as distance=speed×time.
When this would be wrong: Swapping numerator and denominator yields h/km, not km/h. Another error is dividing by minutes but labelling the result km/h. The notebook should put units alongside all symbols, not just the numerical answer.
Check: Reverse-check: the unrounded average speed multiplied by 9 hours reproduces 110 km. Dimensional units also cancel correctly: (km/h)×h=km.
Later retrieval: If the journey lasted 12 hours at the same hypothetical constant rate, distance would be 146.666667 km. This is a model extension, not an observation about a real trip.
45. Card 16: average rate with units
Card prompt: A hypothetical journey covers 117 km in 14 hours. What formula gives average speed, and what are the speed units?
Meaning and conditions: Notebook heading: average speed = total distance / total elapsed time. Label distance in km and time in hours. The quotient therefore has km/h as its unit. The formula describes the whole interval’s average; it does not prove that the speed was constant throughout.
One worked example: Average speed=117/14=8.357143 km/h. This is an exact fraction 117/14 km/h if a rounded display is not requested. To find distance at a stated constant model rate, rearrange as distance=speed×time.
When this would be wrong: Swapping numerator and denominator yields h/km, not km/h. Another error is dividing by minutes but labelling the result km/h. The notebook should put units alongside all symbols, not just the numerical answer.
Check: Reverse-check: the unrounded average speed multiplied by 14 hours reproduces 117 km. Dimensional units also cancel correctly: (km/h)×h=km.
Later retrieval: If the journey lasted 17 hours at the same hypothetical constant rate, distance would be 142.071429 km. This is a model extension, not an observation about a real trip.
46. Card 17: average rate with units
Card prompt: A hypothetical journey covers 124 km in 19 hours. What formula gives average speed, and what are the speed units?
Meaning and conditions: Notebook heading: average speed = total distance / total elapsed time. Label distance in km and time in hours. The quotient therefore has km/h as its unit. The formula describes the whole interval’s average; it does not prove that the speed was constant throughout.
One worked example: Average speed=124/19=6.526316 km/h. This is an exact fraction 124/19 km/h if a rounded display is not requested. To find distance at a stated constant model rate, rearrange as distance=speed×time.
When this would be wrong: Swapping numerator and denominator yields h/km, not km/h. Another error is dividing by minutes but labelling the result km/h. The notebook should put units alongside all symbols, not just the numerical answer.
Check: Reverse-check: the unrounded average speed multiplied by 19 hours reproduces 124 km. Dimensional units also cancel correctly: (km/h)×h=km.
Later retrieval: If the journey lasted 22 hours at the same hypothetical constant rate, distance would be 143.578947 km. This is a model extension, not an observation about a real trip.
47. Card 18: average rate with units
Card prompt: A hypothetical journey covers 131 km in 3 hours. What formula gives average speed, and what are the speed units?
Meaning and conditions: Notebook heading: average speed = total distance / total elapsed time. Label distance in km and time in hours. The quotient therefore has km/h as its unit. The formula describes the whole interval’s average; it does not prove that the speed was constant throughout.
One worked example: Average speed=131/3=43.666667 km/h. This is an exact fraction 131/3 km/h if a rounded display is not requested. To find distance at a stated constant model rate, rearrange as distance=speed×time.
When this would be wrong: Swapping numerator and denominator yields h/km, not km/h. Another error is dividing by minutes but labelling the result km/h. The notebook should put units alongside all symbols, not just the numerical answer.
Check: Reverse-check: the unrounded average speed multiplied by 3 hours reproduces 131 km. Dimensional units also cancel correctly: (km/h)×h=km.
Later retrieval: If the journey lasted 6 hours at the same hypothetical constant rate, distance would be 262 km. This is a model extension, not an observation about a real trip.
48. Card 19: average rate with units
Card prompt: A hypothetical journey covers 138 km in 8 hours. What formula gives average speed, and what are the speed units?
Meaning and conditions: Notebook heading: average speed = total distance / total elapsed time. Label distance in km and time in hours. The quotient therefore has km/h as its unit. The formula describes the whole interval’s average; it does not prove that the speed was constant throughout.
One worked example: Average speed=138/8=17.25 km/h. This is an exact fraction 138/8 km/h if a rounded display is not requested. To find distance at a stated constant model rate, rearrange as distance=speed×time.
When this would be wrong: Swapping numerator and denominator yields h/km, not km/h. Another error is dividing by minutes but labelling the result km/h. The notebook should put units alongside all symbols, not just the numerical answer.
Check: Reverse-check: the unrounded average speed multiplied by 8 hours reproduces 138 km. Dimensional units also cancel correctly: (km/h)×h=km.
Later retrieval: If the journey lasted 11 hours at the same hypothetical constant rate, distance would be 189.75 km. This is a model extension, not an observation about a real trip.
49. Card 20: average rate with units
Card prompt: A hypothetical journey covers 145 km in 13 hours. What formula gives average speed, and what are the speed units?
Meaning and conditions: Notebook heading: average speed = total distance / total elapsed time. Label distance in km and time in hours. The quotient therefore has km/h as its unit. The formula describes the whole interval’s average; it does not prove that the speed was constant throughout.
One worked example: Average speed=145/13=11.153846 km/h. This is an exact fraction 145/13 km/h if a rounded display is not requested. To find distance at a stated constant model rate, rearrange as distance=speed×time.
When this would be wrong: Swapping numerator and denominator yields h/km, not km/h. Another error is dividing by minutes but labelling the result km/h. The notebook should put units alongside all symbols, not just the numerical answer.
Check: Reverse-check: the unrounded average speed multiplied by 13 hours reproduces 145 km. Dimensional units also cancel correctly: (km/h)×h=km.
Later retrieval: If the journey lasted 16 hours at the same hypothetical constant rate, distance would be 178.461538 km. This is a model extension, not an observation about a real trip.
50. Card 21: average rate with units
Card prompt: A hypothetical journey covers 12 km in 18 hours. What formula gives average speed, and what are the speed units?
Meaning and conditions: Notebook heading: average speed = total distance / total elapsed time. Label distance in km and time in hours. The quotient therefore has km/h as its unit. The formula describes the whole interval’s average; it does not prove that the speed was constant throughout.
One worked example: Average speed=12/18=0.666667 km/h. This is an exact fraction 12/18 km/h if a rounded display is not requested. To find distance at a stated constant model rate, rearrange as distance=speed×time.
When this would be wrong: Swapping numerator and denominator yields h/km, not km/h. Another error is dividing by minutes but labelling the result km/h. The notebook should put units alongside all symbols, not just the numerical answer.
Check: Reverse-check: the unrounded average speed multiplied by 18 hours reproduces 12 km. Dimensional units also cancel correctly: (km/h)×h=km.
Later retrieval: If the journey lasted 21 hours at the same hypothetical constant rate, distance would be 14 km. This is a model extension, not an observation about a real trip.
51. Card 22: average rate with units
Card prompt: A hypothetical journey covers 19 km in 2 hours. What formula gives average speed, and what are the speed units?
Meaning and conditions: Notebook heading: average speed = total distance / total elapsed time. Label distance in km and time in hours. The quotient therefore has km/h as its unit. The formula describes the whole interval’s average; it does not prove that the speed was constant throughout.
One worked example: Average speed=19/2=9.5 km/h. This is an exact fraction 19/2 km/h if a rounded display is not requested. To find distance at a stated constant model rate, rearrange as distance=speed×time.
When this would be wrong: Swapping numerator and denominator yields h/km, not km/h. Another error is dividing by minutes but labelling the result km/h. The notebook should put units alongside all symbols, not just the numerical answer.
Check: Reverse-check: the unrounded average speed multiplied by 2 hours reproduces 19 km. Dimensional units also cancel correctly: (km/h)×h=km.
Later retrieval: If the journey lasted 5 hours at the same hypothetical constant rate, distance would be 47.5 km. This is a model extension, not an observation about a real trip.
52. Card 23: average rate with units
Card prompt: A hypothetical journey covers 26 km in 7 hours. What formula gives average speed, and what are the speed units?
Meaning and conditions: Notebook heading: average speed = total distance / total elapsed time. Label distance in km and time in hours. The quotient therefore has km/h as its unit. The formula describes the whole interval’s average; it does not prove that the speed was constant throughout.
One worked example: Average speed=26/7=3.714286 km/h. This is an exact fraction 26/7 km/h if a rounded display is not requested. To find distance at a stated constant model rate, rearrange as distance=speed×time.
When this would be wrong: Swapping numerator and denominator yields h/km, not km/h. Another error is dividing by minutes but labelling the result km/h. The notebook should put units alongside all symbols, not just the numerical answer.
Check: Reverse-check: the unrounded average speed multiplied by 7 hours reproduces 26 km. Dimensional units also cancel correctly: (km/h)×h=km.
Later retrieval: If the journey lasted 10 hours at the same hypothetical constant rate, distance would be 37.142857 km. This is a model extension, not an observation about a real trip.
53. Card 24: average rate with units
Card prompt: A hypothetical journey covers 33 km in 12 hours. What formula gives average speed, and what are the speed units?
Meaning and conditions: Notebook heading: average speed = total distance / total elapsed time. Label distance in km and time in hours. The quotient therefore has km/h as its unit. The formula describes the whole interval’s average; it does not prove that the speed was constant throughout.
One worked example: Average speed=33/12=2.75 km/h. This is an exact fraction 33/12 km/h if a rounded display is not requested. To find distance at a stated constant model rate, rearrange as distance=speed×time.
When this would be wrong: Swapping numerator and denominator yields h/km, not km/h. Another error is dividing by minutes but labelling the result km/h. The notebook should put units alongside all symbols, not just the numerical answer.
Check: Reverse-check: the unrounded average speed multiplied by 12 hours reproduces 33 km. Dimensional units also cancel correctly: (km/h)×h=km.
Later retrieval: If the journey lasted 15 hours at the same hypothetical constant rate, distance would be 41.25 km. This is a model extension, not an observation about a real trip.
54. Card 25: average rate with units
Card prompt: A hypothetical journey covers 40 km in 17 hours. What formula gives average speed, and what are the speed units?
Meaning and conditions: Notebook heading: average speed = total distance / total elapsed time. Label distance in km and time in hours. The quotient therefore has km/h as its unit. The formula describes the whole interval’s average; it does not prove that the speed was constant throughout.
One worked example: Average speed=40/17=2.352941 km/h. This is an exact fraction 40/17 km/h if a rounded display is not requested. To find distance at a stated constant model rate, rearrange as distance=speed×time.
When this would be wrong: Swapping numerator and denominator yields h/km, not km/h. Another error is dividing by minutes but labelling the result km/h. The notebook should put units alongside all symbols, not just the numerical answer.
Check: Reverse-check: the unrounded average speed multiplied by 17 hours reproduces 40 km. Dimensional units also cancel correctly: (km/h)×h=km.
Later retrieval: If the journey lasted 20 hours at the same hypothetical constant rate, distance would be 47.058824 km. This is a model extension, not an observation about a real trip.
55. Card 26: average rate with units
Card prompt: A hypothetical journey covers 47 km in 22 hours. What formula gives average speed, and what are the speed units?
Meaning and conditions: Notebook heading: average speed = total distance / total elapsed time. Label distance in km and time in hours. The quotient therefore has km/h as its unit. The formula describes the whole interval’s average; it does not prove that the speed was constant throughout.
One worked example: Average speed=47/22=2.136364 km/h. This is an exact fraction 47/22 km/h if a rounded display is not requested. To find distance at a stated constant model rate, rearrange as distance=speed×time.
When this would be wrong: Swapping numerator and denominator yields h/km, not km/h. Another error is dividing by minutes but labelling the result km/h. The notebook should put units alongside all symbols, not just the numerical answer.
Check: Reverse-check: the unrounded average speed multiplied by 22 hours reproduces 47 km. Dimensional units also cancel correctly: (km/h)×h=km.
Later retrieval: If the journey lasted 25 hours at the same hypothetical constant rate, distance would be 53.409091 km. This is a model extension, not an observation about a real trip.
56. Card 27: average rate with units
Card prompt: A hypothetical journey covers 54 km in 6 hours. What formula gives average speed, and what are the speed units?
Meaning and conditions: Notebook heading: average speed = total distance / total elapsed time. Label distance in km and time in hours. The quotient therefore has km/h as its unit. The formula describes the whole interval’s average; it does not prove that the speed was constant throughout.
One worked example: Average speed=54/6=9 km/h. This is an exact fraction 54/6 km/h if a rounded display is not requested. To find distance at a stated constant model rate, rearrange as distance=speed×time.
When this would be wrong: Swapping numerator and denominator yields h/km, not km/h. Another error is dividing by minutes but labelling the result km/h. The notebook should put units alongside all symbols, not just the numerical answer.
Check: Reverse-check: the unrounded average speed multiplied by 6 hours reproduces 54 km. Dimensional units also cancel correctly: (km/h)×h=km.
Later retrieval: If the journey lasted 9 hours at the same hypothetical constant rate, distance would be 81 km. This is a model extension, not an observation about a real trip.
Linear equations and straight-line rules
In linear equations and straight-line rules, a notebook card should name the question that triggers the formula and the quantity it calculates. Read the worked example as one illustration of the relationship, not as fixed numbers to memorise. Pay attention to units, assumptions and a reverse check. If two formulas use the same letter, define that letter again in the local context.
57. Card 1: read and use y=mx+b
Card prompt: A straight-line rule is y=-5x−11. Find y when x=-8, then name its gradient and y-intercept.
Meaning and conditions: Notebook heading: linear rule y=mx+b. Here m is the gradient, the change in y per +1 x-unit. The number b is the y-value at x=0. A negative m means the line falls to the right; it does not guarantee every output is negative. This card should include a simple two-column input–output check.
One worked example: Substitute x=-8: y=-5×(-8)+(-11)=29. Gradient is -5. The vertical-axis intercept is the point (0,-11). These are different mathematical quantities, even though they appear in the same short formula.
When this would be wrong: A learner may treat b=-11 as the gradient and m=-5 as the starting output. Another may omit brackets around negative input -8, changing the result. The notebook should include a ‘read before substituting’ reminder.
Check: At x=-7, output is 24, a change of -5; at x=0, output is -11. These checks verify the roles of m and b independently of one substituted answer.
Later retrieval: Change only the intercept by +4. The new rule shifts all outputs up by four but preserves gradient -5. Ask which quantity in the notebook formula was changed.
58. Card 2: read and use y=mx+b
Card prompt: A straight-line rule is y=-3x−8. Find y when x=-1, then name its gradient and y-intercept.
Meaning and conditions: Notebook heading: linear rule y=mx+b. Here m is the gradient, the change in y per +1 x-unit. The number b is the y-value at x=0. A negative m means the line falls to the right; it does not guarantee every output is negative. This card should include a simple two-column input–output check.
One worked example: Substitute x=-1: y=-3×(-1)+(-8)=-5. Gradient is -3. The vertical-axis intercept is the point (0,-8). These are different mathematical quantities, even though they appear in the same short formula.
When this would be wrong: A learner may treat b=-8 as the gradient and m=-3 as the starting output. Another may omit brackets around negative input -1, changing the result. The notebook should include a ‘read before substituting’ reminder.
Check: At x=0, output is -8, a change of -3; at x=0, output is -8. These checks verify the roles of m and b independently of one substituted answer.
Later retrieval: Change only the intercept by +4. The new rule shifts all outputs up by four but preserves gradient -3. Ask which quantity in the notebook formula was changed.
59. Card 3: read and use y=mx+b
Card prompt: A straight-line rule is y=-2x−5. Find y when x=6, then name its gradient and y-intercept.
Meaning and conditions: Notebook heading: linear rule y=mx+b. Here m is the gradient, the change in y per +1 x-unit. The number b is the y-value at x=0. A negative m means the line falls to the right; it does not guarantee every output is negative. This card should include a simple two-column input–output check.
One worked example: Substitute x=6: y=-2×(6)+(-5)=-17. Gradient is -2. The vertical-axis intercept is the point (0,-5). These are different mathematical quantities, even though they appear in the same short formula.
When this would be wrong: A learner may treat b=-5 as the gradient and m=-2 as the starting output. Another may omit brackets around negative input 6, changing the result. The notebook should include a ‘read before substituting’ reminder.
Check: At x=7, output is -19, a change of -2; at x=0, output is -5. These checks verify the roles of m and b independently of one substituted answer.
Later retrieval: Change only the intercept by +4. The new rule shifts all outputs up by four but preserves gradient -2. Ask which quantity in the notebook formula was changed.
60. Card 4: read and use y=mx+b
Card prompt: A straight-line rule is y=-1x−2. Find y when x=-4, then name its gradient and y-intercept.
Meaning and conditions: Notebook heading: linear rule y=mx+b. Here m is the gradient, the change in y per +1 x-unit. The number b is the y-value at x=0. A negative m means the line falls to the right; it does not guarantee every output is negative. This card should include a simple two-column input–output check.
One worked example: Substitute x=-4: y=-1×(-4)+(-2)=2. Gradient is -1. The vertical-axis intercept is the point (0,-2). These are different mathematical quantities, even though they appear in the same short formula.
When this would be wrong: A learner may treat b=-2 as the gradient and m=-1 as the starting output. Another may omit brackets around negative input -4, changing the result. The notebook should include a ‘read before substituting’ reminder.
Check: At x=-3, output is 1, a change of -1; at x=0, output is -2. These checks verify the roles of m and b independently of one substituted answer.
Later retrieval: Change only the intercept by +4. The new rule shifts all outputs up by four but preserves gradient -1. Ask which quantity in the notebook formula was changed.
61. Card 5: read and use y=mx+b
Card prompt: A straight-line rule is y=1x+1. Find y when x=3, then name its gradient and y-intercept.
Meaning and conditions: Notebook heading: linear rule y=mx+b. Here m is the gradient, the change in y per +1 x-unit. The number b is the y-value at x=0. A negative m means the line falls to the right; it does not guarantee every output is negative. This card should include a simple two-column input–output check.
One worked example: Substitute x=3: y=1×(3)+(1)=4. Gradient is 1. The vertical-axis intercept is the point (0,1). These are different mathematical quantities, even though they appear in the same short formula.
When this would be wrong: A learner may treat b=1 as the gradient and m=1 as the starting output. Another may omit brackets around negative input 3, changing the result. The notebook should include a ‘read before substituting’ reminder.
Check: At x=4, output is 5, a change of 1; at x=0, output is 1. These checks verify the roles of m and b independently of one substituted answer.
Later retrieval: Change only the intercept by +4. The new rule shifts all outputs up by four but preserves gradient 1. Ask which quantity in the notebook formula was changed.
62. Card 6: read and use y=mx+b
Card prompt: A straight-line rule is y=2x+4. Find y when x=-7, then name its gradient and y-intercept.
Meaning and conditions: Notebook heading: linear rule y=mx+b. Here m is the gradient, the change in y per +1 x-unit. The number b is the y-value at x=0. A negative m means the line falls to the right; it does not guarantee every output is negative. This card should include a simple two-column input–output check.
One worked example: Substitute x=-7: y=2×(-7)+(4)=-10. Gradient is 2. The vertical-axis intercept is the point (0,4). These are different mathematical quantities, even though they appear in the same short formula.
When this would be wrong: A learner may treat b=4 as the gradient and m=2 as the starting output. Another may omit brackets around negative input -7, changing the result. The notebook should include a ‘read before substituting’ reminder.
Check: At x=-6, output is -8, a change of 2; at x=0, output is 4. These checks verify the roles of m and b independently of one substituted answer.
Later retrieval: Change only the intercept by +4. The new rule shifts all outputs up by four but preserves gradient 2. Ask which quantity in the notebook formula was changed.
63. Card 7: read and use y=mx+b
Card prompt: A straight-line rule is y=3x+7. Find y when x=0, then name its gradient and y-intercept.
Meaning and conditions: Notebook heading: linear rule y=mx+b. Here m is the gradient, the change in y per +1 x-unit. The number b is the y-value at x=0. A negative m means the line falls to the right; it does not guarantee every output is negative. This card should include a simple two-column input–output check.
One worked example: Substitute x=0: y=3×(0)+(7)=7. Gradient is 3. The vertical-axis intercept is the point (0,7). These are different mathematical quantities, even though they appear in the same short formula.
When this would be wrong: A learner may treat b=7 as the gradient and m=3 as the starting output. Another may omit brackets around negative input 0, changing the result. The notebook should include a ‘read before substituting’ reminder.
Check: At x=1, output is 10, a change of 3; at x=0, output is 7. These checks verify the roles of m and b independently of one substituted answer.
Later retrieval: Change only the intercept by +4. The new rule shifts all outputs up by four but preserves gradient 3. Ask which quantity in the notebook formula was changed.
64. Card 8: read and use y=mx+b
Card prompt: A straight-line rule is y=4x+10. Find y when x=7, then name its gradient and y-intercept.
Meaning and conditions: Notebook heading: linear rule y=mx+b. Here m is the gradient, the change in y per +1 x-unit. The number b is the y-value at x=0. A negative m means the line falls to the right; it does not guarantee every output is negative. This card should include a simple two-column input–output check.
One worked example: Substitute x=7: y=4×(7)+(10)=38. Gradient is 4. The vertical-axis intercept is the point (0,10). These are different mathematical quantities, even though they appear in the same short formula.
When this would be wrong: A learner may treat b=10 as the gradient and m=4 as the starting output. Another may omit brackets around negative input 7, changing the result. The notebook should include a ‘read before substituting’ reminder.
Check: At x=8, output is 42, a change of 4; at x=0, output is 10. These checks verify the roles of m and b independently of one substituted answer.
Later retrieval: Change only the intercept by +4. The new rule shifts all outputs up by four but preserves gradient 4. Ask which quantity in the notebook formula was changed.
65. Card 9: read and use y=mx+b
Card prompt: A straight-line rule is y=5x−10. Find y when x=-3, then name its gradient and y-intercept.
Meaning and conditions: Notebook heading: linear rule y=mx+b. Here m is the gradient, the change in y per +1 x-unit. The number b is the y-value at x=0. A negative m means the line falls to the right; it does not guarantee every output is negative. This card should include a simple two-column input–output check.
One worked example: Substitute x=-3: y=5×(-3)+(-10)=-25. Gradient is 5. The vertical-axis intercept is the point (0,-10). These are different mathematical quantities, even though they appear in the same short formula.
When this would be wrong: A learner may treat b=-10 as the gradient and m=5 as the starting output. Another may omit brackets around negative input -3, changing the result. The notebook should include a ‘read before substituting’ reminder.
Check: At x=-2, output is -20, a change of 5; at x=0, output is -10. These checks verify the roles of m and b independently of one substituted answer.
Later retrieval: Change only the intercept by +4. The new rule shifts all outputs up by four but preserves gradient 5. Ask which quantity in the notebook formula was changed.
66. Card 10: read and use y=mx+b
Card prompt: A straight-line rule is y=-5x−7. Find y when x=4, then name its gradient and y-intercept.
Meaning and conditions: Notebook heading: linear rule y=mx+b. Here m is the gradient, the change in y per +1 x-unit. The number b is the y-value at x=0. A negative m means the line falls to the right; it does not guarantee every output is negative. This card should include a simple two-column input–output check.
One worked example: Substitute x=4: y=-5×(4)+(-7)=-27. Gradient is -5. The vertical-axis intercept is the point (0,-7). These are different mathematical quantities, even though they appear in the same short formula.
When this would be wrong: A learner may treat b=-7 as the gradient and m=-5 as the starting output. Another may omit brackets around negative input 4, changing the result. The notebook should include a ‘read before substituting’ reminder.
Check: At x=5, output is -32, a change of -5; at x=0, output is -7. These checks verify the roles of m and b independently of one substituted answer.
Later retrieval: Change only the intercept by +4. The new rule shifts all outputs up by four but preserves gradient -5. Ask which quantity in the notebook formula was changed.
67. Card 11: read and use y=mx+b
Card prompt: A straight-line rule is y=-3x−4. Find y when x=-6, then name its gradient and y-intercept.
Meaning and conditions: Notebook heading: linear rule y=mx+b. Here m is the gradient, the change in y per +1 x-unit. The number b is the y-value at x=0. A negative m means the line falls to the right; it does not guarantee every output is negative. This card should include a simple two-column input–output check.
One worked example: Substitute x=-6: y=-3×(-6)+(-4)=14. Gradient is -3. The vertical-axis intercept is the point (0,-4). These are different mathematical quantities, even though they appear in the same short formula.
When this would be wrong: A learner may treat b=-4 as the gradient and m=-3 as the starting output. Another may omit brackets around negative input -6, changing the result. The notebook should include a ‘read before substituting’ reminder.
Check: At x=-5, output is 11, a change of -3; at x=0, output is -4. These checks verify the roles of m and b independently of one substituted answer.
Later retrieval: Change only the intercept by +4. The new rule shifts all outputs up by four but preserves gradient -3. Ask which quantity in the notebook formula was changed.
68. Card 12: read and use y=mx+b
Card prompt: A straight-line rule is y=-2x−1. Find y when x=1, then name its gradient and y-intercept.
Meaning and conditions: Notebook heading: linear rule y=mx+b. Here m is the gradient, the change in y per +1 x-unit. The number b is the y-value at x=0. A negative m means the line falls to the right; it does not guarantee every output is negative. This card should include a simple two-column input–output check.
One worked example: Substitute x=1: y=-2×(1)+(-1)=-3. Gradient is -2. The vertical-axis intercept is the point (0,-1). These are different mathematical quantities, even though they appear in the same short formula.
When this would be wrong: A learner may treat b=-1 as the gradient and m=-2 as the starting output. Another may omit brackets around negative input 1, changing the result. The notebook should include a ‘read before substituting’ reminder.
Check: At x=2, output is -5, a change of -2; at x=0, output is -1. These checks verify the roles of m and b independently of one substituted answer.
Later retrieval: Change only the intercept by +4. The new rule shifts all outputs up by four but preserves gradient -2. Ask which quantity in the notebook formula was changed.
69. Card 13: read and use y=mx+b
Card prompt: A straight-line rule is y=-1x+2. Find y when x=8, then name its gradient and y-intercept.
Meaning and conditions: Notebook heading: linear rule y=mx+b. Here m is the gradient, the change in y per +1 x-unit. The number b is the y-value at x=0. A negative m means the line falls to the right; it does not guarantee every output is negative. This card should include a simple two-column input–output check.
One worked example: Substitute x=8: y=-1×(8)+(2)=-6. Gradient is -1. The vertical-axis intercept is the point (0,2). These are different mathematical quantities, even though they appear in the same short formula.
When this would be wrong: A learner may treat b=2 as the gradient and m=-1 as the starting output. Another may omit brackets around negative input 8, changing the result. The notebook should include a ‘read before substituting’ reminder.
Check: At x=9, output is -7, a change of -1; at x=0, output is 2. These checks verify the roles of m and b independently of one substituted answer.
Later retrieval: Change only the intercept by +4. The new rule shifts all outputs up by four but preserves gradient -1. Ask which quantity in the notebook formula was changed.
70. Card 14: read and use y=mx+b
Card prompt: A straight-line rule is y=1x+5. Find y when x=-2, then name its gradient and y-intercept.
Meaning and conditions: Notebook heading: linear rule y=mx+b. Here m is the gradient, the change in y per +1 x-unit. The number b is the y-value at x=0. A negative m means the line falls to the right; it does not guarantee every output is negative. This card should include a simple two-column input–output check.
One worked example: Substitute x=-2: y=1×(-2)+(5)=3. Gradient is 1. The vertical-axis intercept is the point (0,5). These are different mathematical quantities, even though they appear in the same short formula.
When this would be wrong: A learner may treat b=5 as the gradient and m=1 as the starting output. Another may omit brackets around negative input -2, changing the result. The notebook should include a ‘read before substituting’ reminder.
Check: At x=-1, output is 4, a change of 1; at x=0, output is 5. These checks verify the roles of m and b independently of one substituted answer.
Later retrieval: Change only the intercept by +4. The new rule shifts all outputs up by four but preserves gradient 1. Ask which quantity in the notebook formula was changed.
71. Card 15: read and use y=mx+b
Card prompt: A straight-line rule is y=2x+8. Find y when x=5, then name its gradient and y-intercept.
Meaning and conditions: Notebook heading: linear rule y=mx+b. Here m is the gradient, the change in y per +1 x-unit. The number b is the y-value at x=0. A negative m means the line falls to the right; it does not guarantee every output is negative. This card should include a simple two-column input–output check.
One worked example: Substitute x=5: y=2×(5)+(8)=18. Gradient is 2. The vertical-axis intercept is the point (0,8). These are different mathematical quantities, even though they appear in the same short formula.
When this would be wrong: A learner may treat b=8 as the gradient and m=2 as the starting output. Another may omit brackets around negative input 5, changing the result. The notebook should include a ‘read before substituting’ reminder.
Check: At x=6, output is 20, a change of 2; at x=0, output is 8. These checks verify the roles of m and b independently of one substituted answer.
Later retrieval: Change only the intercept by +4. The new rule shifts all outputs up by four but preserves gradient 2. Ask which quantity in the notebook formula was changed.
72. Card 16: read and use y=mx+b
Card prompt: A straight-line rule is y=3x+11. Find y when x=-5, then name its gradient and y-intercept.
Meaning and conditions: Notebook heading: linear rule y=mx+b. Here m is the gradient, the change in y per +1 x-unit. The number b is the y-value at x=0. A negative m means the line falls to the right; it does not guarantee every output is negative. This card should include a simple two-column input–output check.
One worked example: Substitute x=-5: y=3×(-5)+(11)=-4. Gradient is 3. The vertical-axis intercept is the point (0,11). These are different mathematical quantities, even though they appear in the same short formula.
When this would be wrong: A learner may treat b=11 as the gradient and m=3 as the starting output. Another may omit brackets around negative input -5, changing the result. The notebook should include a ‘read before substituting’ reminder.
Check: At x=-4, output is -1, a change of 3; at x=0, output is 11. These checks verify the roles of m and b independently of one substituted answer.
Later retrieval: Change only the intercept by +4. The new rule shifts all outputs up by four but preserves gradient 3. Ask which quantity in the notebook formula was changed.
73. Card 17: read and use y=mx+b
Card prompt: A straight-line rule is y=4x−9. Find y when x=2, then name its gradient and y-intercept.
Meaning and conditions: Notebook heading: linear rule y=mx+b. Here m is the gradient, the change in y per +1 x-unit. The number b is the y-value at x=0. A negative m means the line falls to the right; it does not guarantee every output is negative. This card should include a simple two-column input–output check.
One worked example: Substitute x=2: y=4×(2)+(-9)=-1. Gradient is 4. The vertical-axis intercept is the point (0,-9). These are different mathematical quantities, even though they appear in the same short formula.
When this would be wrong: A learner may treat b=-9 as the gradient and m=4 as the starting output. Another may omit brackets around negative input 2, changing the result. The notebook should include a ‘read before substituting’ reminder.
Check: At x=3, output is 3, a change of 4; at x=0, output is -9. These checks verify the roles of m and b independently of one substituted answer.
Later retrieval: Change only the intercept by +4. The new rule shifts all outputs up by four but preserves gradient 4. Ask which quantity in the notebook formula was changed.
74. Card 18: read and use y=mx+b
Card prompt: A straight-line rule is y=5x−6. Find y when x=-8, then name its gradient and y-intercept.
Meaning and conditions: Notebook heading: linear rule y=mx+b. Here m is the gradient, the change in y per +1 x-unit. The number b is the y-value at x=0. A negative m means the line falls to the right; it does not guarantee every output is negative. This card should include a simple two-column input–output check.
One worked example: Substitute x=-8: y=5×(-8)+(-6)=-46. Gradient is 5. The vertical-axis intercept is the point (0,-6). These are different mathematical quantities, even though they appear in the same short formula.
When this would be wrong: A learner may treat b=-6 as the gradient and m=5 as the starting output. Another may omit brackets around negative input -8, changing the result. The notebook should include a ‘read before substituting’ reminder.
Check: At x=-7, output is -41, a change of 5; at x=0, output is -6. These checks verify the roles of m and b independently of one substituted answer.
Later retrieval: Change only the intercept by +4. The new rule shifts all outputs up by four but preserves gradient 5. Ask which quantity in the notebook formula was changed.
75. Card 19: read and use y=mx+b
Card prompt: A straight-line rule is y=-5x−3. Find y when x=-1, then name its gradient and y-intercept.
Meaning and conditions: Notebook heading: linear rule y=mx+b. Here m is the gradient, the change in y per +1 x-unit. The number b is the y-value at x=0. A negative m means the line falls to the right; it does not guarantee every output is negative. This card should include a simple two-column input–output check.
One worked example: Substitute x=-1: y=-5×(-1)+(-3)=2. Gradient is -5. The vertical-axis intercept is the point (0,-3). These are different mathematical quantities, even though they appear in the same short formula.
When this would be wrong: A learner may treat b=-3 as the gradient and m=-5 as the starting output. Another may omit brackets around negative input -1, changing the result. The notebook should include a ‘read before substituting’ reminder.
Check: At x=0, output is -3, a change of -5; at x=0, output is -3. These checks verify the roles of m and b independently of one substituted answer.
Later retrieval: Change only the intercept by +4. The new rule shifts all outputs up by four but preserves gradient -5. Ask which quantity in the notebook formula was changed.
76. Card 20: read and use y=mx+b
Card prompt: A straight-line rule is y=-3x+0. Find y when x=6, then name its gradient and y-intercept.
Meaning and conditions: Notebook heading: linear rule y=mx+b. Here m is the gradient, the change in y per +1 x-unit. The number b is the y-value at x=0. A negative m means the line falls to the right; it does not guarantee every output is negative. This card should include a simple two-column input–output check.
One worked example: Substitute x=6: y=-3×(6)+(0)=-18. Gradient is -3. The vertical-axis intercept is the point (0,0). These are different mathematical quantities, even though they appear in the same short formula.
When this would be wrong: A learner may treat b=0 as the gradient and m=-3 as the starting output. Another may omit brackets around negative input 6, changing the result. The notebook should include a ‘read before substituting’ reminder.
Check: At x=7, output is -21, a change of -3; at x=0, output is 0. These checks verify the roles of m and b independently of one substituted answer.
Later retrieval: Change only the intercept by +4. The new rule shifts all outputs up by four but preserves gradient -3. Ask which quantity in the notebook formula was changed.
77. Card 21: read and use y=mx+b
Card prompt: A straight-line rule is y=-2x+3. Find y when x=-4, then name its gradient and y-intercept.
Meaning and conditions: Notebook heading: linear rule y=mx+b. Here m is the gradient, the change in y per +1 x-unit. The number b is the y-value at x=0. A negative m means the line falls to the right; it does not guarantee every output is negative. This card should include a simple two-column input–output check.
One worked example: Substitute x=-4: y=-2×(-4)+(3)=11. Gradient is -2. The vertical-axis intercept is the point (0,3). These are different mathematical quantities, even though they appear in the same short formula.
When this would be wrong: A learner may treat b=3 as the gradient and m=-2 as the starting output. Another may omit brackets around negative input -4, changing the result. The notebook should include a ‘read before substituting’ reminder.
Check: At x=-3, output is 9, a change of -2; at x=0, output is 3. These checks verify the roles of m and b independently of one substituted answer.
Later retrieval: Change only the intercept by +4. The new rule shifts all outputs up by four but preserves gradient -2. Ask which quantity in the notebook formula was changed.
78. Card 22: read and use y=mx+b
Card prompt: A straight-line rule is y=-1x+6. Find y when x=3, then name its gradient and y-intercept.
Meaning and conditions: Notebook heading: linear rule y=mx+b. Here m is the gradient, the change in y per +1 x-unit. The number b is the y-value at x=0. A negative m means the line falls to the right; it does not guarantee every output is negative. This card should include a simple two-column input–output check.
One worked example: Substitute x=3: y=-1×(3)+(6)=3. Gradient is -1. The vertical-axis intercept is the point (0,6). These are different mathematical quantities, even though they appear in the same short formula.
When this would be wrong: A learner may treat b=6 as the gradient and m=-1 as the starting output. Another may omit brackets around negative input 3, changing the result. The notebook should include a ‘read before substituting’ reminder.
Check: At x=4, output is 2, a change of -1; at x=0, output is 6. These checks verify the roles of m and b independently of one substituted answer.
Later retrieval: Change only the intercept by +4. The new rule shifts all outputs up by four but preserves gradient -1. Ask which quantity in the notebook formula was changed.
79. Card 23: read and use y=mx+b
Card prompt: A straight-line rule is y=1x+9. Find y when x=-7, then name its gradient and y-intercept.
Meaning and conditions: Notebook heading: linear rule y=mx+b. Here m is the gradient, the change in y per +1 x-unit. The number b is the y-value at x=0. A negative m means the line falls to the right; it does not guarantee every output is negative. This card should include a simple two-column input–output check.
One worked example: Substitute x=-7: y=1×(-7)+(9)=2. Gradient is 1. The vertical-axis intercept is the point (0,9). These are different mathematical quantities, even though they appear in the same short formula.
When this would be wrong: A learner may treat b=9 as the gradient and m=1 as the starting output. Another may omit brackets around negative input -7, changing the result. The notebook should include a ‘read before substituting’ reminder.
Check: At x=-6, output is 3, a change of 1; at x=0, output is 9. These checks verify the roles of m and b independently of one substituted answer.
Later retrieval: Change only the intercept by +4. The new rule shifts all outputs up by four but preserves gradient 1. Ask which quantity in the notebook formula was changed.
80. Card 24: read and use y=mx+b
Card prompt: A straight-line rule is y=2x−11. Find y when x=0, then name its gradient and y-intercept.
Meaning and conditions: Notebook heading: linear rule y=mx+b. Here m is the gradient, the change in y per +1 x-unit. The number b is the y-value at x=0. A negative m means the line falls to the right; it does not guarantee every output is negative. This card should include a simple two-column input–output check.
One worked example: Substitute x=0: y=2×(0)+(-11)=-11. Gradient is 2. The vertical-axis intercept is the point (0,-11). These are different mathematical quantities, even though they appear in the same short formula.
When this would be wrong: A learner may treat b=-11 as the gradient and m=2 as the starting output. Another may omit brackets around negative input 0, changing the result. The notebook should include a ‘read before substituting’ reminder.
Check: At x=1, output is -9, a change of 2; at x=0, output is -11. These checks verify the roles of m and b independently of one substituted answer.
Later retrieval: Change only the intercept by +4. The new rule shifts all outputs up by four but preserves gradient 2. Ask which quantity in the notebook formula was changed.
81. Card 25: read and use y=mx+b
Card prompt: A straight-line rule is y=3x−8. Find y when x=7, then name its gradient and y-intercept.
Meaning and conditions: Notebook heading: linear rule y=mx+b. Here m is the gradient, the change in y per +1 x-unit. The number b is the y-value at x=0. A negative m means the line falls to the right; it does not guarantee every output is negative. This card should include a simple two-column input–output check.
One worked example: Substitute x=7: y=3×(7)+(-8)=13. Gradient is 3. The vertical-axis intercept is the point (0,-8). These are different mathematical quantities, even though they appear in the same short formula.
When this would be wrong: A learner may treat b=-8 as the gradient and m=3 as the starting output. Another may omit brackets around negative input 7, changing the result. The notebook should include a ‘read before substituting’ reminder.
Check: At x=8, output is 16, a change of 3; at x=0, output is -8. These checks verify the roles of m and b independently of one substituted answer.
Later retrieval: Change only the intercept by +4. The new rule shifts all outputs up by four but preserves gradient 3. Ask which quantity in the notebook formula was changed.
82. Card 26: read and use y=mx+b
Card prompt: A straight-line rule is y=4x−5. Find y when x=-3, then name its gradient and y-intercept.
Meaning and conditions: Notebook heading: linear rule y=mx+b. Here m is the gradient, the change in y per +1 x-unit. The number b is the y-value at x=0. A negative m means the line falls to the right; it does not guarantee every output is negative. This card should include a simple two-column input–output check.
One worked example: Substitute x=-3: y=4×(-3)+(-5)=-17. Gradient is 4. The vertical-axis intercept is the point (0,-5). These are different mathematical quantities, even though they appear in the same short formula.
When this would be wrong: A learner may treat b=-5 as the gradient and m=4 as the starting output. Another may omit brackets around negative input -3, changing the result. The notebook should include a ‘read before substituting’ reminder.
Check: At x=-2, output is -13, a change of 4; at x=0, output is -5. These checks verify the roles of m and b independently of one substituted answer.
Later retrieval: Change only the intercept by +4. The new rule shifts all outputs up by four but preserves gradient 4. Ask which quantity in the notebook formula was changed.
83. Card 27: read and use y=mx+b
Card prompt: A straight-line rule is y=5x−2. Find y when x=4, then name its gradient and y-intercept.
Meaning and conditions: Notebook heading: linear rule y=mx+b. Here m is the gradient, the change in y per +1 x-unit. The number b is the y-value at x=0. A negative m means the line falls to the right; it does not guarantee every output is negative. This card should include a simple two-column input–output check.
One worked example: Substitute x=4: y=5×(4)+(-2)=18. Gradient is 5. The vertical-axis intercept is the point (0,-2). These are different mathematical quantities, even though they appear in the same short formula.
When this would be wrong: A learner may treat b=-2 as the gradient and m=5 as the starting output. Another may omit brackets around negative input 4, changing the result. The notebook should include a ‘read before substituting’ reminder.
Check: At x=5, output is 23, a change of 5; at x=0, output is -2. These checks verify the roles of m and b independently of one substituted answer.
Later retrieval: Change only the intercept by +4. The new rule shifts all outputs up by four but preserves gradient 5. Ask which quantity in the notebook formula was changed.
84. Card 28: read and use y=mx+b
Card prompt: A straight-line rule is y=-5x+1. Find y when x=-6, then name its gradient and y-intercept.
Meaning and conditions: Notebook heading: linear rule y=mx+b. Here m is the gradient, the change in y per +1 x-unit. The number b is the y-value at x=0. A negative m means the line falls to the right; it does not guarantee every output is negative. This card should include a simple two-column input–output check.
One worked example: Substitute x=-6: y=-5×(-6)+(1)=31. Gradient is -5. The vertical-axis intercept is the point (0,1). These are different mathematical quantities, even though they appear in the same short formula.
When this would be wrong: A learner may treat b=1 as the gradient and m=-5 as the starting output. Another may omit brackets around negative input -6, changing the result. The notebook should include a ‘read before substituting’ reminder.
Check: At x=-5, output is 26, a change of -5; at x=0, output is 1. These checks verify the roles of m and b independently of one substituted answer.
Later retrieval: Change only the intercept by +4. The new rule shifts all outputs up by four but preserves gradient -5. Ask which quantity in the notebook formula was changed.
85. Card 29: read and use y=mx+b
Card prompt: A straight-line rule is y=-3x+4. Find y when x=1, then name its gradient and y-intercept.
Meaning and conditions: Notebook heading: linear rule y=mx+b. Here m is the gradient, the change in y per +1 x-unit. The number b is the y-value at x=0. A negative m means the line falls to the right; it does not guarantee every output is negative. This card should include a simple two-column input–output check.
One worked example: Substitute x=1: y=-3×(1)+(4)=1. Gradient is -3. The vertical-axis intercept is the point (0,4). These are different mathematical quantities, even though they appear in the same short formula.
When this would be wrong: A learner may treat b=4 as the gradient and m=-3 as the starting output. Another may omit brackets around negative input 1, changing the result. The notebook should include a ‘read before substituting’ reminder.
Check: At x=2, output is -2, a change of -3; at x=0, output is 4. These checks verify the roles of m and b independently of one substituted answer.
Later retrieval: Change only the intercept by +4. The new rule shifts all outputs up by four but preserves gradient -3. Ask which quantity in the notebook formula was changed.
Rectangle, triangle and trapezium measures
In rectangle, triangle and trapezium measures, a notebook card should name the question that triggers the formula and the quantity it calculates. Read the worked example as one illustration of the relationship, not as fixed numbers to memorise. Pay attention to units, assumptions and a reverse check. If two formulas use the same letter, define that letter again in the local context.
86. Card 1: choose the plane measure requested
Card prompt: A rectangular diagram has length 3 cm and width 2 cm. Find perimeter and area. A separate triangle has base 3 cm and perpendicular height 2 cm; find its area.
Meaning and conditions: A good notebook has separate labelled cards: rectangle perimeter P=2(l+w), rectangle area A=lw, triangle area A=½bh. The symbol b on the triangle card means base, while on another card it might mean a graph intercept. The notebook must define symbols locally rather than assume all letters mean the same thing everywhere.
One worked example: Rectangle perimeter=2(3+2)=10 cm. Rectangle area=3×2=6 cm². Triangle area=½×3×2=3 cm². The triangle’s height is perpendicular to its chosen base.
When this would be wrong: Applying A=lw to a perimeter question gives the wrong physical quantity. Using a slanted triangle side without perpendicularity proof is another modelling error. Unit checks—cm versus cm²—should appear prominently on the card.
Check: Trace the rectangle’s four sides for 10 cm and count an 3-by-2 square grid for 6 cm². For the triangle, two congruent copies make a base-by-height parallelogram or rectangle under suitable arrangement, confirming the half factor.
Later retrieval: Doubling both sides of the rectangle doubles its perimeter to 20 cm but quadruples area to 24 cm². Explain the different scaling as part of retrieval.
87. Card 2: choose the plane measure requested
Card prompt: A rectangular diagram has length 6 cm and width 9 cm. Find perimeter and area. A separate triangle has base 6 cm and perpendicular height 7 cm; find its area.
Meaning and conditions: A good notebook has separate labelled cards: rectangle perimeter P=2(l+w), rectangle area A=lw, triangle area A=½bh. The symbol b on the triangle card means base, while on another card it might mean a graph intercept. The notebook must define symbols locally rather than assume all letters mean the same thing everywhere.
One worked example: Rectangle perimeter=2(6+9)=30 cm. Rectangle area=6×9=54 cm². Triangle area=½×6×7=21 cm². The triangle’s height is perpendicular to its chosen base.
When this would be wrong: Applying A=lw to a perimeter question gives the wrong physical quantity. Using a slanted triangle side without perpendicularity proof is another modelling error. Unit checks—cm versus cm²—should appear prominently on the card.
Check: Trace the rectangle’s four sides for 30 cm and count an 6-by-9 square grid for 54 cm². For the triangle, two congruent copies make a base-by-height parallelogram or rectangle under suitable arrangement, confirming the half factor.
Later retrieval: Doubling both sides of the rectangle doubles its perimeter to 60 cm but quadruples area to 216 cm². Explain the different scaling as part of retrieval.
88. Card 3: choose the plane measure requested
Card prompt: A rectangular diagram has length 9 cm and width 16 cm. Find perimeter and area. A separate triangle has base 9 cm and perpendicular height 12 cm; find its area.
Meaning and conditions: A good notebook has separate labelled cards: rectangle perimeter P=2(l+w), rectangle area A=lw, triangle area A=½bh. The symbol b on the triangle card means base, while on another card it might mean a graph intercept. The notebook must define symbols locally rather than assume all letters mean the same thing everywhere.
One worked example: Rectangle perimeter=2(9+16)=50 cm. Rectangle area=9×16=144 cm². Triangle area=½×9×12=54 cm². The triangle’s height is perpendicular to its chosen base.
When this would be wrong: Applying A=lw to a perimeter question gives the wrong physical quantity. Using a slanted triangle side without perpendicularity proof is another modelling error. Unit checks—cm versus cm²—should appear prominently on the card.
Check: Trace the rectangle’s four sides for 50 cm and count an 9-by-16 square grid for 144 cm². For the triangle, two congruent copies make a base-by-height parallelogram or rectangle under suitable arrangement, confirming the half factor.
Later retrieval: Doubling both sides of the rectangle doubles its perimeter to 100 cm but quadruples area to 576 cm². Explain the different scaling as part of retrieval.
89. Card 4: choose the plane measure requested
Card prompt: A rectangular diagram has length 12 cm and width 4 cm. Find perimeter and area. A separate triangle has base 12 cm and perpendicular height 17 cm; find its area.
Meaning and conditions: A good notebook has separate labelled cards: rectangle perimeter P=2(l+w), rectangle area A=lw, triangle area A=½bh. The symbol b on the triangle card means base, while on another card it might mean a graph intercept. The notebook must define symbols locally rather than assume all letters mean the same thing everywhere.
One worked example: Rectangle perimeter=2(12+4)=32 cm. Rectangle area=12×4=48 cm². Triangle area=½×12×17=102 cm². The triangle’s height is perpendicular to its chosen base.
When this would be wrong: Applying A=lw to a perimeter question gives the wrong physical quantity. Using a slanted triangle side without perpendicularity proof is another modelling error. Unit checks—cm versus cm²—should appear prominently on the card.
Check: Trace the rectangle’s four sides for 32 cm and count an 12-by-4 square grid for 48 cm². For the triangle, two congruent copies make a base-by-height parallelogram or rectangle under suitable arrangement, confirming the half factor.
Later retrieval: Doubling both sides of the rectangle doubles its perimeter to 64 cm but quadruples area to 192 cm². Explain the different scaling as part of retrieval.
90. Card 5: choose the plane measure requested
Card prompt: A rectangular diagram has length 15 cm and width 11 cm. Find perimeter and area. A separate triangle has base 15 cm and perpendicular height 22 cm; find its area.
Meaning and conditions: A good notebook has separate labelled cards: rectangle perimeter P=2(l+w), rectangle area A=lw, triangle area A=½bh. The symbol b on the triangle card means base, while on another card it might mean a graph intercept. The notebook must define symbols locally rather than assume all letters mean the same thing everywhere.
One worked example: Rectangle perimeter=2(15+11)=52 cm. Rectangle area=15×11=165 cm². Triangle area=½×15×22=165 cm². The triangle’s height is perpendicular to its chosen base.
When this would be wrong: Applying A=lw to a perimeter question gives the wrong physical quantity. Using a slanted triangle side without perpendicularity proof is another modelling error. Unit checks—cm versus cm²—should appear prominently on the card.
Check: Trace the rectangle’s four sides for 52 cm and count an 15-by-11 square grid for 165 cm². For the triangle, two congruent copies make a base-by-height parallelogram or rectangle under suitable arrangement, confirming the half factor.
Later retrieval: Doubling both sides of the rectangle doubles its perimeter to 104 cm but quadruples area to 660 cm². Explain the different scaling as part of retrieval.
91. Card 6: choose the plane measure requested
Card prompt: A rectangular diagram has length 18 cm and width 18 cm. Find perimeter and area. A separate triangle has base 18 cm and perpendicular height 4 cm; find its area.
Meaning and conditions: A good notebook has separate labelled cards: rectangle perimeter P=2(l+w), rectangle area A=lw, triangle area A=½bh. The symbol b on the triangle card means base, while on another card it might mean a graph intercept. The notebook must define symbols locally rather than assume all letters mean the same thing everywhere.
One worked example: Rectangle perimeter=2(18+18)=72 cm. Rectangle area=18×18=324 cm². Triangle area=½×18×4=36 cm². The triangle’s height is perpendicular to its chosen base.
When this would be wrong: Applying A=lw to a perimeter question gives the wrong physical quantity. Using a slanted triangle side without perpendicularity proof is another modelling error. Unit checks—cm versus cm²—should appear prominently on the card.
Check: Trace the rectangle’s four sides for 72 cm and count an 18-by-18 square grid for 324 cm². For the triangle, two congruent copies make a base-by-height parallelogram or rectangle under suitable arrangement, confirming the half factor.
Later retrieval: Doubling both sides of the rectangle doubles its perimeter to 144 cm but quadruples area to 1296 cm². Explain the different scaling as part of retrieval.
92. Card 7: choose the plane measure requested
Card prompt: A rectangular diagram has length 21 cm and width 6 cm. Find perimeter and area. A separate triangle has base 21 cm and perpendicular height 9 cm; find its area.
Meaning and conditions: A good notebook has separate labelled cards: rectangle perimeter P=2(l+w), rectangle area A=lw, triangle area A=½bh. The symbol b on the triangle card means base, while on another card it might mean a graph intercept. The notebook must define symbols locally rather than assume all letters mean the same thing everywhere.
One worked example: Rectangle perimeter=2(21+6)=54 cm. Rectangle area=21×6=126 cm². Triangle area=½×21×9=94.5 cm². The triangle’s height is perpendicular to its chosen base.
When this would be wrong: Applying A=lw to a perimeter question gives the wrong physical quantity. Using a slanted triangle side without perpendicularity proof is another modelling error. Unit checks—cm versus cm²—should appear prominently on the card.
Check: Trace the rectangle’s four sides for 54 cm and count an 21-by-6 square grid for 126 cm². For the triangle, two congruent copies make a base-by-height parallelogram or rectangle under suitable arrangement, confirming the half factor.
Later retrieval: Doubling both sides of the rectangle doubles its perimeter to 108 cm but quadruples area to 504 cm². Explain the different scaling as part of retrieval.
93. Card 8: choose the plane measure requested
Card prompt: A rectangular diagram has length 24 cm and width 13 cm. Find perimeter and area. A separate triangle has base 24 cm and perpendicular height 14 cm; find its area.
Meaning and conditions: A good notebook has separate labelled cards: rectangle perimeter P=2(l+w), rectangle area A=lw, triangle area A=½bh. The symbol b on the triangle card means base, while on another card it might mean a graph intercept. The notebook must define symbols locally rather than assume all letters mean the same thing everywhere.
One worked example: Rectangle perimeter=2(24+13)=74 cm. Rectangle area=24×13=312 cm². Triangle area=½×24×14=168 cm². The triangle’s height is perpendicular to its chosen base.
When this would be wrong: Applying A=lw to a perimeter question gives the wrong physical quantity. Using a slanted triangle side without perpendicularity proof is another modelling error. Unit checks—cm versus cm²—should appear prominently on the card.
Check: Trace the rectangle’s four sides for 74 cm and count an 24-by-13 square grid for 312 cm². For the triangle, two congruent copies make a base-by-height parallelogram or rectangle under suitable arrangement, confirming the half factor.
Later retrieval: Doubling both sides of the rectangle doubles its perimeter to 148 cm but quadruples area to 1248 cm². Explain the different scaling as part of retrieval.
94. Card 9: choose the plane measure requested
Card prompt: A rectangular diagram has length 27 cm and width 20 cm. Find perimeter and area. A separate triangle has base 27 cm and perpendicular height 19 cm; find its area.
Meaning and conditions: A good notebook has separate labelled cards: rectangle perimeter P=2(l+w), rectangle area A=lw, triangle area A=½bh. The symbol b on the triangle card means base, while on another card it might mean a graph intercept. The notebook must define symbols locally rather than assume all letters mean the same thing everywhere.
One worked example: Rectangle perimeter=2(27+20)=94 cm. Rectangle area=27×20=540 cm². Triangle area=½×27×19=256.5 cm². The triangle’s height is perpendicular to its chosen base.
When this would be wrong: Applying A=lw to a perimeter question gives the wrong physical quantity. Using a slanted triangle side without perpendicularity proof is another modelling error. Unit checks—cm versus cm²—should appear prominently on the card.
Check: Trace the rectangle’s four sides for 94 cm and count an 27-by-20 square grid for 540 cm². For the triangle, two congruent copies make a base-by-height parallelogram or rectangle under suitable arrangement, confirming the half factor.
Later retrieval: Doubling both sides of the rectangle doubles its perimeter to 188 cm but quadruples area to 2160 cm². Explain the different scaling as part of retrieval.
95. Card 10: choose the plane measure requested
Card prompt: A rectangular diagram has length 3 cm and width 8 cm. Find perimeter and area. A separate triangle has base 3 cm and perpendicular height 24 cm; find its area.
Meaning and conditions: A good notebook has separate labelled cards: rectangle perimeter P=2(l+w), rectangle area A=lw, triangle area A=½bh. The symbol b on the triangle card means base, while on another card it might mean a graph intercept. The notebook must define symbols locally rather than assume all letters mean the same thing everywhere.
One worked example: Rectangle perimeter=2(3+8)=22 cm. Rectangle area=3×8=24 cm². Triangle area=½×3×24=36 cm². The triangle’s height is perpendicular to its chosen base.
When this would be wrong: Applying A=lw to a perimeter question gives the wrong physical quantity. Using a slanted triangle side without perpendicularity proof is another modelling error. Unit checks—cm versus cm²—should appear prominently on the card.
Check: Trace the rectangle’s four sides for 22 cm and count an 3-by-8 square grid for 24 cm². For the triangle, two congruent copies make a base-by-height parallelogram or rectangle under suitable arrangement, confirming the half factor.
Later retrieval: Doubling both sides of the rectangle doubles its perimeter to 44 cm but quadruples area to 96 cm². Explain the different scaling as part of retrieval.
96. Card 11: choose the plane measure requested
Card prompt: A rectangular diagram has length 6 cm and width 15 cm. Find perimeter and area. A separate triangle has base 6 cm and perpendicular height 6 cm; find its area.
Meaning and conditions: A good notebook has separate labelled cards: rectangle perimeter P=2(l+w), rectangle area A=lw, triangle area A=½bh. The symbol b on the triangle card means base, while on another card it might mean a graph intercept. The notebook must define symbols locally rather than assume all letters mean the same thing everywhere.
One worked example: Rectangle perimeter=2(6+15)=42 cm. Rectangle area=6×15=90 cm². Triangle area=½×6×6=18 cm². The triangle’s height is perpendicular to its chosen base.
When this would be wrong: Applying A=lw to a perimeter question gives the wrong physical quantity. Using a slanted triangle side without perpendicularity proof is another modelling error. Unit checks—cm versus cm²—should appear prominently on the card.
Check: Trace the rectangle’s four sides for 42 cm and count an 6-by-15 square grid for 90 cm². For the triangle, two congruent copies make a base-by-height parallelogram or rectangle under suitable arrangement, confirming the half factor.
Later retrieval: Doubling both sides of the rectangle doubles its perimeter to 84 cm but quadruples area to 360 cm². Explain the different scaling as part of retrieval.
97. Card 12: choose the plane measure requested
Card prompt: A rectangular diagram has length 9 cm and width 3 cm. Find perimeter and area. A separate triangle has base 9 cm and perpendicular height 11 cm; find its area.
Meaning and conditions: A good notebook has separate labelled cards: rectangle perimeter P=2(l+w), rectangle area A=lw, triangle area A=½bh. The symbol b on the triangle card means base, while on another card it might mean a graph intercept. The notebook must define symbols locally rather than assume all letters mean the same thing everywhere.
One worked example: Rectangle perimeter=2(9+3)=24 cm. Rectangle area=9×3=27 cm². Triangle area=½×9×11=49.5 cm². The triangle’s height is perpendicular to its chosen base.
When this would be wrong: Applying A=lw to a perimeter question gives the wrong physical quantity. Using a slanted triangle side without perpendicularity proof is another modelling error. Unit checks—cm versus cm²—should appear prominently on the card.
Check: Trace the rectangle’s four sides for 24 cm and count an 9-by-3 square grid for 27 cm². For the triangle, two congruent copies make a base-by-height parallelogram or rectangle under suitable arrangement, confirming the half factor.
Later retrieval: Doubling both sides of the rectangle doubles its perimeter to 48 cm but quadruples area to 108 cm². Explain the different scaling as part of retrieval.
98. Card 13: choose the plane measure requested
Card prompt: A rectangular diagram has length 12 cm and width 10 cm. Find perimeter and area. A separate triangle has base 12 cm and perpendicular height 16 cm; find its area.
Meaning and conditions: A good notebook has separate labelled cards: rectangle perimeter P=2(l+w), rectangle area A=lw, triangle area A=½bh. The symbol b on the triangle card means base, while on another card it might mean a graph intercept. The notebook must define symbols locally rather than assume all letters mean the same thing everywhere.
One worked example: Rectangle perimeter=2(12+10)=44 cm. Rectangle area=12×10=120 cm². Triangle area=½×12×16=96 cm². The triangle’s height is perpendicular to its chosen base.
When this would be wrong: Applying A=lw to a perimeter question gives the wrong physical quantity. Using a slanted triangle side without perpendicularity proof is another modelling error. Unit checks—cm versus cm²—should appear prominently on the card.
Check: Trace the rectangle’s four sides for 44 cm and count an 12-by-10 square grid for 120 cm². For the triangle, two congruent copies make a base-by-height parallelogram or rectangle under suitable arrangement, confirming the half factor.
Later retrieval: Doubling both sides of the rectangle doubles its perimeter to 88 cm but quadruples area to 480 cm². Explain the different scaling as part of retrieval.
99. Card 14: choose the plane measure requested
Card prompt: A rectangular diagram has length 15 cm and width 17 cm. Find perimeter and area. A separate triangle has base 15 cm and perpendicular height 21 cm; find its area.
Meaning and conditions: A good notebook has separate labelled cards: rectangle perimeter P=2(l+w), rectangle area A=lw, triangle area A=½bh. The symbol b on the triangle card means base, while on another card it might mean a graph intercept. The notebook must define symbols locally rather than assume all letters mean the same thing everywhere.
One worked example: Rectangle perimeter=2(15+17)=64 cm. Rectangle area=15×17=255 cm². Triangle area=½×15×21=157.5 cm². The triangle’s height is perpendicular to its chosen base.
When this would be wrong: Applying A=lw to a perimeter question gives the wrong physical quantity. Using a slanted triangle side without perpendicularity proof is another modelling error. Unit checks—cm versus cm²—should appear prominently on the card.
Check: Trace the rectangle’s four sides for 64 cm and count an 15-by-17 square grid for 255 cm². For the triangle, two congruent copies make a base-by-height parallelogram or rectangle under suitable arrangement, confirming the half factor.
Later retrieval: Doubling both sides of the rectangle doubles its perimeter to 128 cm but quadruples area to 1020 cm². Explain the different scaling as part of retrieval.
100. Card 15: choose the plane measure requested
Card prompt: A rectangular diagram has length 18 cm and width 5 cm. Find perimeter and area. A separate triangle has base 18 cm and perpendicular height 3 cm; find its area.
Meaning and conditions: A good notebook has separate labelled cards: rectangle perimeter P=2(l+w), rectangle area A=lw, triangle area A=½bh. The symbol b on the triangle card means base, while on another card it might mean a graph intercept. The notebook must define symbols locally rather than assume all letters mean the same thing everywhere.
One worked example: Rectangle perimeter=2(18+5)=46 cm. Rectangle area=18×5=90 cm². Triangle area=½×18×3=27 cm². The triangle’s height is perpendicular to its chosen base.
When this would be wrong: Applying A=lw to a perimeter question gives the wrong physical quantity. Using a slanted triangle side without perpendicularity proof is another modelling error. Unit checks—cm versus cm²—should appear prominently on the card.
Check: Trace the rectangle’s four sides for 46 cm and count an 18-by-5 square grid for 90 cm². For the triangle, two congruent copies make a base-by-height parallelogram or rectangle under suitable arrangement, confirming the half factor.
Later retrieval: Doubling both sides of the rectangle doubles its perimeter to 92 cm but quadruples area to 360 cm². Explain the different scaling as part of retrieval.
101. Card 16: choose the plane measure requested
Card prompt: A rectangular diagram has length 21 cm and width 12 cm. Find perimeter and area. A separate triangle has base 21 cm and perpendicular height 8 cm; find its area.
Meaning and conditions: A good notebook has separate labelled cards: rectangle perimeter P=2(l+w), rectangle area A=lw, triangle area A=½bh. The symbol b on the triangle card means base, while on another card it might mean a graph intercept. The notebook must define symbols locally rather than assume all letters mean the same thing everywhere.
One worked example: Rectangle perimeter=2(21+12)=66 cm. Rectangle area=21×12=252 cm². Triangle area=½×21×8=84 cm². The triangle’s height is perpendicular to its chosen base.
When this would be wrong: Applying A=lw to a perimeter question gives the wrong physical quantity. Using a slanted triangle side without perpendicularity proof is another modelling error. Unit checks—cm versus cm²—should appear prominently on the card.
Check: Trace the rectangle’s four sides for 66 cm and count an 21-by-12 square grid for 252 cm². For the triangle, two congruent copies make a base-by-height parallelogram or rectangle under suitable arrangement, confirming the half factor.
Later retrieval: Doubling both sides of the rectangle doubles its perimeter to 132 cm but quadruples area to 1008 cm². Explain the different scaling as part of retrieval.
102. Card 17: choose the plane measure requested
Card prompt: A rectangular diagram has length 24 cm and width 19 cm. Find perimeter and area. A separate triangle has base 24 cm and perpendicular height 13 cm; find its area.
Meaning and conditions: A good notebook has separate labelled cards: rectangle perimeter P=2(l+w), rectangle area A=lw, triangle area A=½bh. The symbol b on the triangle card means base, while on another card it might mean a graph intercept. The notebook must define symbols locally rather than assume all letters mean the same thing everywhere.
One worked example: Rectangle perimeter=2(24+19)=86 cm. Rectangle area=24×19=456 cm². Triangle area=½×24×13=156 cm². The triangle’s height is perpendicular to its chosen base.
When this would be wrong: Applying A=lw to a perimeter question gives the wrong physical quantity. Using a slanted triangle side without perpendicularity proof is another modelling error. Unit checks—cm versus cm²—should appear prominently on the card.
Check: Trace the rectangle’s four sides for 86 cm and count an 24-by-19 square grid for 456 cm². For the triangle, two congruent copies make a base-by-height parallelogram or rectangle under suitable arrangement, confirming the half factor.
Later retrieval: Doubling both sides of the rectangle doubles its perimeter to 172 cm but quadruples area to 1824 cm². Explain the different scaling as part of retrieval.
103. Card 18: choose the plane measure requested
Card prompt: A rectangular diagram has length 27 cm and width 7 cm. Find perimeter and area. A separate triangle has base 27 cm and perpendicular height 18 cm; find its area.
Meaning and conditions: A good notebook has separate labelled cards: rectangle perimeter P=2(l+w), rectangle area A=lw, triangle area A=½bh. The symbol b on the triangle card means base, while on another card it might mean a graph intercept. The notebook must define symbols locally rather than assume all letters mean the same thing everywhere.
One worked example: Rectangle perimeter=2(27+7)=68 cm. Rectangle area=27×7=189 cm². Triangle area=½×27×18=243 cm². The triangle’s height is perpendicular to its chosen base.
When this would be wrong: Applying A=lw to a perimeter question gives the wrong physical quantity. Using a slanted triangle side without perpendicularity proof is another modelling error. Unit checks—cm versus cm²—should appear prominently on the card.
Check: Trace the rectangle’s four sides for 68 cm and count an 27-by-7 square grid for 189 cm². For the triangle, two congruent copies make a base-by-height parallelogram or rectangle under suitable arrangement, confirming the half factor.
Later retrieval: Doubling both sides of the rectangle doubles its perimeter to 136 cm but quadruples area to 756 cm². Explain the different scaling as part of retrieval.
104. Card 19: choose the plane measure requested
Card prompt: A rectangular diagram has length 3 cm and width 14 cm. Find perimeter and area. A separate triangle has base 3 cm and perpendicular height 23 cm; find its area.
Meaning and conditions: A good notebook has separate labelled cards: rectangle perimeter P=2(l+w), rectangle area A=lw, triangle area A=½bh. The symbol b on the triangle card means base, while on another card it might mean a graph intercept. The notebook must define symbols locally rather than assume all letters mean the same thing everywhere.
One worked example: Rectangle perimeter=2(3+14)=34 cm. Rectangle area=3×14=42 cm². Triangle area=½×3×23=34.5 cm². The triangle’s height is perpendicular to its chosen base.
When this would be wrong: Applying A=lw to a perimeter question gives the wrong physical quantity. Using a slanted triangle side without perpendicularity proof is another modelling error. Unit checks—cm versus cm²—should appear prominently on the card.
Check: Trace the rectangle’s four sides for 34 cm and count an 3-by-14 square grid for 42 cm². For the triangle, two congruent copies make a base-by-height parallelogram or rectangle under suitable arrangement, confirming the half factor.
Later retrieval: Doubling both sides of the rectangle doubles its perimeter to 68 cm but quadruples area to 168 cm². Explain the different scaling as part of retrieval.
105. Card 20: choose the plane measure requested
Card prompt: A rectangular diagram has length 6 cm and width 2 cm. Find perimeter and area. A separate triangle has base 6 cm and perpendicular height 5 cm; find its area.
Meaning and conditions: A good notebook has separate labelled cards: rectangle perimeter P=2(l+w), rectangle area A=lw, triangle area A=½bh. The symbol b on the triangle card means base, while on another card it might mean a graph intercept. The notebook must define symbols locally rather than assume all letters mean the same thing everywhere.
One worked example: Rectangle perimeter=2(6+2)=16 cm. Rectangle area=6×2=12 cm². Triangle area=½×6×5=15 cm². The triangle’s height is perpendicular to its chosen base.
When this would be wrong: Applying A=lw to a perimeter question gives the wrong physical quantity. Using a slanted triangle side without perpendicularity proof is another modelling error. Unit checks—cm versus cm²—should appear prominently on the card.
Check: Trace the rectangle’s four sides for 16 cm and count an 6-by-2 square grid for 12 cm². For the triangle, two congruent copies make a base-by-height parallelogram or rectangle under suitable arrangement, confirming the half factor.
Later retrieval: Doubling both sides of the rectangle doubles its perimeter to 32 cm but quadruples area to 48 cm². Explain the different scaling as part of retrieval.
106. Card 21: choose the plane measure requested
Card prompt: A rectangular diagram has length 9 cm and width 9 cm. Find perimeter and area. A separate triangle has base 9 cm and perpendicular height 10 cm; find its area.
Meaning and conditions: A good notebook has separate labelled cards: rectangle perimeter P=2(l+w), rectangle area A=lw, triangle area A=½bh. The symbol b on the triangle card means base, while on another card it might mean a graph intercept. The notebook must define symbols locally rather than assume all letters mean the same thing everywhere.
One worked example: Rectangle perimeter=2(9+9)=36 cm. Rectangle area=9×9=81 cm². Triangle area=½×9×10=45 cm². The triangle’s height is perpendicular to its chosen base.
When this would be wrong: Applying A=lw to a perimeter question gives the wrong physical quantity. Using a slanted triangle side without perpendicularity proof is another modelling error. Unit checks—cm versus cm²—should appear prominently on the card.
Check: Trace the rectangle’s four sides for 36 cm and count an 9-by-9 square grid for 81 cm². For the triangle, two congruent copies make a base-by-height parallelogram or rectangle under suitable arrangement, confirming the half factor.
Later retrieval: Doubling both sides of the rectangle doubles its perimeter to 72 cm but quadruples area to 324 cm². Explain the different scaling as part of retrieval.
107. Card 22: choose the plane measure requested
Card prompt: A rectangular diagram has length 12 cm and width 16 cm. Find perimeter and area. A separate triangle has base 12 cm and perpendicular height 15 cm; find its area.
Meaning and conditions: A good notebook has separate labelled cards: rectangle perimeter P=2(l+w), rectangle area A=lw, triangle area A=½bh. The symbol b on the triangle card means base, while on another card it might mean a graph intercept. The notebook must define symbols locally rather than assume all letters mean the same thing everywhere.
One worked example: Rectangle perimeter=2(12+16)=56 cm. Rectangle area=12×16=192 cm². Triangle area=½×12×15=90 cm². The triangle’s height is perpendicular to its chosen base.
When this would be wrong: Applying A=lw to a perimeter question gives the wrong physical quantity. Using a slanted triangle side without perpendicularity proof is another modelling error. Unit checks—cm versus cm²—should appear prominently on the card.
Check: Trace the rectangle’s four sides for 56 cm and count an 12-by-16 square grid for 192 cm². For the triangle, two congruent copies make a base-by-height parallelogram or rectangle under suitable arrangement, confirming the half factor.
Later retrieval: Doubling both sides of the rectangle doubles its perimeter to 112 cm but quadruples area to 768 cm². Explain the different scaling as part of retrieval.
108. Card 23: choose the plane measure requested
Card prompt: A rectangular diagram has length 15 cm and width 4 cm. Find perimeter and area. A separate triangle has base 15 cm and perpendicular height 20 cm; find its area.
Meaning and conditions: A good notebook has separate labelled cards: rectangle perimeter P=2(l+w), rectangle area A=lw, triangle area A=½bh. The symbol b on the triangle card means base, while on another card it might mean a graph intercept. The notebook must define symbols locally rather than assume all letters mean the same thing everywhere.
One worked example: Rectangle perimeter=2(15+4)=38 cm. Rectangle area=15×4=60 cm². Triangle area=½×15×20=150 cm². The triangle’s height is perpendicular to its chosen base.
When this would be wrong: Applying A=lw to a perimeter question gives the wrong physical quantity. Using a slanted triangle side without perpendicularity proof is another modelling error. Unit checks—cm versus cm²—should appear prominently on the card.
Check: Trace the rectangle’s four sides for 38 cm and count an 15-by-4 square grid for 60 cm². For the triangle, two congruent copies make a base-by-height parallelogram or rectangle under suitable arrangement, confirming the half factor.
Later retrieval: Doubling both sides of the rectangle doubles its perimeter to 76 cm but quadruples area to 240 cm². Explain the different scaling as part of retrieval.
109. Card 24: choose the plane measure requested
Card prompt: A rectangular diagram has length 18 cm and width 11 cm. Find perimeter and area. A separate triangle has base 18 cm and perpendicular height 2 cm; find its area.
Meaning and conditions: A good notebook has separate labelled cards: rectangle perimeter P=2(l+w), rectangle area A=lw, triangle area A=½bh. The symbol b on the triangle card means base, while on another card it might mean a graph intercept. The notebook must define symbols locally rather than assume all letters mean the same thing everywhere.
One worked example: Rectangle perimeter=2(18+11)=58 cm. Rectangle area=18×11=198 cm². Triangle area=½×18×2=18 cm². The triangle’s height is perpendicular to its chosen base.
When this would be wrong: Applying A=lw to a perimeter question gives the wrong physical quantity. Using a slanted triangle side without perpendicularity proof is another modelling error. Unit checks—cm versus cm²—should appear prominently on the card.
Check: Trace the rectangle’s four sides for 58 cm and count an 18-by-11 square grid for 198 cm². For the triangle, two congruent copies make a base-by-height parallelogram or rectangle under suitable arrangement, confirming the half factor.
Later retrieval: Doubling both sides of the rectangle doubles its perimeter to 116 cm but quadruples area to 792 cm². Explain the different scaling as part of retrieval.
110. Card 25: choose the plane measure requested
Card prompt: A rectangular diagram has length 21 cm and width 18 cm. Find perimeter and area. A separate triangle has base 21 cm and perpendicular height 7 cm; find its area.
Meaning and conditions: A good notebook has separate labelled cards: rectangle perimeter P=2(l+w), rectangle area A=lw, triangle area A=½bh. The symbol b on the triangle card means base, while on another card it might mean a graph intercept. The notebook must define symbols locally rather than assume all letters mean the same thing everywhere.
One worked example: Rectangle perimeter=2(21+18)=78 cm. Rectangle area=21×18=378 cm². Triangle area=½×21×7=73.5 cm². The triangle’s height is perpendicular to its chosen base.
When this would be wrong: Applying A=lw to a perimeter question gives the wrong physical quantity. Using a slanted triangle side without perpendicularity proof is another modelling error. Unit checks—cm versus cm²—should appear prominently on the card.
Check: Trace the rectangle’s four sides for 78 cm and count an 21-by-18 square grid for 378 cm². For the triangle, two congruent copies make a base-by-height parallelogram or rectangle under suitable arrangement, confirming the half factor.
Later retrieval: Doubling both sides of the rectangle doubles its perimeter to 156 cm but quadruples area to 1512 cm². Explain the different scaling as part of retrieval.
111. Card 26: choose the plane measure requested
Card prompt: A rectangular diagram has length 24 cm and width 6 cm. Find perimeter and area. A separate triangle has base 24 cm and perpendicular height 12 cm; find its area.
Meaning and conditions: A good notebook has separate labelled cards: rectangle perimeter P=2(l+w), rectangle area A=lw, triangle area A=½bh. The symbol b on the triangle card means base, while on another card it might mean a graph intercept. The notebook must define symbols locally rather than assume all letters mean the same thing everywhere.
One worked example: Rectangle perimeter=2(24+6)=60 cm. Rectangle area=24×6=144 cm². Triangle area=½×24×12=144 cm². The triangle’s height is perpendicular to its chosen base.
When this would be wrong: Applying A=lw to a perimeter question gives the wrong physical quantity. Using a slanted triangle side without perpendicularity proof is another modelling error. Unit checks—cm versus cm²—should appear prominently on the card.
Check: Trace the rectangle’s four sides for 60 cm and count an 24-by-6 square grid for 144 cm². For the triangle, two congruent copies make a base-by-height parallelogram or rectangle under suitable arrangement, confirming the half factor.
Later retrieval: Doubling both sides of the rectangle doubles its perimeter to 120 cm but quadruples area to 576 cm². Explain the different scaling as part of retrieval.
112. Card 27: choose the plane measure requested
Card prompt: A rectangular diagram has length 27 cm and width 13 cm. Find perimeter and area. A separate triangle has base 27 cm and perpendicular height 17 cm; find its area.
Meaning and conditions: A good notebook has separate labelled cards: rectangle perimeter P=2(l+w), rectangle area A=lw, triangle area A=½bh. The symbol b on the triangle card means base, while on another card it might mean a graph intercept. The notebook must define symbols locally rather than assume all letters mean the same thing everywhere.
One worked example: Rectangle perimeter=2(27+13)=80 cm. Rectangle area=27×13=351 cm². Triangle area=½×27×17=229.5 cm². The triangle’s height is perpendicular to its chosen base.
When this would be wrong: Applying A=lw to a perimeter question gives the wrong physical quantity. Using a slanted triangle side without perpendicularity proof is another modelling error. Unit checks—cm versus cm²—should appear prominently on the card.
Check: Trace the rectangle’s four sides for 80 cm and count an 27-by-13 square grid for 351 cm². For the triangle, two congruent copies make a base-by-height parallelogram or rectangle under suitable arrangement, confirming the half factor.
Later retrieval: Doubling both sides of the rectangle doubles its perimeter to 160 cm but quadruples area to 1404 cm². Explain the different scaling as part of retrieval.
113. Card 28: choose the plane measure requested
Card prompt: A rectangular diagram has length 3 cm and width 20 cm. Find perimeter and area. A separate triangle has base 3 cm and perpendicular height 22 cm; find its area.
Meaning and conditions: A good notebook has separate labelled cards: rectangle perimeter P=2(l+w), rectangle area A=lw, triangle area A=½bh. The symbol b on the triangle card means base, while on another card it might mean a graph intercept. The notebook must define symbols locally rather than assume all letters mean the same thing everywhere.
One worked example: Rectangle perimeter=2(3+20)=46 cm. Rectangle area=3×20=60 cm². Triangle area=½×3×22=33 cm². The triangle’s height is perpendicular to its chosen base.
When this would be wrong: Applying A=lw to a perimeter question gives the wrong physical quantity. Using a slanted triangle side without perpendicularity proof is another modelling error. Unit checks—cm versus cm²—should appear prominently on the card.
Check: Trace the rectangle’s four sides for 46 cm and count an 3-by-20 square grid for 60 cm². For the triangle, two congruent copies make a base-by-height parallelogram or rectangle under suitable arrangement, confirming the half factor.
Later retrieval: Doubling both sides of the rectangle doubles its perimeter to 92 cm but quadruples area to 240 cm². Explain the different scaling as part of retrieval.
114. Card 29: choose the plane measure requested
Card prompt: A rectangular diagram has length 6 cm and width 8 cm. Find perimeter and area. A separate triangle has base 6 cm and perpendicular height 4 cm; find its area.
Meaning and conditions: A good notebook has separate labelled cards: rectangle perimeter P=2(l+w), rectangle area A=lw, triangle area A=½bh. The symbol b on the triangle card means base, while on another card it might mean a graph intercept. The notebook must define symbols locally rather than assume all letters mean the same thing everywhere.
One worked example: Rectangle perimeter=2(6+8)=28 cm. Rectangle area=6×8=48 cm². Triangle area=½×6×4=12 cm². The triangle’s height is perpendicular to its chosen base.
When this would be wrong: Applying A=lw to a perimeter question gives the wrong physical quantity. Using a slanted triangle side without perpendicularity proof is another modelling error. Unit checks—cm versus cm²—should appear prominently on the card.
Check: Trace the rectangle’s four sides for 28 cm and count an 6-by-8 square grid for 48 cm². For the triangle, two congruent copies make a base-by-height parallelogram or rectangle under suitable arrangement, confirming the half factor.
Later retrieval: Doubling both sides of the rectangle doubles its perimeter to 56 cm but quadruples area to 192 cm². Explain the different scaling as part of retrieval.
Circles, arcs and sector extensions
In circles, arcs and sector extensions, a notebook card should name the question that triggers the formula and the quantity it calculates. Read the worked example as one illustration of the relationship, not as fixed numbers to memorise. Pay attention to units, assumptions and a reverse check. If two formulas use the same letter, define that letter again in the local context.
115. Card 1: circle first, optional sector later
Card prompt: A circle has radius 2 cm. Calculate its exact full circumference and area. For an optional later-stage G1 extension, a central-angle sector measures 30°; describe its arc and sector area as fractions of the whole.
Meaning and conditions: Notebook heading one: circumference=2πr with length units; circle area=πr² with square units. Only after those are secure, a later-stage sector card can state arc=(θ/360)×2πr and sector area=(θ/360)×πr² for θ in degrees. This is not a claim that every current Secondary 2 G1 class is testing sectors.
One worked example: The complete circumference is 4π cm; the complete area is 4π cm². Sector share 30/360 produces arc (30/360)×4π cm≈1.047198 cm and sector area (30/360)×4π cm²≈1.047198 cm².
When this would be wrong: Using πr² for a curved arc, or 2πr for a covered surface, swaps two physical dimensions. Using diameter as radius in an area calculation causes a fourfold error. The notebook should show a circle with centre, radius and perimeter traced separately.
Check: Each sector amount is 30/360 of its respective full-circle quantity; multiplying by 360/30 would reconstruct the full circumference or full area. The units cm and cm² must remain distinct.
Later retrieval: If radius doubles, circumference doubles to 8π cm, while full area quadruples to 16π cm². The same linear-versus-square scaling applies to sector arc and sector area at unchanged angle.
116. Card 2: circle first, optional sector later
Card prompt: A circle has radius 7 cm. Calculate its exact full circumference and area. For an optional later-stage G1 extension, a central-angle sector measures 45°; describe its arc and sector area as fractions of the whole.
Meaning and conditions: Notebook heading one: circumference=2πr with length units; circle area=πr² with square units. Only after those are secure, a later-stage sector card can state arc=(θ/360)×2πr and sector area=(θ/360)×πr² for θ in degrees. This is not a claim that every current Secondary 2 G1 class is testing sectors.
One worked example: The complete circumference is 14π cm; the complete area is 49π cm². Sector share 45/360 produces arc (45/360)×14π cm≈5.497787 cm and sector area (45/360)×49π cm²≈19.242255 cm².
When this would be wrong: Using πr² for a curved arc, or 2πr for a covered surface, swaps two physical dimensions. Using diameter as radius in an area calculation causes a fourfold error. The notebook should show a circle with centre, radius and perimeter traced separately.
Check: Each sector amount is 45/360 of its respective full-circle quantity; multiplying by 360/45 would reconstruct the full circumference or full area. The units cm and cm² must remain distinct.
Later retrieval: If radius doubles, circumference doubles to 28π cm, while full area quadruples to 196π cm². The same linear-versus-square scaling applies to sector arc and sector area at unchanged angle.
117. Card 3: circle first, optional sector later
Card prompt: A circle has radius 12 cm. Calculate its exact full circumference and area. For an optional later-stage G1 extension, a central-angle sector measures 60°; describe its arc and sector area as fractions of the whole.
Meaning and conditions: Notebook heading one: circumference=2πr with length units; circle area=πr² with square units. Only after those are secure, a later-stage sector card can state arc=(θ/360)×2πr and sector area=(θ/360)×πr² for θ in degrees. This is not a claim that every current Secondary 2 G1 class is testing sectors.
One worked example: The complete circumference is 24π cm; the complete area is 144π cm². Sector share 60/360 produces arc (60/360)×24π cm≈12.566371 cm and sector area (60/360)×144π cm²≈75.398224 cm².
When this would be wrong: Using πr² for a curved arc, or 2πr for a covered surface, swaps two physical dimensions. Using diameter as radius in an area calculation causes a fourfold error. The notebook should show a circle with centre, radius and perimeter traced separately.
Check: Each sector amount is 60/360 of its respective full-circle quantity; multiplying by 360/60 would reconstruct the full circumference or full area. The units cm and cm² must remain distinct.
Later retrieval: If radius doubles, circumference doubles to 48π cm, while full area quadruples to 576π cm². The same linear-versus-square scaling applies to sector arc and sector area at unchanged angle.
118. Card 4: circle first, optional sector later
Card prompt: A circle has radius 17 cm. Calculate its exact full circumference and area. For an optional later-stage G1 extension, a central-angle sector measures 72°; describe its arc and sector area as fractions of the whole.
Meaning and conditions: Notebook heading one: circumference=2πr with length units; circle area=πr² with square units. Only after those are secure, a later-stage sector card can state arc=(θ/360)×2πr and sector area=(θ/360)×πr² for θ in degrees. This is not a claim that every current Secondary 2 G1 class is testing sectors.
One worked example: The complete circumference is 34π cm; the complete area is 289π cm². Sector share 72/360 produces arc (72/360)×34π cm≈21.36283 cm and sector area (72/360)×289π cm²≈181.584055 cm².
When this would be wrong: Using πr² for a curved arc, or 2πr for a covered surface, swaps two physical dimensions. Using diameter as radius in an area calculation causes a fourfold error. The notebook should show a circle with centre, radius and perimeter traced separately.
Check: Each sector amount is 72/360 of its respective full-circle quantity; multiplying by 360/72 would reconstruct the full circumference or full area. The units cm and cm² must remain distinct.
Later retrieval: If radius doubles, circumference doubles to 68π cm, while full area quadruples to 1156π cm². The same linear-versus-square scaling applies to sector arc and sector area at unchanged angle.
119. Card 5: circle first, optional sector later
Card prompt: A circle has radius 3 cm. Calculate its exact full circumference and area. For an optional later-stage G1 extension, a central-angle sector measures 90°; describe its arc and sector area as fractions of the whole.
Meaning and conditions: Notebook heading one: circumference=2πr with length units; circle area=πr² with square units. Only after those are secure, a later-stage sector card can state arc=(θ/360)×2πr and sector area=(θ/360)×πr² for θ in degrees. This is not a claim that every current Secondary 2 G1 class is testing sectors.
One worked example: The complete circumference is 6π cm; the complete area is 9π cm². Sector share 90/360 produces arc (90/360)×6π cm≈4.712389 cm and sector area (90/360)×9π cm²≈7.068583 cm².
When this would be wrong: Using πr² for a curved arc, or 2πr for a covered surface, swaps two physical dimensions. Using diameter as radius in an area calculation causes a fourfold error. The notebook should show a circle with centre, radius and perimeter traced separately.
Check: Each sector amount is 90/360 of its respective full-circle quantity; multiplying by 360/90 would reconstruct the full circumference or full area. The units cm and cm² must remain distinct.
Later retrieval: If radius doubles, circumference doubles to 12π cm, while full area quadruples to 36π cm². The same linear-versus-square scaling applies to sector arc and sector area at unchanged angle.
120. Card 6: circle first, optional sector later
Card prompt: A circle has radius 8 cm. Calculate its exact full circumference and area. For an optional later-stage G1 extension, a central-angle sector measures 120°; describe its arc and sector area as fractions of the whole.
Meaning and conditions: Notebook heading one: circumference=2πr with length units; circle area=πr² with square units. Only after those are secure, a later-stage sector card can state arc=(θ/360)×2πr and sector area=(θ/360)×πr² for θ in degrees. This is not a claim that every current Secondary 2 G1 class is testing sectors.
One worked example: The complete circumference is 16π cm; the complete area is 64π cm². Sector share 120/360 produces arc (120/360)×16π cm≈16.755161 cm and sector area (120/360)×64π cm²≈67.020643 cm².
When this would be wrong: Using πr² for a curved arc, or 2πr for a covered surface, swaps two physical dimensions. Using diameter as radius in an area calculation causes a fourfold error. The notebook should show a circle with centre, radius and perimeter traced separately.
Check: Each sector amount is 120/360 of its respective full-circle quantity; multiplying by 360/120 would reconstruct the full circumference or full area. The units cm and cm² must remain distinct.
Later retrieval: If radius doubles, circumference doubles to 32π cm, while full area quadruples to 256π cm². The same linear-versus-square scaling applies to sector arc and sector area at unchanged angle.
121. Card 7: circle first, optional sector later
Card prompt: A circle has radius 13 cm. Calculate its exact full circumference and area. For an optional later-stage G1 extension, a central-angle sector measures 135°; describe its arc and sector area as fractions of the whole.
Meaning and conditions: Notebook heading one: circumference=2πr with length units; circle area=πr² with square units. Only after those are secure, a later-stage sector card can state arc=(θ/360)×2πr and sector area=(θ/360)×πr² for θ in degrees. This is not a claim that every current Secondary 2 G1 class is testing sectors.
One worked example: The complete circumference is 26π cm; the complete area is 169π cm². Sector share 135/360 produces arc (135/360)×26π cm≈30.630528 cm and sector area (135/360)×169π cm²≈199.098434 cm².
When this would be wrong: Using πr² for a curved arc, or 2πr for a covered surface, swaps two physical dimensions. Using diameter as radius in an area calculation causes a fourfold error. The notebook should show a circle with centre, radius and perimeter traced separately.
Check: Each sector amount is 135/360 of its respective full-circle quantity; multiplying by 360/135 would reconstruct the full circumference or full area. The units cm and cm² must remain distinct.
Later retrieval: If radius doubles, circumference doubles to 52π cm, while full area quadruples to 676π cm². The same linear-versus-square scaling applies to sector arc and sector area at unchanged angle.
122. Card 8: circle first, optional sector later
Card prompt: A circle has radius 18 cm. Calculate its exact full circumference and area. For an optional later-stage G1 extension, a central-angle sector measures 150°; describe its arc and sector area as fractions of the whole.
Meaning and conditions: Notebook heading one: circumference=2πr with length units; circle area=πr² with square units. Only after those are secure, a later-stage sector card can state arc=(θ/360)×2πr and sector area=(θ/360)×πr² for θ in degrees. This is not a claim that every current Secondary 2 G1 class is testing sectors.
One worked example: The complete circumference is 36π cm; the complete area is 324π cm². Sector share 150/360 produces arc (150/360)×36π cm≈47.12389 cm and sector area (150/360)×324π cm²≈424.115008 cm².
When this would be wrong: Using πr² for a curved arc, or 2πr for a covered surface, swaps two physical dimensions. Using diameter as radius in an area calculation causes a fourfold error. The notebook should show a circle with centre, radius and perimeter traced separately.
Check: Each sector amount is 150/360 of its respective full-circle quantity; multiplying by 360/150 would reconstruct the full circumference or full area. The units cm and cm² must remain distinct.
Later retrieval: If radius doubles, circumference doubles to 72π cm, while full area quadruples to 1296π cm². The same linear-versus-square scaling applies to sector arc and sector area at unchanged angle.
123. Card 9: circle first, optional sector later
Card prompt: A circle has radius 4 cm. Calculate its exact full circumference and area. For an optional later-stage G1 extension, a central-angle sector measures 180°; describe its arc and sector area as fractions of the whole.
Meaning and conditions: Notebook heading one: circumference=2πr with length units; circle area=πr² with square units. Only after those are secure, a later-stage sector card can state arc=(θ/360)×2πr and sector area=(θ/360)×πr² for θ in degrees. This is not a claim that every current Secondary 2 G1 class is testing sectors.
One worked example: The complete circumference is 8π cm; the complete area is 16π cm². Sector share 180/360 produces arc (180/360)×8π cm≈12.566371 cm and sector area (180/360)×16π cm²≈25.132741 cm².
When this would be wrong: Using πr² for a curved arc, or 2πr for a covered surface, swaps two physical dimensions. Using diameter as radius in an area calculation causes a fourfold error. The notebook should show a circle with centre, radius and perimeter traced separately.
Check: Each sector amount is 180/360 of its respective full-circle quantity; multiplying by 360/180 would reconstruct the full circumference or full area. The units cm and cm² must remain distinct.
Later retrieval: If radius doubles, circumference doubles to 16π cm, while full area quadruples to 64π cm². The same linear-versus-square scaling applies to sector arc and sector area at unchanged angle.
124. Card 10: circle first, optional sector later
Card prompt: A circle has radius 9 cm. Calculate its exact full circumference and area. For an optional later-stage G1 extension, a central-angle sector measures 240°; describe its arc and sector area as fractions of the whole.
Meaning and conditions: Notebook heading one: circumference=2πr with length units; circle area=πr² with square units. Only after those are secure, a later-stage sector card can state arc=(θ/360)×2πr and sector area=(θ/360)×πr² for θ in degrees. This is not a claim that every current Secondary 2 G1 class is testing sectors.
One worked example: The complete circumference is 18π cm; the complete area is 81π cm². Sector share 240/360 produces arc (240/360)×18π cm≈37.699112 cm and sector area (240/360)×81π cm²≈169.646003 cm².
When this would be wrong: Using πr² for a curved arc, or 2πr for a covered surface, swaps two physical dimensions. Using diameter as radius in an area calculation causes a fourfold error. The notebook should show a circle with centre, radius and perimeter traced separately.
Check: Each sector amount is 240/360 of its respective full-circle quantity; multiplying by 360/240 would reconstruct the full circumference or full area. The units cm and cm² must remain distinct.
Later retrieval: If radius doubles, circumference doubles to 36π cm, while full area quadruples to 324π cm². The same linear-versus-square scaling applies to sector arc and sector area at unchanged angle.
125. Card 11: circle first, optional sector later
Card prompt: A circle has radius 14 cm. Calculate its exact full circumference and area. For an optional later-stage G1 extension, a central-angle sector measures 30°; describe its arc and sector area as fractions of the whole.
Meaning and conditions: Notebook heading one: circumference=2πr with length units; circle area=πr² with square units. Only after those are secure, a later-stage sector card can state arc=(θ/360)×2πr and sector area=(θ/360)×πr² for θ in degrees. This is not a claim that every current Secondary 2 G1 class is testing sectors.
One worked example: The complete circumference is 28π cm; the complete area is 196π cm². Sector share 30/360 produces arc (30/360)×28π cm≈7.330383 cm and sector area (30/360)×196π cm²≈51.31268 cm².
When this would be wrong: Using πr² for a curved arc, or 2πr for a covered surface, swaps two physical dimensions. Using diameter as radius in an area calculation causes a fourfold error. The notebook should show a circle with centre, radius and perimeter traced separately.
Check: Each sector amount is 30/360 of its respective full-circle quantity; multiplying by 360/30 would reconstruct the full circumference or full area. The units cm and cm² must remain distinct.
Later retrieval: If radius doubles, circumference doubles to 56π cm, while full area quadruples to 784π cm². The same linear-versus-square scaling applies to sector arc and sector area at unchanged angle.
126. Card 12: circle first, optional sector later
Card prompt: A circle has radius 19 cm. Calculate its exact full circumference and area. For an optional later-stage G1 extension, a central-angle sector measures 45°; describe its arc and sector area as fractions of the whole.
Meaning and conditions: Notebook heading one: circumference=2πr with length units; circle area=πr² with square units. Only after those are secure, a later-stage sector card can state arc=(θ/360)×2πr and sector area=(θ/360)×πr² for θ in degrees. This is not a claim that every current Secondary 2 G1 class is testing sectors.
One worked example: The complete circumference is 38π cm; the complete area is 361π cm². Sector share 45/360 produces arc (45/360)×38π cm≈14.922565 cm and sector area (45/360)×361π cm²≈141.764368 cm².
When this would be wrong: Using πr² for a curved arc, or 2πr for a covered surface, swaps two physical dimensions. Using diameter as radius in an area calculation causes a fourfold error. The notebook should show a circle with centre, radius and perimeter traced separately.
Check: Each sector amount is 45/360 of its respective full-circle quantity; multiplying by 360/45 would reconstruct the full circumference or full area. The units cm and cm² must remain distinct.
Later retrieval: If radius doubles, circumference doubles to 76π cm, while full area quadruples to 1444π cm². The same linear-versus-square scaling applies to sector arc and sector area at unchanged angle.
127. Card 13: circle first, optional sector later
Card prompt: A circle has radius 5 cm. Calculate its exact full circumference and area. For an optional later-stage G1 extension, a central-angle sector measures 60°; describe its arc and sector area as fractions of the whole.
Meaning and conditions: Notebook heading one: circumference=2πr with length units; circle area=πr² with square units. Only after those are secure, a later-stage sector card can state arc=(θ/360)×2πr and sector area=(θ/360)×πr² for θ in degrees. This is not a claim that every current Secondary 2 G1 class is testing sectors.
One worked example: The complete circumference is 10π cm; the complete area is 25π cm². Sector share 60/360 produces arc (60/360)×10π cm≈5.235988 cm and sector area (60/360)×25π cm²≈13.089969 cm².
When this would be wrong: Using πr² for a curved arc, or 2πr for a covered surface, swaps two physical dimensions. Using diameter as radius in an area calculation causes a fourfold error. The notebook should show a circle with centre, radius and perimeter traced separately.
Check: Each sector amount is 60/360 of its respective full-circle quantity; multiplying by 360/60 would reconstruct the full circumference or full area. The units cm and cm² must remain distinct.
Later retrieval: If radius doubles, circumference doubles to 20π cm, while full area quadruples to 100π cm². The same linear-versus-square scaling applies to sector arc and sector area at unchanged angle.
128. Card 14: circle first, optional sector later
Card prompt: A circle has radius 10 cm. Calculate its exact full circumference and area. For an optional later-stage G1 extension, a central-angle sector measures 72°; describe its arc and sector area as fractions of the whole.
Meaning and conditions: Notebook heading one: circumference=2πr with length units; circle area=πr² with square units. Only after those are secure, a later-stage sector card can state arc=(θ/360)×2πr and sector area=(θ/360)×πr² for θ in degrees. This is not a claim that every current Secondary 2 G1 class is testing sectors.
One worked example: The complete circumference is 20π cm; the complete area is 100π cm². Sector share 72/360 produces arc (72/360)×20π cm≈12.566371 cm and sector area (72/360)×100π cm²≈62.831853 cm².
When this would be wrong: Using πr² for a curved arc, or 2πr for a covered surface, swaps two physical dimensions. Using diameter as radius in an area calculation causes a fourfold error. The notebook should show a circle with centre, radius and perimeter traced separately.
Check: Each sector amount is 72/360 of its respective full-circle quantity; multiplying by 360/72 would reconstruct the full circumference or full area. The units cm and cm² must remain distinct.
Later retrieval: If radius doubles, circumference doubles to 40π cm, while full area quadruples to 400π cm². The same linear-versus-square scaling applies to sector arc and sector area at unchanged angle.
129. Card 15: circle first, optional sector later
Card prompt: A circle has radius 15 cm. Calculate its exact full circumference and area. For an optional later-stage G1 extension, a central-angle sector measures 90°; describe its arc and sector area as fractions of the whole.
Meaning and conditions: Notebook heading one: circumference=2πr with length units; circle area=πr² with square units. Only after those are secure, a later-stage sector card can state arc=(θ/360)×2πr and sector area=(θ/360)×πr² for θ in degrees. This is not a claim that every current Secondary 2 G1 class is testing sectors.
One worked example: The complete circumference is 30π cm; the complete area is 225π cm². Sector share 90/360 produces arc (90/360)×30π cm≈23.561945 cm and sector area (90/360)×225π cm²≈176.714587 cm².
When this would be wrong: Using πr² for a curved arc, or 2πr for a covered surface, swaps two physical dimensions. Using diameter as radius in an area calculation causes a fourfold error. The notebook should show a circle with centre, radius and perimeter traced separately.
Check: Each sector amount is 90/360 of its respective full-circle quantity; multiplying by 360/90 would reconstruct the full circumference or full area. The units cm and cm² must remain distinct.
Later retrieval: If radius doubles, circumference doubles to 60π cm, while full area quadruples to 900π cm². The same linear-versus-square scaling applies to sector arc and sector area at unchanged angle.
130. Card 16: circle first, optional sector later
Card prompt: A circle has radius 20 cm. Calculate its exact full circumference and area. For an optional later-stage G1 extension, a central-angle sector measures 120°; describe its arc and sector area as fractions of the whole.
Meaning and conditions: Notebook heading one: circumference=2πr with length units; circle area=πr² with square units. Only after those are secure, a later-stage sector card can state arc=(θ/360)×2πr and sector area=(θ/360)×πr² for θ in degrees. This is not a claim that every current Secondary 2 G1 class is testing sectors.
One worked example: The complete circumference is 40π cm; the complete area is 400π cm². Sector share 120/360 produces arc (120/360)×40π cm≈41.887902 cm and sector area (120/360)×400π cm²≈418.87902 cm².
When this would be wrong: Using πr² for a curved arc, or 2πr for a covered surface, swaps two physical dimensions. Using diameter as radius in an area calculation causes a fourfold error. The notebook should show a circle with centre, radius and perimeter traced separately.
Check: Each sector amount is 120/360 of its respective full-circle quantity; multiplying by 360/120 would reconstruct the full circumference or full area. The units cm and cm² must remain distinct.
Later retrieval: If radius doubles, circumference doubles to 80π cm, while full area quadruples to 1600π cm². The same linear-versus-square scaling applies to sector arc and sector area at unchanged angle.
131. Card 17: circle first, optional sector later
Card prompt: A circle has radius 6 cm. Calculate its exact full circumference and area. For an optional later-stage G1 extension, a central-angle sector measures 135°; describe its arc and sector area as fractions of the whole.
Meaning and conditions: Notebook heading one: circumference=2πr with length units; circle area=πr² with square units. Only after those are secure, a later-stage sector card can state arc=(θ/360)×2πr and sector area=(θ/360)×πr² for θ in degrees. This is not a claim that every current Secondary 2 G1 class is testing sectors.
One worked example: The complete circumference is 12π cm; the complete area is 36π cm². Sector share 135/360 produces arc (135/360)×12π cm≈14.137167 cm and sector area (135/360)×36π cm²≈42.411501 cm².
When this would be wrong: Using πr² for a curved arc, or 2πr for a covered surface, swaps two physical dimensions. Using diameter as radius in an area calculation causes a fourfold error. The notebook should show a circle with centre, radius and perimeter traced separately.
Check: Each sector amount is 135/360 of its respective full-circle quantity; multiplying by 360/135 would reconstruct the full circumference or full area. The units cm and cm² must remain distinct.
Later retrieval: If radius doubles, circumference doubles to 24π cm, while full area quadruples to 144π cm². The same linear-versus-square scaling applies to sector arc and sector area at unchanged angle.
132. Card 18: circle first, optional sector later
Card prompt: A circle has radius 11 cm. Calculate its exact full circumference and area. For an optional later-stage G1 extension, a central-angle sector measures 150°; describe its arc and sector area as fractions of the whole.
Meaning and conditions: Notebook heading one: circumference=2πr with length units; circle area=πr² with square units. Only after those are secure, a later-stage sector card can state arc=(θ/360)×2πr and sector area=(θ/360)×πr² for θ in degrees. This is not a claim that every current Secondary 2 G1 class is testing sectors.
One worked example: The complete circumference is 22π cm; the complete area is 121π cm². Sector share 150/360 produces arc (150/360)×22π cm≈28.797933 cm and sector area (150/360)×121π cm²≈158.38863 cm².
When this would be wrong: Using πr² for a curved arc, or 2πr for a covered surface, swaps two physical dimensions. Using diameter as radius in an area calculation causes a fourfold error. The notebook should show a circle with centre, radius and perimeter traced separately.
Check: Each sector amount is 150/360 of its respective full-circle quantity; multiplying by 360/150 would reconstruct the full circumference or full area. The units cm and cm² must remain distinct.
Later retrieval: If radius doubles, circumference doubles to 44π cm, while full area quadruples to 484π cm². The same linear-versus-square scaling applies to sector arc and sector area at unchanged angle.
133. Card 19: circle first, optional sector later
Card prompt: A circle has radius 16 cm. Calculate its exact full circumference and area. For an optional later-stage G1 extension, a central-angle sector measures 180°; describe its arc and sector area as fractions of the whole.
Meaning and conditions: Notebook heading one: circumference=2πr with length units; circle area=πr² with square units. Only after those are secure, a later-stage sector card can state arc=(θ/360)×2πr and sector area=(θ/360)×πr² for θ in degrees. This is not a claim that every current Secondary 2 G1 class is testing sectors.
One worked example: The complete circumference is 32π cm; the complete area is 256π cm². Sector share 180/360 produces arc (180/360)×32π cm≈50.265482 cm and sector area (180/360)×256π cm²≈402.12386 cm².
When this would be wrong: Using πr² for a curved arc, or 2πr for a covered surface, swaps two physical dimensions. Using diameter as radius in an area calculation causes a fourfold error. The notebook should show a circle with centre, radius and perimeter traced separately.
Check: Each sector amount is 180/360 of its respective full-circle quantity; multiplying by 360/180 would reconstruct the full circumference or full area. The units cm and cm² must remain distinct.
Later retrieval: If radius doubles, circumference doubles to 64π cm, while full area quadruples to 1024π cm². The same linear-versus-square scaling applies to sector arc and sector area at unchanged angle.
134. Card 20: circle first, optional sector later
Card prompt: A circle has radius 2 cm. Calculate its exact full circumference and area. For an optional later-stage G1 extension, a central-angle sector measures 240°; describe its arc and sector area as fractions of the whole.
Meaning and conditions: Notebook heading one: circumference=2πr with length units; circle area=πr² with square units. Only after those are secure, a later-stage sector card can state arc=(θ/360)×2πr and sector area=(θ/360)×πr² for θ in degrees. This is not a claim that every current Secondary 2 G1 class is testing sectors.
One worked example: The complete circumference is 4π cm; the complete area is 4π cm². Sector share 240/360 produces arc (240/360)×4π cm≈8.37758 cm and sector area (240/360)×4π cm²≈8.37758 cm².
When this would be wrong: Using πr² for a curved arc, or 2πr for a covered surface, swaps two physical dimensions. Using diameter as radius in an area calculation causes a fourfold error. The notebook should show a circle with centre, radius and perimeter traced separately.
Check: Each sector amount is 240/360 of its respective full-circle quantity; multiplying by 360/240 would reconstruct the full circumference or full area. The units cm and cm² must remain distinct.
Later retrieval: If radius doubles, circumference doubles to 8π cm, while full area quadruples to 16π cm². The same linear-versus-square scaling applies to sector arc and sector area at unchanged angle.
135. Card 21: circle first, optional sector later
Card prompt: A circle has radius 7 cm. Calculate its exact full circumference and area. For an optional later-stage G1 extension, a central-angle sector measures 30°; describe its arc and sector area as fractions of the whole.
Meaning and conditions: Notebook heading one: circumference=2πr with length units; circle area=πr² with square units. Only after those are secure, a later-stage sector card can state arc=(θ/360)×2πr and sector area=(θ/360)×πr² for θ in degrees. This is not a claim that every current Secondary 2 G1 class is testing sectors.
One worked example: The complete circumference is 14π cm; the complete area is 49π cm². Sector share 30/360 produces arc (30/360)×14π cm≈3.665191 cm and sector area (30/360)×49π cm²≈12.82817 cm².
When this would be wrong: Using πr² for a curved arc, or 2πr for a covered surface, swaps two physical dimensions. Using diameter as radius in an area calculation causes a fourfold error. The notebook should show a circle with centre, radius and perimeter traced separately.
Check: Each sector amount is 30/360 of its respective full-circle quantity; multiplying by 360/30 would reconstruct the full circumference or full area. The units cm and cm² must remain distinct.
Later retrieval: If radius doubles, circumference doubles to 28π cm, while full area quadruples to 196π cm². The same linear-versus-square scaling applies to sector arc and sector area at unchanged angle.
136. Card 22: circle first, optional sector later
Card prompt: A circle has radius 12 cm. Calculate its exact full circumference and area. For an optional later-stage G1 extension, a central-angle sector measures 45°; describe its arc and sector area as fractions of the whole.
Meaning and conditions: Notebook heading one: circumference=2πr with length units; circle area=πr² with square units. Only after those are secure, a later-stage sector card can state arc=(θ/360)×2πr and sector area=(θ/360)×πr² for θ in degrees. This is not a claim that every current Secondary 2 G1 class is testing sectors.
One worked example: The complete circumference is 24π cm; the complete area is 144π cm². Sector share 45/360 produces arc (45/360)×24π cm≈9.424778 cm and sector area (45/360)×144π cm²≈56.548668 cm².
When this would be wrong: Using πr² for a curved arc, or 2πr for a covered surface, swaps two physical dimensions. Using diameter as radius in an area calculation causes a fourfold error. The notebook should show a circle with centre, radius and perimeter traced separately.
Check: Each sector amount is 45/360 of its respective full-circle quantity; multiplying by 360/45 would reconstruct the full circumference or full area. The units cm and cm² must remain distinct.
Later retrieval: If radius doubles, circumference doubles to 48π cm, while full area quadruples to 576π cm². The same linear-versus-square scaling applies to sector arc and sector area at unchanged angle.
137. Card 23: circle first, optional sector later
Card prompt: A circle has radius 17 cm. Calculate its exact full circumference and area. For an optional later-stage G1 extension, a central-angle sector measures 60°; describe its arc and sector area as fractions of the whole.
Meaning and conditions: Notebook heading one: circumference=2πr with length units; circle area=πr² with square units. Only after those are secure, a later-stage sector card can state arc=(θ/360)×2πr and sector area=(θ/360)×πr² for θ in degrees. This is not a claim that every current Secondary 2 G1 class is testing sectors.
One worked example: The complete circumference is 34π cm; the complete area is 289π cm². Sector share 60/360 produces arc (60/360)×34π cm≈17.802358 cm and sector area (60/360)×289π cm²≈151.320046 cm².
When this would be wrong: Using πr² for a curved arc, or 2πr for a covered surface, swaps two physical dimensions. Using diameter as radius in an area calculation causes a fourfold error. The notebook should show a circle with centre, radius and perimeter traced separately.
Check: Each sector amount is 60/360 of its respective full-circle quantity; multiplying by 360/60 would reconstruct the full circumference or full area. The units cm and cm² must remain distinct.
Later retrieval: If radius doubles, circumference doubles to 68π cm, while full area quadruples to 1156π cm². The same linear-versus-square scaling applies to sector arc and sector area at unchanged angle.
138. Card 24: circle first, optional sector later
Card prompt: A circle has radius 3 cm. Calculate its exact full circumference and area. For an optional later-stage G1 extension, a central-angle sector measures 72°; describe its arc and sector area as fractions of the whole.
Meaning and conditions: Notebook heading one: circumference=2πr with length units; circle area=πr² with square units. Only after those are secure, a later-stage sector card can state arc=(θ/360)×2πr and sector area=(θ/360)×πr² for θ in degrees. This is not a claim that every current Secondary 2 G1 class is testing sectors.
One worked example: The complete circumference is 6π cm; the complete area is 9π cm². Sector share 72/360 produces arc (72/360)×6π cm≈3.769911 cm and sector area (72/360)×9π cm²≈5.654867 cm².
When this would be wrong: Using πr² for a curved arc, or 2πr for a covered surface, swaps two physical dimensions. Using diameter as radius in an area calculation causes a fourfold error. The notebook should show a circle with centre, radius and perimeter traced separately.
Check: Each sector amount is 72/360 of its respective full-circle quantity; multiplying by 360/72 would reconstruct the full circumference or full area. The units cm and cm² must remain distinct.
Later retrieval: If radius doubles, circumference doubles to 12π cm, while full area quadruples to 36π cm². The same linear-versus-square scaling applies to sector arc and sector area at unchanged angle.
139. Card 25: circle first, optional sector later
Card prompt: A circle has radius 8 cm. Calculate its exact full circumference and area. For an optional later-stage G1 extension, a central-angle sector measures 90°; describe its arc and sector area as fractions of the whole.
Meaning and conditions: Notebook heading one: circumference=2πr with length units; circle area=πr² with square units. Only after those are secure, a later-stage sector card can state arc=(θ/360)×2πr and sector area=(θ/360)×πr² for θ in degrees. This is not a claim that every current Secondary 2 G1 class is testing sectors.
One worked example: The complete circumference is 16π cm; the complete area is 64π cm². Sector share 90/360 produces arc (90/360)×16π cm≈12.566371 cm and sector area (90/360)×64π cm²≈50.265482 cm².
When this would be wrong: Using πr² for a curved arc, or 2πr for a covered surface, swaps two physical dimensions. Using diameter as radius in an area calculation causes a fourfold error. The notebook should show a circle with centre, radius and perimeter traced separately.
Check: Each sector amount is 90/360 of its respective full-circle quantity; multiplying by 360/90 would reconstruct the full circumference or full area. The units cm and cm² must remain distinct.
Later retrieval: If radius doubles, circumference doubles to 32π cm, while full area quadruples to 256π cm². The same linear-versus-square scaling applies to sector arc and sector area at unchanged angle.
140. Card 26: circle first, optional sector later
Card prompt: A circle has radius 13 cm. Calculate its exact full circumference and area. For an optional later-stage G1 extension, a central-angle sector measures 120°; describe its arc and sector area as fractions of the whole.
Meaning and conditions: Notebook heading one: circumference=2πr with length units; circle area=πr² with square units. Only after those are secure, a later-stage sector card can state arc=(θ/360)×2πr and sector area=(θ/360)×πr² for θ in degrees. This is not a claim that every current Secondary 2 G1 class is testing sectors.
One worked example: The complete circumference is 26π cm; the complete area is 169π cm². Sector share 120/360 produces arc (120/360)×26π cm≈27.227136 cm and sector area (120/360)×169π cm²≈176.976386 cm².
When this would be wrong: Using πr² for a curved arc, or 2πr for a covered surface, swaps two physical dimensions. Using diameter as radius in an area calculation causes a fourfold error. The notebook should show a circle with centre, radius and perimeter traced separately.
Check: Each sector amount is 120/360 of its respective full-circle quantity; multiplying by 360/120 would reconstruct the full circumference or full area. The units cm and cm² must remain distinct.
Later retrieval: If radius doubles, circumference doubles to 52π cm, while full area quadruples to 676π cm². The same linear-versus-square scaling applies to sector arc and sector area at unchanged angle.
141. Card 27: circle first, optional sector later
Card prompt: A circle has radius 18 cm. Calculate its exact full circumference and area. For an optional later-stage G1 extension, a central-angle sector measures 135°; describe its arc and sector area as fractions of the whole.
Meaning and conditions: Notebook heading one: circumference=2πr with length units; circle area=πr² with square units. Only after those are secure, a later-stage sector card can state arc=(θ/360)×2πr and sector area=(θ/360)×πr² for θ in degrees. This is not a claim that every current Secondary 2 G1 class is testing sectors.
One worked example: The complete circumference is 36π cm; the complete area is 324π cm². Sector share 135/360 produces arc (135/360)×36π cm≈42.411501 cm and sector area (135/360)×324π cm²≈381.703507 cm².
When this would be wrong: Using πr² for a curved arc, or 2πr for a covered surface, swaps two physical dimensions. Using diameter as radius in an area calculation causes a fourfold error. The notebook should show a circle with centre, radius and perimeter traced separately.
Check: Each sector amount is 135/360 of its respective full-circle quantity; multiplying by 360/135 would reconstruct the full circumference or full area. The units cm and cm² must remain distinct.
Later retrieval: If radius doubles, circumference doubles to 72π cm, while full area quadruples to 1296π cm². The same linear-versus-square scaling applies to sector arc and sector area at unchanged angle.
142. Card 28: circle first, optional sector later
Card prompt: A circle has radius 4 cm. Calculate its exact full circumference and area. For an optional later-stage G1 extension, a central-angle sector measures 150°; describe its arc and sector area as fractions of the whole.
Meaning and conditions: Notebook heading one: circumference=2πr with length units; circle area=πr² with square units. Only after those are secure, a later-stage sector card can state arc=(θ/360)×2πr and sector area=(θ/360)×πr² for θ in degrees. This is not a claim that every current Secondary 2 G1 class is testing sectors.
One worked example: The complete circumference is 8π cm; the complete area is 16π cm². Sector share 150/360 produces arc (150/360)×8π cm≈10.471976 cm and sector area (150/360)×16π cm²≈20.943951 cm².
When this would be wrong: Using πr² for a curved arc, or 2πr for a covered surface, swaps two physical dimensions. Using diameter as radius in an area calculation causes a fourfold error. The notebook should show a circle with centre, radius and perimeter traced separately.
Check: Each sector amount is 150/360 of its respective full-circle quantity; multiplying by 360/150 would reconstruct the full circumference or full area. The units cm and cm² must remain distinct.
Later retrieval: If radius doubles, circumference doubles to 16π cm, while full area quadruples to 64π cm². The same linear-versus-square scaling applies to sector arc and sector area at unchanged angle.
Cuboids, prisms and cylinders
In cuboids, prisms and cylinders, a notebook card should name the question that triggers the formula and the quantity it calculates. Read the worked example as one illustration of the relationship, not as fixed numbers to memorise. Pay attention to units, assumptions and a reverse check. If two formulas use the same letter, define that letter again in the local context.
143. Card 1: cuboid volume versus surface area
Card prompt: An ideal closed cuboid has dimensions 3 cm × 2 cm × 4 cm. Use a formula notebook to find its volume and total area of the six outside faces, and check their different units.
Meaning and conditions: Notebook card: cuboid volume=length×width×height, which multiplies three lengths and yields cm³. A separate card says closed cuboid surface area=2(lw+lh+wh) for all six faces, yielding cm². The two formulas describe interior space versus exterior covering.
One worked example: Volume=3×2×4=24 cm³. Surface area=2(6+12+8)=52 cm². A net would show two matching faces of each dimension pair, explaining the factor two.
When this would be wrong: A child who uses 24 as an area or 52 as a volume has chosen a formula for a different quantity. An open-top box would also lack one exterior face, so the closed-box card does not automatically apply to every container.
Check: For volume, divide by one known dimension to recover an area, then by another to recover the remaining length. For surface area, sum all six face areas directly; the result must match 52.
Later retrieval: If only height increased to 5 cm, volume would rise by 6 cm³ while total surface area would rise by 2(3+2)=10 cm². A useful notebook includes this changed-dimension explanation.
144. Card 2: cuboid volume versus surface area
Card prompt: An ideal closed cuboid has dimensions 6 cm × 7 cm × 11 cm. Use a formula notebook to find its volume and total area of the six outside faces, and check their different units.
Meaning and conditions: Notebook card: cuboid volume=length×width×height, which multiplies three lengths and yields cm³. A separate card says closed cuboid surface area=2(lw+lh+wh) for all six faces, yielding cm². The two formulas describe interior space versus exterior covering.
One worked example: Volume=6×7×11=462 cm³. Surface area=2(42+66+77)=370 cm². A net would show two matching faces of each dimension pair, explaining the factor two.
When this would be wrong: A child who uses 462 as an area or 370 as a volume has chosen a formula for a different quantity. An open-top box would also lack one exterior face, so the closed-box card does not automatically apply to every container.
Check: For volume, divide by one known dimension to recover an area, then by another to recover the remaining length. For surface area, sum all six face areas directly; the result must match 370.
Later retrieval: If only height increased to 12 cm, volume would rise by 42 cm³ while total surface area would rise by 2(6+7)=26 cm². A useful notebook includes this changed-dimension explanation.
145. Card 3: cuboid volume versus surface area
Card prompt: An ideal closed cuboid has dimensions 9 cm × 12 cm × 4 cm. Use a formula notebook to find its volume and total area of the six outside faces, and check their different units.
Meaning and conditions: Notebook card: cuboid volume=length×width×height, which multiplies three lengths and yields cm³. A separate card says closed cuboid surface area=2(lw+lh+wh) for all six faces, yielding cm². The two formulas describe interior space versus exterior covering.
One worked example: Volume=9×12×4=432 cm³. Surface area=2(108+36+48)=384 cm². A net would show two matching faces of each dimension pair, explaining the factor two.
When this would be wrong: A child who uses 432 as an area or 384 as a volume has chosen a formula for a different quantity. An open-top box would also lack one exterior face, so the closed-box card does not automatically apply to every container.
Check: For volume, divide by one known dimension to recover an area, then by another to recover the remaining length. For surface area, sum all six face areas directly; the result must match 384.
Later retrieval: If only height increased to 5 cm, volume would rise by 108 cm³ while total surface area would rise by 2(9+12)=42 cm². A useful notebook includes this changed-dimension explanation.
146. Card 4: cuboid volume versus surface area
Card prompt: An ideal closed cuboid has dimensions 12 cm × 4 cm × 11 cm. Use a formula notebook to find its volume and total area of the six outside faces, and check their different units.
Meaning and conditions: Notebook card: cuboid volume=length×width×height, which multiplies three lengths and yields cm³. A separate card says closed cuboid surface area=2(lw+lh+wh) for all six faces, yielding cm². The two formulas describe interior space versus exterior covering.
One worked example: Volume=12×4×11=528 cm³. Surface area=2(48+132+44)=448 cm². A net would show two matching faces of each dimension pair, explaining the factor two.
When this would be wrong: A child who uses 528 as an area or 448 as a volume has chosen a formula for a different quantity. An open-top box would also lack one exterior face, so the closed-box card does not automatically apply to every container.
Check: For volume, divide by one known dimension to recover an area, then by another to recover the remaining length. For surface area, sum all six face areas directly; the result must match 448.
Later retrieval: If only height increased to 12 cm, volume would rise by 48 cm³ while total surface area would rise by 2(12+4)=32 cm². A useful notebook includes this changed-dimension explanation.
147. Card 5: cuboid volume versus surface area
Card prompt: An ideal closed cuboid has dimensions 15 cm × 9 cm × 4 cm. Use a formula notebook to find its volume and total area of the six outside faces, and check their different units.
Meaning and conditions: Notebook card: cuboid volume=length×width×height, which multiplies three lengths and yields cm³. A separate card says closed cuboid surface area=2(lw+lh+wh) for all six faces, yielding cm². The two formulas describe interior space versus exterior covering.
One worked example: Volume=15×9×4=540 cm³. Surface area=2(135+60+36)=462 cm². A net would show two matching faces of each dimension pair, explaining the factor two.
When this would be wrong: A child who uses 540 as an area or 462 as a volume has chosen a formula for a different quantity. An open-top box would also lack one exterior face, so the closed-box card does not automatically apply to every container.
Check: For volume, divide by one known dimension to recover an area, then by another to recover the remaining length. For surface area, sum all six face areas directly; the result must match 462.
Later retrieval: If only height increased to 5 cm, volume would rise by 135 cm³ while total surface area would rise by 2(15+9)=48 cm². A useful notebook includes this changed-dimension explanation.
148. Card 6: cuboid volume versus surface area
Card prompt: An ideal closed cuboid has dimensions 3 cm × 14 cm × 11 cm. Use a formula notebook to find its volume and total area of the six outside faces, and check their different units.
Meaning and conditions: Notebook card: cuboid volume=length×width×height, which multiplies three lengths and yields cm³. A separate card says closed cuboid surface area=2(lw+lh+wh) for all six faces, yielding cm². The two formulas describe interior space versus exterior covering.
One worked example: Volume=3×14×11=462 cm³. Surface area=2(42+33+154)=458 cm². A net would show two matching faces of each dimension pair, explaining the factor two.
When this would be wrong: A child who uses 462 as an area or 458 as a volume has chosen a formula for a different quantity. An open-top box would also lack one exterior face, so the closed-box card does not automatically apply to every container.
Check: For volume, divide by one known dimension to recover an area, then by another to recover the remaining length. For surface area, sum all six face areas directly; the result must match 458.
Later retrieval: If only height increased to 12 cm, volume would rise by 42 cm³ while total surface area would rise by 2(3+14)=34 cm². A useful notebook includes this changed-dimension explanation.
149. Card 7: cuboid volume versus surface area
Card prompt: An ideal closed cuboid has dimensions 6 cm × 6 cm × 4 cm. Use a formula notebook to find its volume and total area of the six outside faces, and check their different units.
Meaning and conditions: Notebook card: cuboid volume=length×width×height, which multiplies three lengths and yields cm³. A separate card says closed cuboid surface area=2(lw+lh+wh) for all six faces, yielding cm². The two formulas describe interior space versus exterior covering.
One worked example: Volume=6×6×4=144 cm³. Surface area=2(36+24+24)=168 cm². A net would show two matching faces of each dimension pair, explaining the factor two.
When this would be wrong: A child who uses 144 as an area or 168 as a volume has chosen a formula for a different quantity. An open-top box would also lack one exterior face, so the closed-box card does not automatically apply to every container.
Check: For volume, divide by one known dimension to recover an area, then by another to recover the remaining length. For surface area, sum all six face areas directly; the result must match 168.
Later retrieval: If only height increased to 5 cm, volume would rise by 36 cm³ while total surface area would rise by 2(6+6)=24 cm². A useful notebook includes this changed-dimension explanation.
150. Card 8: cuboid volume versus surface area
Card prompt: An ideal closed cuboid has dimensions 9 cm × 11 cm × 11 cm. Use a formula notebook to find its volume and total area of the six outside faces, and check their different units.
Meaning and conditions: Notebook card: cuboid volume=length×width×height, which multiplies three lengths and yields cm³. A separate card says closed cuboid surface area=2(lw+lh+wh) for all six faces, yielding cm². The two formulas describe interior space versus exterior covering.
One worked example: Volume=9×11×11=1089 cm³. Surface area=2(99+99+121)=638 cm². A net would show two matching faces of each dimension pair, explaining the factor two.
When this would be wrong: A child who uses 1089 as an area or 638 as a volume has chosen a formula for a different quantity. An open-top box would also lack one exterior face, so the closed-box card does not automatically apply to every container.
Check: For volume, divide by one known dimension to recover an area, then by another to recover the remaining length. For surface area, sum all six face areas directly; the result must match 638.
Later retrieval: If only height increased to 12 cm, volume would rise by 99 cm³ while total surface area would rise by 2(9+11)=40 cm². A useful notebook includes this changed-dimension explanation.
151. Card 9: cuboid volume versus surface area
Card prompt: An ideal closed cuboid has dimensions 12 cm × 3 cm × 4 cm. Use a formula notebook to find its volume and total area of the six outside faces, and check their different units.
Meaning and conditions: Notebook card: cuboid volume=length×width×height, which multiplies three lengths and yields cm³. A separate card says closed cuboid surface area=2(lw+lh+wh) for all six faces, yielding cm². The two formulas describe interior space versus exterior covering.
One worked example: Volume=12×3×4=144 cm³. Surface area=2(36+48+12)=192 cm². A net would show two matching faces of each dimension pair, explaining the factor two.
When this would be wrong: A child who uses 144 as an area or 192 as a volume has chosen a formula for a different quantity. An open-top box would also lack one exterior face, so the closed-box card does not automatically apply to every container.
Check: For volume, divide by one known dimension to recover an area, then by another to recover the remaining length. For surface area, sum all six face areas directly; the result must match 192.
Later retrieval: If only height increased to 5 cm, volume would rise by 36 cm³ while total surface area would rise by 2(12+3)=30 cm². A useful notebook includes this changed-dimension explanation.
152. Card 10: cuboid volume versus surface area
Card prompt: An ideal closed cuboid has dimensions 15 cm × 8 cm × 11 cm. Use a formula notebook to find its volume and total area of the six outside faces, and check their different units.
Meaning and conditions: Notebook card: cuboid volume=length×width×height, which multiplies three lengths and yields cm³. A separate card says closed cuboid surface area=2(lw+lh+wh) for all six faces, yielding cm². The two formulas describe interior space versus exterior covering.
One worked example: Volume=15×8×11=1320 cm³. Surface area=2(120+165+88)=746 cm². A net would show two matching faces of each dimension pair, explaining the factor two.
When this would be wrong: A child who uses 1320 as an area or 746 as a volume has chosen a formula for a different quantity. An open-top box would also lack one exterior face, so the closed-box card does not automatically apply to every container.
Check: For volume, divide by one known dimension to recover an area, then by another to recover the remaining length. For surface area, sum all six face areas directly; the result must match 746.
Later retrieval: If only height increased to 12 cm, volume would rise by 120 cm³ while total surface area would rise by 2(15+8)=46 cm². A useful notebook includes this changed-dimension explanation.
153. Card 11: cuboid volume versus surface area
Card prompt: An ideal closed cuboid has dimensions 3 cm × 13 cm × 4 cm. Use a formula notebook to find its volume and total area of the six outside faces, and check their different units.
Meaning and conditions: Notebook card: cuboid volume=length×width×height, which multiplies three lengths and yields cm³. A separate card says closed cuboid surface area=2(lw+lh+wh) for all six faces, yielding cm². The two formulas describe interior space versus exterior covering.
One worked example: Volume=3×13×4=156 cm³. Surface area=2(39+12+52)=206 cm². A net would show two matching faces of each dimension pair, explaining the factor two.
When this would be wrong: A child who uses 156 as an area or 206 as a volume has chosen a formula for a different quantity. An open-top box would also lack one exterior face, so the closed-box card does not automatically apply to every container.
Check: For volume, divide by one known dimension to recover an area, then by another to recover the remaining length. For surface area, sum all six face areas directly; the result must match 206.
Later retrieval: If only height increased to 5 cm, volume would rise by 39 cm³ while total surface area would rise by 2(3+13)=32 cm². A useful notebook includes this changed-dimension explanation.
154. Card 12: cuboid volume versus surface area
Card prompt: An ideal closed cuboid has dimensions 6 cm × 5 cm × 11 cm. Use a formula notebook to find its volume and total area of the six outside faces, and check their different units.
Meaning and conditions: Notebook card: cuboid volume=length×width×height, which multiplies three lengths and yields cm³. A separate card says closed cuboid surface area=2(lw+lh+wh) for all six faces, yielding cm². The two formulas describe interior space versus exterior covering.
One worked example: Volume=6×5×11=330 cm³. Surface area=2(30+66+55)=302 cm². A net would show two matching faces of each dimension pair, explaining the factor two.
When this would be wrong: A child who uses 330 as an area or 302 as a volume has chosen a formula for a different quantity. An open-top box would also lack one exterior face, so the closed-box card does not automatically apply to every container.
Check: For volume, divide by one known dimension to recover an area, then by another to recover the remaining length. For surface area, sum all six face areas directly; the result must match 302.
Later retrieval: If only height increased to 12 cm, volume would rise by 30 cm³ while total surface area would rise by 2(6+5)=22 cm². A useful notebook includes this changed-dimension explanation.
155. Card 13: cuboid volume versus surface area
Card prompt: An ideal closed cuboid has dimensions 9 cm × 10 cm × 4 cm. Use a formula notebook to find its volume and total area of the six outside faces, and check their different units.
Meaning and conditions: Notebook card: cuboid volume=length×width×height, which multiplies three lengths and yields cm³. A separate card says closed cuboid surface area=2(lw+lh+wh) for all six faces, yielding cm². The two formulas describe interior space versus exterior covering.
One worked example: Volume=9×10×4=360 cm³. Surface area=2(90+36+40)=332 cm². A net would show two matching faces of each dimension pair, explaining the factor two.
When this would be wrong: A child who uses 360 as an area or 332 as a volume has chosen a formula for a different quantity. An open-top box would also lack one exterior face, so the closed-box card does not automatically apply to every container.
Check: For volume, divide by one known dimension to recover an area, then by another to recover the remaining length. For surface area, sum all six face areas directly; the result must match 332.
Later retrieval: If only height increased to 5 cm, volume would rise by 90 cm³ while total surface area would rise by 2(9+10)=38 cm². A useful notebook includes this changed-dimension explanation.
156. Card 14: cuboid volume versus surface area
Card prompt: An ideal closed cuboid has dimensions 12 cm × 2 cm × 11 cm. Use a formula notebook to find its volume and total area of the six outside faces, and check their different units.
Meaning and conditions: Notebook card: cuboid volume=length×width×height, which multiplies three lengths and yields cm³. A separate card says closed cuboid surface area=2(lw+lh+wh) for all six faces, yielding cm². The two formulas describe interior space versus exterior covering.
One worked example: Volume=12×2×11=264 cm³. Surface area=2(24+132+22)=356 cm². A net would show two matching faces of each dimension pair, explaining the factor two.
When this would be wrong: A child who uses 264 as an area or 356 as a volume has chosen a formula for a different quantity. An open-top box would also lack one exterior face, so the closed-box card does not automatically apply to every container.
Check: For volume, divide by one known dimension to recover an area, then by another to recover the remaining length. For surface area, sum all six face areas directly; the result must match 356.
Later retrieval: If only height increased to 12 cm, volume would rise by 24 cm³ while total surface area would rise by 2(12+2)=28 cm². A useful notebook includes this changed-dimension explanation.
157. Card 15: cuboid volume versus surface area
Card prompt: An ideal closed cuboid has dimensions 15 cm × 7 cm × 4 cm. Use a formula notebook to find its volume and total area of the six outside faces, and check their different units.
Meaning and conditions: Notebook card: cuboid volume=length×width×height, which multiplies three lengths and yields cm³. A separate card says closed cuboid surface area=2(lw+lh+wh) for all six faces, yielding cm². The two formulas describe interior space versus exterior covering.
One worked example: Volume=15×7×4=420 cm³. Surface area=2(105+60+28)=386 cm². A net would show two matching faces of each dimension pair, explaining the factor two.
When this would be wrong: A child who uses 420 as an area or 386 as a volume has chosen a formula for a different quantity. An open-top box would also lack one exterior face, so the closed-box card does not automatically apply to every container.
Check: For volume, divide by one known dimension to recover an area, then by another to recover the remaining length. For surface area, sum all six face areas directly; the result must match 386.
Later retrieval: If only height increased to 5 cm, volume would rise by 105 cm³ while total surface area would rise by 2(15+7)=44 cm². A useful notebook includes this changed-dimension explanation.
158. Card 16: cuboid volume versus surface area
Card prompt: An ideal closed cuboid has dimensions 3 cm × 12 cm × 11 cm. Use a formula notebook to find its volume and total area of the six outside faces, and check their different units.
Meaning and conditions: Notebook card: cuboid volume=length×width×height, which multiplies three lengths and yields cm³. A separate card says closed cuboid surface area=2(lw+lh+wh) for all six faces, yielding cm². The two formulas describe interior space versus exterior covering.
One worked example: Volume=3×12×11=396 cm³. Surface area=2(36+33+132)=402 cm². A net would show two matching faces of each dimension pair, explaining the factor two.
When this would be wrong: A child who uses 396 as an area or 402 as a volume has chosen a formula for a different quantity. An open-top box would also lack one exterior face, so the closed-box card does not automatically apply to every container.
Check: For volume, divide by one known dimension to recover an area, then by another to recover the remaining length. For surface area, sum all six face areas directly; the result must match 402.
Later retrieval: If only height increased to 12 cm, volume would rise by 36 cm³ while total surface area would rise by 2(3+12)=30 cm². A useful notebook includes this changed-dimension explanation.
159. Card 17: cuboid volume versus surface area
Card prompt: An ideal closed cuboid has dimensions 6 cm × 4 cm × 4 cm. Use a formula notebook to find its volume and total area of the six outside faces, and check their different units.
Meaning and conditions: Notebook card: cuboid volume=length×width×height, which multiplies three lengths and yields cm³. A separate card says closed cuboid surface area=2(lw+lh+wh) for all six faces, yielding cm². The two formulas describe interior space versus exterior covering.
One worked example: Volume=6×4×4=96 cm³. Surface area=2(24+24+16)=128 cm². A net would show two matching faces of each dimension pair, explaining the factor two.
When this would be wrong: A child who uses 96 as an area or 128 as a volume has chosen a formula for a different quantity. An open-top box would also lack one exterior face, so the closed-box card does not automatically apply to every container.
Check: For volume, divide by one known dimension to recover an area, then by another to recover the remaining length. For surface area, sum all six face areas directly; the result must match 128.
Later retrieval: If only height increased to 5 cm, volume would rise by 24 cm³ while total surface area would rise by 2(6+4)=20 cm². A useful notebook includes this changed-dimension explanation.
160. Card 18: cuboid volume versus surface area
Card prompt: An ideal closed cuboid has dimensions 9 cm × 9 cm × 11 cm. Use a formula notebook to find its volume and total area of the six outside faces, and check their different units.
Meaning and conditions: Notebook card: cuboid volume=length×width×height, which multiplies three lengths and yields cm³. A separate card says closed cuboid surface area=2(lw+lh+wh) for all six faces, yielding cm². The two formulas describe interior space versus exterior covering.
One worked example: Volume=9×9×11=891 cm³. Surface area=2(81+99+99)=558 cm². A net would show two matching faces of each dimension pair, explaining the factor two.
When this would be wrong: A child who uses 891 as an area or 558 as a volume has chosen a formula for a different quantity. An open-top box would also lack one exterior face, so the closed-box card does not automatically apply to every container.
Check: For volume, divide by one known dimension to recover an area, then by another to recover the remaining length. For surface area, sum all six face areas directly; the result must match 558.
Later retrieval: If only height increased to 12 cm, volume would rise by 81 cm³ while total surface area would rise by 2(9+9)=36 cm². A useful notebook includes this changed-dimension explanation.
161. Card 19: cuboid volume versus surface area
Card prompt: An ideal closed cuboid has dimensions 12 cm × 14 cm × 4 cm. Use a formula notebook to find its volume and total area of the six outside faces, and check their different units.
Meaning and conditions: Notebook card: cuboid volume=length×width×height, which multiplies three lengths and yields cm³. A separate card says closed cuboid surface area=2(lw+lh+wh) for all six faces, yielding cm². The two formulas describe interior space versus exterior covering.
One worked example: Volume=12×14×4=672 cm³. Surface area=2(168+48+56)=544 cm². A net would show two matching faces of each dimension pair, explaining the factor two.
When this would be wrong: A child who uses 672 as an area or 544 as a volume has chosen a formula for a different quantity. An open-top box would also lack one exterior face, so the closed-box card does not automatically apply to every container.
Check: For volume, divide by one known dimension to recover an area, then by another to recover the remaining length. For surface area, sum all six face areas directly; the result must match 544.
Later retrieval: If only height increased to 5 cm, volume would rise by 168 cm³ while total surface area would rise by 2(12+14)=52 cm². A useful notebook includes this changed-dimension explanation.
162. Card 20: cuboid volume versus surface area
Card prompt: An ideal closed cuboid has dimensions 15 cm × 6 cm × 11 cm. Use a formula notebook to find its volume and total area of the six outside faces, and check their different units.
Meaning and conditions: Notebook card: cuboid volume=length×width×height, which multiplies three lengths and yields cm³. A separate card says closed cuboid surface area=2(lw+lh+wh) for all six faces, yielding cm². The two formulas describe interior space versus exterior covering.
One worked example: Volume=15×6×11=990 cm³. Surface area=2(90+165+66)=642 cm². A net would show two matching faces of each dimension pair, explaining the factor two.
When this would be wrong: A child who uses 990 as an area or 642 as a volume has chosen a formula for a different quantity. An open-top box would also lack one exterior face, so the closed-box card does not automatically apply to every container.
Check: For volume, divide by one known dimension to recover an area, then by another to recover the remaining length. For surface area, sum all six face areas directly; the result must match 642.
Later retrieval: If only height increased to 12 cm, volume would rise by 90 cm³ while total surface area would rise by 2(15+6)=42 cm². A useful notebook includes this changed-dimension explanation.
163. Card 21: cuboid volume versus surface area
Card prompt: An ideal closed cuboid has dimensions 3 cm × 11 cm × 4 cm. Use a formula notebook to find its volume and total area of the six outside faces, and check their different units.
Meaning and conditions: Notebook card: cuboid volume=length×width×height, which multiplies three lengths and yields cm³. A separate card says closed cuboid surface area=2(lw+lh+wh) for all six faces, yielding cm². The two formulas describe interior space versus exterior covering.
One worked example: Volume=3×11×4=132 cm³. Surface area=2(33+12+44)=178 cm². A net would show two matching faces of each dimension pair, explaining the factor two.
When this would be wrong: A child who uses 132 as an area or 178 as a volume has chosen a formula for a different quantity. An open-top box would also lack one exterior face, so the closed-box card does not automatically apply to every container.
Check: For volume, divide by one known dimension to recover an area, then by another to recover the remaining length. For surface area, sum all six face areas directly; the result must match 178.
Later retrieval: If only height increased to 5 cm, volume would rise by 33 cm³ while total surface area would rise by 2(3+11)=28 cm². A useful notebook includes this changed-dimension explanation.
164. Card 22: cuboid volume versus surface area
Card prompt: An ideal closed cuboid has dimensions 6 cm × 3 cm × 11 cm. Use a formula notebook to find its volume and total area of the six outside faces, and check their different units.
Meaning and conditions: Notebook card: cuboid volume=length×width×height, which multiplies three lengths and yields cm³. A separate card says closed cuboid surface area=2(lw+lh+wh) for all six faces, yielding cm². The two formulas describe interior space versus exterior covering.
One worked example: Volume=6×3×11=198 cm³. Surface area=2(18+66+33)=234 cm². A net would show two matching faces of each dimension pair, explaining the factor two.
When this would be wrong: A child who uses 198 as an area or 234 as a volume has chosen a formula for a different quantity. An open-top box would also lack one exterior face, so the closed-box card does not automatically apply to every container.
Check: For volume, divide by one known dimension to recover an area, then by another to recover the remaining length. For surface area, sum all six face areas directly; the result must match 234.
Later retrieval: If only height increased to 12 cm, volume would rise by 18 cm³ while total surface area would rise by 2(6+3)=18 cm². A useful notebook includes this changed-dimension explanation.
165. Card 23: cuboid volume versus surface area
Card prompt: An ideal closed cuboid has dimensions 9 cm × 8 cm × 4 cm. Use a formula notebook to find its volume and total area of the six outside faces, and check their different units.
Meaning and conditions: Notebook card: cuboid volume=length×width×height, which multiplies three lengths and yields cm³. A separate card says closed cuboid surface area=2(lw+lh+wh) for all six faces, yielding cm². The two formulas describe interior space versus exterior covering.
One worked example: Volume=9×8×4=288 cm³. Surface area=2(72+36+32)=280 cm². A net would show two matching faces of each dimension pair, explaining the factor two.
When this would be wrong: A child who uses 288 as an area or 280 as a volume has chosen a formula for a different quantity. An open-top box would also lack one exterior face, so the closed-box card does not automatically apply to every container.
Check: For volume, divide by one known dimension to recover an area, then by another to recover the remaining length. For surface area, sum all six face areas directly; the result must match 280.
Later retrieval: If only height increased to 5 cm, volume would rise by 72 cm³ while total surface area would rise by 2(9+8)=34 cm². A useful notebook includes this changed-dimension explanation.
166. Card 24: cuboid volume versus surface area
Card prompt: An ideal closed cuboid has dimensions 12 cm × 13 cm × 11 cm. Use a formula notebook to find its volume and total area of the six outside faces, and check their different units.
Meaning and conditions: Notebook card: cuboid volume=length×width×height, which multiplies three lengths and yields cm³. A separate card says closed cuboid surface area=2(lw+lh+wh) for all six faces, yielding cm². The two formulas describe interior space versus exterior covering.
One worked example: Volume=12×13×11=1716 cm³. Surface area=2(156+132+143)=862 cm². A net would show two matching faces of each dimension pair, explaining the factor two.
When this would be wrong: A child who uses 1716 as an area or 862 as a volume has chosen a formula for a different quantity. An open-top box would also lack one exterior face, so the closed-box card does not automatically apply to every container.
Check: For volume, divide by one known dimension to recover an area, then by another to recover the remaining length. For surface area, sum all six face areas directly; the result must match 862.
Later retrieval: If only height increased to 12 cm, volume would rise by 156 cm³ while total surface area would rise by 2(12+13)=50 cm². A useful notebook includes this changed-dimension explanation.
167. Card 25: cuboid volume versus surface area
Card prompt: An ideal closed cuboid has dimensions 15 cm × 5 cm × 4 cm. Use a formula notebook to find its volume and total area of the six outside faces, and check their different units.
Meaning and conditions: Notebook card: cuboid volume=length×width×height, which multiplies three lengths and yields cm³. A separate card says closed cuboid surface area=2(lw+lh+wh) for all six faces, yielding cm². The two formulas describe interior space versus exterior covering.
One worked example: Volume=15×5×4=300 cm³. Surface area=2(75+60+20)=310 cm². A net would show two matching faces of each dimension pair, explaining the factor two.
When this would be wrong: A child who uses 300 as an area or 310 as a volume has chosen a formula for a different quantity. An open-top box would also lack one exterior face, so the closed-box card does not automatically apply to every container.
Check: For volume, divide by one known dimension to recover an area, then by another to recover the remaining length. For surface area, sum all six face areas directly; the result must match 310.
Later retrieval: If only height increased to 5 cm, volume would rise by 75 cm³ while total surface area would rise by 2(15+5)=40 cm². A useful notebook includes this changed-dimension explanation.
168. Card 26: cuboid volume versus surface area
Card prompt: An ideal closed cuboid has dimensions 3 cm × 10 cm × 11 cm. Use a formula notebook to find its volume and total area of the six outside faces, and check their different units.
Meaning and conditions: Notebook card: cuboid volume=length×width×height, which multiplies three lengths and yields cm³. A separate card says closed cuboid surface area=2(lw+lh+wh) for all six faces, yielding cm². The two formulas describe interior space versus exterior covering.
One worked example: Volume=3×10×11=330 cm³. Surface area=2(30+33+110)=346 cm². A net would show two matching faces of each dimension pair, explaining the factor two.
When this would be wrong: A child who uses 330 as an area or 346 as a volume has chosen a formula for a different quantity. An open-top box would also lack one exterior face, so the closed-box card does not automatically apply to every container.
Check: For volume, divide by one known dimension to recover an area, then by another to recover the remaining length. For surface area, sum all six face areas directly; the result must match 346.
Later retrieval: If only height increased to 12 cm, volume would rise by 30 cm³ while total surface area would rise by 2(3+10)=26 cm². A useful notebook includes this changed-dimension explanation.
169. Card 27: cuboid volume versus surface area
Card prompt: An ideal closed cuboid has dimensions 6 cm × 2 cm × 4 cm. Use a formula notebook to find its volume and total area of the six outside faces, and check their different units.
Meaning and conditions: Notebook card: cuboid volume=length×width×height, which multiplies three lengths and yields cm³. A separate card says closed cuboid surface area=2(lw+lh+wh) for all six faces, yielding cm². The two formulas describe interior space versus exterior covering.
One worked example: Volume=6×2×4=48 cm³. Surface area=2(12+24+8)=88 cm². A net would show two matching faces of each dimension pair, explaining the factor two.
When this would be wrong: A child who uses 48 as an area or 88 as a volume has chosen a formula for a different quantity. An open-top box would also lack one exterior face, so the closed-box card does not automatically apply to every container.
Check: For volume, divide by one known dimension to recover an area, then by another to recover the remaining length. For surface area, sum all six face areas directly; the result must match 88.
Later retrieval: If only height increased to 5 cm, volume would rise by 12 cm³ while total surface area would rise by 2(6+2)=16 cm². A useful notebook includes this changed-dimension explanation.
170. Card 28: cuboid volume versus surface area
Card prompt: An ideal closed cuboid has dimensions 9 cm × 7 cm × 11 cm. Use a formula notebook to find its volume and total area of the six outside faces, and check their different units.
Meaning and conditions: Notebook card: cuboid volume=length×width×height, which multiplies three lengths and yields cm³. A separate card says closed cuboid surface area=2(lw+lh+wh) for all six faces, yielding cm². The two formulas describe interior space versus exterior covering.
One worked example: Volume=9×7×11=693 cm³. Surface area=2(63+99+77)=478 cm². A net would show two matching faces of each dimension pair, explaining the factor two.
When this would be wrong: A child who uses 693 as an area or 478 as a volume has chosen a formula for a different quantity. An open-top box would also lack one exterior face, so the closed-box card does not automatically apply to every container.
Check: For volume, divide by one known dimension to recover an area, then by another to recover the remaining length. For surface area, sum all six face areas directly; the result must match 478.
Later retrieval: If only height increased to 12 cm, volume would rise by 63 cm³ while total surface area would rise by 2(9+7)=32 cm². A useful notebook includes this changed-dimension explanation.
Means, frequencies and probability
In means, frequencies and probability, a notebook card should name the question that triggers the formula and the quantity it calculates. Read the worked example as one illustration of the relationship, not as fixed numbers to memorise. Pay attention to units, assumptions and a reverse check. If two formulas use the same letter, define that letter again in the local context.
171. Card 1: weighted mean from frequencies
Card prompt: An exact-value table contains score 2 with frequency 1, and score 3 with frequency 2. Find the mean using the appropriate formula and identify what each symbol represents.
Meaning and conditions: Notebook heading: mean = total of all observations / number of observations. For a value–frequency table, total is Σ(value×frequency); count is Σfrequency. Explain the sigma notation in ordinary words if it is unfamiliar: multiply each value by how many times it occurs, add those contributions and divide by all observed entries.
One worked example: Total score=2×1+3×2=8. Total frequency=1+2=3. Mean=8/3≈2.666667. This differs from simply averaging the two printed score labels when their frequencies differ.
When this would be wrong: Dividing (2+3) by two pretends the two distinct score values occur equally often. A formula card that forgets the frequency column cannot reconstruct the true dataset mean.
Check: The unrounded fraction 8/3 lies between 2 and 3 and multiplying it by 3 restores the total score 8. If a display rounds, expect a small residual in a numeric check.
Later retrieval: If one extra observation of value 3 is added, total becomes 11 across 4 observations. New mean is (11)/(4)≈2.75. Record the changed denominator, not just the new numerator.
172. Card 2: weighted mean from frequencies
Card prompt: An exact-value table contains score 5 with frequency 8, and score 8 with frequency 3. Find the mean using the appropriate formula and identify what each symbol represents.
Meaning and conditions: Notebook heading: mean = total of all observations / number of observations. For a value–frequency table, total is Σ(value×frequency); count is Σfrequency. Explain the sigma notation in ordinary words if it is unfamiliar: multiply each value by how many times it occurs, add those contributions and divide by all observed entries.
One worked example: Total score=5×8+8×3=64. Total frequency=8+3=11. Mean=64/11≈5.818182. This differs from simply averaging the two printed score labels when their frequencies differ.
When this would be wrong: Dividing (5+8) by two pretends the two distinct score values occur equally often. A formula card that forgets the frequency column cannot reconstruct the true dataset mean.
Check: The unrounded fraction 64/11 lies between 5 and 8 and multiplying it by 11 restores the total score 64. If a display rounds, expect a small residual in a numeric check.
Later retrieval: If one extra observation of value 8 is added, total becomes 72 across 12 observations. New mean is (72)/(12)≈6. Record the changed denominator, not just the new numerator.
173. Card 3: weighted mean from frequencies
Card prompt: An exact-value table contains score 8 with frequency 6, and score 13 with frequency 4. Find the mean using the appropriate formula and identify what each symbol represents.
Meaning and conditions: Notebook heading: mean = total of all observations / number of observations. For a value–frequency table, total is Σ(value×frequency); count is Σfrequency. Explain the sigma notation in ordinary words if it is unfamiliar: multiply each value by how many times it occurs, add those contributions and divide by all observed entries.
One worked example: Total score=8×6+13×4=100. Total frequency=6+4=10. Mean=100/10≈10. This differs from simply averaging the two printed score labels when their frequencies differ.
When this would be wrong: Dividing (8+13) by two pretends the two distinct score values occur equally often. A formula card that forgets the frequency column cannot reconstruct the true dataset mean.
Check: The unrounded fraction 100/10 lies between 8 and 13 and multiplying it by 10 restores the total score 100. If a display rounds, expect a small residual in a numeric check.
Later retrieval: If one extra observation of value 13 is added, total becomes 113 across 11 observations. New mean is (113)/(11)≈10.272727. Record the changed denominator, not just the new numerator.
174. Card 4: weighted mean from frequencies
Card prompt: An exact-value table contains score 11 with frequency 4, and score 5 with frequency 5. Find the mean using the appropriate formula and identify what each symbol represents.
Meaning and conditions: Notebook heading: mean = total of all observations / number of observations. For a value–frequency table, total is Σ(value×frequency); count is Σfrequency. Explain the sigma notation in ordinary words if it is unfamiliar: multiply each value by how many times it occurs, add those contributions and divide by all observed entries.
One worked example: Total score=11×4+5×5=69. Total frequency=4+5=9. Mean=69/9≈7.666667. This differs from simply averaging the two printed score labels when their frequencies differ.
When this would be wrong: Dividing (11+5) by two pretends the two distinct score values occur equally often. A formula card that forgets the frequency column cannot reconstruct the true dataset mean.
Check: The unrounded fraction 69/9 lies between 5 and 11 and multiplying it by 9 restores the total score 69. If a display rounds, expect a small residual in a numeric check.
Later retrieval: If one extra observation of value 5 is added, total becomes 74 across 10 observations. New mean is (74)/(10)≈7.4. Record the changed denominator, not just the new numerator.
175. Card 5: weighted mean from frequencies
Card prompt: An exact-value table contains score 3 with frequency 2, and score 10 with frequency 6. Find the mean using the appropriate formula and identify what each symbol represents.
Meaning and conditions: Notebook heading: mean = total of all observations / number of observations. For a value–frequency table, total is Σ(value×frequency); count is Σfrequency. Explain the sigma notation in ordinary words if it is unfamiliar: multiply each value by how many times it occurs, add those contributions and divide by all observed entries.
One worked example: Total score=3×2+10×6=66. Total frequency=2+6=8. Mean=66/8≈8.25. This differs from simply averaging the two printed score labels when their frequencies differ.
When this would be wrong: Dividing (3+10) by two pretends the two distinct score values occur equally often. A formula card that forgets the frequency column cannot reconstruct the true dataset mean.
Check: The unrounded fraction 66/8 lies between 3 and 10 and multiplying it by 8 restores the total score 66. If a display rounds, expect a small residual in a numeric check.
Later retrieval: If one extra observation of value 10 is added, total becomes 76 across 9 observations. New mean is (76)/(9)≈8.444444. Record the changed denominator, not just the new numerator.
176. Card 6: weighted mean from frequencies
Card prompt: An exact-value table contains score 6 with frequency 9, and score 15 with frequency 7. Find the mean using the appropriate formula and identify what each symbol represents.
Meaning and conditions: Notebook heading: mean = total of all observations / number of observations. For a value–frequency table, total is Σ(value×frequency); count is Σfrequency. Explain the sigma notation in ordinary words if it is unfamiliar: multiply each value by how many times it occurs, add those contributions and divide by all observed entries.
One worked example: Total score=6×9+15×7=159. Total frequency=9+7=16. Mean=159/16≈9.9375. This differs from simply averaging the two printed score labels when their frequencies differ.
When this would be wrong: Dividing (6+15) by two pretends the two distinct score values occur equally often. A formula card that forgets the frequency column cannot reconstruct the true dataset mean.
Check: The unrounded fraction 159/16 lies between 6 and 15 and multiplying it by 16 restores the total score 159. If a display rounds, expect a small residual in a numeric check.
Later retrieval: If one extra observation of value 15 is added, total becomes 174 across 17 observations. New mean is (174)/(17)≈10.235294. Record the changed denominator, not just the new numerator.
177. Card 7: weighted mean from frequencies
Card prompt: An exact-value table contains score 9 with frequency 7, and score 7 with frequency 8. Find the mean using the appropriate formula and identify what each symbol represents.
Meaning and conditions: Notebook heading: mean = total of all observations / number of observations. For a value–frequency table, total is Σ(value×frequency); count is Σfrequency. Explain the sigma notation in ordinary words if it is unfamiliar: multiply each value by how many times it occurs, add those contributions and divide by all observed entries.
One worked example: Total score=9×7+7×8=119. Total frequency=7+8=15. Mean=119/15≈7.933333. This differs from simply averaging the two printed score labels when their frequencies differ.
When this would be wrong: Dividing (9+7) by two pretends the two distinct score values occur equally often. A formula card that forgets the frequency column cannot reconstruct the true dataset mean.
Check: The unrounded fraction 119/15 lies between 7 and 9 and multiplying it by 15 restores the total score 119. If a display rounds, expect a small residual in a numeric check.
Later retrieval: If one extra observation of value 7 is added, total becomes 126 across 16 observations. New mean is (126)/(16)≈7.875. Record the changed denominator, not just the new numerator.
178. Card 8: weighted mean from frequencies
Card prompt: An exact-value table contains score 12 with frequency 5, and score 12 with frequency 9. Find the mean using the appropriate formula and identify what each symbol represents.
Meaning and conditions: Notebook heading: mean = total of all observations / number of observations. For a value–frequency table, total is Σ(value×frequency); count is Σfrequency. Explain the sigma notation in ordinary words if it is unfamiliar: multiply each value by how many times it occurs, add those contributions and divide by all observed entries.
One worked example: Total score=12×5+12×9=168. Total frequency=5+9=14. Mean=168/14≈12. This differs from simply averaging the two printed score labels when their frequencies differ.
When this would be wrong: Dividing (12+12) by two pretends the two distinct score values occur equally often. A formula card that forgets the frequency column cannot reconstruct the true dataset mean.
Check: The unrounded fraction 168/14 lies between 12 and 12 and multiplying it by 14 restores the total score 168. If a display rounds, expect a small residual in a numeric check.
Later retrieval: If one extra observation of value 12 is added, total becomes 180 across 15 observations. New mean is (180)/(15)≈12. Record the changed denominator, not just the new numerator.
179. Card 9: weighted mean from frequencies
Card prompt: An exact-value table contains score 4 with frequency 3, and score 4 with frequency 10. Find the mean using the appropriate formula and identify what each symbol represents.
Meaning and conditions: Notebook heading: mean = total of all observations / number of observations. For a value–frequency table, total is Σ(value×frequency); count is Σfrequency. Explain the sigma notation in ordinary words if it is unfamiliar: multiply each value by how many times it occurs, add those contributions and divide by all observed entries.
One worked example: Total score=4×3+4×10=52. Total frequency=3+10=13. Mean=52/13≈4. This differs from simply averaging the two printed score labels when their frequencies differ.
When this would be wrong: Dividing (4+4) by two pretends the two distinct score values occur equally often. A formula card that forgets the frequency column cannot reconstruct the true dataset mean.
Check: The unrounded fraction 52/13 lies between 4 and 4 and multiplying it by 13 restores the total score 52. If a display rounds, expect a small residual in a numeric check.
Later retrieval: If one extra observation of value 4 is added, total becomes 56 across 14 observations. New mean is (56)/(14)≈4. Record the changed denominator, not just the new numerator.
180. Card 10: weighted mean from frequencies
Card prompt: An exact-value table contains score 7 with frequency 1, and score 9 with frequency 11. Find the mean using the appropriate formula and identify what each symbol represents.
Meaning and conditions: Notebook heading: mean = total of all observations / number of observations. For a value–frequency table, total is Σ(value×frequency); count is Σfrequency. Explain the sigma notation in ordinary words if it is unfamiliar: multiply each value by how many times it occurs, add those contributions and divide by all observed entries.
One worked example: Total score=7×1+9×11=106. Total frequency=1+11=12. Mean=106/12≈8.833333. This differs from simply averaging the two printed score labels when their frequencies differ.
When this would be wrong: Dividing (7+9) by two pretends the two distinct score values occur equally often. A formula card that forgets the frequency column cannot reconstruct the true dataset mean.
Check: The unrounded fraction 106/12 lies between 7 and 9 and multiplying it by 12 restores the total score 106. If a display rounds, expect a small residual in a numeric check.
Later retrieval: If one extra observation of value 9 is added, total becomes 115 across 13 observations. New mean is (115)/(13)≈8.846154. Record the changed denominator, not just the new numerator.
181. Card 11: weighted mean from frequencies
Card prompt: An exact-value table contains score 10 with frequency 8, and score 14 with frequency 2. Find the mean using the appropriate formula and identify what each symbol represents.
Meaning and conditions: Notebook heading: mean = total of all observations / number of observations. For a value–frequency table, total is Σ(value×frequency); count is Σfrequency. Explain the sigma notation in ordinary words if it is unfamiliar: multiply each value by how many times it occurs, add those contributions and divide by all observed entries.
One worked example: Total score=10×8+14×2=108. Total frequency=8+2=10. Mean=108/10≈10.8. This differs from simply averaging the two printed score labels when their frequencies differ.
When this would be wrong: Dividing (10+14) by two pretends the two distinct score values occur equally often. A formula card that forgets the frequency column cannot reconstruct the true dataset mean.
Check: The unrounded fraction 108/10 lies between 10 and 14 and multiplying it by 10 restores the total score 108. If a display rounds, expect a small residual in a numeric check.
Later retrieval: If one extra observation of value 14 is added, total becomes 122 across 11 observations. New mean is (122)/(11)≈11.090909. Record the changed denominator, not just the new numerator.
182. Card 12: weighted mean from frequencies
Card prompt: An exact-value table contains score 2 with frequency 6, and score 6 with frequency 3. Find the mean using the appropriate formula and identify what each symbol represents.
Meaning and conditions: Notebook heading: mean = total of all observations / number of observations. For a value–frequency table, total is Σ(value×frequency); count is Σfrequency. Explain the sigma notation in ordinary words if it is unfamiliar: multiply each value by how many times it occurs, add those contributions and divide by all observed entries.
One worked example: Total score=2×6+6×3=30. Total frequency=6+3=9. Mean=30/9≈3.333333. This differs from simply averaging the two printed score labels when their frequencies differ.
When this would be wrong: Dividing (2+6) by two pretends the two distinct score values occur equally often. A formula card that forgets the frequency column cannot reconstruct the true dataset mean.
Check: The unrounded fraction 30/9 lies between 2 and 6 and multiplying it by 9 restores the total score 30. If a display rounds, expect a small residual in a numeric check.
Later retrieval: If one extra observation of value 6 is added, total becomes 36 across 10 observations. New mean is (36)/(10)≈3.6. Record the changed denominator, not just the new numerator.
183. Card 13: weighted mean from frequencies
Card prompt: An exact-value table contains score 5 with frequency 4, and score 11 with frequency 4. Find the mean using the appropriate formula and identify what each symbol represents.
Meaning and conditions: Notebook heading: mean = total of all observations / number of observations. For a value–frequency table, total is Σ(value×frequency); count is Σfrequency. Explain the sigma notation in ordinary words if it is unfamiliar: multiply each value by how many times it occurs, add those contributions and divide by all observed entries.
One worked example: Total score=5×4+11×4=64. Total frequency=4+4=8. Mean=64/8≈8. This differs from simply averaging the two printed score labels when their frequencies differ.
When this would be wrong: Dividing (5+11) by two pretends the two distinct score values occur equally often. A formula card that forgets the frequency column cannot reconstruct the true dataset mean.
Check: The unrounded fraction 64/8 lies between 5 and 11 and multiplying it by 8 restores the total score 64. If a display rounds, expect a small residual in a numeric check.
Later retrieval: If one extra observation of value 11 is added, total becomes 75 across 9 observations. New mean is (75)/(9)≈8.333333. Record the changed denominator, not just the new numerator.
184. Card 14: weighted mean from frequencies
Card prompt: An exact-value table contains score 8 with frequency 2, and score 3 with frequency 5. Find the mean using the appropriate formula and identify what each symbol represents.
Meaning and conditions: Notebook heading: mean = total of all observations / number of observations. For a value–frequency table, total is Σ(value×frequency); count is Σfrequency. Explain the sigma notation in ordinary words if it is unfamiliar: multiply each value by how many times it occurs, add those contributions and divide by all observed entries.
One worked example: Total score=8×2+3×5=31. Total frequency=2+5=7. Mean=31/7≈4.428571. This differs from simply averaging the two printed score labels when their frequencies differ.
When this would be wrong: Dividing (8+3) by two pretends the two distinct score values occur equally often. A formula card that forgets the frequency column cannot reconstruct the true dataset mean.
Check: The unrounded fraction 31/7 lies between 3 and 8 and multiplying it by 7 restores the total score 31. If a display rounds, expect a small residual in a numeric check.
Later retrieval: If one extra observation of value 3 is added, total becomes 34 across 8 observations. New mean is (34)/(8)≈4.25. Record the changed denominator, not just the new numerator.
185. Card 15: weighted mean from frequencies
Card prompt: An exact-value table contains score 11 with frequency 9, and score 8 with frequency 6. Find the mean using the appropriate formula and identify what each symbol represents.
Meaning and conditions: Notebook heading: mean = total of all observations / number of observations. For a value–frequency table, total is Σ(value×frequency); count is Σfrequency. Explain the sigma notation in ordinary words if it is unfamiliar: multiply each value by how many times it occurs, add those contributions and divide by all observed entries.
One worked example: Total score=11×9+8×6=147. Total frequency=9+6=15. Mean=147/15≈9.8. This differs from simply averaging the two printed score labels when their frequencies differ.
When this would be wrong: Dividing (11+8) by two pretends the two distinct score values occur equally often. A formula card that forgets the frequency column cannot reconstruct the true dataset mean.
Check: The unrounded fraction 147/15 lies between 8 and 11 and multiplying it by 15 restores the total score 147. If a display rounds, expect a small residual in a numeric check.
Later retrieval: If one extra observation of value 8 is added, total becomes 155 across 16 observations. New mean is (155)/(16)≈9.6875. Record the changed denominator, not just the new numerator.
186. Card 16: weighted mean from frequencies
Card prompt: An exact-value table contains score 3 with frequency 7, and score 13 with frequency 7. Find the mean using the appropriate formula and identify what each symbol represents.
Meaning and conditions: Notebook heading: mean = total of all observations / number of observations. For a value–frequency table, total is Σ(value×frequency); count is Σfrequency. Explain the sigma notation in ordinary words if it is unfamiliar: multiply each value by how many times it occurs, add those contributions and divide by all observed entries.
One worked example: Total score=3×7+13×7=112. Total frequency=7+7=14. Mean=112/14≈8. This differs from simply averaging the two printed score labels when their frequencies differ.
When this would be wrong: Dividing (3+13) by two pretends the two distinct score values occur equally often. A formula card that forgets the frequency column cannot reconstruct the true dataset mean.
Check: The unrounded fraction 112/14 lies between 3 and 13 and multiplying it by 14 restores the total score 112. If a display rounds, expect a small residual in a numeric check.
Later retrieval: If one extra observation of value 13 is added, total becomes 125 across 15 observations. New mean is (125)/(15)≈8.333333. Record the changed denominator, not just the new numerator.
187. Card 17: weighted mean from frequencies
Card prompt: An exact-value table contains score 6 with frequency 5, and score 5 with frequency 8. Find the mean using the appropriate formula and identify what each symbol represents.
Meaning and conditions: Notebook heading: mean = total of all observations / number of observations. For a value–frequency table, total is Σ(value×frequency); count is Σfrequency. Explain the sigma notation in ordinary words if it is unfamiliar: multiply each value by how many times it occurs, add those contributions and divide by all observed entries.
One worked example: Total score=6×5+5×8=70. Total frequency=5+8=13. Mean=70/13≈5.384615. This differs from simply averaging the two printed score labels when their frequencies differ.
When this would be wrong: Dividing (6+5) by two pretends the two distinct score values occur equally often. A formula card that forgets the frequency column cannot reconstruct the true dataset mean.
Check: The unrounded fraction 70/13 lies between 5 and 6 and multiplying it by 13 restores the total score 70. If a display rounds, expect a small residual in a numeric check.
Later retrieval: If one extra observation of value 5 is added, total becomes 75 across 14 observations. New mean is (75)/(14)≈5.357143. Record the changed denominator, not just the new numerator.
188. Card 18: weighted mean from frequencies
Card prompt: An exact-value table contains score 9 with frequency 3, and score 10 with frequency 9. Find the mean using the appropriate formula and identify what each symbol represents.
Meaning and conditions: Notebook heading: mean = total of all observations / number of observations. For a value–frequency table, total is Σ(value×frequency); count is Σfrequency. Explain the sigma notation in ordinary words if it is unfamiliar: multiply each value by how many times it occurs, add those contributions and divide by all observed entries.
One worked example: Total score=9×3+10×9=117. Total frequency=3+9=12. Mean=117/12≈9.75. This differs from simply averaging the two printed score labels when their frequencies differ.
When this would be wrong: Dividing (9+10) by two pretends the two distinct score values occur equally often. A formula card that forgets the frequency column cannot reconstruct the true dataset mean.
Check: The unrounded fraction 117/12 lies between 9 and 10 and multiplying it by 12 restores the total score 117. If a display rounds, expect a small residual in a numeric check.
Later retrieval: If one extra observation of value 10 is added, total becomes 127 across 13 observations. New mean is (127)/(13)≈9.769231. Record the changed denominator, not just the new numerator.
189. Card 19: weighted mean from frequencies
Card prompt: An exact-value table contains score 12 with frequency 1, and score 15 with frequency 10. Find the mean using the appropriate formula and identify what each symbol represents.
Meaning and conditions: Notebook heading: mean = total of all observations / number of observations. For a value–frequency table, total is Σ(value×frequency); count is Σfrequency. Explain the sigma notation in ordinary words if it is unfamiliar: multiply each value by how many times it occurs, add those contributions and divide by all observed entries.
One worked example: Total score=12×1+15×10=162. Total frequency=1+10=11. Mean=162/11≈14.727273. This differs from simply averaging the two printed score labels when their frequencies differ.
When this would be wrong: Dividing (12+15) by two pretends the two distinct score values occur equally often. A formula card that forgets the frequency column cannot reconstruct the true dataset mean.
Check: The unrounded fraction 162/11 lies between 12 and 15 and multiplying it by 11 restores the total score 162. If a display rounds, expect a small residual in a numeric check.
Later retrieval: If one extra observation of value 15 is added, total becomes 177 across 12 observations. New mean is (177)/(12)≈14.75. Record the changed denominator, not just the new numerator.
190. Card 20: weighted mean from frequencies
Card prompt: An exact-value table contains score 4 with frequency 8, and score 7 with frequency 11. Find the mean using the appropriate formula and identify what each symbol represents.
Meaning and conditions: Notebook heading: mean = total of all observations / number of observations. For a value–frequency table, total is Σ(value×frequency); count is Σfrequency. Explain the sigma notation in ordinary words if it is unfamiliar: multiply each value by how many times it occurs, add those contributions and divide by all observed entries.
One worked example: Total score=4×8+7×11=109. Total frequency=8+11=19. Mean=109/19≈5.736842. This differs from simply averaging the two printed score labels when their frequencies differ.
When this would be wrong: Dividing (4+7) by two pretends the two distinct score values occur equally often. A formula card that forgets the frequency column cannot reconstruct the true dataset mean.
Check: The unrounded fraction 109/19 lies between 4 and 7 and multiplying it by 19 restores the total score 109. If a display rounds, expect a small residual in a numeric check.
Later retrieval: If one extra observation of value 7 is added, total becomes 116 across 20 observations. New mean is (116)/(20)≈5.8. Record the changed denominator, not just the new numerator.
191. Card 21: weighted mean from frequencies
Card prompt: An exact-value table contains score 7 with frequency 6, and score 12 with frequency 2. Find the mean using the appropriate formula and identify what each symbol represents.
Meaning and conditions: Notebook heading: mean = total of all observations / number of observations. For a value–frequency table, total is Σ(value×frequency); count is Σfrequency. Explain the sigma notation in ordinary words if it is unfamiliar: multiply each value by how many times it occurs, add those contributions and divide by all observed entries.
One worked example: Total score=7×6+12×2=66. Total frequency=6+2=8. Mean=66/8≈8.25. This differs from simply averaging the two printed score labels when their frequencies differ.
When this would be wrong: Dividing (7+12) by two pretends the two distinct score values occur equally often. A formula card that forgets the frequency column cannot reconstruct the true dataset mean.
Check: The unrounded fraction 66/8 lies between 7 and 12 and multiplying it by 8 restores the total score 66. If a display rounds, expect a small residual in a numeric check.
Later retrieval: If one extra observation of value 12 is added, total becomes 78 across 9 observations. New mean is (78)/(9)≈8.666667. Record the changed denominator, not just the new numerator.
192. Card 22: weighted mean from frequencies
Card prompt: An exact-value table contains score 10 with frequency 4, and score 4 with frequency 3. Find the mean using the appropriate formula and identify what each symbol represents.
Meaning and conditions: Notebook heading: mean = total of all observations / number of observations. For a value–frequency table, total is Σ(value×frequency); count is Σfrequency. Explain the sigma notation in ordinary words if it is unfamiliar: multiply each value by how many times it occurs, add those contributions and divide by all observed entries.
One worked example: Total score=10×4+4×3=52. Total frequency=4+3=7. Mean=52/7≈7.428571. This differs from simply averaging the two printed score labels when their frequencies differ.
When this would be wrong: Dividing (10+4) by two pretends the two distinct score values occur equally often. A formula card that forgets the frequency column cannot reconstruct the true dataset mean.
Check: The unrounded fraction 52/7 lies between 4 and 10 and multiplying it by 7 restores the total score 52. If a display rounds, expect a small residual in a numeric check.
Later retrieval: If one extra observation of value 4 is added, total becomes 56 across 8 observations. New mean is (56)/(8)≈7. Record the changed denominator, not just the new numerator.
193. Card 23: weighted mean from frequencies
Card prompt: An exact-value table contains score 2 with frequency 2, and score 9 with frequency 4. Find the mean using the appropriate formula and identify what each symbol represents.
Meaning and conditions: Notebook heading: mean = total of all observations / number of observations. For a value–frequency table, total is Σ(value×frequency); count is Σfrequency. Explain the sigma notation in ordinary words if it is unfamiliar: multiply each value by how many times it occurs, add those contributions and divide by all observed entries.
One worked example: Total score=2×2+9×4=40. Total frequency=2+4=6. Mean=40/6≈6.666667. This differs from simply averaging the two printed score labels when their frequencies differ.
When this would be wrong: Dividing (2+9) by two pretends the two distinct score values occur equally often. A formula card that forgets the frequency column cannot reconstruct the true dataset mean.
Check: The unrounded fraction 40/6 lies between 2 and 9 and multiplying it by 6 restores the total score 40. If a display rounds, expect a small residual in a numeric check.
Later retrieval: If one extra observation of value 9 is added, total becomes 49 across 7 observations. New mean is (49)/(7)≈7. Record the changed denominator, not just the new numerator.
194. Card 24: weighted mean from frequencies
Card prompt: An exact-value table contains score 5 with frequency 9, and score 14 with frequency 5. Find the mean using the appropriate formula and identify what each symbol represents.
Meaning and conditions: Notebook heading: mean = total of all observations / number of observations. For a value–frequency table, total is Σ(value×frequency); count is Σfrequency. Explain the sigma notation in ordinary words if it is unfamiliar: multiply each value by how many times it occurs, add those contributions and divide by all observed entries.
One worked example: Total score=5×9+14×5=115. Total frequency=9+5=14. Mean=115/14≈8.214286. This differs from simply averaging the two printed score labels when their frequencies differ.
When this would be wrong: Dividing (5+14) by two pretends the two distinct score values occur equally often. A formula card that forgets the frequency column cannot reconstruct the true dataset mean.
Check: The unrounded fraction 115/14 lies between 5 and 14 and multiplying it by 14 restores the total score 115. If a display rounds, expect a small residual in a numeric check.
Later retrieval: If one extra observation of value 14 is added, total becomes 129 across 15 observations. New mean is (129)/(15)≈8.6. Record the changed denominator, not just the new numerator.
195. Card 25: weighted mean from frequencies
Card prompt: An exact-value table contains score 8 with frequency 7, and score 6 with frequency 6. Find the mean using the appropriate formula and identify what each symbol represents.
Meaning and conditions: Notebook heading: mean = total of all observations / number of observations. For a value–frequency table, total is Σ(value×frequency); count is Σfrequency. Explain the sigma notation in ordinary words if it is unfamiliar: multiply each value by how many times it occurs, add those contributions and divide by all observed entries.
One worked example: Total score=8×7+6×6=92. Total frequency=7+6=13. Mean=92/13≈7.076923. This differs from simply averaging the two printed score labels when their frequencies differ.
When this would be wrong: Dividing (8+6) by two pretends the two distinct score values occur equally often. A formula card that forgets the frequency column cannot reconstruct the true dataset mean.
Check: The unrounded fraction 92/13 lies between 6 and 8 and multiplying it by 13 restores the total score 92. If a display rounds, expect a small residual in a numeric check.
Later retrieval: If one extra observation of value 6 is added, total becomes 98 across 14 observations. New mean is (98)/(14)≈7. Record the changed denominator, not just the new numerator.
196. Card 26: weighted mean from frequencies
Card prompt: An exact-value table contains score 11 with frequency 5, and score 11 with frequency 7. Find the mean using the appropriate formula and identify what each symbol represents.
Meaning and conditions: Notebook heading: mean = total of all observations / number of observations. For a value–frequency table, total is Σ(value×frequency); count is Σfrequency. Explain the sigma notation in ordinary words if it is unfamiliar: multiply each value by how many times it occurs, add those contributions and divide by all observed entries.
One worked example: Total score=11×5+11×7=132. Total frequency=5+7=12. Mean=132/12≈11. This differs from simply averaging the two printed score labels when their frequencies differ.
When this would be wrong: Dividing (11+11) by two pretends the two distinct score values occur equally often. A formula card that forgets the frequency column cannot reconstruct the true dataset mean.
Check: The unrounded fraction 132/12 lies between 11 and 11 and multiplying it by 12 restores the total score 132. If a display rounds, expect a small residual in a numeric check.
Later retrieval: If one extra observation of value 11 is added, total becomes 143 across 13 observations. New mean is (143)/(13)≈11. Record the changed denominator, not just the new numerator.
197. Card 27: weighted mean from frequencies
Card prompt: An exact-value table contains score 3 with frequency 3, and score 3 with frequency 8. Find the mean using the appropriate formula and identify what each symbol represents.
Meaning and conditions: Notebook heading: mean = total of all observations / number of observations. For a value–frequency table, total is Σ(value×frequency); count is Σfrequency. Explain the sigma notation in ordinary words if it is unfamiliar: multiply each value by how many times it occurs, add those contributions and divide by all observed entries.
One worked example: Total score=3×3+3×8=33. Total frequency=3+8=11. Mean=33/11≈3. This differs from simply averaging the two printed score labels when their frequencies differ.
When this would be wrong: Dividing (3+3) by two pretends the two distinct score values occur equally often. A formula card that forgets the frequency column cannot reconstruct the true dataset mean.
Check: The unrounded fraction 33/11 lies between 3 and 3 and multiplying it by 11 restores the total score 33. If a display rounds, expect a small residual in a numeric check.
Later retrieval: If one extra observation of value 3 is added, total becomes 36 across 12 observations. New mean is (36)/(12)≈3. Record the changed denominator, not just the new numerator.
Building and retrieving a personal notebook
In building and retrieving a personal notebook, a notebook card should name the question that triggers the formula and the quantity it calculates. Read the worked example as one illustration of the relationship, not as fixed numbers to memorise. Pay attention to units, assumptions and a reverse check. If two formulas use the same letter, define that letter again in the local context.
198. Write one question at the top of each card
Card prompt: A formula notebook entry simply says ‘area = base times height’. Is that enough?
Meaning and conditions: A practical formula notebook should explain the question type, the symbols and their units, and the assumptions that make the relationship valid. A card is for understanding and later retrieval, not simply for decorating a page with equations.
One worked example: Not for every shape. Identify whether the shape is a rectangle, parallelogram or triangle and what ‘height’ means, then write the correct formula with a sketch.
When this would be wrong: A generic card can encourage using bh for a triangle when ½bh is required.
Check: Make the card’s first line a question like ‘Area of which figure?’.
Later retrieval: Write a changed-number practice prompt beside this rule and hide the full working. On the next suitable day, ask the pupil to choose the correct relationship independently and to explain one condition or limit. Make the card’s first line a question like ‘Area of which figure?’.
199. Define every symbol locally
Card prompt: A card uses b in y=mx+b and A=½bh. Does b have one fixed meaning?
Meaning and conditions: A practical formula notebook should explain the question type, the symbols and their units, and the assumptions that make the relationship valid. A card is for understanding and later retrieval, not simply for decorating a page with equations.
One worked example: No. In a line rule b is often y-intercept; in triangle area it is base length. The heading and definitions provide context.
When this would be wrong: Letters do not carry one universal meaning across all mathematics.
Check: Write ‘b=intercept’ and ‘b=base’ on their respective cards.
Later retrieval: Write a changed-number practice prompt beside this rule and hide the full working. On the next suitable day, ask the pupil to choose the correct relationship independently and to explain one condition or limit. Write ‘b=intercept’ and ‘b=base’ on their respective cards.
200. Show one worked example, not ten copied ones
Card prompt: A card contains 12 identical substituted answers. Is that necessary?
Meaning and conditions: A practical formula notebook should explain the question type, the symbols and their units, and the assumptions that make the relationship valid. A card is for understanding and later retrieval, not simply for decorating a page with equations.
One worked example: Not usually. One carefully explained example and one changed-number retrieval prompt can be more useful.
When this would be wrong: Copying many steps may become a page-count goal instead of understanding.
Check: Cover the worked example and attempt a changed case.
Later retrieval: Write a changed-number practice prompt beside this rule and hide the full working. On the next suitable day, ask the pupil to choose the correct relationship independently and to explain one condition or limit. Cover the worked example and attempt a changed case.
201. Add a dimensional check
Card prompt: A formula card for volume shows 4×3×2=24 but no unit. What should be written?
Meaning and conditions: A practical formula notebook should explain the question type, the symbols and their units, and the assumptions that make the relationship valid. A card is for understanding and later retrieval, not simply for decorating a page with equations.
One worked example: If inputs are centimetres, output is 24 cm³; the three length factors create cubic units.
When this would be wrong: An unlabelled numerical result may be confused with surface area.
Check: Use cm³ beside volume and cm² beside surface area.
Later retrieval: Write a changed-number practice prompt beside this rule and hide the full working. On the next suitable day, ask the pupil to choose the correct relationship independently and to explain one condition or limit. Use cm³ beside volume and cm² beside surface area.
202. Record the condition under which a formula works
Card prompt: A speed formula card states d=st without saying speed is constant. Is it always a real journey law?
Meaning and conditions: A practical formula notebook should explain the question type, the symbols and their units, and the assumptions that make the relationship valid. A card is for understanding and later retrieval, not simply for decorating a page with equations.
One worked example: The equation can describe distance from a constant speed s over time t, while average speed uses total distance/time. State the model assumption.
When this would be wrong: Using a constant-rate formula for variable instantaneous speed without qualification can mislead.
Check: Label ‘constant speed model’ or ‘average over interval’.
Later retrieval: Write a changed-number practice prompt beside this rule and hide the full working. On the next suitable day, ask the pupil to choose the correct relationship independently and to explain one condition or limit. Label ‘constant speed model’ or ‘average over interval’.
203. Distinguish exact and approximate results
Card prompt: A circle-area card writes π=3.14. Should it say exactly equal?
Meaning and conditions: A practical formula notebook should explain the question type, the symbols and their units, and the assumptions that make the relationship valid. A card is for understanding and later retrieval, not simply for decorating a page with equations.
One worked example: No. π is an exact constant and 3.14 is an approximation. Keep π until requested final rounding.
When this would be wrong: Premature rounding can affect multiple later calculation steps.
Check: Use the ≈ sign with decimal approximations.
Later retrieval: Write a changed-number practice prompt beside this rule and hide the full working. On the next suitable day, ask the pupil to choose the correct relationship independently and to explain one condition or limit. Use the ≈ sign with decimal approximations.
204. Make a reverse-check line
Card prompt: A card says rectangle area=A=lw. How can the student check a calculated width?
Meaning and conditions: A practical formula notebook should explain the question type, the symbols and their units, and the assumptions that make the relationship valid. A card is for understanding and later retrieval, not simply for decorating a page with equations.
One worked example: Multiply the recovered width by the stated length and reproduce the original area.
When this would be wrong: Remembering a formula does not guarantee that it was rearranged or applied correctly.
Check: Write ‘check: length×found width=given area’.
Later retrieval: Write a changed-number practice prompt beside this rule and hide the full working. On the next suitable day, ask the pupil to choose the correct relationship independently and to explain one condition or limit. Write ‘check: length×found width=given area’.
205. Separately label derived versus supplied formulae
Card prompt: A note includes a later-stage sector formula but the school’s current chapter only covers circle area. How should it be labelled?
Meaning and conditions: A practical formula notebook should explain the question type, the symbols and their units, and the assumptions that make the relationship valid. A card is for understanding and later retrieval, not simply for decorating a page with equations.
One worked example: Mark ‘optional next-stage extension’ and keep current school-required concepts clearly separated.
When this would be wrong: Treating all online formula examples as examinable this term can confuse the pupil.
Check: Keep a ‘current school topic’ column.
Later retrieval: Write a changed-number practice prompt beside this rule and hide the full working. On the next suitable day, ask the pupil to choose the correct relationship independently and to explain one condition or limit. Keep a ‘current school topic’ column.
206. Formula names should be descriptive
Card prompt: A card heading simply says ‘Formula 7’. Is that helpful for retrieval?
Meaning and conditions: A practical formula notebook should explain the question type, the symbols and their units, and the assumptions that make the relationship valid. A card is for understanding and later retrieval, not simply for decorating a page with equations.
One worked example: A heading such as ‘Perimeter of a rectangle’ states the problem type and output.
When this would be wrong: Number-only headings make a pupil rely on positional memory.
Check: Ask the learner to name the formula from a question with no formula number.
Later retrieval: Write a changed-number practice prompt beside this rule and hide the full working. On the next suitable day, ask the pupil to choose the correct relationship independently and to explain one condition or limit. Ask the learner to name the formula from a question with no formula number.
207. One small sketch can explain a factor
Card prompt: Why does triangle area have ½?
Meaning and conditions: A practical formula notebook should explain the question type, the symbols and their units, and the assumptions that make the relationship valid. A card is for understanding and later retrieval, not simply for decorating a page with equations.
One worked example: Two congruent copies of a triangle can form a corresponding parallelogram with base b and perpendicular height h, explaining half of bh.
When this would be wrong: Memorising ‘divide by two’ without a shape picture can lead to using it on every polygon.
Check: Draw a base and perpendicular height to show the two-copy argument.
Later retrieval: Write a changed-number practice prompt beside this rule and hide the full working. On the next suitable day, ask the pupil to choose the correct relationship independently and to explain one condition or limit. Draw a base and perpendicular height to show the two-copy argument.
208. Do not substitute before identifying the requested unknown
Card prompt: A question asks for height but a formula notebook only has A=½bh. What is the first step?
Meaning and conditions: A practical formula notebook should explain the question type, the symbols and their units, and the assumptions that make the relationship valid. A card is for understanding and later retrieval, not simply for decorating a page with equations.
One worked example: Identify h as unknown and rearrange or use inverse steps before putting numbers in.
When this would be wrong: Substituting all values randomly without knowing which symbol is unknown may result in wrong formula entry.
Check: Write ‘unknown: h; inputs: area and base’.
Later retrieval: Write a changed-number practice prompt beside this rule and hide the full working. On the next suitable day, ask the pupil to choose the correct relationship independently and to explain one condition or limit. Write ‘unknown: h; inputs: area and base’.
209. Not every ratio is part of a whole
Card prompt: A card says share = part/other×total for A:B. Is it generally correct?
Meaning and conditions: A practical formula notebook should explain the question type, the symbols and their units, and the assumptions that make the relationship valid. A card is for understanding and later retrieval, not simply for decorating a page with equations.
One worked example: No. If A:B=a:b, A/whole=a/(a+b), not a/b.
When this would be wrong: A part-to-part ratio differs from a part-to-whole fraction.
Check: Write both quantities and count combined ratio parts.
Later retrieval: Write a changed-number practice prompt beside this rule and hide the full working. On the next suitable day, ask the pupil to choose the correct relationship independently and to explain one condition or limit. Write both quantities and count combined ratio parts.
210. Formula selection comes before arithmetic
Card prompt: A rectangle question asks for outside edging length. Should the student use A=lw?
Meaning and conditions: A practical formula notebook should explain the question type, the symbols and their units, and the assumptions that make the relationship valid. A card is for understanding and later retrieval, not simply for decorating a page with equations.
One worked example: No. Use perimeter P=2(l+w), because edging follows boundary length.
When this would be wrong: Formula recall without interpreting the requested quantity can cause systematic errors.
Check: Underline ‘edging’ and predict length units.
Later retrieval: Write a changed-number practice prompt beside this rule and hide the full working. On the next suitable day, ask the pupil to choose the correct relationship independently and to explain one condition or limit. Underline ‘edging’ and predict length units.
211. A formula card should not assert a grade guarantee
Card prompt: Does completing a personal notebook guarantee a top SEC grade?
Meaning and conditions: A practical formula notebook should explain the question type, the symbols and their units, and the assumptions that make the relationship valid. A card is for understanding and later retrieval, not simply for decorating a page with equations.
One worked example: No. A notebook can support retrieval and error checking but does not by itself measure all skills or future examination performance.
When this would be wrong: Turning a study aid into a promise exceeds the evidence.
Check: Use unseen school-aligned questions to assess progress.
Later retrieval: Write a changed-number practice prompt beside this rule and hide the full working. On the next suitable day, ask the pupil to choose the correct relationship independently and to explain one condition or limit. Use unseen school-aligned questions to assess progress.
212. Separate the source and the student’s explanation
Card prompt: The notebook copies a teacher-issued formula. What additional note helps?
Meaning and conditions: A practical formula notebook should explain the question type, the symbols and their units, and the assumptions that make the relationship valid. A card is for understanding and later retrieval, not simply for decorating a page with equations.
One worked example: Add the student’s own explanation of what each symbol measures and one original example, while respecting the source.
When this would be wrong: A copied formula without meaning may not transfer to new stories.
Check: Explain the unit of every input aloud.
Later retrieval: Write a changed-number practice prompt beside this rule and hide the full working. On the next suitable day, ask the pupil to choose the correct relationship independently and to explain one condition or limit. Explain the unit of every input aloud.
213. A notebook should be revised after a mistake
Card prompt: A pupil repeatedly confuses circumference and area. What should change?
Meaning and conditions: A practical formula notebook should explain the question type, the symbols and their units, and the assumptions that make the relationship valid. A card is for understanding and later retrieval, not simply for decorating a page with equations.
One worked example: Add a short ‘length around / region inside’ contrast with cm and cm², then retest using new radii.
When this would be wrong: Copying the same two formulas without identifying the confusion leaves the gap unaddressed.
Check: Compare an exact perimeter and an area with their separate units.
Later retrieval: Write a changed-number practice prompt beside this rule and hide the full working. On the next suitable day, ask the pupil to choose the correct relationship independently and to explain one condition or limit. Compare an exact perimeter and an area with their separate units.
214. Formula cards may include algebraic derivations
Card prompt: A card says y=mx+b and gives y=11 at x=2 with m=3. What is b?
Meaning and conditions: A practical formula notebook should explain the question type, the symbols and their units, and the assumptions that make the relationship valid. A card is for understanding and later retrieval, not simply for decorating a page with equations.
One worked example: b=11−3×2=5. A short rearrangement demonstrates the symbol’s role.
When this would be wrong: Declaring b=11 treats the observed output as the intercept.
Check: Substitute x=0 into y=3x+5.
Later retrieval: Write a changed-number practice prompt beside this rule and hide the full working. On the next suitable day, ask the pupil to choose the correct relationship independently and to explain one condition or limit. Substitute x=0 into y=3x+5.
215. One formula can produce many outputs
Card prompt: Does A=lw mean every rectangle with length five has equal area?
Meaning and conditions: A practical formula notebook should explain the question type, the symbols and their units, and the assumptions that make the relationship valid. A card is for understanding and later retrieval, not simply for decorating a page with equations.
One worked example: No. Width also matters. The formula is a relation, not a fixed numeric answer.
When this would be wrong: Treating one known variable as enough information creates guesses.
Check: 5×2 and 5×4 yield different areas.
Later retrieval: Write a changed-number practice prompt beside this rule and hide the full working. On the next suitable day, ask the pupil to choose the correct relationship independently and to explain one condition or limit. 5×2 and 5×4 yield different areas.
216. A volume unit card should distinguish litres
Card prompt: What is the useful link from cm³ to mL?
Meaning and conditions: A practical formula notebook should explain the question type, the symbols and their units, and the assumptions that make the relationship valid. A card is for understanding and later retrieval, not simply for decorating a page with equations.
One worked example: 1 cm³=1 mL and 1,000 mL=1 L. It is a volume conversion, not a square-area conversion.
When this would be wrong: Confusing cm² with mL changes dimensions.
Check: Convert 2,500 cm³ to 2.5 L.
Later retrieval: Write a changed-number practice prompt beside this rule and hide the full working. On the next suitable day, ask the pupil to choose the correct relationship independently and to explain one condition or limit. Convert 2,500 cm³ to 2.5 L.
217. Keep a worked example small and correct
Card prompt: A card includes a long worked problem with one incorrect sign. Should it remain?
Meaning and conditions: A practical formula notebook should explain the question type, the symbols and their units, and the assumptions that make the relationship valid. A card is for understanding and later retrieval, not simply for decorating a page with equations.
One worked example: No. Correct the first invalid transformation before treating the card as a reusable reference.
When this would be wrong: A neat-looking incorrect example can reinforce an error across future practice.
Check: Substitute the answer into the original expression.
Later retrieval: Write a changed-number practice prompt beside this rule and hide the full working. On the next suitable day, ask the pupil to choose the correct relationship independently and to explain one condition or limit. Substitute the answer into the original expression.
218. Use both forward and reverse questions
Card prompt: A child can find price after a 20% discount but not original price from the sale price. What should be added?
Meaning and conditions: A practical formula notebook should explain the question type, the symbols and their units, and the assumptions that make the relationship valid. A card is for understanding and later retrieval, not simply for decorating a page with equations.
One worked example: A reverse card: sale=0.8×original, hence original=sale/0.8.
When this would be wrong: One-way memorisation may not show relational understanding.
Check: A $72 sale at 20% off comes from $90.
Later retrieval: Write a changed-number practice prompt beside this rule and hide the full working. On the next suitable day, ask the pupil to choose the correct relationship independently and to explain one condition or limit. A $72 sale at 20% off comes from $90.
219. Include a boundary and sign check
Card prompt: The formula gives P(event)=7/6. What should the pupil notice?
Meaning and conditions: A practical formula notebook should explain the question type, the symbols and their units, and the assumptions that make the relationship valid. A card is for understanding and later retrieval, not simply for decorating a page with equations.
One worked example: A probability cannot exceed one. Check numerator count and denominator of sample space.
When this would be wrong: A device display does not certify a probability model.
Check: Return to 0≤P≤1.
Later retrieval: Write a changed-number practice prompt beside this rule and hide the full working. On the next suitable day, ask the pupil to choose the correct relationship independently and to explain one condition or limit. Return to 0≤P≤1.
220. Mark formulas by prerequisite
Card prompt: A later quadratic rule uses negative squaring but the learner struggles with signed multiplication. What next?
Meaning and conditions: A practical formula notebook should explain the question type, the symbols and their units, and the assumptions that make the relationship valid. A card is for understanding and later retrieval, not simply for decorating a page with equations.
One worked example: Repair signed arithmetic before adding the advanced formula. The notebook’s order should follow actual prerequisite needs.
When this would be wrong: An advanced formula may amplify an earlier weakness.
Check: Complete a changed negative-number question independently first.
Later retrieval: Write a changed-number practice prompt beside this rule and hide the full working. On the next suitable day, ask the pupil to choose the correct relationship independently and to explain one condition or limit. Complete a changed negative-number question independently first.
221. Use one card for a mistaken unit conversion
Card prompt: How should cm² to m² be noted?
Meaning and conditions: A practical formula notebook should explain the question type, the symbols and their units, and the assumptions that make the relationship valid. A card is for understanding and later retrieval, not simply for decorating a page with equations.
One worked example: 1 m²=10,000 cm² because 100 cm along two dimensions gives 100² square centimetres.
When this would be wrong: Writing 1 m²=100 cm² uses a length factor only once.
Check: Reverse convert 2 m² to 20,000 cm².
Later retrieval: Write a changed-number practice prompt beside this rule and hide the full working. On the next suitable day, ask the pupil to choose the correct relationship independently and to explain one condition or limit. Reverse convert 2 m² to 20,000 cm².
222. Use one card for a cubic conversion
Card prompt: How should cm³ to m³ be noted?
Meaning and conditions: A practical formula notebook should explain the question type, the symbols and their units, and the assumptions that make the relationship valid. A card is for understanding and later retrieval, not simply for decorating a page with equations.
One worked example: 1 m³=1,000,000 cm³ because 100³ cubic centimetres fill the metre cube.
When this would be wrong: Area conversion factor 10,000 is not sufficient for volume.
Check: 0.01 m³ is 10,000 cm³.
Later retrieval: Write a changed-number practice prompt beside this rule and hide the full working. On the next suitable day, ask the pupil to choose the correct relationship independently and to explain one condition or limit. 0.01 m³ is 10,000 cm³.
223. A formula does not fix ambiguous diagram labels
Card prompt: A triangle diagram gives a slanted side seven but no perpendicular height. Can A=½×base×7 always be used?
Meaning and conditions: A practical formula notebook should explain the question type, the symbols and their units, and the assumptions that make the relationship valid. A card is for understanding and later retrieval, not simply for decorating a page with equations.
One worked example: No. The seven must be perpendicular height to the chosen base for that substitution.
When this would be wrong: Assuming any vertex-to-edge side is the altitude changes area.
Check: Look for a right-angle marker or statement.
Later retrieval: Write a changed-number practice prompt beside this rule and hide the full working. On the next suitable day, ask the pupil to choose the correct relationship independently and to explain one condition or limit. Look for a right-angle marker or statement.
224. A calculator reminder belongs beside a grouped formula
Card prompt: A mean card says sum readings divided by count. What entry reminder helps?
Meaning and conditions: A practical formula notebook should explain the question type, the symbols and their units, and the assumptions that make the relationship valid. A card is for understanding and later retrieval, not simply for decorating a page with equations.
One worked example: Use parentheses around the entire sum before dividing, for example (3+5+7)/3.
When this would be wrong: Typing 3+5+7/3 divides only the last term under standard precedence.
Check: Mean of three, five and seven is five.
Later retrieval: Write a changed-number practice prompt beside this rule and hide the full working. On the next suitable day, ask the pupil to choose the correct relationship independently and to explain one condition or limit. Mean of three, five and seven is five.
225. Syllabus year and paper rules must be verified
Card prompt: Is a formula seen on a 2027 K110 source automatically the exact supplied formula sheet for a future cohort?
Meaning and conditions: A practical formula notebook should explain the question type, the symbols and their units, and the assumptions that make the relationship valid. A card is for understanding and later retrieval, not simply for decorating a page with equations.
One worked example: No. The exam’s own year and instructions govern. Keep source date and use school guidance.
When this would be wrong: Assuming a later or different cohort uses identical paper provisions can mislead.
Check: Consult the actual official syllabus and paper materials for the student’s year.
Later retrieval: Write a changed-number practice prompt beside this rule and hide the full working. On the next suitable day, ask the pupil to choose the correct relationship independently and to explain one condition or limit. Consult the actual official syllabus and paper materials for the student’s year.
226. Formula without context can be misleading
Card prompt: Is the line ‘P=2πr’ enough to know what P measures?
Meaning and conditions: A practical formula notebook should explain the question type, the symbols and their units, and the assumptions that make the relationship valid. A card is for understanding and later retrieval, not simply for decorating a page with equations.
One worked example: Only if labelled: here it could represent circle perimeter/circumference for radius r. Definitions prevent ambiguity.
When this would be wrong: A symbol like P can elsewhere mean probability or payment.
Check: Write ‘circumference (cm)’ above the formula.
Later retrieval: Write a changed-number practice prompt beside this rule and hide the full working. On the next suitable day, ask the pupil to choose the correct relationship independently and to explain one condition or limit. Write ‘circumference (cm)’ above the formula.
227. Use errors as notebook prompts
Card prompt: A pupil loses the minus in y=−2x+3. What note helps?
Meaning and conditions: A practical formula notebook should explain the question type, the symbols and their units, and the assumptions that make the relationship valid. A card is for understanding and later retrieval, not simply for decorating a page with equations.
One worked example: Add a signed-substitution example with x=−4, yielding y=11, and a first-error reminder.
When this would be wrong: An extra generic formula page would not target the sign issue.
Check: Check −2(−4)=+8.
Later retrieval: Write a changed-number practice prompt beside this rule and hide the full working. On the next suitable day, ask the pupil to choose the correct relationship independently and to explain one condition or limit. Check −2(−4)=+8.
228. Model assumption belongs with direct proportion
Card prompt: A cost model C=kn assumes what?
Meaning and conditions: A practical formula notebook should explain the question type, the symbols and their units, and the assumptions that make the relationship valid. A card is for understanding and later retrieval, not simply for decorating a page with equations.
One worked example: No fixed fee and constant per-item rate k over the stated range. With a fixed charge, C=F+kn instead.
When this would be wrong: Misclassifying a fixed-fee line as direct proportion can distort ratios.
Check: Check value at n=0.
Later retrieval: Write a changed-number practice prompt beside this rule and hide the full working. On the next suitable day, ask the pupil to choose the correct relationship independently and to explain one condition or limit. Check value at n=0.
229. A good notebook remains short enough to retrieve
Card prompt: Should a pupil copy every worked example in a 40,000-word guide into one notebook?
Meaning and conditions: A practical formula notebook should explain the question type, the symbols and their units, and the assumptions that make the relationship valid. A card is for understanding and later retrieval, not simply for decorating a page with equations.
One worked example: No. Select the current formula, a definition, one meaningful example, one common mistake and one changed-number retest.
When this would be wrong: Large repetitive notebooks can become difficult to use in revision.
Check: Aim for a concise card that can be explained without the model.
Later retrieval: Write a changed-number practice prompt beside this rule and hide the full working. On the next suitable day, ask the pupil to choose the correct relationship independently and to explain one condition or limit. Aim for a concise card that can be explained without the model.
230. Classify the units on a graph rule
Card prompt: A line uses time seconds horizontally and distance centimetres vertically. What are units of m in y=mx+b?
Meaning and conditions: A practical formula notebook should explain the question type, the symbols and their units, and the assumptions that make the relationship valid. A card is for understanding and later retrieval, not simply for decorating a page with equations.
One worked example: cm/s for the gradient; b has cm units for starting distance.
When this would be wrong: Treating m as unitless loses physical meaning.
Check: Rise centimetres divided by run seconds.
Later retrieval: Write a changed-number practice prompt beside this rule and hide the full working. On the next suitable day, ask the pupil to choose the correct relationship independently and to explain one condition or limit. Rise centimetres divided by run seconds.
231. One card cannot replace the teacher’s examples
Card prompt: A school teacher uses a specific diagram convention. Should a student discard it for an internet notebook?
Meaning and conditions: A practical formula notebook should explain the question type, the symbols and their units, and the assumptions that make the relationship valid. A card is for understanding and later retrieval, not simply for decorating a page with equations.
One worked example: No. Use the actual school terminology and teacher instructions; a personal card is a supplementary explanation.
When this would be wrong: Conflicting diagram labels can confuse otherwise valid knowledge.
Check: Match the source and requested notation.
Later retrieval: Write a changed-number practice prompt beside this rule and hide the full working. On the next suitable day, ask the pupil to choose the correct relationship independently and to explain one condition or limit. Match the source and requested notation.
232. Use an explanation of why formula applies
Card prompt: A prism volume card says V=Ah. What does A mean?
Meaning and conditions: A practical formula notebook should explain the question type, the symbols and their units, and the assumptions that make the relationship valid. A card is for understanding and later retrieval, not simply for decorating a page with equations.
One worked example: Area of the uniform cross-section perpendicular to the prism length/height h; it must be appropriately defined.
When this would be wrong: Using arbitrary side area instead of base or cross-sectional area changes volume.
Check: If A=12 cm² and h=5 cm, volume is 60 cm³.
Later retrieval: Write a changed-number practice prompt beside this rule and hide the full working. On the next suitable day, ask the pupil to choose the correct relationship independently and to explain one condition or limit. If A=12 cm² and h=5 cm, volume is 60 cm³.
233. A notebook is a learning aid, not an assessment record
Card prompt: A pupil has a complete neat formula card but cannot solve one unseen question. Is the topic mastered?
Meaning and conditions: A practical formula notebook should explain the question type, the symbols and their units, and the assumptions that make the relationship valid. A card is for understanding and later retrieval, not simply for decorating a page with equations.
One worked example: Not demonstrated. A changed independent question is needed to test actual use.
When this would be wrong: Neat presentation can conceal uncertain method selection.
Check: Record first-error and delayed retest separately.
Later retrieval: Write a changed-number practice prompt beside this rule and hide the full working. On the next suitable day, ask the pupil to choose the correct relationship independently and to explain one condition or limit. Record first-error and delayed retest separately.
234. The same formula may be written equivalently
Card prompt: Are P=2(l+w) and P=2l+2w equivalent for a rectangle?
Meaning and conditions: A practical formula notebook should explain the question type, the symbols and their units, and the assumptions that make the relationship valid. A card is for understanding and later retrieval, not simply for decorating a page with equations.
One worked example: Yes. Distribution makes them identical expressions.
When this would be wrong: Treating differently formatted formulas as different physical laws.
Check: Substitute l=3,w=4 to get fourteen both ways.
Later retrieval: Write a changed-number practice prompt beside this rule and hide the full working. On the next suitable day, ask the pupil to choose the correct relationship independently and to explain one condition or limit. Substitute l=3,w=4 to get fourteen both ways.
235. A ratio card can contain an explicit unknown unit
Card prompt: If a:b=2:3 and total is 40, what does one part equal?
Meaning and conditions: A practical formula notebook should explain the question type, the symbols and their units, and the assumptions that make the relationship valid. A card is for understanding and later retrieval, not simply for decorating a page with equations.
One worked example: Five equal parts total forty, so one part eight; shares sixteen and twenty-four.
When this would be wrong: Interpreting ratio labels as actual item counts ignores scale.
Check: 16+24=40 and 16:24=2:3.
Later retrieval: Write a changed-number practice prompt beside this rule and hide the full working. On the next suitable day, ask the pupil to choose the correct relationship independently and to explain one condition or limit. 16+24=40 and 16:24=2:3.
236. An equation formula cannot be divided by zero
Card prompt: In x=(y−b)/m, what restriction matters?
Meaning and conditions: A practical formula notebook should explain the question type, the symbols and their units, and the assumptions that make the relationship valid. A card is for understanding and later retrieval, not simply for decorating a page with equations.
One worked example: m≠0. If m=0, the line is constant y=b and x is not uniquely determined from y=b.
When this would be wrong: Blind division by zero is invalid.
Check: State the coefficient before isolating a variable.
Later retrieval: Write a changed-number practice prompt beside this rule and hide the full working. On the next suitable day, ask the pupil to choose the correct relationship independently and to explain one condition or limit. State the coefficient before isolating a variable.
237. Diagram-based understanding survives lost memory
Card prompt: If a pupil forgets trapezium area formula, what model can rebuild it?
Meaning and conditions: A practical formula notebook should explain the question type, the symbols and their units, and the assumptions that make the relationship valid. A card is for understanding and later retrieval, not simply for decorating a page with equations.
One worked example: Two copies of the trapezium can form a parallelogram with base equal to sum of the parallel sides and the same height, so A=½(a+b)h.
When this would be wrong: Trying an unrelated perimeter formula as a guess is not justified.
Check: Check for a=4,b=6,h=3, area fifteen.
Later retrieval: Write a changed-number practice prompt beside this rule and hide the full working. On the next suitable day, ask the pupil to choose the correct relationship independently and to explain one condition or limit. Check for a=4,b=6,h=3, area fifteen.
238. Retrieve a rule before reading the card
Card prompt: Why hide a formula’s answer during practice?
Meaning and conditions: A practical formula notebook should explain the question type, the symbols and their units, and the assumptions that make the relationship valid. A card is for understanding and later retrieval, not simply for decorating a page with equations.
One worked example: To test whether the learner can recall and choose the relationship independently rather than merely recognise a familiar display.
When this would be wrong: Constant visible models can create false fluency.
Check: Show the card after the attempt, then retest with changed quantities.
Later retrieval: Write a changed-number practice prompt beside this rule and hide the full working. On the next suitable day, ask the pupil to choose the correct relationship independently and to explain one condition or limit. Show the card after the attempt, then retest with changed quantities.
239. Prioritise the next school chapter
Card prompt: A notebook contains arcs, cylinders and advanced identities, but school is teaching linear equations. What should be revised?
Meaning and conditions: A practical formula notebook should explain the question type, the symbols and their units, and the assumptions that make the relationship valid. A card is for understanding and later retrieval, not simply for decorating a page with equations.
One worked example: Prioritise the current linear-equation prerequisites and relevant teacher-issued materials; reserve optional extensions separately.
When this would be wrong: A long list of hard formulas is not automatically better preparation.
Check: Choose the school-relevant card and one changed equation.
Later retrieval: Write a changed-number practice prompt beside this rule and hide the full working. On the next suitable day, ask the pupil to choose the correct relationship independently and to explain one condition or limit. Choose the school-relevant card and one changed equation.
240. Use a reverse denominator check
Card prompt: A fraction card has A=(b+c)/d. What should be entered?
Meaning and conditions: A practical formula notebook should explain the question type, the symbols and their units, and the assumptions that make the relationship valid. A card is for understanding and later retrieval, not simply for decorating a page with equations.
One worked example: Group the numerator (b+c) and divide the whole sum by nonzero d.
When this would be wrong: Typing b+c/d divides only c under ordinary precedence.
Check: For b=2,c=4,d=3, result two.
Later retrieval: Write a changed-number practice prompt beside this rule and hide the full working. On the next suitable day, ask the pupil to choose the correct relationship independently and to explain one condition or limit. For b=2,c=4,d=3, result two.
241. Record one source without claiming completeness
Card prompt: The notebook cites MOE G1 and 2027 K110. Is it an official complete formula list for all future cohorts?
Meaning and conditions: A practical formula notebook should explain the question type, the symbols and their units, and the assumptions that make the relationship valid. A card is for understanding and later retrieval, not simply for decorating a page with equations.
One worked example: No. It is a self-made learning aid; official exam documents and school guidance control exact requirements.
When this would be wrong: Calling a personal notebook the examination’s official list would be misleading.
Check: Compare against the correct syllabus year and teacher notes.
Later retrieval: Write a changed-number practice prompt beside this rule and hide the full working. On the next suitable day, ask the pupil to choose the correct relationship independently and to explain one condition or limit. Compare against the correct syllabus year and teacher notes.
242. Use a mini glossary
Card prompt: What is the difference between h in triangle area and h in a time-height graph?
Meaning and conditions: A practical formula notebook should explain the question type, the symbols and their units, and the assumptions that make the relationship valid. A card is for understanding and later retrieval, not simply for decorating a page with equations.
One worked example: They may denote perpendicular height of a triangle versus vertical dependent quantity or coordinate; notation is contextual.
When this would be wrong: One letter can have different mathematical roles between chapters.
Check: Define h in the local card.
Later retrieval: Write a changed-number practice prompt beside this rule and hide the full working. On the next suitable day, ask the pupil to choose the correct relationship independently and to explain one condition or limit. Define h in the local card.
243. A useful final page lists next steps
Card prompt: What should the end of a small notebook contain?
Meaning and conditions: A practical formula notebook should explain the question type, the symbols and their units, and the assumptions that make the relationship valid. A card is for understanding and later retrieval, not simply for decorating a page with equations.
One worked example: A short list of secure formulas, first-error reminders and one or two unmastered school-relevant relationships to retest.
When this would be wrong: A large static formula catalogue with no retrieval plan may not support progress.
Check: Update after each genuine changed-number check.
Later retrieval: Write a changed-number practice prompt beside this rule and hide the full working. On the next suitable day, ask the pupil to choose the correct relationship independently and to explain one condition or limit. Update after each genuine changed-number check.
What a three-pupil tutorial could do with these cards
The unchanged eduKateSG Clementi small-group Maths reference describes 90-minute tutorials for up to three students near Sixth Avenue MRT. A suitable G1 lesson could have one student build a rate card with units, another distinguish area from perimeter, and a third explain a graph rule. The teacher can check understanding by hiding the card and asking for the correct formula on an unseen question. The format reference does not establish a current class vacancy or guarantee grades.
- 10 minutes: retrieve one current formula from memory and explain its symbols.
- 20 minutes: derive or visualise one relationship with a diagram or unit model.
- 25 minutes: solve differentiated school-relevant practice independently.
- 15 minutes: discuss one common formula-selection error per learner.
- 10 minutes: write a concise five-line notebook card.
- 10 minutes: set one changed-number delayed retrieval question and explain the next lesson’s focus.
Five manageable home sessions
- Day one: choose just one current formula and define every symbol.
- Day two: add one short numerical example with correct units.
- Day three: write one misleading use of that formula and explain why it is wrong.
- Day four: solve a changed-number question without looking at the card.
- Day five: review the first error and update the card only if it improves the learner’s next independent decision.
Parents do not need a huge workbook to supervise this process. They can ask, ‘What does each symbol mean?’, ‘What kind of quantity will the answer measure?’ and ‘What changes if one side or input doubles?’ The tutor can provide topic-specific guidance when the parent is unsure. The notebook should stay short enough to be read, retrieved and revised within the child’s school and CCA commitments.
Frequently asked questions
Should a pupil memorise every formula in this guide?
No. Select the current school-required or prerequisite formulas and understand when they apply. Optional later-stage examples should be clearly separated.
Will an exam give a formula sheet?
This depends on the assessment and examination year. Check the relevant official syllabus and teacher instructions rather than assuming all papers supply the same items.
Can one letter mean different things on different cards?
Yes. For example b can mean a triangle’s base or a linear graph’s intercept. Define symbols locally.
What is the most important part of a formula card?
The relationship’s meaning and when it applies, along with one independent way to check the result. A copied equation alone is not evidence of mastery.
How many examples belong on one card?
Often one clear worked example, one warning and one changed-number retest are enough. Adjust to the learner’s needs.
How can a tutor tell whether the notebook helped?
Remove the card, give a changed school-relevant question and ask the pupil to choose, explain, apply and check the correct relation independently.
Continue the Secondary 2 G1 Maths pathway
- Formula substitution and units
- Changing the subject of a formula
- Sense-checking answers
- Calculator entry and checking
- Four-week mastery checks
Official references and reader notes
- MOE: G1 Mathematics by secondary level
- SEAB 2027 SEC G1 K110 Mathematics
- SEAB: 2027 K110 Mathematics subject and formulae guidance
- eduKateSG immutable three-pupil tutorial reference
Reader note: This is a personal study-aid method and an original mathematical example bank, not an official examination formula list, a promise of current class opening or a guarantee of marks. Exact syllabus and formula provisions depend on the pupil’s present school work and official graduation year. Confirm teaching availability, fees and placement directly with the centre.
Bring an existing formula notebook or one repeated formula-selection mistake to eduKate Singapore and ask how a tutor would turn it into one concise question–meaning–check card with an independent follow-up.
Did you know? A pupil can memorise the area of a triangle formula and still use it incorrectly on a perimeter question. The missing skill is often not recall—it is recognising what the formula measures and whether the stated measurements fit its symbols. A useful mathematics formula notebook should answer three questions before showing any worked arithmetic: what kind of problem uses the formula, what does each symbol mean, and how can we check the result?
Quick answer: the five-line formula notebook card
- Question type: ‘Find the area of a triangle’, ‘Find average speed’ or ‘Find a percentage of an original whole’.
- Meaning: write the formula and define every symbol with its unit; state any restrictions such as nonzero denominator.
- One solved example: use manageable numbers and explain the choice of formula, not just the substitution.
- One common wrong use: for example, the slanted side is not automatically the triangle’s perpendicular height.
- One changed-number retrieval: cover the model and use the formula later on a new question without being told which card to open.
This guide is for parents exploring a Secondary 2 G1 Mathematics tutor in Bukit Timah. It is different from a formula-substitution catalogue: the goal is a personal, concise, usable reference for the child’s actual learning gaps. MOE’s G1 Secondary Two content includes algebraic formulas, rates, graphs, mensuration and data analysis. The published 2027 SEC Mathematics K110 syllabus is relevant to its graduating cohort; paper-specific formula provision and permitted aids must be checked for the student’s actual examination year. Not every extension included here is an immediate Secondary Two school topic.
Choose a formula card
- How to make a useful formula card
- Current school scope versus optional extensions
- Parts, percentages and ratios
- Distance, time and rates
- Linear equations and straight-line rules
- Rectangle, triangle and trapezium measures
- Circles, arcs and sector extensions
- Cuboids, prisms and cylinders
- Means, frequencies and probability
- Building and retrieving a personal notebook
- A practical three-pupil lesson
- Frequently asked questions
- Official references
Make the card explain a decision, not just a symbol
Start with a question in plain English such as ‘How much material covers the six faces of a closed cuboid?’ Under it, write the appropriate surface-area formula. Put ‘not volume’ beside the formula and define l, w and h. Use one example with units, such as a 2-by-3-by-4 cm cuboid: 2(6+8+12)=52 cm². Then add a later question with altered height. If the student can solve that unseen question without the card, the formula has become a tool instead of a poster.
Do not build an imaginary exam formula sheet
A personal formula notebook is not the same as the official mathematical formulae supplied, if any, in a particular paper. Mark each card as ‘current school topic’, ‘prerequisite to repair’ or ‘optional next-stage bridge’. Verify current teacher instructions and the student’s actual syllabus. For example, circle circumference and area may be used to explain a later sector formula, but a secondary-school parent should not assume every future graduating cohort has exactly the same formula provisions as the 2027 K110 source.
243 original formula notebook demonstrations
This large teaching bank offers examples from which to select a small personal notebook. It is not a request to copy hundreds of cards. The worked numerical examples and mistake prompts are original, with a deliberate separation between a formula’s meaning, a correct use, a misleading shortcut and a later changed-number check. Choose current G1 school-relevant cards first, and ask the pupil to explain the symbols aloud.
Parts, percentages and ratios
In parts, percentages and ratios, a notebook card should name the question that triggers the formula and the quantity it calculates. Read the worked example as one illustration of the relationship, not as fixed numbers to memorise. Pay attention to units, assumptions and a reverse check. If two formulas use the same letter, define that letter again in the local context.
1. Card 1: percentage of a known whole
Card prompt: A fictional total is 160 units; find 5% of it, then state the remaining amount.
Meaning and conditions: Notebook heading: part = percent/100 × original whole. Symbols must be defined: part means the selected quantity, percent is p out of 100, and original whole is the base that the percentage refers to. The note should explicitly ask ‘What is 100% in this question?’ before any multiplication.
One worked example: Part = (5/100)×160=8 units. The rest of the whole is 160−8=152 units. The sum of part and remainder must reconstruct the supplied total.
When this would be wrong: A common formula error is using p as the multiplier instead of p/100, or calculating a percentage of the remainder when the question defined the original whole as the base. A notebook card should show one wrong-base example as a warning.
Check: Check 8+152=160. The selected part is between zero and 160, because the stated percentage is positive and less than 100%.
Later retrieval: For a changed total 320 with the same p%, the part becomes 16. The notebook should prompt this scaling prediction before the exact calculation.
2. Card 2: percentage of a known whole
Card prompt: A fictional total is 260 units; find 10% of it, then state the remaining amount.
Meaning and conditions: Notebook heading: part = percent/100 × original whole. Symbols must be defined: part means the selected quantity, percent is p out of 100, and original whole is the base that the percentage refers to. The note should explicitly ask ‘What is 100% in this question?’ before any multiplication.
One worked example: Part = (10/100)×260=26 units. The rest of the whole is 260−26=234 units. The sum of part and remainder must reconstruct the supplied total.
When this would be wrong: A common formula error is using p as the multiplier instead of p/100, or calculating a percentage of the remainder when the question defined the original whole as the base. A notebook card should show one wrong-base example as a warning.
Check: Check 26+234=260. The selected part is between zero and 260, because the stated percentage is positive and less than 100%.
Later retrieval: For a changed total 520 with the same p%, the part becomes 52. The notebook should prompt this scaling prediction before the exact calculation.
3. Card 3: percentage of a known whole
Card prompt: A fictional total is 360 units; find 12.5% of it, then state the remaining amount.
Meaning and conditions: Notebook heading: part = percent/100 × original whole. Symbols must be defined: part means the selected quantity, percent is p out of 100, and original whole is the base that the percentage refers to. The note should explicitly ask ‘What is 100% in this question?’ before any multiplication.
One worked example: Part = (12.5/100)×360=45 units. The rest of the whole is 360−45=315 units. The sum of part and remainder must reconstruct the supplied total.
When this would be wrong: A common formula error is using p as the multiplier instead of p/100, or calculating a percentage of the remainder when the question defined the original whole as the base. A notebook card should show one wrong-base example as a warning.
Check: Check 45+315=360. The selected part is between zero and 360, because the stated percentage is positive and less than 100%.
Later retrieval: For a changed total 720 with the same p%, the part becomes 90. The notebook should prompt this scaling prediction before the exact calculation.
4. Card 4: percentage of a known whole
Card prompt: A fictional total is 460 units; find 20% of it, then state the remaining amount.
Meaning and conditions: Notebook heading: part = percent/100 × original whole. Symbols must be defined: part means the selected quantity, percent is p out of 100, and original whole is the base that the percentage refers to. The note should explicitly ask ‘What is 100% in this question?’ before any multiplication.
One worked example: Part = (20/100)×460=92 units. The rest of the whole is 460−92=368 units. The sum of part and remainder must reconstruct the supplied total.
When this would be wrong: A common formula error is using p as the multiplier instead of p/100, or calculating a percentage of the remainder when the question defined the original whole as the base. A notebook card should show one wrong-base example as a warning.
Check: Check 92+368=460. The selected part is between zero and 460, because the stated percentage is positive and less than 100%.
Later retrieval: For a changed total 920 with the same p%, the part becomes 184. The notebook should prompt this scaling prediction before the exact calculation.
5. Card 5: percentage of a known whole
Card prompt: A fictional total is 560 units; find 25% of it, then state the remaining amount.
Meaning and conditions: Notebook heading: part = percent/100 × original whole. Symbols must be defined: part means the selected quantity, percent is p out of 100, and original whole is the base that the percentage refers to. The note should explicitly ask ‘What is 100% in this question?’ before any multiplication.
One worked example: Part = (25/100)×560=140 units. The rest of the whole is 560−140=420 units. The sum of part and remainder must reconstruct the supplied total.
When this would be wrong: A common formula error is using p as the multiplier instead of p/100, or calculating a percentage of the remainder when the question defined the original whole as the base. A notebook card should show one wrong-base example as a warning.
Check: Check 140+420=560. The selected part is between zero and 560, because the stated percentage is positive and less than 100%.
Later retrieval: For a changed total 1120 with the same p%, the part becomes 280. The notebook should prompt this scaling prediction before the exact calculation.
6. Card 6: percentage of a known whole
Card prompt: A fictional total is 660 units; find 30% of it, then state the remaining amount.
Meaning and conditions: Notebook heading: part = percent/100 × original whole. Symbols must be defined: part means the selected quantity, percent is p out of 100, and original whole is the base that the percentage refers to. The note should explicitly ask ‘What is 100% in this question?’ before any multiplication.
One worked example: Part = (30/100)×660=198 units. The rest of the whole is 660−198=462 units. The sum of part and remainder must reconstruct the supplied total.
When this would be wrong: A common formula error is using p as the multiplier instead of p/100, or calculating a percentage of the remainder when the question defined the original whole as the base. A notebook card should show one wrong-base example as a warning.
Check: Check 198+462=660. The selected part is between zero and 660, because the stated percentage is positive and less than 100%.
Later retrieval: For a changed total 1320 with the same p%, the part becomes 396. The notebook should prompt this scaling prediction before the exact calculation.
7. Card 7: percentage of a known whole
Card prompt: A fictional total is 760 units; find 40% of it, then state the remaining amount.
Meaning and conditions: Notebook heading: part = percent/100 × original whole. Symbols must be defined: part means the selected quantity, percent is p out of 100, and original whole is the base that the percentage refers to. The note should explicitly ask ‘What is 100% in this question?’ before any multiplication.
One worked example: Part = (40/100)×760=304 units. The rest of the whole is 760−304=456 units. The sum of part and remainder must reconstruct the supplied total.
When this would be wrong: A common formula error is using p as the multiplier instead of p/100, or calculating a percentage of the remainder when the question defined the original whole as the base. A notebook card should show one wrong-base example as a warning.
Check: Check 304+456=760. The selected part is between zero and 760, because the stated percentage is positive and less than 100%.
Later retrieval: For a changed total 1520 with the same p%, the part becomes 608. The notebook should prompt this scaling prediction before the exact calculation.
8. Card 8: percentage of a known whole
Card prompt: A fictional total is 860 units; find 50% of it, then state the remaining amount.
Meaning and conditions: Notebook heading: part = percent/100 × original whole. Symbols must be defined: part means the selected quantity, percent is p out of 100, and original whole is the base that the percentage refers to. The note should explicitly ask ‘What is 100% in this question?’ before any multiplication.
One worked example: Part = (50/100)×860=430 units. The rest of the whole is 860−430=430 units. The sum of part and remainder must reconstruct the supplied total.
When this would be wrong: A common formula error is using p as the multiplier instead of p/100, or calculating a percentage of the remainder when the question defined the original whole as the base. A notebook card should show one wrong-base example as a warning.
Check: Check 430+430=860. The selected part is between zero and 860, because the stated percentage is positive and less than 100%.
Later retrieval: For a changed total 1720 with the same p%, the part becomes 860. The notebook should prompt this scaling prediction before the exact calculation.
9. Card 9: percentage of a known whole
Card prompt: A fictional total is 180 units; find 60% of it, then state the remaining amount.
Meaning and conditions: Notebook heading: part = percent/100 × original whole. Symbols must be defined: part means the selected quantity, percent is p out of 100, and original whole is the base that the percentage refers to. The note should explicitly ask ‘What is 100% in this question?’ before any multiplication.
One worked example: Part = (60/100)×180=108 units. The rest of the whole is 180−108=72 units. The sum of part and remainder must reconstruct the supplied total.
When this would be wrong: A common formula error is using p as the multiplier instead of p/100, or calculating a percentage of the remainder when the question defined the original whole as the base. A notebook card should show one wrong-base example as a warning.
Check: Check 108+72=180. The selected part is between zero and 180, because the stated percentage is positive and less than 100%.
Later retrieval: For a changed total 360 with the same p%, the part becomes 216. The notebook should prompt this scaling prediction before the exact calculation.
10. Card 10: percentage of a known whole
Card prompt: A fictional total is 280 units; find 75% of it, then state the remaining amount.
Meaning and conditions: Notebook heading: part = percent/100 × original whole. Symbols must be defined: part means the selected quantity, percent is p out of 100, and original whole is the base that the percentage refers to. The note should explicitly ask ‘What is 100% in this question?’ before any multiplication.
One worked example: Part = (75/100)×280=210 units. The rest of the whole is 280−210=70 units. The sum of part and remainder must reconstruct the supplied total.
When this would be wrong: A common formula error is using p as the multiplier instead of p/100, or calculating a percentage of the remainder when the question defined the original whole as the base. A notebook card should show one wrong-base example as a warning.
Check: Check 210+70=280. The selected part is between zero and 280, because the stated percentage is positive and less than 100%.
Later retrieval: For a changed total 560 with the same p%, the part becomes 420. The notebook should prompt this scaling prediction before the exact calculation.
11. Card 11: percentage of a known whole
Card prompt: A fictional total is 380 units; find 80% of it, then state the remaining amount.
Meaning and conditions: Notebook heading: part = percent/100 × original whole. Symbols must be defined: part means the selected quantity, percent is p out of 100, and original whole is the base that the percentage refers to. The note should explicitly ask ‘What is 100% in this question?’ before any multiplication.
One worked example: Part = (80/100)×380=304 units. The rest of the whole is 380−304=76 units. The sum of part and remainder must reconstruct the supplied total.
When this would be wrong: A common formula error is using p as the multiplier instead of p/100, or calculating a percentage of the remainder when the question defined the original whole as the base. A notebook card should show one wrong-base example as a warning.
Check: Check 304+76=380. The selected part is between zero and 380, because the stated percentage is positive and less than 100%.
Later retrieval: For a changed total 760 with the same p%, the part becomes 608. The notebook should prompt this scaling prediction before the exact calculation.
12. Card 12: percentage of a known whole
Card prompt: A fictional total is 480 units; find 5% of it, then state the remaining amount.
Meaning and conditions: Notebook heading: part = percent/100 × original whole. Symbols must be defined: part means the selected quantity, percent is p out of 100, and original whole is the base that the percentage refers to. The note should explicitly ask ‘What is 100% in this question?’ before any multiplication.
One worked example: Part = (5/100)×480=24 units. The rest of the whole is 480−24=456 units. The sum of part and remainder must reconstruct the supplied total.
When this would be wrong: A common formula error is using p as the multiplier instead of p/100, or calculating a percentage of the remainder when the question defined the original whole as the base. A notebook card should show one wrong-base example as a warning.
Check: Check 24+456=480. The selected part is between zero and 480, because the stated percentage is positive and less than 100%.
Later retrieval: For a changed total 960 with the same p%, the part becomes 48. The notebook should prompt this scaling prediction before the exact calculation.
13. Card 13: percentage of a known whole
Card prompt: A fictional total is 580 units; find 10% of it, then state the remaining amount.
Meaning and conditions: Notebook heading: part = percent/100 × original whole. Symbols must be defined: part means the selected quantity, percent is p out of 100, and original whole is the base that the percentage refers to. The note should explicitly ask ‘What is 100% in this question?’ before any multiplication.
One worked example: Part = (10/100)×580=58 units. The rest of the whole is 580−58=522 units. The sum of part and remainder must reconstruct the supplied total.
When this would be wrong: A common formula error is using p as the multiplier instead of p/100, or calculating a percentage of the remainder when the question defined the original whole as the base. A notebook card should show one wrong-base example as a warning.
Check: Check 58+522=580. The selected part is between zero and 580, because the stated percentage is positive and less than 100%.
Later retrieval: For a changed total 1160 with the same p%, the part becomes 116. The notebook should prompt this scaling prediction before the exact calculation.
14. Card 14: percentage of a known whole
Card prompt: A fictional total is 680 units; find 12.5% of it, then state the remaining amount.
Meaning and conditions: Notebook heading: part = percent/100 × original whole. Symbols must be defined: part means the selected quantity, percent is p out of 100, and original whole is the base that the percentage refers to. The note should explicitly ask ‘What is 100% in this question?’ before any multiplication.
One worked example: Part = (12.5/100)×680=85 units. The rest of the whole is 680−85=595 units. The sum of part and remainder must reconstruct the supplied total.
When this would be wrong: A common formula error is using p as the multiplier instead of p/100, or calculating a percentage of the remainder when the question defined the original whole as the base. A notebook card should show one wrong-base example as a warning.
Check: Check 85+595=680. The selected part is between zero and 680, because the stated percentage is positive and less than 100%.
Later retrieval: For a changed total 1360 with the same p%, the part becomes 170. The notebook should prompt this scaling prediction before the exact calculation.
15. Card 15: percentage of a known whole
Card prompt: A fictional total is 780 units; find 20% of it, then state the remaining amount.
Meaning and conditions: Notebook heading: part = percent/100 × original whole. Symbols must be defined: part means the selected quantity, percent is p out of 100, and original whole is the base that the percentage refers to. The note should explicitly ask ‘What is 100% in this question?’ before any multiplication.
One worked example: Part = (20/100)×780=156 units. The rest of the whole is 780−156=624 units. The sum of part and remainder must reconstruct the supplied total.
When this would be wrong: A common formula error is using p as the multiplier instead of p/100, or calculating a percentage of the remainder when the question defined the original whole as the base. A notebook card should show one wrong-base example as a warning.
Check: Check 156+624=780. The selected part is between zero and 780, because the stated percentage is positive and less than 100%.
Later retrieval: For a changed total 1560 with the same p%, the part becomes 312. The notebook should prompt this scaling prediction before the exact calculation.
16. Card 16: percentage of a known whole
Card prompt: A fictional total is 880 units; find 25% of it, then state the remaining amount.
Meaning and conditions: Notebook heading: part = percent/100 × original whole. Symbols must be defined: part means the selected quantity, percent is p out of 100, and original whole is the base that the percentage refers to. The note should explicitly ask ‘What is 100% in this question?’ before any multiplication.
One worked example: Part = (25/100)×880=220 units. The rest of the whole is 880−220=660 units. The sum of part and remainder must reconstruct the supplied total.
When this would be wrong: A common formula error is using p as the multiplier instead of p/100, or calculating a percentage of the remainder when the question defined the original whole as the base. A notebook card should show one wrong-base example as a warning.
Check: Check 220+660=880. The selected part is between zero and 880, because the stated percentage is positive and less than 100%.
Later retrieval: For a changed total 1760 with the same p%, the part becomes 440. The notebook should prompt this scaling prediction before the exact calculation.
17. Card 17: percentage of a known whole
Card prompt: A fictional total is 200 units; find 30% of it, then state the remaining amount.
Meaning and conditions: Notebook heading: part = percent/100 × original whole. Symbols must be defined: part means the selected quantity, percent is p out of 100, and original whole is the base that the percentage refers to. The note should explicitly ask ‘What is 100% in this question?’ before any multiplication.
One worked example: Part = (30/100)×200=60 units. The rest of the whole is 200−60=140 units. The sum of part and remainder must reconstruct the supplied total.
When this would be wrong: A common formula error is using p as the multiplier instead of p/100, or calculating a percentage of the remainder when the question defined the original whole as the base. A notebook card should show one wrong-base example as a warning.
Check: Check 60+140=200. The selected part is between zero and 200, because the stated percentage is positive and less than 100%.
Later retrieval: For a changed total 400 with the same p%, the part becomes 120. The notebook should prompt this scaling prediction before the exact calculation.
18. Card 18: percentage of a known whole
Card prompt: A fictional total is 300 units; find 40% of it, then state the remaining amount.
Meaning and conditions: Notebook heading: part = percent/100 × original whole. Symbols must be defined: part means the selected quantity, percent is p out of 100, and original whole is the base that the percentage refers to. The note should explicitly ask ‘What is 100% in this question?’ before any multiplication.
One worked example: Part = (40/100)×300=120 units. The rest of the whole is 300−120=180 units. The sum of part and remainder must reconstruct the supplied total.
When this would be wrong: A common formula error is using p as the multiplier instead of p/100, or calculating a percentage of the remainder when the question defined the original whole as the base. A notebook card should show one wrong-base example as a warning.
Check: Check 120+180=300. The selected part is between zero and 300, because the stated percentage is positive and less than 100%.
Later retrieval: For a changed total 600 with the same p%, the part becomes 240. The notebook should prompt this scaling prediction before the exact calculation.
19. Card 19: percentage of a known whole
Card prompt: A fictional total is 400 units; find 50% of it, then state the remaining amount.
Meaning and conditions: Notebook heading: part = percent/100 × original whole. Symbols must be defined: part means the selected quantity, percent is p out of 100, and original whole is the base that the percentage refers to. The note should explicitly ask ‘What is 100% in this question?’ before any multiplication.
One worked example: Part = (50/100)×400=200 units. The rest of the whole is 400−200=200 units. The sum of part and remainder must reconstruct the supplied total.
When this would be wrong: A common formula error is using p as the multiplier instead of p/100, or calculating a percentage of the remainder when the question defined the original whole as the base. A notebook card should show one wrong-base example as a warning.
Check: Check 200+200=400. The selected part is between zero and 400, because the stated percentage is positive and less than 100%.
Later retrieval: For a changed total 800 with the same p%, the part becomes 400. The notebook should prompt this scaling prediction before the exact calculation.
20. Card 20: percentage of a known whole
Card prompt: A fictional total is 500 units; find 60% of it, then state the remaining amount.
Meaning and conditions: Notebook heading: part = percent/100 × original whole. Symbols must be defined: part means the selected quantity, percent is p out of 100, and original whole is the base that the percentage refers to. The note should explicitly ask ‘What is 100% in this question?’ before any multiplication.
One worked example: Part = (60/100)×500=300 units. The rest of the whole is 500−300=200 units. The sum of part and remainder must reconstruct the supplied total.
When this would be wrong: A common formula error is using p as the multiplier instead of p/100, or calculating a percentage of the remainder when the question defined the original whole as the base. A notebook card should show one wrong-base example as a warning.
Check: Check 300+200=500. The selected part is between zero and 500, because the stated percentage is positive and less than 100%.
Later retrieval: For a changed total 1000 with the same p%, the part becomes 600. The notebook should prompt this scaling prediction before the exact calculation.
21. Card 21: percentage of a known whole
Card prompt: A fictional total is 600 units; find 75% of it, then state the remaining amount.
Meaning and conditions: Notebook heading: part = percent/100 × original whole. Symbols must be defined: part means the selected quantity, percent is p out of 100, and original whole is the base that the percentage refers to. The note should explicitly ask ‘What is 100% in this question?’ before any multiplication.
One worked example: Part = (75/100)×600=450 units. The rest of the whole is 600−450=150 units. The sum of part and remainder must reconstruct the supplied total.
When this would be wrong: A common formula error is using p as the multiplier instead of p/100, or calculating a percentage of the remainder when the question defined the original whole as the base. A notebook card should show one wrong-base example as a warning.
Check: Check 450+150=600. The selected part is between zero and 600, because the stated percentage is positive and less than 100%.
Later retrieval: For a changed total 1200 with the same p%, the part becomes 900. The notebook should prompt this scaling prediction before the exact calculation.
22. Card 22: percentage of a known whole
Card prompt: A fictional total is 700 units; find 80% of it, then state the remaining amount.
Meaning and conditions: Notebook heading: part = percent/100 × original whole. Symbols must be defined: part means the selected quantity, percent is p out of 100, and original whole is the base that the percentage refers to. The note should explicitly ask ‘What is 100% in this question?’ before any multiplication.
One worked example: Part = (80/100)×700=560 units. The rest of the whole is 700−560=140 units. The sum of part and remainder must reconstruct the supplied total.
When this would be wrong: A common formula error is using p as the multiplier instead of p/100, or calculating a percentage of the remainder when the question defined the original whole as the base. A notebook card should show one wrong-base example as a warning.
Check: Check 560+140=700. The selected part is between zero and 700, because the stated percentage is positive and less than 100%.
Later retrieval: For a changed total 1400 with the same p%, the part becomes 1120. The notebook should prompt this scaling prediction before the exact calculation.
23. Card 23: percentage of a known whole
Card prompt: A fictional total is 800 units; find 5% of it, then state the remaining amount.
Meaning and conditions: Notebook heading: part = percent/100 × original whole. Symbols must be defined: part means the selected quantity, percent is p out of 100, and original whole is the base that the percentage refers to. The note should explicitly ask ‘What is 100% in this question?’ before any multiplication.
One worked example: Part = (5/100)×800=40 units. The rest of the whole is 800−40=760 units. The sum of part and remainder must reconstruct the supplied total.
When this would be wrong: A common formula error is using p as the multiplier instead of p/100, or calculating a percentage of the remainder when the question defined the original whole as the base. A notebook card should show one wrong-base example as a warning.
Check: Check 40+760=800. The selected part is between zero and 800, because the stated percentage is positive and less than 100%.
Later retrieval: For a changed total 1600 with the same p%, the part becomes 80. The notebook should prompt this scaling prediction before the exact calculation.
24. Card 24: percentage of a known whole
Card prompt: A fictional total is 900 units; find 10% of it, then state the remaining amount.
Meaning and conditions: Notebook heading: part = percent/100 × original whole. Symbols must be defined: part means the selected quantity, percent is p out of 100, and original whole is the base that the percentage refers to. The note should explicitly ask ‘What is 100% in this question?’ before any multiplication.
One worked example: Part = (10/100)×900=90 units. The rest of the whole is 900−90=810 units. The sum of part and remainder must reconstruct the supplied total.
When this would be wrong: A common formula error is using p as the multiplier instead of p/100, or calculating a percentage of the remainder when the question defined the original whole as the base. A notebook card should show one wrong-base example as a warning.
Check: Check 90+810=900. The selected part is between zero and 900, because the stated percentage is positive and less than 100%.
Later retrieval: For a changed total 1800 with the same p%, the part becomes 180. The notebook should prompt this scaling prediction before the exact calculation.
25. Card 25: percentage of a known whole
Card prompt: A fictional total is 220 units; find 12.5% of it, then state the remaining amount.
Meaning and conditions: Notebook heading: part = percent/100 × original whole. Symbols must be defined: part means the selected quantity, percent is p out of 100, and original whole is the base that the percentage refers to. The note should explicitly ask ‘What is 100% in this question?’ before any multiplication.
One worked example: Part = (12.5/100)×220=27.5 units. The rest of the whole is 220−27.5=192.5 units. The sum of part and remainder must reconstruct the supplied total.
When this would be wrong: A common formula error is using p as the multiplier instead of p/100, or calculating a percentage of the remainder when the question defined the original whole as the base. A notebook card should show one wrong-base example as a warning.
Check: Check 27.5+192.5=220. The selected part is between zero and 220, because the stated percentage is positive and less than 100%.
Later retrieval: For a changed total 440 with the same p%, the part becomes 55. The notebook should prompt this scaling prediction before the exact calculation.
26. Card 26: percentage of a known whole
Card prompt: A fictional total is 320 units; find 20% of it, then state the remaining amount.
Meaning and conditions: Notebook heading: part = percent/100 × original whole. Symbols must be defined: part means the selected quantity, percent is p out of 100, and original whole is the base that the percentage refers to. The note should explicitly ask ‘What is 100% in this question?’ before any multiplication.
One worked example: Part = (20/100)×320=64 units. The rest of the whole is 320−64=256 units. The sum of part and remainder must reconstruct the supplied total.
When this would be wrong: A common formula error is using p as the multiplier instead of p/100, or calculating a percentage of the remainder when the question defined the original whole as the base. A notebook card should show one wrong-base example as a warning.
Check: Check 64+256=320. The selected part is between zero and 320, because the stated percentage is positive and less than 100%.
Later retrieval: For a changed total 640 with the same p%, the part becomes 128. The notebook should prompt this scaling prediction before the exact calculation.
27. Card 27: percentage of a known whole
Card prompt: A fictional total is 420 units; find 25% of it, then state the remaining amount.
Meaning and conditions: Notebook heading: part = percent/100 × original whole. Symbols must be defined: part means the selected quantity, percent is p out of 100, and original whole is the base that the percentage refers to. The note should explicitly ask ‘What is 100% in this question?’ before any multiplication.
One worked example: Part = (25/100)×420=105 units. The rest of the whole is 420−105=315 units. The sum of part and remainder must reconstruct the supplied total.
When this would be wrong: A common formula error is using p as the multiplier instead of p/100, or calculating a percentage of the remainder when the question defined the original whole as the base. A notebook card should show one wrong-base example as a warning.
Check: Check 105+315=420. The selected part is between zero and 420, because the stated percentage is positive and less than 100%.
Later retrieval: For a changed total 840 with the same p%, the part becomes 210. The notebook should prompt this scaling prediction before the exact calculation.
28. Card 28: percentage of a known whole
Card prompt: A fictional total is 520 units; find 30% of it, then state the remaining amount.
Meaning and conditions: Notebook heading: part = percent/100 × original whole. Symbols must be defined: part means the selected quantity, percent is p out of 100, and original whole is the base that the percentage refers to. The note should explicitly ask ‘What is 100% in this question?’ before any multiplication.
One worked example: Part = (30/100)×520=156 units. The rest of the whole is 520−156=364 units. The sum of part and remainder must reconstruct the supplied total.
When this would be wrong: A common formula error is using p as the multiplier instead of p/100, or calculating a percentage of the remainder when the question defined the original whole as the base. A notebook card should show one wrong-base example as a warning.
Check: Check 156+364=520. The selected part is between zero and 520, because the stated percentage is positive and less than 100%.
Later retrieval: For a changed total 1040 with the same p%, the part becomes 312. The notebook should prompt this scaling prediction before the exact calculation.
29. Card 29: percentage of a known whole
Card prompt: A fictional total is 620 units; find 40% of it, then state the remaining amount.
Meaning and conditions: Notebook heading: part = percent/100 × original whole. Symbols must be defined: part means the selected quantity, percent is p out of 100, and original whole is the base that the percentage refers to. The note should explicitly ask ‘What is 100% in this question?’ before any multiplication.
One worked example: Part = (40/100)×620=248 units. The rest of the whole is 620−248=372 units. The sum of part and remainder must reconstruct the supplied total.
When this would be wrong: A common formula error is using p as the multiplier instead of p/100, or calculating a percentage of the remainder when the question defined the original whole as the base. A notebook card should show one wrong-base example as a warning.
Check: Check 248+372=620. The selected part is between zero and 620, because the stated percentage is positive and less than 100%.
Later retrieval: For a changed total 1240 with the same p%, the part becomes 496. The notebook should prompt this scaling prediction before the exact calculation.
Distance, time and rates
In distance, time and rates, a notebook card should name the question that triggers the formula and the quantity it calculates. Read the worked example as one illustration of the relationship, not as fixed numbers to memorise. Pay attention to units, assumptions and a reverse check. If two formulas use the same letter, define that letter again in the local context.
30. Card 1: average rate with units
Card prompt: A hypothetical journey covers 12 km in 2 hours. What formula gives average speed, and what are the speed units?
Meaning and conditions: Notebook heading: average speed = total distance / total elapsed time. Label distance in km and time in hours. The quotient therefore has km/h as its unit. The formula describes the whole interval’s average; it does not prove that the speed was constant throughout.
One worked example: Average speed=12/2=6 km/h. This is an exact fraction 12/2 km/h if a rounded display is not requested. To find distance at a stated constant model rate, rearrange as distance=speed×time.
When this would be wrong: Swapping numerator and denominator yields h/km, not km/h. Another error is dividing by minutes but labelling the result km/h. The notebook should put units alongside all symbols, not just the numerical answer.
Check: Reverse-check: the unrounded average speed multiplied by 2 hours reproduces 12 km. Dimensional units also cancel correctly: (km/h)×h=km.
Later retrieval: If the journey lasted 5 hours at the same hypothetical constant rate, distance would be 30 km. This is a model extension, not an observation about a real trip.
31. Card 2: average rate with units
Card prompt: A hypothetical journey covers 19 km in 7 hours. What formula gives average speed, and what are the speed units?
Meaning and conditions: Notebook heading: average speed = total distance / total elapsed time. Label distance in km and time in hours. The quotient therefore has km/h as its unit. The formula describes the whole interval’s average; it does not prove that the speed was constant throughout.
One worked example: Average speed=19/7=2.714286 km/h. This is an exact fraction 19/7 km/h if a rounded display is not requested. To find distance at a stated constant model rate, rearrange as distance=speed×time.
When this would be wrong: Swapping numerator and denominator yields h/km, not km/h. Another error is dividing by minutes but labelling the result km/h. The notebook should put units alongside all symbols, not just the numerical answer.
Check: Reverse-check: the unrounded average speed multiplied by 7 hours reproduces 19 km. Dimensional units also cancel correctly: (km/h)×h=km.
Later retrieval: If the journey lasted 10 hours at the same hypothetical constant rate, distance would be 27.142857 km. This is a model extension, not an observation about a real trip.
32. Card 3: average rate with units
Card prompt: A hypothetical journey covers 26 km in 12 hours. What formula gives average speed, and what are the speed units?
Meaning and conditions: Notebook heading: average speed = total distance / total elapsed time. Label distance in km and time in hours. The quotient therefore has km/h as its unit. The formula describes the whole interval’s average; it does not prove that the speed was constant throughout.
One worked example: Average speed=26/12=2.166667 km/h. This is an exact fraction 26/12 km/h if a rounded display is not requested. To find distance at a stated constant model rate, rearrange as distance=speed×time.
When this would be wrong: Swapping numerator and denominator yields h/km, not km/h. Another error is dividing by minutes but labelling the result km/h. The notebook should put units alongside all symbols, not just the numerical answer.
Check: Reverse-check: the unrounded average speed multiplied by 12 hours reproduces 26 km. Dimensional units also cancel correctly: (km/h)×h=km.
Later retrieval: If the journey lasted 15 hours at the same hypothetical constant rate, distance would be 32.5 km. This is a model extension, not an observation about a real trip.
33. Card 4: average rate with units
Card prompt: A hypothetical journey covers 33 km in 17 hours. What formula gives average speed, and what are the speed units?
Meaning and conditions: Notebook heading: average speed = total distance / total elapsed time. Label distance in km and time in hours. The quotient therefore has km/h as its unit. The formula describes the whole interval’s average; it does not prove that the speed was constant throughout.
One worked example: Average speed=33/17=1.941176 km/h. This is an exact fraction 33/17 km/h if a rounded display is not requested. To find distance at a stated constant model rate, rearrange as distance=speed×time.
When this would be wrong: Swapping numerator and denominator yields h/km, not km/h. Another error is dividing by minutes but labelling the result km/h. The notebook should put units alongside all symbols, not just the numerical answer.
Check: Reverse-check: the unrounded average speed multiplied by 17 hours reproduces 33 km. Dimensional units also cancel correctly: (km/h)×h=km.
Later retrieval: If the journey lasted 20 hours at the same hypothetical constant rate, distance would be 38.823529 km. This is a model extension, not an observation about a real trip.
34. Card 5: average rate with units
Card prompt: A hypothetical journey covers 40 km in 22 hours. What formula gives average speed, and what are the speed units?
Meaning and conditions: Notebook heading: average speed = total distance / total elapsed time. Label distance in km and time in hours. The quotient therefore has km/h as its unit. The formula describes the whole interval’s average; it does not prove that the speed was constant throughout.
One worked example: Average speed=40/22=1.818182 km/h. This is an exact fraction 40/22 km/h if a rounded display is not requested. To find distance at a stated constant model rate, rearrange as distance=speed×time.
When this would be wrong: Swapping numerator and denominator yields h/km, not km/h. Another error is dividing by minutes but labelling the result km/h. The notebook should put units alongside all symbols, not just the numerical answer.
Check: Reverse-check: the unrounded average speed multiplied by 22 hours reproduces 40 km. Dimensional units also cancel correctly: (km/h)×h=km.
Later retrieval: If the journey lasted 25 hours at the same hypothetical constant rate, distance would be 45.454545 km. This is a model extension, not an observation about a real trip.
35. Card 6: average rate with units
Card prompt: A hypothetical journey covers 47 km in 6 hours. What formula gives average speed, and what are the speed units?
Meaning and conditions: Notebook heading: average speed = total distance / total elapsed time. Label distance in km and time in hours. The quotient therefore has km/h as its unit. The formula describes the whole interval’s average; it does not prove that the speed was constant throughout.
One worked example: Average speed=47/6=7.833333 km/h. This is an exact fraction 47/6 km/h if a rounded display is not requested. To find distance at a stated constant model rate, rearrange as distance=speed×time.
When this would be wrong: Swapping numerator and denominator yields h/km, not km/h. Another error is dividing by minutes but labelling the result km/h. The notebook should put units alongside all symbols, not just the numerical answer.
Check: Reverse-check: the unrounded average speed multiplied by 6 hours reproduces 47 km. Dimensional units also cancel correctly: (km/h)×h=km.
Later retrieval: If the journey lasted 9 hours at the same hypothetical constant rate, distance would be 70.5 km. This is a model extension, not an observation about a real trip.
36. Card 7: average rate with units
Card prompt: A hypothetical journey covers 54 km in 11 hours. What formula gives average speed, and what are the speed units?
Meaning and conditions: Notebook heading: average speed = total distance / total elapsed time. Label distance in km and time in hours. The quotient therefore has km/h as its unit. The formula describes the whole interval’s average; it does not prove that the speed was constant throughout.
One worked example: Average speed=54/11=4.909091 km/h. This is an exact fraction 54/11 km/h if a rounded display is not requested. To find distance at a stated constant model rate, rearrange as distance=speed×time.
When this would be wrong: Swapping numerator and denominator yields h/km, not km/h. Another error is dividing by minutes but labelling the result km/h. The notebook should put units alongside all symbols, not just the numerical answer.
Check: Reverse-check: the unrounded average speed multiplied by 11 hours reproduces 54 km. Dimensional units also cancel correctly: (km/h)×h=km.
Later retrieval: If the journey lasted 14 hours at the same hypothetical constant rate, distance would be 68.727273 km. This is a model extension, not an observation about a real trip.
37. Card 8: average rate with units
Card prompt: A hypothetical journey covers 61 km in 16 hours. What formula gives average speed, and what are the speed units?
Meaning and conditions: Notebook heading: average speed = total distance / total elapsed time. Label distance in km and time in hours. The quotient therefore has km/h as its unit. The formula describes the whole interval’s average; it does not prove that the speed was constant throughout.
One worked example: Average speed=61/16=3.8125 km/h. This is an exact fraction 61/16 km/h if a rounded display is not requested. To find distance at a stated constant model rate, rearrange as distance=speed×time.
When this would be wrong: Swapping numerator and denominator yields h/km, not km/h. Another error is dividing by minutes but labelling the result km/h. The notebook should put units alongside all symbols, not just the numerical answer.
Check: Reverse-check: the unrounded average speed multiplied by 16 hours reproduces 61 km. Dimensional units also cancel correctly: (km/h)×h=km.
Later retrieval: If the journey lasted 19 hours at the same hypothetical constant rate, distance would be 72.4375 km. This is a model extension, not an observation about a real trip.
38. Card 9: average rate with units
Card prompt: A hypothetical journey covers 68 km in 21 hours. What formula gives average speed, and what are the speed units?
Meaning and conditions: Notebook heading: average speed = total distance / total elapsed time. Label distance in km and time in hours. The quotient therefore has km/h as its unit. The formula describes the whole interval’s average; it does not prove that the speed was constant throughout.
One worked example: Average speed=68/21=3.238095 km/h. This is an exact fraction 68/21 km/h if a rounded display is not requested. To find distance at a stated constant model rate, rearrange as distance=speed×time.
When this would be wrong: Swapping numerator and denominator yields h/km, not km/h. Another error is dividing by minutes but labelling the result km/h. The notebook should put units alongside all symbols, not just the numerical answer.
Check: Reverse-check: the unrounded average speed multiplied by 21 hours reproduces 68 km. Dimensional units also cancel correctly: (km/h)×h=km.
Later retrieval: If the journey lasted 24 hours at the same hypothetical constant rate, distance would be 77.714286 km. This is a model extension, not an observation about a real trip.
39. Card 10: average rate with units
Card prompt: A hypothetical journey covers 75 km in 5 hours. What formula gives average speed, and what are the speed units?
Meaning and conditions: Notebook heading: average speed = total distance / total elapsed time. Label distance in km and time in hours. The quotient therefore has km/h as its unit. The formula describes the whole interval’s average; it does not prove that the speed was constant throughout.
One worked example: Average speed=75/5=15 km/h. This is an exact fraction 75/5 km/h if a rounded display is not requested. To find distance at a stated constant model rate, rearrange as distance=speed×time.
When this would be wrong: Swapping numerator and denominator yields h/km, not km/h. Another error is dividing by minutes but labelling the result km/h. The notebook should put units alongside all symbols, not just the numerical answer.
Check: Reverse-check: the unrounded average speed multiplied by 5 hours reproduces 75 km. Dimensional units also cancel correctly: (km/h)×h=km.
Later retrieval: If the journey lasted 8 hours at the same hypothetical constant rate, distance would be 120 km. This is a model extension, not an observation about a real trip.
40. Card 11: average rate with units
Card prompt: A hypothetical journey covers 82 km in 10 hours. What formula gives average speed, and what are the speed units?
Meaning and conditions: Notebook heading: average speed = total distance / total elapsed time. Label distance in km and time in hours. The quotient therefore has km/h as its unit. The formula describes the whole interval’s average; it does not prove that the speed was constant throughout.
One worked example: Average speed=82/10=8.2 km/h. This is an exact fraction 82/10 km/h if a rounded display is not requested. To find distance at a stated constant model rate, rearrange as distance=speed×time.
When this would be wrong: Swapping numerator and denominator yields h/km, not km/h. Another error is dividing by minutes but labelling the result km/h. The notebook should put units alongside all symbols, not just the numerical answer.
Check: Reverse-check: the unrounded average speed multiplied by 10 hours reproduces 82 km. Dimensional units also cancel correctly: (km/h)×h=km.
Later retrieval: If the journey lasted 13 hours at the same hypothetical constant rate, distance would be 106.6 km. This is a model extension, not an observation about a real trip.
41. Card 12: average rate with units
Card prompt: A hypothetical journey covers 89 km in 15 hours. What formula gives average speed, and what are the speed units?
Meaning and conditions: Notebook heading: average speed = total distance / total elapsed time. Label distance in km and time in hours. The quotient therefore has km/h as its unit. The formula describes the whole interval’s average; it does not prove that the speed was constant throughout.
One worked example: Average speed=89/15=5.933333 km/h. This is an exact fraction 89/15 km/h if a rounded display is not requested. To find distance at a stated constant model rate, rearrange as distance=speed×time.
When this would be wrong: Swapping numerator and denominator yields h/km, not km/h. Another error is dividing by minutes but labelling the result km/h. The notebook should put units alongside all symbols, not just the numerical answer.
Check: Reverse-check: the unrounded average speed multiplied by 15 hours reproduces 89 km. Dimensional units also cancel correctly: (km/h)×h=km.
Later retrieval: If the journey lasted 18 hours at the same hypothetical constant rate, distance would be 106.8 km. This is a model extension, not an observation about a real trip.
42. Card 13: average rate with units
Card prompt: A hypothetical journey covers 96 km in 20 hours. What formula gives average speed, and what are the speed units?
Meaning and conditions: Notebook heading: average speed = total distance / total elapsed time. Label distance in km and time in hours. The quotient therefore has km/h as its unit. The formula describes the whole interval’s average; it does not prove that the speed was constant throughout.
One worked example: Average speed=96/20=4.8 km/h. This is an exact fraction 96/20 km/h if a rounded display is not requested. To find distance at a stated constant model rate, rearrange as distance=speed×time.
When this would be wrong: Swapping numerator and denominator yields h/km, not km/h. Another error is dividing by minutes but labelling the result km/h. The notebook should put units alongside all symbols, not just the numerical answer.
Check: Reverse-check: the unrounded average speed multiplied by 20 hours reproduces 96 km. Dimensional units also cancel correctly: (km/h)×h=km.
Later retrieval: If the journey lasted 23 hours at the same hypothetical constant rate, distance would be 110.4 km. This is a model extension, not an observation about a real trip.
43. Card 14: average rate with units
Card prompt: A hypothetical journey covers 103 km in 4 hours. What formula gives average speed, and what are the speed units?
Meaning and conditions: Notebook heading: average speed = total distance / total elapsed time. Label distance in km and time in hours. The quotient therefore has km/h as its unit. The formula describes the whole interval’s average; it does not prove that the speed was constant throughout.
One worked example: Average speed=103/4=25.75 km/h. This is an exact fraction 103/4 km/h if a rounded display is not requested. To find distance at a stated constant model rate, rearrange as distance=speed×time.
When this would be wrong: Swapping numerator and denominator yields h/km, not km/h. Another error is dividing by minutes but labelling the result km/h. The notebook should put units alongside all symbols, not just the numerical answer.
Check: Reverse-check: the unrounded average speed multiplied by 4 hours reproduces 103 km. Dimensional units also cancel correctly: (km/h)×h=km.
Later retrieval: If the journey lasted 7 hours at the same hypothetical constant rate, distance would be 180.25 km. This is a model extension, not an observation about a real trip.
44. Card 15: average rate with units
Card prompt: A hypothetical journey covers 110 km in 9 hours. What formula gives average speed, and what are the speed units?
Meaning and conditions: Notebook heading: average speed = total distance / total elapsed time. Label distance in km and time in hours. The quotient therefore has km/h as its unit. The formula describes the whole interval’s average; it does not prove that the speed was constant throughout.
One worked example: Average speed=110/9=12.222222 km/h. This is an exact fraction 110/9 km/h if a rounded display is not requested. To find distance at a stated constant model rate, rearrange as distance=speed×time.
When this would be wrong: Swapping numerator and denominator yields h/km, not km/h. Another error is dividing by minutes but labelling the result km/h. The notebook should put units alongside all symbols, not just the numerical answer.
Check: Reverse-check: the unrounded average speed multiplied by 9 hours reproduces 110 km. Dimensional units also cancel correctly: (km/h)×h=km.
Later retrieval: If the journey lasted 12 hours at the same hypothetical constant rate, distance would be 146.666667 km. This is a model extension, not an observation about a real trip.
45. Card 16: average rate with units
Card prompt: A hypothetical journey covers 117 km in 14 hours. What formula gives average speed, and what are the speed units?
Meaning and conditions: Notebook heading: average speed = total distance / total elapsed time. Label distance in km and time in hours. The quotient therefore has km/h as its unit. The formula describes the whole interval’s average; it does not prove that the speed was constant throughout.
One worked example: Average speed=117/14=8.357143 km/h. This is an exact fraction 117/14 km/h if a rounded display is not requested. To find distance at a stated constant model rate, rearrange as distance=speed×time.
When this would be wrong: Swapping numerator and denominator yields h/km, not km/h. Another error is dividing by minutes but labelling the result km/h. The notebook should put units alongside all symbols, not just the numerical answer.
Check: Reverse-check: the unrounded average speed multiplied by 14 hours reproduces 117 km. Dimensional units also cancel correctly: (km/h)×h=km.
Later retrieval: If the journey lasted 17 hours at the same hypothetical constant rate, distance would be 142.071429 km. This is a model extension, not an observation about a real trip.
46. Card 17: average rate with units
Card prompt: A hypothetical journey covers 124 km in 19 hours. What formula gives average speed, and what are the speed units?
Meaning and conditions: Notebook heading: average speed = total distance / total elapsed time. Label distance in km and time in hours. The quotient therefore has km/h as its unit. The formula describes the whole interval’s average; it does not prove that the speed was constant throughout.
One worked example: Average speed=124/19=6.526316 km/h. This is an exact fraction 124/19 km/h if a rounded display is not requested. To find distance at a stated constant model rate, rearrange as distance=speed×time.
When this would be wrong: Swapping numerator and denominator yields h/km, not km/h. Another error is dividing by minutes but labelling the result km/h. The notebook should put units alongside all symbols, not just the numerical answer.
Check: Reverse-check: the unrounded average speed multiplied by 19 hours reproduces 124 km. Dimensional units also cancel correctly: (km/h)×h=km.
Later retrieval: If the journey lasted 22 hours at the same hypothetical constant rate, distance would be 143.578947 km. This is a model extension, not an observation about a real trip.
47. Card 18: average rate with units
Card prompt: A hypothetical journey covers 131 km in 3 hours. What formula gives average speed, and what are the speed units?
Meaning and conditions: Notebook heading: average speed = total distance / total elapsed time. Label distance in km and time in hours. The quotient therefore has km/h as its unit. The formula describes the whole interval’s average; it does not prove that the speed was constant throughout.
One worked example: Average speed=131/3=43.666667 km/h. This is an exact fraction 131/3 km/h if a rounded display is not requested. To find distance at a stated constant model rate, rearrange as distance=speed×time.
When this would be wrong: Swapping numerator and denominator yields h/km, not km/h. Another error is dividing by minutes but labelling the result km/h. The notebook should put units alongside all symbols, not just the numerical answer.
Check: Reverse-check: the unrounded average speed multiplied by 3 hours reproduces 131 km. Dimensional units also cancel correctly: (km/h)×h=km.
Later retrieval: If the journey lasted 6 hours at the same hypothetical constant rate, distance would be 262 km. This is a model extension, not an observation about a real trip.
48. Card 19: average rate with units
Card prompt: A hypothetical journey covers 138 km in 8 hours. What formula gives average speed, and what are the speed units?
Meaning and conditions: Notebook heading: average speed = total distance / total elapsed time. Label distance in km and time in hours. The quotient therefore has km/h as its unit. The formula describes the whole interval’s average; it does not prove that the speed was constant throughout.
One worked example: Average speed=138/8=17.25 km/h. This is an exact fraction 138/8 km/h if a rounded display is not requested. To find distance at a stated constant model rate, rearrange as distance=speed×time.
When this would be wrong: Swapping numerator and denominator yields h/km, not km/h. Another error is dividing by minutes but labelling the result km/h. The notebook should put units alongside all symbols, not just the numerical answer.
Check: Reverse-check: the unrounded average speed multiplied by 8 hours reproduces 138 km. Dimensional units also cancel correctly: (km/h)×h=km.
Later retrieval: If the journey lasted 11 hours at the same hypothetical constant rate, distance would be 189.75 km. This is a model extension, not an observation about a real trip.
49. Card 20: average rate with units
Card prompt: A hypothetical journey covers 145 km in 13 hours. What formula gives average speed, and what are the speed units?
Meaning and conditions: Notebook heading: average speed = total distance / total elapsed time. Label distance in km and time in hours. The quotient therefore has km/h as its unit. The formula describes the whole interval’s average; it does not prove that the speed was constant throughout.
One worked example: Average speed=145/13=11.153846 km/h. This is an exact fraction 145/13 km/h if a rounded display is not requested. To find distance at a stated constant model rate, rearrange as distance=speed×time.
When this would be wrong: Swapping numerator and denominator yields h/km, not km/h. Another error is dividing by minutes but labelling the result km/h. The notebook should put units alongside all symbols, not just the numerical answer.
Check: Reverse-check: the unrounded average speed multiplied by 13 hours reproduces 145 km. Dimensional units also cancel correctly: (km/h)×h=km.
Later retrieval: If the journey lasted 16 hours at the same hypothetical constant rate, distance would be 178.461538 km. This is a model extension, not an observation about a real trip.
50. Card 21: average rate with units
Card prompt: A hypothetical journey covers 12 km in 18 hours. What formula gives average speed, and what are the speed units?
Meaning and conditions: Notebook heading: average speed = total distance / total elapsed time. Label distance in km and time in hours. The quotient therefore has km/h as its unit. The formula describes the whole interval’s average; it does not prove that the speed was constant throughout.
One worked example: Average speed=12/18=0.666667 km/h. This is an exact fraction 12/18 km/h if a rounded display is not requested. To find distance at a stated constant model rate, rearrange as distance=speed×time.
When this would be wrong: Swapping numerator and denominator yields h/km, not km/h. Another error is dividing by minutes but labelling the result km/h. The notebook should put units alongside all symbols, not just the numerical answer.
Check: Reverse-check: the unrounded average speed multiplied by 18 hours reproduces 12 km. Dimensional units also cancel correctly: (km/h)×h=km.
Later retrieval: If the journey lasted 21 hours at the same hypothetical constant rate, distance would be 14 km. This is a model extension, not an observation about a real trip.
51. Card 22: average rate with units
Card prompt: A hypothetical journey covers 19 km in 2 hours. What formula gives average speed, and what are the speed units?
Meaning and conditions: Notebook heading: average speed = total distance / total elapsed time. Label distance in km and time in hours. The quotient therefore has km/h as its unit. The formula describes the whole interval’s average; it does not prove that the speed was constant throughout.
One worked example: Average speed=19/2=9.5 km/h. This is an exact fraction 19/2 km/h if a rounded display is not requested. To find distance at a stated constant model rate, rearrange as distance=speed×time.
When this would be wrong: Swapping numerator and denominator yields h/km, not km/h. Another error is dividing by minutes but labelling the result km/h. The notebook should put units alongside all symbols, not just the numerical answer.
Check: Reverse-check: the unrounded average speed multiplied by 2 hours reproduces 19 km. Dimensional units also cancel correctly: (km/h)×h=km.
Later retrieval: If the journey lasted 5 hours at the same hypothetical constant rate, distance would be 47.5 km. This is a model extension, not an observation about a real trip.
52. Card 23: average rate with units
Card prompt: A hypothetical journey covers 26 km in 7 hours. What formula gives average speed, and what are the speed units?
Meaning and conditions: Notebook heading: average speed = total distance / total elapsed time. Label distance in km and time in hours. The quotient therefore has km/h as its unit. The formula describes the whole interval’s average; it does not prove that the speed was constant throughout.
One worked example: Average speed=26/7=3.714286 km/h. This is an exact fraction 26/7 km/h if a rounded display is not requested. To find distance at a stated constant model rate, rearrange as distance=speed×time.
When this would be wrong: Swapping numerator and denominator yields h/km, not km/h. Another error is dividing by minutes but labelling the result km/h. The notebook should put units alongside all symbols, not just the numerical answer.
Check: Reverse-check: the unrounded average speed multiplied by 7 hours reproduces 26 km. Dimensional units also cancel correctly: (km/h)×h=km.
Later retrieval: If the journey lasted 10 hours at the same hypothetical constant rate, distance would be 37.142857 km. This is a model extension, not an observation about a real trip.
53. Card 24: average rate with units
Card prompt: A hypothetical journey covers 33 km in 12 hours. What formula gives average speed, and what are the speed units?
Meaning and conditions: Notebook heading: average speed = total distance / total elapsed time. Label distance in km and time in hours. The quotient therefore has km/h as its unit. The formula describes the whole interval’s average; it does not prove that the speed was constant throughout.
One worked example: Average speed=33/12=2.75 km/h. This is an exact fraction 33/12 km/h if a rounded display is not requested. To find distance at a stated constant model rate, rearrange as distance=speed×time.
When this would be wrong: Swapping numerator and denominator yields h/km, not km/h. Another error is dividing by minutes but labelling the result km/h. The notebook should put units alongside all symbols, not just the numerical answer.
Check: Reverse-check: the unrounded average speed multiplied by 12 hours reproduces 33 km. Dimensional units also cancel correctly: (km/h)×h=km.
Later retrieval: If the journey lasted 15 hours at the same hypothetical constant rate, distance would be 41.25 km. This is a model extension, not an observation about a real trip.
54. Card 25: average rate with units
Card prompt: A hypothetical journey covers 40 km in 17 hours. What formula gives average speed, and what are the speed units?
Meaning and conditions: Notebook heading: average speed = total distance / total elapsed time. Label distance in km and time in hours. The quotient therefore has km/h as its unit. The formula describes the whole interval’s average; it does not prove that the speed was constant throughout.
One worked example: Average speed=40/17=2.352941 km/h. This is an exact fraction 40/17 km/h if a rounded display is not requested. To find distance at a stated constant model rate, rearrange as distance=speed×time.
When this would be wrong: Swapping numerator and denominator yields h/km, not km/h. Another error is dividing by minutes but labelling the result km/h. The notebook should put units alongside all symbols, not just the numerical answer.
Check: Reverse-check: the unrounded average speed multiplied by 17 hours reproduces 40 km. Dimensional units also cancel correctly: (km/h)×h=km.
Later retrieval: If the journey lasted 20 hours at the same hypothetical constant rate, distance would be 47.058824 km. This is a model extension, not an observation about a real trip.
55. Card 26: average rate with units
Card prompt: A hypothetical journey covers 47 km in 22 hours. What formula gives average speed, and what are the speed units?
Meaning and conditions: Notebook heading: average speed = total distance / total elapsed time. Label distance in km and time in hours. The quotient therefore has km/h as its unit. The formula describes the whole interval’s average; it does not prove that the speed was constant throughout.
One worked example: Average speed=47/22=2.136364 km/h. This is an exact fraction 47/22 km/h if a rounded display is not requested. To find distance at a stated constant model rate, rearrange as distance=speed×time.
When this would be wrong: Swapping numerator and denominator yields h/km, not km/h. Another error is dividing by minutes but labelling the result km/h. The notebook should put units alongside all symbols, not just the numerical answer.
Check: Reverse-check: the unrounded average speed multiplied by 22 hours reproduces 47 km. Dimensional units also cancel correctly: (km/h)×h=km.
Later retrieval: If the journey lasted 25 hours at the same hypothetical constant rate, distance would be 53.409091 km. This is a model extension, not an observation about a real trip.
56. Card 27: average rate with units
Card prompt: A hypothetical journey covers 54 km in 6 hours. What formula gives average speed, and what are the speed units?
Meaning and conditions: Notebook heading: average speed = total distance / total elapsed time. Label distance in km and time in hours. The quotient therefore has km/h as its unit. The formula describes the whole interval’s average; it does not prove that the speed was constant throughout.
One worked example: Average speed=54/6=9 km/h. This is an exact fraction 54/6 km/h if a rounded display is not requested. To find distance at a stated constant model rate, rearrange as distance=speed×time.
When this would be wrong: Swapping numerator and denominator yields h/km, not km/h. Another error is dividing by minutes but labelling the result km/h. The notebook should put units alongside all symbols, not just the numerical answer.
Check: Reverse-check: the unrounded average speed multiplied by 6 hours reproduces 54 km. Dimensional units also cancel correctly: (km/h)×h=km.
Later retrieval: If the journey lasted 9 hours at the same hypothetical constant rate, distance would be 81 km. This is a model extension, not an observation about a real trip.
Linear equations and straight-line rules
In linear equations and straight-line rules, a notebook card should name the question that triggers the formula and the quantity it calculates. Read the worked example as one illustration of the relationship, not as fixed numbers to memorise. Pay attention to units, assumptions and a reverse check. If two formulas use the same letter, define that letter again in the local context.
57. Card 1: read and use y=mx+b
Card prompt: A straight-line rule is y=-5x−11. Find y when x=-8, then name its gradient and y-intercept.
Meaning and conditions: Notebook heading: linear rule y=mx+b. Here m is the gradient, the change in y per +1 x-unit. The number b is the y-value at x=0. A negative m means the line falls to the right; it does not guarantee every output is negative. This card should include a simple two-column input–output check.
One worked example: Substitute x=-8: y=-5×(-8)+(-11)=29. Gradient is -5. The vertical-axis intercept is the point (0,-11). These are different mathematical quantities, even though they appear in the same short formula.
When this would be wrong: A learner may treat b=-11 as the gradient and m=-5 as the starting output. Another may omit brackets around negative input -8, changing the result. The notebook should include a ‘read before substituting’ reminder.
Check: At x=-7, output is 24, a change of -5; at x=0, output is -11. These checks verify the roles of m and b independently of one substituted answer.
Later retrieval: Change only the intercept by +4. The new rule shifts all outputs up by four but preserves gradient -5. Ask which quantity in the notebook formula was changed.
58. Card 2: read and use y=mx+b
Card prompt: A straight-line rule is y=-3x−8. Find y when x=-1, then name its gradient and y-intercept.
Meaning and conditions: Notebook heading: linear rule y=mx+b. Here m is the gradient, the change in y per +1 x-unit. The number b is the y-value at x=0. A negative m means the line falls to the right; it does not guarantee every output is negative. This card should include a simple two-column input–output check.
One worked example: Substitute x=-1: y=-3×(-1)+(-8)=-5. Gradient is -3. The vertical-axis intercept is the point (0,-8). These are different mathematical quantities, even though they appear in the same short formula.
When this would be wrong: A learner may treat b=-8 as the gradient and m=-3 as the starting output. Another may omit brackets around negative input -1, changing the result. The notebook should include a ‘read before substituting’ reminder.
Check: At x=0, output is -8, a change of -3; at x=0, output is -8. These checks verify the roles of m and b independently of one substituted answer.
Later retrieval: Change only the intercept by +4. The new rule shifts all outputs up by four but preserves gradient -3. Ask which quantity in the notebook formula was changed.
59. Card 3: read and use y=mx+b
Card prompt: A straight-line rule is y=-2x−5. Find y when x=6, then name its gradient and y-intercept.
Meaning and conditions: Notebook heading: linear rule y=mx+b. Here m is the gradient, the change in y per +1 x-unit. The number b is the y-value at x=0. A negative m means the line falls to the right; it does not guarantee every output is negative. This card should include a simple two-column input–output check.
One worked example: Substitute x=6: y=-2×(6)+(-5)=-17. Gradient is -2. The vertical-axis intercept is the point (0,-5). These are different mathematical quantities, even though they appear in the same short formula.
When this would be wrong: A learner may treat b=-5 as the gradient and m=-2 as the starting output. Another may omit brackets around negative input 6, changing the result. The notebook should include a ‘read before substituting’ reminder.
Check: At x=7, output is -19, a change of -2; at x=0, output is -5. These checks verify the roles of m and b independently of one substituted answer.
Later retrieval: Change only the intercept by +4. The new rule shifts all outputs up by four but preserves gradient -2. Ask which quantity in the notebook formula was changed.
60. Card 4: read and use y=mx+b
Card prompt: A straight-line rule is y=-1x−2. Find y when x=-4, then name its gradient and y-intercept.
Meaning and conditions: Notebook heading: linear rule y=mx+b. Here m is the gradient, the change in y per +1 x-unit. The number b is the y-value at x=0. A negative m means the line falls to the right; it does not guarantee every output is negative. This card should include a simple two-column input–output check.
One worked example: Substitute x=-4: y=-1×(-4)+(-2)=2. Gradient is -1. The vertical-axis intercept is the point (0,-2). These are different mathematical quantities, even though they appear in the same short formula.
When this would be wrong: A learner may treat b=-2 as the gradient and m=-1 as the starting output. Another may omit brackets around negative input -4, changing the result. The notebook should include a ‘read before substituting’ reminder.
Check: At x=-3, output is 1, a change of -1; at x=0, output is -2. These checks verify the roles of m and b independently of one substituted answer.
Later retrieval: Change only the intercept by +4. The new rule shifts all outputs up by four but preserves gradient -1. Ask which quantity in the notebook formula was changed.
61. Card 5: read and use y=mx+b
Card prompt: A straight-line rule is y=1x+1. Find y when x=3, then name its gradient and y-intercept.
Meaning and conditions: Notebook heading: linear rule y=mx+b. Here m is the gradient, the change in y per +1 x-unit. The number b is the y-value at x=0. A negative m means the line falls to the right; it does not guarantee every output is negative. This card should include a simple two-column input–output check.
One worked example: Substitute x=3: y=1×(3)+(1)=4. Gradient is 1. The vertical-axis intercept is the point (0,1). These are different mathematical quantities, even though they appear in the same short formula.
When this would be wrong: A learner may treat b=1 as the gradient and m=1 as the starting output. Another may omit brackets around negative input 3, changing the result. The notebook should include a ‘read before substituting’ reminder.
Check: At x=4, output is 5, a change of 1; at x=0, output is 1. These checks verify the roles of m and b independently of one substituted answer.
Later retrieval: Change only the intercept by +4. The new rule shifts all outputs up by four but preserves gradient 1. Ask which quantity in the notebook formula was changed.
62. Card 6: read and use y=mx+b
Card prompt: A straight-line rule is y=2x+4. Find y when x=-7, then name its gradient and y-intercept.
Meaning and conditions: Notebook heading: linear rule y=mx+b. Here m is the gradient, the change in y per +1 x-unit. The number b is the y-value at x=0. A negative m means the line falls to the right; it does not guarantee every output is negative. This card should include a simple two-column input–output check.
One worked example: Substitute x=-7: y=2×(-7)+(4)=-10. Gradient is 2. The vertical-axis intercept is the point (0,4). These are different mathematical quantities, even though they appear in the same short formula.
When this would be wrong: A learner may treat b=4 as the gradient and m=2 as the starting output. Another may omit brackets around negative input -7, changing the result. The notebook should include a ‘read before substituting’ reminder.
Check: At x=-6, output is -8, a change of 2; at x=0, output is 4. These checks verify the roles of m and b independently of one substituted answer.
Later retrieval: Change only the intercept by +4. The new rule shifts all outputs up by four but preserves gradient 2. Ask which quantity in the notebook formula was changed.
63. Card 7: read and use y=mx+b
Card prompt: A straight-line rule is y=3x+7. Find y when x=0, then name its gradient and y-intercept.
Meaning and conditions: Notebook heading: linear rule y=mx+b. Here m is the gradient, the change in y per +1 x-unit. The number b is the y-value at x=0. A negative m means the line falls to the right; it does not guarantee every output is negative. This card should include a simple two-column input–output check.
One worked example: Substitute x=0: y=3×(0)+(7)=7. Gradient is 3. The vertical-axis intercept is the point (0,7). These are different mathematical quantities, even though they appear in the same short formula.
When this would be wrong: A learner may treat b=7 as the gradient and m=3 as the starting output. Another may omit brackets around negative input 0, changing the result. The notebook should include a ‘read before substituting’ reminder.
Check: At x=1, output is 10, a change of 3; at x=0, output is 7. These checks verify the roles of m and b independently of one substituted answer.
Later retrieval: Change only the intercept by +4. The new rule shifts all outputs up by four but preserves gradient 3. Ask which quantity in the notebook formula was changed.
64. Card 8: read and use y=mx+b
Card prompt: A straight-line rule is y=4x+10. Find y when x=7, then name its gradient and y-intercept.
Meaning and conditions: Notebook heading: linear rule y=mx+b. Here m is the gradient, the change in y per +1 x-unit. The number b is the y-value at x=0. A negative m means the line falls to the right; it does not guarantee every output is negative. This card should include a simple two-column input–output check.
One worked example: Substitute x=7: y=4×(7)+(10)=38. Gradient is 4. The vertical-axis intercept is the point (0,10). These are different mathematical quantities, even though they appear in the same short formula.
When this would be wrong: A learner may treat b=10 as the gradient and m=4 as the starting output. Another may omit brackets around negative input 7, changing the result. The notebook should include a ‘read before substituting’ reminder.
Check: At x=8, output is 42, a change of 4; at x=0, output is 10. These checks verify the roles of m and b independently of one substituted answer.
Later retrieval: Change only the intercept by +4. The new rule shifts all outputs up by four but preserves gradient 4. Ask which quantity in the notebook formula was changed.
65. Card 9: read and use y=mx+b
Card prompt: A straight-line rule is y=5x−10. Find y when x=-3, then name its gradient and y-intercept.
Meaning and conditions: Notebook heading: linear rule y=mx+b. Here m is the gradient, the change in y per +1 x-unit. The number b is the y-value at x=0. A negative m means the line falls to the right; it does not guarantee every output is negative. This card should include a simple two-column input–output check.
One worked example: Substitute x=-3: y=5×(-3)+(-10)=-25. Gradient is 5. The vertical-axis intercept is the point (0,-10). These are different mathematical quantities, even though they appear in the same short formula.
When this would be wrong: A learner may treat b=-10 as the gradient and m=5 as the starting output. Another may omit brackets around negative input -3, changing the result. The notebook should include a ‘read before substituting’ reminder.
Check: At x=-2, output is -20, a change of 5; at x=0, output is -10. These checks verify the roles of m and b independently of one substituted answer.
Later retrieval: Change only the intercept by +4. The new rule shifts all outputs up by four but preserves gradient 5. Ask which quantity in the notebook formula was changed.
66. Card 10: read and use y=mx+b
Card prompt: A straight-line rule is y=-5x−7. Find y when x=4, then name its gradient and y-intercept.
Meaning and conditions: Notebook heading: linear rule y=mx+b. Here m is the gradient, the change in y per +1 x-unit. The number b is the y-value at x=0. A negative m means the line falls to the right; it does not guarantee every output is negative. This card should include a simple two-column input–output check.
One worked example: Substitute x=4: y=-5×(4)+(-7)=-27. Gradient is -5. The vertical-axis intercept is the point (0,-7). These are different mathematical quantities, even though they appear in the same short formula.
When this would be wrong: A learner may treat b=-7 as the gradient and m=-5 as the starting output. Another may omit brackets around negative input 4, changing the result. The notebook should include a ‘read before substituting’ reminder.
Check: At x=5, output is -32, a change of -5; at x=0, output is -7. These checks verify the roles of m and b independently of one substituted answer.
Later retrieval: Change only the intercept by +4. The new rule shifts all outputs up by four but preserves gradient -5. Ask which quantity in the notebook formula was changed.
67. Card 11: read and use y=mx+b
Card prompt: A straight-line rule is y=-3x−4. Find y when x=-6, then name its gradient and y-intercept.
Meaning and conditions: Notebook heading: linear rule y=mx+b. Here m is the gradient, the change in y per +1 x-unit. The number b is the y-value at x=0. A negative m means the line falls to the right; it does not guarantee every output is negative. This card should include a simple two-column input–output check.
One worked example: Substitute x=-6: y=-3×(-6)+(-4)=14. Gradient is -3. The vertical-axis intercept is the point (0,-4). These are different mathematical quantities, even though they appear in the same short formula.
When this would be wrong: A learner may treat b=-4 as the gradient and m=-3 as the starting output. Another may omit brackets around negative input -6, changing the result. The notebook should include a ‘read before substituting’ reminder.
Check: At x=-5, output is 11, a change of -3; at x=0, output is -4. These checks verify the roles of m and b independently of one substituted answer.
Later retrieval: Change only the intercept by +4. The new rule shifts all outputs up by four but preserves gradient -3. Ask which quantity in the notebook formula was changed.
68. Card 12: read and use y=mx+b
Card prompt: A straight-line rule is y=-2x−1. Find y when x=1, then name its gradient and y-intercept.
Meaning and conditions: Notebook heading: linear rule y=mx+b. Here m is the gradient, the change in y per +1 x-unit. The number b is the y-value at x=0. A negative m means the line falls to the right; it does not guarantee every output is negative. This card should include a simple two-column input–output check.
One worked example: Substitute x=1: y=-2×(1)+(-1)=-3. Gradient is -2. The vertical-axis intercept is the point (0,-1). These are different mathematical quantities, even though they appear in the same short formula.
When this would be wrong: A learner may treat b=-1 as the gradient and m=-2 as the starting output. Another may omit brackets around negative input 1, changing the result. The notebook should include a ‘read before substituting’ reminder.
Check: At x=2, output is -5, a change of -2; at x=0, output is -1. These checks verify the roles of m and b independently of one substituted answer.
Later retrieval: Change only the intercept by +4. The new rule shifts all outputs up by four but preserves gradient -2. Ask which quantity in the notebook formula was changed.
69. Card 13: read and use y=mx+b
Card prompt: A straight-line rule is y=-1x+2. Find y when x=8, then name its gradient and y-intercept.
Meaning and conditions: Notebook heading: linear rule y=mx+b. Here m is the gradient, the change in y per +1 x-unit. The number b is the y-value at x=0. A negative m means the line falls to the right; it does not guarantee every output is negative. This card should include a simple two-column input–output check.
One worked example: Substitute x=8: y=-1×(8)+(2)=-6. Gradient is -1. The vertical-axis intercept is the point (0,2). These are different mathematical quantities, even though they appear in the same short formula.
When this would be wrong: A learner may treat b=2 as the gradient and m=-1 as the starting output. Another may omit brackets around negative input 8, changing the result. The notebook should include a ‘read before substituting’ reminder.
Check: At x=9, output is -7, a change of -1; at x=0, output is 2. These checks verify the roles of m and b independently of one substituted answer.
Later retrieval: Change only the intercept by +4. The new rule shifts all outputs up by four but preserves gradient -1. Ask which quantity in the notebook formula was changed.
70. Card 14: read and use y=mx+b
Card prompt: A straight-line rule is y=1x+5. Find y when x=-2, then name its gradient and y-intercept.
Meaning and conditions: Notebook heading: linear rule y=mx+b. Here m is the gradient, the change in y per +1 x-unit. The number b is the y-value at x=0. A negative m means the line falls to the right; it does not guarantee every output is negative. This card should include a simple two-column input–output check.
One worked example: Substitute x=-2: y=1×(-2)+(5)=3. Gradient is 1. The vertical-axis intercept is the point (0,5). These are different mathematical quantities, even though they appear in the same short formula.
When this would be wrong: A learner may treat b=5 as the gradient and m=1 as the starting output. Another may omit brackets around negative input -2, changing the result. The notebook should include a ‘read before substituting’ reminder.
Check: At x=-1, output is 4, a change of 1; at x=0, output is 5. These checks verify the roles of m and b independently of one substituted answer.
Later retrieval: Change only the intercept by +4. The new rule shifts all outputs up by four but preserves gradient 1. Ask which quantity in the notebook formula was changed.
71. Card 15: read and use y=mx+b
Card prompt: A straight-line rule is y=2x+8. Find y when x=5, then name its gradient and y-intercept.
Meaning and conditions: Notebook heading: linear rule y=mx+b. Here m is the gradient, the change in y per +1 x-unit. The number b is the y-value at x=0. A negative m means the line falls to the right; it does not guarantee every output is negative. This card should include a simple two-column input–output check.
One worked example: Substitute x=5: y=2×(5)+(8)=18. Gradient is 2. The vertical-axis intercept is the point (0,8). These are different mathematical quantities, even though they appear in the same short formula.
When this would be wrong: A learner may treat b=8 as the gradient and m=2 as the starting output. Another may omit brackets around negative input 5, changing the result. The notebook should include a ‘read before substituting’ reminder.
Check: At x=6, output is 20, a change of 2; at x=0, output is 8. These checks verify the roles of m and b independently of one substituted answer.
Later retrieval: Change only the intercept by +4. The new rule shifts all outputs up by four but preserves gradient 2. Ask which quantity in the notebook formula was changed.
72. Card 16: read and use y=mx+b
Card prompt: A straight-line rule is y=3x+11. Find y when x=-5, then name its gradient and y-intercept.
Meaning and conditions: Notebook heading: linear rule y=mx+b. Here m is the gradient, the change in y per +1 x-unit. The number b is the y-value at x=0. A negative m means the line falls to the right; it does not guarantee every output is negative. This card should include a simple two-column input–output check.
One worked example: Substitute x=-5: y=3×(-5)+(11)=-4. Gradient is 3. The vertical-axis intercept is the point (0,11). These are different mathematical quantities, even though they appear in the same short formula.
When this would be wrong: A learner may treat b=11 as the gradient and m=3 as the starting output. Another may omit brackets around negative input -5, changing the result. The notebook should include a ‘read before substituting’ reminder.
Check: At x=-4, output is -1, a change of 3; at x=0, output is 11. These checks verify the roles of m and b independently of one substituted answer.
Later retrieval: Change only the intercept by +4. The new rule shifts all outputs up by four but preserves gradient 3. Ask which quantity in the notebook formula was changed.
73. Card 17: read and use y=mx+b
Card prompt: A straight-line rule is y=4x−9. Find y when x=2, then name its gradient and y-intercept.
Meaning and conditions: Notebook heading: linear rule y=mx+b. Here m is the gradient, the change in y per +1 x-unit. The number b is the y-value at x=0. A negative m means the line falls to the right; it does not guarantee every output is negative. This card should include a simple two-column input–output check.
One worked example: Substitute x=2: y=4×(2)+(-9)=-1. Gradient is 4. The vertical-axis intercept is the point (0,-9). These are different mathematical quantities, even though they appear in the same short formula.
When this would be wrong: A learner may treat b=-9 as the gradient and m=4 as the starting output. Another may omit brackets around negative input 2, changing the result. The notebook should include a ‘read before substituting’ reminder.
Check: At x=3, output is 3, a change of 4; at x=0, output is -9. These checks verify the roles of m and b independently of one substituted answer.
Later retrieval: Change only the intercept by +4. The new rule shifts all outputs up by four but preserves gradient 4. Ask which quantity in the notebook formula was changed.
74. Card 18: read and use y=mx+b
Card prompt: A straight-line rule is y=5x−6. Find y when x=-8, then name its gradient and y-intercept.
Meaning and conditions: Notebook heading: linear rule y=mx+b. Here m is the gradient, the change in y per +1 x-unit. The number b is the y-value at x=0. A negative m means the line falls to the right; it does not guarantee every output is negative. This card should include a simple two-column input–output check.
One worked example: Substitute x=-8: y=5×(-8)+(-6)=-46. Gradient is 5. The vertical-axis intercept is the point (0,-6). These are different mathematical quantities, even though they appear in the same short formula.
When this would be wrong: A learner may treat b=-6 as the gradient and m=5 as the starting output. Another may omit brackets around negative input -8, changing the result. The notebook should include a ‘read before substituting’ reminder.
Check: At x=-7, output is -41, a change of 5; at x=0, output is -6. These checks verify the roles of m and b independently of one substituted answer.
Later retrieval: Change only the intercept by +4. The new rule shifts all outputs up by four but preserves gradient 5. Ask which quantity in the notebook formula was changed.
75. Card 19: read and use y=mx+b
Card prompt: A straight-line rule is y=-5x−3. Find y when x=-1, then name its gradient and y-intercept.
Meaning and conditions: Notebook heading: linear rule y=mx+b. Here m is the gradient, the change in y per +1 x-unit. The number b is the y-value at x=0. A negative m means the line falls to the right; it does not guarantee every output is negative. This card should include a simple two-column input–output check.
One worked example: Substitute x=-1: y=-5×(-1)+(-3)=2. Gradient is -5. The vertical-axis intercept is the point (0,-3). These are different mathematical quantities, even though they appear in the same short formula.
When this would be wrong: A learner may treat b=-3 as the gradient and m=-5 as the starting output. Another may omit brackets around negative input -1, changing the result. The notebook should include a ‘read before substituting’ reminder.
Check: At x=0, output is -3, a change of -5; at x=0, output is -3. These checks verify the roles of m and b independently of one substituted answer.
Later retrieval: Change only the intercept by +4. The new rule shifts all outputs up by four but preserves gradient -5. Ask which quantity in the notebook formula was changed.
76. Card 20: read and use y=mx+b
Card prompt: A straight-line rule is y=-3x+0. Find y when x=6, then name its gradient and y-intercept.
Meaning and conditions: Notebook heading: linear rule y=mx+b. Here m is the gradient, the change in y per +1 x-unit. The number b is the y-value at x=0. A negative m means the line falls to the right; it does not guarantee every output is negative. This card should include a simple two-column input–output check.
One worked example: Substitute x=6: y=-3×(6)+(0)=-18. Gradient is -3. The vertical-axis intercept is the point (0,0). These are different mathematical quantities, even though they appear in the same short formula.
When this would be wrong: A learner may treat b=0 as the gradient and m=-3 as the starting output. Another may omit brackets around negative input 6, changing the result. The notebook should include a ‘read before substituting’ reminder.
Check: At x=7, output is -21, a change of -3; at x=0, output is 0. These checks verify the roles of m and b independently of one substituted answer.
Later retrieval: Change only the intercept by +4. The new rule shifts all outputs up by four but preserves gradient -3. Ask which quantity in the notebook formula was changed.
77. Card 21: read and use y=mx+b
Card prompt: A straight-line rule is y=-2x+3. Find y when x=-4, then name its gradient and y-intercept.
Meaning and conditions: Notebook heading: linear rule y=mx+b. Here m is the gradient, the change in y per +1 x-unit. The number b is the y-value at x=0. A negative m means the line falls to the right; it does not guarantee every output is negative. This card should include a simple two-column input–output check.
One worked example: Substitute x=-4: y=-2×(-4)+(3)=11. Gradient is -2. The vertical-axis intercept is the point (0,3). These are different mathematical quantities, even though they appear in the same short formula.
When this would be wrong: A learner may treat b=3 as the gradient and m=-2 as the starting output. Another may omit brackets around negative input -4, changing the result. The notebook should include a ‘read before substituting’ reminder.
Check: At x=-3, output is 9, a change of -2; at x=0, output is 3. These checks verify the roles of m and b independently of one substituted answer.
Later retrieval: Change only the intercept by +4. The new rule shifts all outputs up by four but preserves gradient -2. Ask which quantity in the notebook formula was changed.
78. Card 22: read and use y=mx+b
Card prompt: A straight-line rule is y=-1x+6. Find y when x=3, then name its gradient and y-intercept.
Meaning and conditions: Notebook heading: linear rule y=mx+b. Here m is the gradient, the change in y per +1 x-unit. The number b is the y-value at x=0. A negative m means the line falls to the right; it does not guarantee every output is negative. This card should include a simple two-column input–output check.
One worked example: Substitute x=3: y=-1×(3)+(6)=3. Gradient is -1. The vertical-axis intercept is the point (0,6). These are different mathematical quantities, even though they appear in the same short formula.
When this would be wrong: A learner may treat b=6 as the gradient and m=-1 as the starting output. Another may omit brackets around negative input 3, changing the result. The notebook should include a ‘read before substituting’ reminder.
Check: At x=4, output is 2, a change of -1; at x=0, output is 6. These checks verify the roles of m and b independently of one substituted answer.
Later retrieval: Change only the intercept by +4. The new rule shifts all outputs up by four but preserves gradient -1. Ask which quantity in the notebook formula was changed.
79. Card 23: read and use y=mx+b
Card prompt: A straight-line rule is y=1x+9. Find y when x=-7, then name its gradient and y-intercept.
Meaning and conditions: Notebook heading: linear rule y=mx+b. Here m is the gradient, the change in y per +1 x-unit. The number b is the y-value at x=0. A negative m means the line falls to the right; it does not guarantee every output is negative. This card should include a simple two-column input–output check.
One worked example: Substitute x=-7: y=1×(-7)+(9)=2. Gradient is 1. The vertical-axis intercept is the point (0,9). These are different mathematical quantities, even though they appear in the same short formula.
When this would be wrong: A learner may treat b=9 as the gradient and m=1 as the starting output. Another may omit brackets around negative input -7, changing the result. The notebook should include a ‘read before substituting’ reminder.
Check: At x=-6, output is 3, a change of 1; at x=0, output is 9. These checks verify the roles of m and b independently of one substituted answer.
Later retrieval: Change only the intercept by +4. The new rule shifts all outputs up by four but preserves gradient 1. Ask which quantity in the notebook formula was changed.
80. Card 24: read and use y=mx+b
Card prompt: A straight-line rule is y=2x−11. Find y when x=0, then name its gradient and y-intercept.
Meaning and conditions: Notebook heading: linear rule y=mx+b. Here m is the gradient, the change in y per +1 x-unit. The number b is the y-value at x=0. A negative m means the line falls to the right; it does not guarantee every output is negative. This card should include a simple two-column input–output check.
One worked example: Substitute x=0: y=2×(0)+(-11)=-11. Gradient is 2. The vertical-axis intercept is the point (0,-11). These are different mathematical quantities, even though they appear in the same short formula.
When this would be wrong: A learner may treat b=-11 as the gradient and m=2 as the starting output. Another may omit brackets around negative input 0, changing the result. The notebook should include a ‘read before substituting’ reminder.
Check: At x=1, output is -9, a change of 2; at x=0, output is -11. These checks verify the roles of m and b independently of one substituted answer.
Later retrieval: Change only the intercept by +4. The new rule shifts all outputs up by four but preserves gradient 2. Ask which quantity in the notebook formula was changed.
81. Card 25: read and use y=mx+b
Card prompt: A straight-line rule is y=3x−8. Find y when x=7, then name its gradient and y-intercept.
Meaning and conditions: Notebook heading: linear rule y=mx+b. Here m is the gradient, the change in y per +1 x-unit. The number b is the y-value at x=0. A negative m means the line falls to the right; it does not guarantee every output is negative. This card should include a simple two-column input–output check.
One worked example: Substitute x=7: y=3×(7)+(-8)=13. Gradient is 3. The vertical-axis intercept is the point (0,-8). These are different mathematical quantities, even though they appear in the same short formula.
When this would be wrong: A learner may treat b=-8 as the gradient and m=3 as the starting output. Another may omit brackets around negative input 7, changing the result. The notebook should include a ‘read before substituting’ reminder.
Check: At x=8, output is 16, a change of 3; at x=0, output is -8. These checks verify the roles of m and b independently of one substituted answer.
Later retrieval: Change only the intercept by +4. The new rule shifts all outputs up by four but preserves gradient 3. Ask which quantity in the notebook formula was changed.
82. Card 26: read and use y=mx+b
Card prompt: A straight-line rule is y=4x−5. Find y when x=-3, then name its gradient and y-intercept.
Meaning and conditions: Notebook heading: linear rule y=mx+b. Here m is the gradient, the change in y per +1 x-unit. The number b is the y-value at x=0. A negative m means the line falls to the right; it does not guarantee every output is negative. This card should include a simple two-column input–output check.
One worked example: Substitute x=-3: y=4×(-3)+(-5)=-17. Gradient is 4. The vertical-axis intercept is the point (0,-5). These are different mathematical quantities, even though they appear in the same short formula.
When this would be wrong: A learner may treat b=-5 as the gradient and m=4 as the starting output. Another may omit brackets around negative input -3, changing the result. The notebook should include a ‘read before substituting’ reminder.
Check: At x=-2, output is -13, a change of 4; at x=0, output is -5. These checks verify the roles of m and b independently of one substituted answer.
Later retrieval: Change only the intercept by +4. The new rule shifts all outputs up by four but preserves gradient 4. Ask which quantity in the notebook formula was changed.
83. Card 27: read and use y=mx+b
Card prompt: A straight-line rule is y=5x−2. Find y when x=4, then name its gradient and y-intercept.
Meaning and conditions: Notebook heading: linear rule y=mx+b. Here m is the gradient, the change in y per +1 x-unit. The number b is the y-value at x=0. A negative m means the line falls to the right; it does not guarantee every output is negative. This card should include a simple two-column input–output check.
One worked example: Substitute x=4: y=5×(4)+(-2)=18. Gradient is 5. The vertical-axis intercept is the point (0,-2). These are different mathematical quantities, even though they appear in the same short formula.
When this would be wrong: A learner may treat b=-2 as the gradient and m=5 as the starting output. Another may omit brackets around negative input 4, changing the result. The notebook should include a ‘read before substituting’ reminder.
Check: At x=5, output is 23, a change of 5; at x=0, output is -2. These checks verify the roles of m and b independently of one substituted answer.
Later retrieval: Change only the intercept by +4. The new rule shifts all outputs up by four but preserves gradient 5. Ask which quantity in the notebook formula was changed.
84. Card 28: read and use y=mx+b
Card prompt: A straight-line rule is y=-5x+1. Find y when x=-6, then name its gradient and y-intercept.
Meaning and conditions: Notebook heading: linear rule y=mx+b. Here m is the gradient, the change in y per +1 x-unit. The number b is the y-value at x=0. A negative m means the line falls to the right; it does not guarantee every output is negative. This card should include a simple two-column input–output check.
One worked example: Substitute x=-6: y=-5×(-6)+(1)=31. Gradient is -5. The vertical-axis intercept is the point (0,1). These are different mathematical quantities, even though they appear in the same short formula.
When this would be wrong: A learner may treat b=1 as the gradient and m=-5 as the starting output. Another may omit brackets around negative input -6, changing the result. The notebook should include a ‘read before substituting’ reminder.
Check: At x=-5, output is 26, a change of -5; at x=0, output is 1. These checks verify the roles of m and b independently of one substituted answer.
Later retrieval: Change only the intercept by +4. The new rule shifts all outputs up by four but preserves gradient -5. Ask which quantity in the notebook formula was changed.
85. Card 29: read and use y=mx+b
Card prompt: A straight-line rule is y=-3x+4. Find y when x=1, then name its gradient and y-intercept.
Meaning and conditions: Notebook heading: linear rule y=mx+b. Here m is the gradient, the change in y per +1 x-unit. The number b is the y-value at x=0. A negative m means the line falls to the right; it does not guarantee every output is negative. This card should include a simple two-column input–output check.
One worked example: Substitute x=1: y=-3×(1)+(4)=1. Gradient is -3. The vertical-axis intercept is the point (0,4). These are different mathematical quantities, even though they appear in the same short formula.
When this would be wrong: A learner may treat b=4 as the gradient and m=-3 as the starting output. Another may omit brackets around negative input 1, changing the result. The notebook should include a ‘read before substituting’ reminder.
Check: At x=2, output is -2, a change of -3; at x=0, output is 4. These checks verify the roles of m and b independently of one substituted answer.
Later retrieval: Change only the intercept by +4. The new rule shifts all outputs up by four but preserves gradient -3. Ask which quantity in the notebook formula was changed.
Rectangle, triangle and trapezium measures
In rectangle, triangle and trapezium measures, a notebook card should name the question that triggers the formula and the quantity it calculates. Read the worked example as one illustration of the relationship, not as fixed numbers to memorise. Pay attention to units, assumptions and a reverse check. If two formulas use the same letter, define that letter again in the local context.
86. Card 1: choose the plane measure requested
Card prompt: A rectangular diagram has length 3 cm and width 2 cm. Find perimeter and area. A separate triangle has base 3 cm and perpendicular height 2 cm; find its area.
Meaning and conditions: A good notebook has separate labelled cards: rectangle perimeter P=2(l+w), rectangle area A=lw, triangle area A=½bh. The symbol b on the triangle card means base, while on another card it might mean a graph intercept. The notebook must define symbols locally rather than assume all letters mean the same thing everywhere.
One worked example: Rectangle perimeter=2(3+2)=10 cm. Rectangle area=3×2=6 cm². Triangle area=½×3×2=3 cm². The triangle’s height is perpendicular to its chosen base.
When this would be wrong: Applying A=lw to a perimeter question gives the wrong physical quantity. Using a slanted triangle side without perpendicularity proof is another modelling error. Unit checks—cm versus cm²—should appear prominently on the card.
Check: Trace the rectangle’s four sides for 10 cm and count an 3-by-2 square grid for 6 cm². For the triangle, two congruent copies make a base-by-height parallelogram or rectangle under suitable arrangement, confirming the half factor.
Later retrieval: Doubling both sides of the rectangle doubles its perimeter to 20 cm but quadruples area to 24 cm². Explain the different scaling as part of retrieval.
87. Card 2: choose the plane measure requested
Card prompt: A rectangular diagram has length 6 cm and width 9 cm. Find perimeter and area. A separate triangle has base 6 cm and perpendicular height 7 cm; find its area.
Meaning and conditions: A good notebook has separate labelled cards: rectangle perimeter P=2(l+w), rectangle area A=lw, triangle area A=½bh. The symbol b on the triangle card means base, while on another card it might mean a graph intercept. The notebook must define symbols locally rather than assume all letters mean the same thing everywhere.
One worked example: Rectangle perimeter=2(6+9)=30 cm. Rectangle area=6×9=54 cm². Triangle area=½×6×7=21 cm². The triangle’s height is perpendicular to its chosen base.
When this would be wrong: Applying A=lw to a perimeter question gives the wrong physical quantity. Using a slanted triangle side without perpendicularity proof is another modelling error. Unit checks—cm versus cm²—should appear prominently on the card.
Check: Trace the rectangle’s four sides for 30 cm and count an 6-by-9 square grid for 54 cm². For the triangle, two congruent copies make a base-by-height parallelogram or rectangle under suitable arrangement, confirming the half factor.
Later retrieval: Doubling both sides of the rectangle doubles its perimeter to 60 cm but quadruples area to 216 cm². Explain the different scaling as part of retrieval.
88. Card 3: choose the plane measure requested
Card prompt: A rectangular diagram has length 9 cm and width 16 cm. Find perimeter and area. A separate triangle has base 9 cm and perpendicular height 12 cm; find its area.
Meaning and conditions: A good notebook has separate labelled cards: rectangle perimeter P=2(l+w), rectangle area A=lw, triangle area A=½bh. The symbol b on the triangle card means base, while on another card it might mean a graph intercept. The notebook must define symbols locally rather than assume all letters mean the same thing everywhere.
One worked example: Rectangle perimeter=2(9+16)=50 cm. Rectangle area=9×16=144 cm². Triangle area=½×9×12=54 cm². The triangle’s height is perpendicular to its chosen base.
When this would be wrong: Applying A=lw to a perimeter question gives the wrong physical quantity. Using a slanted triangle side without perpendicularity proof is another modelling error. Unit checks—cm versus cm²—should appear prominently on the card.
Check: Trace the rectangle’s four sides for 50 cm and count an 9-by-16 square grid for 144 cm². For the triangle, two congruent copies make a base-by-height parallelogram or rectangle under suitable arrangement, confirming the half factor.
Later retrieval: Doubling both sides of the rectangle doubles its perimeter to 100 cm but quadruples area to 576 cm². Explain the different scaling as part of retrieval.
89. Card 4: choose the plane measure requested
Card prompt: A rectangular diagram has length 12 cm and width 4 cm. Find perimeter and area. A separate triangle has base 12 cm and perpendicular height 17 cm; find its area.
Meaning and conditions: A good notebook has separate labelled cards: rectangle perimeter P=2(l+w), rectangle area A=lw, triangle area A=½bh. The symbol b on the triangle card means base, while on another card it might mean a graph intercept. The notebook must define symbols locally rather than assume all letters mean the same thing everywhere.
One worked example: Rectangle perimeter=2(12+4)=32 cm. Rectangle area=12×4=48 cm². Triangle area=½×12×17=102 cm². The triangle’s height is perpendicular to its chosen base.
When this would be wrong: Applying A=lw to a perimeter question gives the wrong physical quantity. Using a slanted triangle side without perpendicularity proof is another modelling error. Unit checks—cm versus cm²—should appear prominently on the card.
Check: Trace the rectangle’s four sides for 32 cm and count an 12-by-4 square grid for 48 cm². For the triangle, two congruent copies make a base-by-height parallelogram or rectangle under suitable arrangement, confirming the half factor.
Later retrieval: Doubling both sides of the rectangle doubles its perimeter to 64 cm but quadruples area to 192 cm². Explain the different scaling as part of retrieval.
90. Card 5: choose the plane measure requested
Card prompt: A rectangular diagram has length 15 cm and width 11 cm. Find perimeter and area. A separate triangle has base 15 cm and perpendicular height 22 cm; find its area.
Meaning and conditions: A good notebook has separate labelled cards: rectangle perimeter P=2(l+w), rectangle area A=lw, triangle area A=½bh. The symbol b on the triangle card means base, while on another card it might mean a graph intercept. The notebook must define symbols locally rather than assume all letters mean the same thing everywhere.
One worked example: Rectangle perimeter=2(15+11)=52 cm. Rectangle area=15×11=165 cm². Triangle area=½×15×22=165 cm². The triangle’s height is perpendicular to its chosen base.
When this would be wrong: Applying A=lw to a perimeter question gives the wrong physical quantity. Using a slanted triangle side without perpendicularity proof is another modelling error. Unit checks—cm versus cm²—should appear prominently on the card.
Check: Trace the rectangle’s four sides for 52 cm and count an 15-by-11 square grid for 165 cm². For the triangle, two congruent copies make a base-by-height parallelogram or rectangle under suitable arrangement, confirming the half factor.
Later retrieval: Doubling both sides of the rectangle doubles its perimeter to 104 cm but quadruples area to 660 cm². Explain the different scaling as part of retrieval.
91. Card 6: choose the plane measure requested
Card prompt: A rectangular diagram has length 18 cm and width 18 cm. Find perimeter and area. A separate triangle has base 18 cm and perpendicular height 4 cm; find its area.
Meaning and conditions: A good notebook has separate labelled cards: rectangle perimeter P=2(l+w), rectangle area A=lw, triangle area A=½bh. The symbol b on the triangle card means base, while on another card it might mean a graph intercept. The notebook must define symbols locally rather than assume all letters mean the same thing everywhere.
One worked example: Rectangle perimeter=2(18+18)=72 cm. Rectangle area=18×18=324 cm². Triangle area=½×18×4=36 cm². The triangle’s height is perpendicular to its chosen base.
When this would be wrong: Applying A=lw to a perimeter question gives the wrong physical quantity. Using a slanted triangle side without perpendicularity proof is another modelling error. Unit checks—cm versus cm²—should appear prominently on the card.
Check: Trace the rectangle’s four sides for 72 cm and count an 18-by-18 square grid for 324 cm². For the triangle, two congruent copies make a base-by-height parallelogram or rectangle under suitable arrangement, confirming the half factor.
Later retrieval: Doubling both sides of the rectangle doubles its perimeter to 144 cm but quadruples area to 1296 cm². Explain the different scaling as part of retrieval.
92. Card 7: choose the plane measure requested
Card prompt: A rectangular diagram has length 21 cm and width 6 cm. Find perimeter and area. A separate triangle has base 21 cm and perpendicular height 9 cm; find its area.
Meaning and conditions: A good notebook has separate labelled cards: rectangle perimeter P=2(l+w), rectangle area A=lw, triangle area A=½bh. The symbol b on the triangle card means base, while on another card it might mean a graph intercept. The notebook must define symbols locally rather than assume all letters mean the same thing everywhere.
One worked example: Rectangle perimeter=2(21+6)=54 cm. Rectangle area=21×6=126 cm². Triangle area=½×21×9=94.5 cm². The triangle’s height is perpendicular to its chosen base.
When this would be wrong: Applying A=lw to a perimeter question gives the wrong physical quantity. Using a slanted triangle side without perpendicularity proof is another modelling error. Unit checks—cm versus cm²—should appear prominently on the card.
Check: Trace the rectangle’s four sides for 54 cm and count an 21-by-6 square grid for 126 cm². For the triangle, two congruent copies make a base-by-height parallelogram or rectangle under suitable arrangement, confirming the half factor.
Later retrieval: Doubling both sides of the rectangle doubles its perimeter to 108 cm but quadruples area to 504 cm². Explain the different scaling as part of retrieval.
93. Card 8: choose the plane measure requested
Card prompt: A rectangular diagram has length 24 cm and width 13 cm. Find perimeter and area. A separate triangle has base 24 cm and perpendicular height 14 cm; find its area.
Meaning and conditions: A good notebook has separate labelled cards: rectangle perimeter P=2(l+w), rectangle area A=lw, triangle area A=½bh. The symbol b on the triangle card means base, while on another card it might mean a graph intercept. The notebook must define symbols locally rather than assume all letters mean the same thing everywhere.
One worked example: Rectangle perimeter=2(24+13)=74 cm. Rectangle area=24×13=312 cm². Triangle area=½×24×14=168 cm². The triangle’s height is perpendicular to its chosen base.
When this would be wrong: Applying A=lw to a perimeter question gives the wrong physical quantity. Using a slanted triangle side without perpendicularity proof is another modelling error. Unit checks—cm versus cm²—should appear prominently on the card.
Check: Trace the rectangle’s four sides for 74 cm and count an 24-by-13 square grid for 312 cm². For the triangle, two congruent copies make a base-by-height parallelogram or rectangle under suitable arrangement, confirming the half factor.
Later retrieval: Doubling both sides of the rectangle doubles its perimeter to 148 cm but quadruples area to 1248 cm². Explain the different scaling as part of retrieval.
94. Card 9: choose the plane measure requested
Card prompt: A rectangular diagram has length 27 cm and width 20 cm. Find perimeter and area. A separate triangle has base 27 cm and perpendicular height 19 cm; find its area.
Meaning and conditions: A good notebook has separate labelled cards: rectangle perimeter P=2(l+w), rectangle area A=lw, triangle area A=½bh. The symbol b on the triangle card means base, while on another card it might mean a graph intercept. The notebook must define symbols locally rather than assume all letters mean the same thing everywhere.
One worked example: Rectangle perimeter=2(27+20)=94 cm. Rectangle area=27×20=540 cm². Triangle area=½×27×19=256.5 cm². The triangle’s height is perpendicular to its chosen base.
When this would be wrong: Applying A=lw to a perimeter question gives the wrong physical quantity. Using a slanted triangle side without perpendicularity proof is another modelling error. Unit checks—cm versus cm²—should appear prominently on the card.
Check: Trace the rectangle’s four sides for 94 cm and count an 27-by-20 square grid for 540 cm². For the triangle, two congruent copies make a base-by-height parallelogram or rectangle under suitable arrangement, confirming the half factor.
Later retrieval: Doubling both sides of the rectangle doubles its perimeter to 188 cm but quadruples area to 2160 cm². Explain the different scaling as part of retrieval.
95. Card 10: choose the plane measure requested
Card prompt: A rectangular diagram has length 3 cm and width 8 cm. Find perimeter and area. A separate triangle has base 3 cm and perpendicular height 24 cm; find its area.
Meaning and conditions: A good notebook has separate labelled cards: rectangle perimeter P=2(l+w), rectangle area A=lw, triangle area A=½bh. The symbol b on the triangle card means base, while on another card it might mean a graph intercept. The notebook must define symbols locally rather than assume all letters mean the same thing everywhere.
One worked example: Rectangle perimeter=2(3+8)=22 cm. Rectangle area=3×8=24 cm². Triangle area=½×3×24=36 cm². The triangle’s height is perpendicular to its chosen base.
When this would be wrong: Applying A=lw to a perimeter question gives the wrong physical quantity. Using a slanted triangle side without perpendicularity proof is another modelling error. Unit checks—cm versus cm²—should appear prominently on the card.
Check: Trace the rectangle’s four sides for 22 cm and count an 3-by-8 square grid for 24 cm². For the triangle, two congruent copies make a base-by-height parallelogram or rectangle under suitable arrangement, confirming the half factor.
Later retrieval: Doubling both sides of the rectangle doubles its perimeter to 44 cm but quadruples area to 96 cm². Explain the different scaling as part of retrieval.
96. Card 11: choose the plane measure requested
Card prompt: A rectangular diagram has length 6 cm and width 15 cm. Find perimeter and area. A separate triangle has base 6 cm and perpendicular height 6 cm; find its area.
Meaning and conditions: A good notebook has separate labelled cards: rectangle perimeter P=2(l+w), rectangle area A=lw, triangle area A=½bh. The symbol b on the triangle card means base, while on another card it might mean a graph intercept. The notebook must define symbols locally rather than assume all letters mean the same thing everywhere.
One worked example: Rectangle perimeter=2(6+15)=42 cm. Rectangle area=6×15=90 cm². Triangle area=½×6×6=18 cm². The triangle’s height is perpendicular to its chosen base.
When this would be wrong: Applying A=lw to a perimeter question gives the wrong physical quantity. Using a slanted triangle side without perpendicularity proof is another modelling error. Unit checks—cm versus cm²—should appear prominently on the card.
Check: Trace the rectangle’s four sides for 42 cm and count an 6-by-15 square grid for 90 cm². For the triangle, two congruent copies make a base-by-height parallelogram or rectangle under suitable arrangement, confirming the half factor.
Later retrieval: Doubling both sides of the rectangle doubles its perimeter to 84 cm but quadruples area to 360 cm². Explain the different scaling as part of retrieval.
97. Card 12: choose the plane measure requested
Card prompt: A rectangular diagram has length 9 cm and width 3 cm. Find perimeter and area. A separate triangle has base 9 cm and perpendicular height 11 cm; find its area.
Meaning and conditions: A good notebook has separate labelled cards: rectangle perimeter P=2(l+w), rectangle area A=lw, triangle area A=½bh. The symbol b on the triangle card means base, while on another card it might mean a graph intercept. The notebook must define symbols locally rather than assume all letters mean the same thing everywhere.
One worked example: Rectangle perimeter=2(9+3)=24 cm. Rectangle area=9×3=27 cm². Triangle area=½×9×11=49.5 cm². The triangle’s height is perpendicular to its chosen base.
When this would be wrong: Applying A=lw to a perimeter question gives the wrong physical quantity. Using a slanted triangle side without perpendicularity proof is another modelling error. Unit checks—cm versus cm²—should appear prominently on the card.
Check: Trace the rectangle’s four sides for 24 cm and count an 9-by-3 square grid for 27 cm². For the triangle, two congruent copies make a base-by-height parallelogram or rectangle under suitable arrangement, confirming the half factor.
Later retrieval: Doubling both sides of the rectangle doubles its perimeter to 48 cm but quadruples area to 108 cm². Explain the different scaling as part of retrieval.
98. Card 13: choose the plane measure requested
Card prompt: A rectangular diagram has length 12 cm and width 10 cm. Find perimeter and area. A separate triangle has base 12 cm and perpendicular height 16 cm; find its area.
Meaning and conditions: A good notebook has separate labelled cards: rectangle perimeter P=2(l+w), rectangle area A=lw, triangle area A=½bh. The symbol b on the triangle card means base, while on another card it might mean a graph intercept. The notebook must define symbols locally rather than assume all letters mean the same thing everywhere.
One worked example: Rectangle perimeter=2(12+10)=44 cm. Rectangle area=12×10=120 cm². Triangle area=½×12×16=96 cm². The triangle’s height is perpendicular to its chosen base.
When this would be wrong: Applying A=lw to a perimeter question gives the wrong physical quantity. Using a slanted triangle side without perpendicularity proof is another modelling error. Unit checks—cm versus cm²—should appear prominently on the card.
Check: Trace the rectangle’s four sides for 44 cm and count an 12-by-10 square grid for 120 cm². For the triangle, two congruent copies make a base-by-height parallelogram or rectangle under suitable arrangement, confirming the half factor.
Later retrieval: Doubling both sides of the rectangle doubles its perimeter to 88 cm but quadruples area to 480 cm². Explain the different scaling as part of retrieval.
99. Card 14: choose the plane measure requested
Card prompt: A rectangular diagram has length 15 cm and width 17 cm. Find perimeter and area. A separate triangle has base 15 cm and perpendicular height 21 cm; find its area.
Meaning and conditions: A good notebook has separate labelled cards: rectangle perimeter P=2(l+w), rectangle area A=lw, triangle area A=½bh. The symbol b on the triangle card means base, while on another card it might mean a graph intercept. The notebook must define symbols locally rather than assume all letters mean the same thing everywhere.
One worked example: Rectangle perimeter=2(15+17)=64 cm. Rectangle area=15×17=255 cm². Triangle area=½×15×21=157.5 cm². The triangle’s height is perpendicular to its chosen base.
When this would be wrong: Applying A=lw to a perimeter question gives the wrong physical quantity. Using a slanted triangle side without perpendicularity proof is another modelling error. Unit checks—cm versus cm²—should appear prominently on the card.
Check: Trace the rectangle’s four sides for 64 cm and count an 15-by-17 square grid for 255 cm². For the triangle, two congruent copies make a base-by-height parallelogram or rectangle under suitable arrangement, confirming the half factor.
Later retrieval: Doubling both sides of the rectangle doubles its perimeter to 128 cm but quadruples area to 1020 cm². Explain the different scaling as part of retrieval.
100. Card 15: choose the plane measure requested
Card prompt: A rectangular diagram has length 18 cm and width 5 cm. Find perimeter and area. A separate triangle has base 18 cm and perpendicular height 3 cm; find its area.
Meaning and conditions: A good notebook has separate labelled cards: rectangle perimeter P=2(l+w), rectangle area A=lw, triangle area A=½bh. The symbol b on the triangle card means base, while on another card it might mean a graph intercept. The notebook must define symbols locally rather than assume all letters mean the same thing everywhere.
One worked example: Rectangle perimeter=2(18+5)=46 cm. Rectangle area=18×5=90 cm². Triangle area=½×18×3=27 cm². The triangle’s height is perpendicular to its chosen base.
When this would be wrong: Applying A=lw to a perimeter question gives the wrong physical quantity. Using a slanted triangle side without perpendicularity proof is another modelling error. Unit checks—cm versus cm²—should appear prominently on the card.
Check: Trace the rectangle’s four sides for 46 cm and count an 18-by-5 square grid for 90 cm². For the triangle, two congruent copies make a base-by-height parallelogram or rectangle under suitable arrangement, confirming the half factor.
Later retrieval: Doubling both sides of the rectangle doubles its perimeter to 92 cm but quadruples area to 360 cm². Explain the different scaling as part of retrieval.
101. Card 16: choose the plane measure requested
Card prompt: A rectangular diagram has length 21 cm and width 12 cm. Find perimeter and area. A separate triangle has base 21 cm and perpendicular height 8 cm; find its area.
Meaning and conditions: A good notebook has separate labelled cards: rectangle perimeter P=2(l+w), rectangle area A=lw, triangle area A=½bh. The symbol b on the triangle card means base, while on another card it might mean a graph intercept. The notebook must define symbols locally rather than assume all letters mean the same thing everywhere.
One worked example: Rectangle perimeter=2(21+12)=66 cm. Rectangle area=21×12=252 cm². Triangle area=½×21×8=84 cm². The triangle’s height is perpendicular to its chosen base.
When this would be wrong: Applying A=lw to a perimeter question gives the wrong physical quantity. Using a slanted triangle side without perpendicularity proof is another modelling error. Unit checks—cm versus cm²—should appear prominently on the card.
Check: Trace the rectangle’s four sides for 66 cm and count an 21-by-12 square grid for 252 cm². For the triangle, two congruent copies make a base-by-height parallelogram or rectangle under suitable arrangement, confirming the half factor.
Later retrieval: Doubling both sides of the rectangle doubles its perimeter to 132 cm but quadruples area to 1008 cm². Explain the different scaling as part of retrieval.
102. Card 17: choose the plane measure requested
Card prompt: A rectangular diagram has length 24 cm and width 19 cm. Find perimeter and area. A separate triangle has base 24 cm and perpendicular height 13 cm; find its area.
Meaning and conditions: A good notebook has separate labelled cards: rectangle perimeter P=2(l+w), rectangle area A=lw, triangle area A=½bh. The symbol b on the triangle card means base, while on another card it might mean a graph intercept. The notebook must define symbols locally rather than assume all letters mean the same thing everywhere.
One worked example: Rectangle perimeter=2(24+19)=86 cm. Rectangle area=24×19=456 cm². Triangle area=½×24×13=156 cm². The triangle’s height is perpendicular to its chosen base.
When this would be wrong: Applying A=lw to a perimeter question gives the wrong physical quantity. Using a slanted triangle side without perpendicularity proof is another modelling error. Unit checks—cm versus cm²—should appear prominently on the card.
Check: Trace the rectangle’s four sides for 86 cm and count an 24-by-19 square grid for 456 cm². For the triangle, two congruent copies make a base-by-height parallelogram or rectangle under suitable arrangement, confirming the half factor.
Later retrieval: Doubling both sides of the rectangle doubles its perimeter to 172 cm but quadruples area to 1824 cm². Explain the different scaling as part of retrieval.
103. Card 18: choose the plane measure requested
Card prompt: A rectangular diagram has length 27 cm and width 7 cm. Find perimeter and area. A separate triangle has base 27 cm and perpendicular height 18 cm; find its area.
Meaning and conditions: A good notebook has separate labelled cards: rectangle perimeter P=2(l+w), rectangle area A=lw, triangle area A=½bh. The symbol b on the triangle card means base, while on another card it might mean a graph intercept. The notebook must define symbols locally rather than assume all letters mean the same thing everywhere.
One worked example: Rectangle perimeter=2(27+7)=68 cm. Rectangle area=27×7=189 cm². Triangle area=½×27×18=243 cm². The triangle’s height is perpendicular to its chosen base.
When this would be wrong: Applying A=lw to a perimeter question gives the wrong physical quantity. Using a slanted triangle side without perpendicularity proof is another modelling error. Unit checks—cm versus cm²—should appear prominently on the card.
Check: Trace the rectangle’s four sides for 68 cm and count an 27-by-7 square grid for 189 cm². For the triangle, two congruent copies make a base-by-height parallelogram or rectangle under suitable arrangement, confirming the half factor.
Later retrieval: Doubling both sides of the rectangle doubles its perimeter to 136 cm but quadruples area to 756 cm². Explain the different scaling as part of retrieval.
104. Card 19: choose the plane measure requested
Card prompt: A rectangular diagram has length 3 cm and width 14 cm. Find perimeter and area. A separate triangle has base 3 cm and perpendicular height 23 cm; find its area.
Meaning and conditions: A good notebook has separate labelled cards: rectangle perimeter P=2(l+w), rectangle area A=lw, triangle area A=½bh. The symbol b on the triangle card means base, while on another card it might mean a graph intercept. The notebook must define symbols locally rather than assume all letters mean the same thing everywhere.
One worked example: Rectangle perimeter=2(3+14)=34 cm. Rectangle area=3×14=42 cm². Triangle area=½×3×23=34.5 cm². The triangle’s height is perpendicular to its chosen base.
When this would be wrong: Applying A=lw to a perimeter question gives the wrong physical quantity. Using a slanted triangle side without perpendicularity proof is another modelling error. Unit checks—cm versus cm²—should appear prominently on the card.
Check: Trace the rectangle’s four sides for 34 cm and count an 3-by-14 square grid for 42 cm². For the triangle, two congruent copies make a base-by-height parallelogram or rectangle under suitable arrangement, confirming the half factor.
Later retrieval: Doubling both sides of the rectangle doubles its perimeter to 68 cm but quadruples area to 168 cm². Explain the different scaling as part of retrieval.
105. Card 20: choose the plane measure requested
Card prompt: A rectangular diagram has length 6 cm and width 2 cm. Find perimeter and area. A separate triangle has base 6 cm and perpendicular height 5 cm; find its area.
Meaning and conditions: A good notebook has separate labelled cards: rectangle perimeter P=2(l+w), rectangle area A=lw, triangle area A=½bh. The symbol b on the triangle card means base, while on another card it might mean a graph intercept. The notebook must define symbols locally rather than assume all letters mean the same thing everywhere.
One worked example: Rectangle perimeter=2(6+2)=16 cm. Rectangle area=6×2=12 cm². Triangle area=½×6×5=15 cm². The triangle’s height is perpendicular to its chosen base.
When this would be wrong: Applying A=lw to a perimeter question gives the wrong physical quantity. Using a slanted triangle side without perpendicularity proof is another modelling error. Unit checks—cm versus cm²—should appear prominently on the card.
Check: Trace the rectangle’s four sides for 16 cm and count an 6-by-2 square grid for 12 cm². For the triangle, two congruent copies make a base-by-height parallelogram or rectangle under suitable arrangement, confirming the half factor.
Later retrieval: Doubling both sides of the rectangle doubles its perimeter to 32 cm but quadruples area to 48 cm². Explain the different scaling as part of retrieval.
106. Card 21: choose the plane measure requested
Card prompt: A rectangular diagram has length 9 cm and width 9 cm. Find perimeter and area. A separate triangle has base 9 cm and perpendicular height 10 cm; find its area.
Meaning and conditions: A good notebook has separate labelled cards: rectangle perimeter P=2(l+w), rectangle area A=lw, triangle area A=½bh. The symbol b on the triangle card means base, while on another card it might mean a graph intercept. The notebook must define symbols locally rather than assume all letters mean the same thing everywhere.
One worked example: Rectangle perimeter=2(9+9)=36 cm. Rectangle area=9×9=81 cm². Triangle area=½×9×10=45 cm². The triangle’s height is perpendicular to its chosen base.
When this would be wrong: Applying A=lw to a perimeter question gives the wrong physical quantity. Using a slanted triangle side without perpendicularity proof is another modelling error. Unit checks—cm versus cm²—should appear prominently on the card.
Check: Trace the rectangle’s four sides for 36 cm and count an 9-by-9 square grid for 81 cm². For the triangle, two congruent copies make a base-by-height parallelogram or rectangle under suitable arrangement, confirming the half factor.
Later retrieval: Doubling both sides of the rectangle doubles its perimeter to 72 cm but quadruples area to 324 cm². Explain the different scaling as part of retrieval.
107. Card 22: choose the plane measure requested
Card prompt: A rectangular diagram has length 12 cm and width 16 cm. Find perimeter and area. A separate triangle has base 12 cm and perpendicular height 15 cm; find its area.
Meaning and conditions: A good notebook has separate labelled cards: rectangle perimeter P=2(l+w), rectangle area A=lw, triangle area A=½bh. The symbol b on the triangle card means base, while on another card it might mean a graph intercept. The notebook must define symbols locally rather than assume all letters mean the same thing everywhere.
One worked example: Rectangle perimeter=2(12+16)=56 cm. Rectangle area=12×16=192 cm². Triangle area=½×12×15=90 cm². The triangle’s height is perpendicular to its chosen base.
When this would be wrong: Applying A=lw to a perimeter question gives the wrong physical quantity. Using a slanted triangle side without perpendicularity proof is another modelling error. Unit checks—cm versus cm²—should appear prominently on the card.
Check: Trace the rectangle’s four sides for 56 cm and count an 12-by-16 square grid for 192 cm². For the triangle, two congruent copies make a base-by-height parallelogram or rectangle under suitable arrangement, confirming the half factor.
Later retrieval: Doubling both sides of the rectangle doubles its perimeter to 112 cm but quadruples area to 768 cm². Explain the different scaling as part of retrieval.
108. Card 23: choose the plane measure requested
Card prompt: A rectangular diagram has length 15 cm and width 4 cm. Find perimeter and area. A separate triangle has base 15 cm and perpendicular height 20 cm; find its area.
Meaning and conditions: A good notebook has separate labelled cards: rectangle perimeter P=2(l+w), rectangle area A=lw, triangle area A=½bh. The symbol b on the triangle card means base, while on another card it might mean a graph intercept. The notebook must define symbols locally rather than assume all letters mean the same thing everywhere.
One worked example: Rectangle perimeter=2(15+4)=38 cm. Rectangle area=15×4=60 cm². Triangle area=½×15×20=150 cm². The triangle’s height is perpendicular to its chosen base.
When this would be wrong: Applying A=lw to a perimeter question gives the wrong physical quantity. Using a slanted triangle side without perpendicularity proof is another modelling error. Unit checks—cm versus cm²—should appear prominently on the card.
Check: Trace the rectangle’s four sides for 38 cm and count an 15-by-4 square grid for 60 cm². For the triangle, two congruent copies make a base-by-height parallelogram or rectangle under suitable arrangement, confirming the half factor.
Later retrieval: Doubling both sides of the rectangle doubles its perimeter to 76 cm but quadruples area to 240 cm². Explain the different scaling as part of retrieval.
109. Card 24: choose the plane measure requested
Card prompt: A rectangular diagram has length 18 cm and width 11 cm. Find perimeter and area. A separate triangle has base 18 cm and perpendicular height 2 cm; find its area.
Meaning and conditions: A good notebook has separate labelled cards: rectangle perimeter P=2(l+w), rectangle area A=lw, triangle area A=½bh. The symbol b on the triangle card means base, while on another card it might mean a graph intercept. The notebook must define symbols locally rather than assume all letters mean the same thing everywhere.
One worked example: Rectangle perimeter=2(18+11)=58 cm. Rectangle area=18×11=198 cm². Triangle area=½×18×2=18 cm². The triangle’s height is perpendicular to its chosen base.
When this would be wrong: Applying A=lw to a perimeter question gives the wrong physical quantity. Using a slanted triangle side without perpendicularity proof is another modelling error. Unit checks—cm versus cm²—should appear prominently on the card.
Check: Trace the rectangle’s four sides for 58 cm and count an 18-by-11 square grid for 198 cm². For the triangle, two congruent copies make a base-by-height parallelogram or rectangle under suitable arrangement, confirming the half factor.
Later retrieval: Doubling both sides of the rectangle doubles its perimeter to 116 cm but quadruples area to 792 cm². Explain the different scaling as part of retrieval.
110. Card 25: choose the plane measure requested
Card prompt: A rectangular diagram has length 21 cm and width 18 cm. Find perimeter and area. A separate triangle has base 21 cm and perpendicular height 7 cm; find its area.
Meaning and conditions: A good notebook has separate labelled cards: rectangle perimeter P=2(l+w), rectangle area A=lw, triangle area A=½bh. The symbol b on the triangle card means base, while on another card it might mean a graph intercept. The notebook must define symbols locally rather than assume all letters mean the same thing everywhere.
One worked example: Rectangle perimeter=2(21+18)=78 cm. Rectangle area=21×18=378 cm². Triangle area=½×21×7=73.5 cm². The triangle’s height is perpendicular to its chosen base.
When this would be wrong: Applying A=lw to a perimeter question gives the wrong physical quantity. Using a slanted triangle side without perpendicularity proof is another modelling error. Unit checks—cm versus cm²—should appear prominently on the card.
Check: Trace the rectangle’s four sides for 78 cm and count an 21-by-18 square grid for 378 cm². For the triangle, two congruent copies make a base-by-height parallelogram or rectangle under suitable arrangement, confirming the half factor.
Later retrieval: Doubling both sides of the rectangle doubles its perimeter to 156 cm but quadruples area to 1512 cm². Explain the different scaling as part of retrieval.
111. Card 26: choose the plane measure requested
Card prompt: A rectangular diagram has length 24 cm and width 6 cm. Find perimeter and area. A separate triangle has base 24 cm and perpendicular height 12 cm; find its area.
Meaning and conditions: A good notebook has separate labelled cards: rectangle perimeter P=2(l+w), rectangle area A=lw, triangle area A=½bh. The symbol b on the triangle card means base, while on another card it might mean a graph intercept. The notebook must define symbols locally rather than assume all letters mean the same thing everywhere.
One worked example: Rectangle perimeter=2(24+6)=60 cm. Rectangle area=24×6=144 cm². Triangle area=½×24×12=144 cm². The triangle’s height is perpendicular to its chosen base.
When this would be wrong: Applying A=lw to a perimeter question gives the wrong physical quantity. Using a slanted triangle side without perpendicularity proof is another modelling error. Unit checks—cm versus cm²—should appear prominently on the card.
Check: Trace the rectangle’s four sides for 60 cm and count an 24-by-6 square grid for 144 cm². For the triangle, two congruent copies make a base-by-height parallelogram or rectangle under suitable arrangement, confirming the half factor.
Later retrieval: Doubling both sides of the rectangle doubles its perimeter to 120 cm but quadruples area to 576 cm². Explain the different scaling as part of retrieval.
112. Card 27: choose the plane measure requested
Card prompt: A rectangular diagram has length 27 cm and width 13 cm. Find perimeter and area. A separate triangle has base 27 cm and perpendicular height 17 cm; find its area.
Meaning and conditions: A good notebook has separate labelled cards: rectangle perimeter P=2(l+w), rectangle area A=lw, triangle area A=½bh. The symbol b on the triangle card means base, while on another card it might mean a graph intercept. The notebook must define symbols locally rather than assume all letters mean the same thing everywhere.
One worked example: Rectangle perimeter=2(27+13)=80 cm. Rectangle area=27×13=351 cm². Triangle area=½×27×17=229.5 cm². The triangle’s height is perpendicular to its chosen base.
When this would be wrong: Applying A=lw to a perimeter question gives the wrong physical quantity. Using a slanted triangle side without perpendicularity proof is another modelling error. Unit checks—cm versus cm²—should appear prominently on the card.
Check: Trace the rectangle’s four sides for 80 cm and count an 27-by-13 square grid for 351 cm². For the triangle, two congruent copies make a base-by-height parallelogram or rectangle under suitable arrangement, confirming the half factor.
Later retrieval: Doubling both sides of the rectangle doubles its perimeter to 160 cm but quadruples area to 1404 cm². Explain the different scaling as part of retrieval.
113. Card 28: choose the plane measure requested
Card prompt: A rectangular diagram has length 3 cm and width 20 cm. Find perimeter and area. A separate triangle has base 3 cm and perpendicular height 22 cm; find its area.
Meaning and conditions: A good notebook has separate labelled cards: rectangle perimeter P=2(l+w), rectangle area A=lw, triangle area A=½bh. The symbol b on the triangle card means base, while on another card it might mean a graph intercept. The notebook must define symbols locally rather than assume all letters mean the same thing everywhere.
One worked example: Rectangle perimeter=2(3+20)=46 cm. Rectangle area=3×20=60 cm². Triangle area=½×3×22=33 cm². The triangle’s height is perpendicular to its chosen base.
When this would be wrong: Applying A=lw to a perimeter question gives the wrong physical quantity. Using a slanted triangle side without perpendicularity proof is another modelling error. Unit checks—cm versus cm²—should appear prominently on the card.
Check: Trace the rectangle’s four sides for 46 cm and count an 3-by-20 square grid for 60 cm². For the triangle, two congruent copies make a base-by-height parallelogram or rectangle under suitable arrangement, confirming the half factor.
Later retrieval: Doubling both sides of the rectangle doubles its perimeter to 92 cm but quadruples area to 240 cm². Explain the different scaling as part of retrieval.
114. Card 29: choose the plane measure requested
Card prompt: A rectangular diagram has length 6 cm and width 8 cm. Find perimeter and area. A separate triangle has base 6 cm and perpendicular height 4 cm; find its area.
Meaning and conditions: A good notebook has separate labelled cards: rectangle perimeter P=2(l+w), rectangle area A=lw, triangle area A=½bh. The symbol b on the triangle card means base, while on another card it might mean a graph intercept. The notebook must define symbols locally rather than assume all letters mean the same thing everywhere.
One worked example: Rectangle perimeter=2(6+8)=28 cm. Rectangle area=6×8=48 cm². Triangle area=½×6×4=12 cm². The triangle’s height is perpendicular to its chosen base.
When this would be wrong: Applying A=lw to a perimeter question gives the wrong physical quantity. Using a slanted triangle side without perpendicularity proof is another modelling error. Unit checks—cm versus cm²—should appear prominently on the card.
Check: Trace the rectangle’s four sides for 28 cm and count an 6-by-8 square grid for 48 cm². For the triangle, two congruent copies make a base-by-height parallelogram or rectangle under suitable arrangement, confirming the half factor.
Later retrieval: Doubling both sides of the rectangle doubles its perimeter to 56 cm but quadruples area to 192 cm². Explain the different scaling as part of retrieval.
Circles, arcs and sector extensions
In circles, arcs and sector extensions, a notebook card should name the question that triggers the formula and the quantity it calculates. Read the worked example as one illustration of the relationship, not as fixed numbers to memorise. Pay attention to units, assumptions and a reverse check. If two formulas use the same letter, define that letter again in the local context.
115. Card 1: circle first, optional sector later
Card prompt: A circle has radius 2 cm. Calculate its exact full circumference and area. For an optional later-stage G1 extension, a central-angle sector measures 30°; describe its arc and sector area as fractions of the whole.
Meaning and conditions: Notebook heading one: circumference=2πr with length units; circle area=πr² with square units. Only after those are secure, a later-stage sector card can state arc=(θ/360)×2πr and sector area=(θ/360)×πr² for θ in degrees. This is not a claim that every current Secondary 2 G1 class is testing sectors.
One worked example: The complete circumference is 4π cm; the complete area is 4π cm². Sector share 30/360 produces arc (30/360)×4π cm≈1.047198 cm and sector area (30/360)×4π cm²≈1.047198 cm².
When this would be wrong: Using πr² for a curved arc, or 2πr for a covered surface, swaps two physical dimensions. Using diameter as radius in an area calculation causes a fourfold error. The notebook should show a circle with centre, radius and perimeter traced separately.
Check: Each sector amount is 30/360 of its respective full-circle quantity; multiplying by 360/30 would reconstruct the full circumference or full area. The units cm and cm² must remain distinct.
Later retrieval: If radius doubles, circumference doubles to 8π cm, while full area quadruples to 16π cm². The same linear-versus-square scaling applies to sector arc and sector area at unchanged angle.
116. Card 2: circle first, optional sector later
Card prompt: A circle has radius 7 cm. Calculate its exact full circumference and area. For an optional later-stage G1 extension, a central-angle sector measures 45°; describe its arc and sector area as fractions of the whole.
Meaning and conditions: Notebook heading one: circumference=2πr with length units; circle area=πr² with square units. Only after those are secure, a later-stage sector card can state arc=(θ/360)×2πr and sector area=(θ/360)×πr² for θ in degrees. This is not a claim that every current Secondary 2 G1 class is testing sectors.
One worked example: The complete circumference is 14π cm; the complete area is 49π cm². Sector share 45/360 produces arc (45/360)×14π cm≈5.497787 cm and sector area (45/360)×49π cm²≈19.242255 cm².
When this would be wrong: Using πr² for a curved arc, or 2πr for a covered surface, swaps two physical dimensions. Using diameter as radius in an area calculation causes a fourfold error. The notebook should show a circle with centre, radius and perimeter traced separately.
Check: Each sector amount is 45/360 of its respective full-circle quantity; multiplying by 360/45 would reconstruct the full circumference or full area. The units cm and cm² must remain distinct.
Later retrieval: If radius doubles, circumference doubles to 28π cm, while full area quadruples to 196π cm². The same linear-versus-square scaling applies to sector arc and sector area at unchanged angle.
117. Card 3: circle first, optional sector later
Card prompt: A circle has radius 12 cm. Calculate its exact full circumference and area. For an optional later-stage G1 extension, a central-angle sector measures 60°; describe its arc and sector area as fractions of the whole.
Meaning and conditions: Notebook heading one: circumference=2πr with length units; circle area=πr² with square units. Only after those are secure, a later-stage sector card can state arc=(θ/360)×2πr and sector area=(θ/360)×πr² for θ in degrees. This is not a claim that every current Secondary 2 G1 class is testing sectors.
One worked example: The complete circumference is 24π cm; the complete area is 144π cm². Sector share 60/360 produces arc (60/360)×24π cm≈12.566371 cm and sector area (60/360)×144π cm²≈75.398224 cm².
When this would be wrong: Using πr² for a curved arc, or 2πr for a covered surface, swaps two physical dimensions. Using diameter as radius in an area calculation causes a fourfold error. The notebook should show a circle with centre, radius and perimeter traced separately.
Check: Each sector amount is 60/360 of its respective full-circle quantity; multiplying by 360/60 would reconstruct the full circumference or full area. The units cm and cm² must remain distinct.
Later retrieval: If radius doubles, circumference doubles to 48π cm, while full area quadruples to 576π cm². The same linear-versus-square scaling applies to sector arc and sector area at unchanged angle.
118. Card 4: circle first, optional sector later
Card prompt: A circle has radius 17 cm. Calculate its exact full circumference and area. For an optional later-stage G1 extension, a central-angle sector measures 72°; describe its arc and sector area as fractions of the whole.
Meaning and conditions: Notebook heading one: circumference=2πr with length units; circle area=πr² with square units. Only after those are secure, a later-stage sector card can state arc=(θ/360)×2πr and sector area=(θ/360)×πr² for θ in degrees. This is not a claim that every current Secondary 2 G1 class is testing sectors.
One worked example: The complete circumference is 34π cm; the complete area is 289π cm². Sector share 72/360 produces arc (72/360)×34π cm≈21.36283 cm and sector area (72/360)×289π cm²≈181.584055 cm².
When this would be wrong: Using πr² for a curved arc, or 2πr for a covered surface, swaps two physical dimensions. Using diameter as radius in an area calculation causes a fourfold error. The notebook should show a circle with centre, radius and perimeter traced separately.
Check: Each sector amount is 72/360 of its respective full-circle quantity; multiplying by 360/72 would reconstruct the full circumference or full area. The units cm and cm² must remain distinct.
Later retrieval: If radius doubles, circumference doubles to 68π cm, while full area quadruples to 1156π cm². The same linear-versus-square scaling applies to sector arc and sector area at unchanged angle.
119. Card 5: circle first, optional sector later
Card prompt: A circle has radius 3 cm. Calculate its exact full circumference and area. For an optional later-stage G1 extension, a central-angle sector measures 90°; describe its arc and sector area as fractions of the whole.
Meaning and conditions: Notebook heading one: circumference=2πr with length units; circle area=πr² with square units. Only after those are secure, a later-stage sector card can state arc=(θ/360)×2πr and sector area=(θ/360)×πr² for θ in degrees. This is not a claim that every current Secondary 2 G1 class is testing sectors.
One worked example: The complete circumference is 6π cm; the complete area is 9π cm². Sector share 90/360 produces arc (90/360)×6π cm≈4.712389 cm and sector area (90/360)×9π cm²≈7.068583 cm².
When this would be wrong: Using πr² for a curved arc, or 2πr for a covered surface, swaps two physical dimensions. Using diameter as radius in an area calculation causes a fourfold error. The notebook should show a circle with centre, radius and perimeter traced separately.
Check: Each sector amount is 90/360 of its respective full-circle quantity; multiplying by 360/90 would reconstruct the full circumference or full area. The units cm and cm² must remain distinct.
Later retrieval: If radius doubles, circumference doubles to 12π cm, while full area quadruples to 36π cm². The same linear-versus-square scaling applies to sector arc and sector area at unchanged angle.
120. Card 6: circle first, optional sector later
Card prompt: A circle has radius 8 cm. Calculate its exact full circumference and area. For an optional later-stage G1 extension, a central-angle sector measures 120°; describe its arc and sector area as fractions of the whole.
Meaning and conditions: Notebook heading one: circumference=2πr with length units; circle area=πr² with square units. Only after those are secure, a later-stage sector card can state arc=(θ/360)×2πr and sector area=(θ/360)×πr² for θ in degrees. This is not a claim that every current Secondary 2 G1 class is testing sectors.
One worked example: The complete circumference is 16π cm; the complete area is 64π cm². Sector share 120/360 produces arc (120/360)×16π cm≈16.755161 cm and sector area (120/360)×64π cm²≈67.020643 cm².
When this would be wrong: Using πr² for a curved arc, or 2πr for a covered surface, swaps two physical dimensions. Using diameter as radius in an area calculation causes a fourfold error. The notebook should show a circle with centre, radius and perimeter traced separately.
Check: Each sector amount is 120/360 of its respective full-circle quantity; multiplying by 360/120 would reconstruct the full circumference or full area. The units cm and cm² must remain distinct.
Later retrieval: If radius doubles, circumference doubles to 32π cm, while full area quadruples to 256π cm². The same linear-versus-square scaling applies to sector arc and sector area at unchanged angle.
121. Card 7: circle first, optional sector later
Card prompt: A circle has radius 13 cm. Calculate its exact full circumference and area. For an optional later-stage G1 extension, a central-angle sector measures 135°; describe its arc and sector area as fractions of the whole.
Meaning and conditions: Notebook heading one: circumference=2πr with length units; circle area=πr² with square units. Only after those are secure, a later-stage sector card can state arc=(θ/360)×2πr and sector area=(θ/360)×πr² for θ in degrees. This is not a claim that every current Secondary 2 G1 class is testing sectors.
One worked example: The complete circumference is 26π cm; the complete area is 169π cm². Sector share 135/360 produces arc (135/360)×26π cm≈30.630528 cm and sector area (135/360)×169π cm²≈199.098434 cm².
When this would be wrong: Using πr² for a curved arc, or 2πr for a covered surface, swaps two physical dimensions. Using diameter as radius in an area calculation causes a fourfold error. The notebook should show a circle with centre, radius and perimeter traced separately.
Check: Each sector amount is 135/360 of its respective full-circle quantity; multiplying by 360/135 would reconstruct the full circumference or full area. The units cm and cm² must remain distinct.
Later retrieval: If radius doubles, circumference doubles to 52π cm, while full area quadruples to 676π cm². The same linear-versus-square scaling applies to sector arc and sector area at unchanged angle.
122. Card 8: circle first, optional sector later
Card prompt: A circle has radius 18 cm. Calculate its exact full circumference and area. For an optional later-stage G1 extension, a central-angle sector measures 150°; describe its arc and sector area as fractions of the whole.
Meaning and conditions: Notebook heading one: circumference=2πr with length units; circle area=πr² with square units. Only after those are secure, a later-stage sector card can state arc=(θ/360)×2πr and sector area=(θ/360)×πr² for θ in degrees. This is not a claim that every current Secondary 2 G1 class is testing sectors.
One worked example: The complete circumference is 36π cm; the complete area is 324π cm². Sector share 150/360 produces arc (150/360)×36π cm≈47.12389 cm and sector area (150/360)×324π cm²≈424.115008 cm².
When this would be wrong: Using πr² for a curved arc, or 2πr for a covered surface, swaps two physical dimensions. Using diameter as radius in an area calculation causes a fourfold error. The notebook should show a circle with centre, radius and perimeter traced separately.
Check: Each sector amount is 150/360 of its respective full-circle quantity; multiplying by 360/150 would reconstruct the full circumference or full area. The units cm and cm² must remain distinct.
Later retrieval: If radius doubles, circumference doubles to 72π cm, while full area quadruples to 1296π cm². The same linear-versus-square scaling applies to sector arc and sector area at unchanged angle.
123. Card 9: circle first, optional sector later
Card prompt: A circle has radius 4 cm. Calculate its exact full circumference and area. For an optional later-stage G1 extension, a central-angle sector measures 180°; describe its arc and sector area as fractions of the whole.
Meaning and conditions: Notebook heading one: circumference=2πr with length units; circle area=πr² with square units. Only after those are secure, a later-stage sector card can state arc=(θ/360)×2πr and sector area=(θ/360)×πr² for θ in degrees. This is not a claim that every current Secondary 2 G1 class is testing sectors.
One worked example: The complete circumference is 8π cm; the complete area is 16π cm². Sector share 180/360 produces arc (180/360)×8π cm≈12.566371 cm and sector area (180/360)×16π cm²≈25.132741 cm².
When this would be wrong: Using πr² for a curved arc, or 2πr for a covered surface, swaps two physical dimensions. Using diameter as radius in an area calculation causes a fourfold error. The notebook should show a circle with centre, radius and perimeter traced separately.
Check: Each sector amount is 180/360 of its respective full-circle quantity; multiplying by 360/180 would reconstruct the full circumference or full area. The units cm and cm² must remain distinct.
Later retrieval: If radius doubles, circumference doubles to 16π cm, while full area quadruples to 64π cm². The same linear-versus-square scaling applies to sector arc and sector area at unchanged angle.
124. Card 10: circle first, optional sector later
Card prompt: A circle has radius 9 cm. Calculate its exact full circumference and area. For an optional later-stage G1 extension, a central-angle sector measures 240°; describe its arc and sector area as fractions of the whole.
Meaning and conditions: Notebook heading one: circumference=2πr with length units; circle area=πr² with square units. Only after those are secure, a later-stage sector card can state arc=(θ/360)×2πr and sector area=(θ/360)×πr² for θ in degrees. This is not a claim that every current Secondary 2 G1 class is testing sectors.
One worked example: The complete circumference is 18π cm; the complete area is 81π cm². Sector share 240/360 produces arc (240/360)×18π cm≈37.699112 cm and sector area (240/360)×81π cm²≈169.646003 cm².
When this would be wrong: Using πr² for a curved arc, or 2πr for a covered surface, swaps two physical dimensions. Using diameter as radius in an area calculation causes a fourfold error. The notebook should show a circle with centre, radius and perimeter traced separately.
Check: Each sector amount is 240/360 of its respective full-circle quantity; multiplying by 360/240 would reconstruct the full circumference or full area. The units cm and cm² must remain distinct.
Later retrieval: If radius doubles, circumference doubles to 36π cm, while full area quadruples to 324π cm². The same linear-versus-square scaling applies to sector arc and sector area at unchanged angle.
125. Card 11: circle first, optional sector later
Card prompt: A circle has radius 14 cm. Calculate its exact full circumference and area. For an optional later-stage G1 extension, a central-angle sector measures 30°; describe its arc and sector area as fractions of the whole.
Meaning and conditions: Notebook heading one: circumference=2πr with length units; circle area=πr² with square units. Only after those are secure, a later-stage sector card can state arc=(θ/360)×2πr and sector area=(θ/360)×πr² for θ in degrees. This is not a claim that every current Secondary 2 G1 class is testing sectors.
One worked example: The complete circumference is 28π cm; the complete area is 196π cm². Sector share 30/360 produces arc (30/360)×28π cm≈7.330383 cm and sector area (30/360)×196π cm²≈51.31268 cm².
When this would be wrong: Using πr² for a curved arc, or 2πr for a covered surface, swaps two physical dimensions. Using diameter as radius in an area calculation causes a fourfold error. The notebook should show a circle with centre, radius and perimeter traced separately.
Check: Each sector amount is 30/360 of its respective full-circle quantity; multiplying by 360/30 would reconstruct the full circumference or full area. The units cm and cm² must remain distinct.
Later retrieval: If radius doubles, circumference doubles to 56π cm, while full area quadruples to 784π cm². The same linear-versus-square scaling applies to sector arc and sector area at unchanged angle.
126. Card 12: circle first, optional sector later
Card prompt: A circle has radius 19 cm. Calculate its exact full circumference and area. For an optional later-stage G1 extension, a central-angle sector measures 45°; describe its arc and sector area as fractions of the whole.
Meaning and conditions: Notebook heading one: circumference=2πr with length units; circle area=πr² with square units. Only after those are secure, a later-stage sector card can state arc=(θ/360)×2πr and sector area=(θ/360)×πr² for θ in degrees. This is not a claim that every current Secondary 2 G1 class is testing sectors.
One worked example: The complete circumference is 38π cm; the complete area is 361π cm². Sector share 45/360 produces arc (45/360)×38π cm≈14.922565 cm and sector area (45/360)×361π cm²≈141.764368 cm².
When this would be wrong: Using πr² for a curved arc, or 2πr for a covered surface, swaps two physical dimensions. Using diameter as radius in an area calculation causes a fourfold error. The notebook should show a circle with centre, radius and perimeter traced separately.
Check: Each sector amount is 45/360 of its respective full-circle quantity; multiplying by 360/45 would reconstruct the full circumference or full area. The units cm and cm² must remain distinct.
Later retrieval: If radius doubles, circumference doubles to 76π cm, while full area quadruples to 1444π cm². The same linear-versus-square scaling applies to sector arc and sector area at unchanged angle.
127. Card 13: circle first, optional sector later
Card prompt: A circle has radius 5 cm. Calculate its exact full circumference and area. For an optional later-stage G1 extension, a central-angle sector measures 60°; describe its arc and sector area as fractions of the whole.
Meaning and conditions: Notebook heading one: circumference=2πr with length units; circle area=πr² with square units. Only after those are secure, a later-stage sector card can state arc=(θ/360)×2πr and sector area=(θ/360)×πr² for θ in degrees. This is not a claim that every current Secondary 2 G1 class is testing sectors.
One worked example: The complete circumference is 10π cm; the complete area is 25π cm². Sector share 60/360 produces arc (60/360)×10π cm≈5.235988 cm and sector area (60/360)×25π cm²≈13.089969 cm².
When this would be wrong: Using πr² for a curved arc, or 2πr for a covered surface, swaps two physical dimensions. Using diameter as radius in an area calculation causes a fourfold error. The notebook should show a circle with centre, radius and perimeter traced separately.
Check: Each sector amount is 60/360 of its respective full-circle quantity; multiplying by 360/60 would reconstruct the full circumference or full area. The units cm and cm² must remain distinct.
Later retrieval: If radius doubles, circumference doubles to 20π cm, while full area quadruples to 100π cm². The same linear-versus-square scaling applies to sector arc and sector area at unchanged angle.
128. Card 14: circle first, optional sector later
Card prompt: A circle has radius 10 cm. Calculate its exact full circumference and area. For an optional later-stage G1 extension, a central-angle sector measures 72°; describe its arc and sector area as fractions of the whole.
Meaning and conditions: Notebook heading one: circumference=2πr with length units; circle area=πr² with square units. Only after those are secure, a later-stage sector card can state arc=(θ/360)×2πr and sector area=(θ/360)×πr² for θ in degrees. This is not a claim that every current Secondary 2 G1 class is testing sectors.
One worked example: The complete circumference is 20π cm; the complete area is 100π cm². Sector share 72/360 produces arc (72/360)×20π cm≈12.566371 cm and sector area (72/360)×100π cm²≈62.831853 cm².
When this would be wrong: Using πr² for a curved arc, or 2πr for a covered surface, swaps two physical dimensions. Using diameter as radius in an area calculation causes a fourfold error. The notebook should show a circle with centre, radius and perimeter traced separately.
Check: Each sector amount is 72/360 of its respective full-circle quantity; multiplying by 360/72 would reconstruct the full circumference or full area. The units cm and cm² must remain distinct.
Later retrieval: If radius doubles, circumference doubles to 40π cm, while full area quadruples to 400π cm². The same linear-versus-square scaling applies to sector arc and sector area at unchanged angle.
129. Card 15: circle first, optional sector later
Card prompt: A circle has radius 15 cm. Calculate its exact full circumference and area. For an optional later-stage G1 extension, a central-angle sector measures 90°; describe its arc and sector area as fractions of the whole.
Meaning and conditions: Notebook heading one: circumference=2πr with length units; circle area=πr² with square units. Only after those are secure, a later-stage sector card can state arc=(θ/360)×2πr and sector area=(θ/360)×πr² for θ in degrees. This is not a claim that every current Secondary 2 G1 class is testing sectors.
One worked example: The complete circumference is 30π cm; the complete area is 225π cm². Sector share 90/360 produces arc (90/360)×30π cm≈23.561945 cm and sector area (90/360)×225π cm²≈176.714587 cm².
When this would be wrong: Using πr² for a curved arc, or 2πr for a covered surface, swaps two physical dimensions. Using diameter as radius in an area calculation causes a fourfold error. The notebook should show a circle with centre, radius and perimeter traced separately.
Check: Each sector amount is 90/360 of its respective full-circle quantity; multiplying by 360/90 would reconstruct the full circumference or full area. The units cm and cm² must remain distinct.
Later retrieval: If radius doubles, circumference doubles to 60π cm, while full area quadruples to 900π cm². The same linear-versus-square scaling applies to sector arc and sector area at unchanged angle.
130. Card 16: circle first, optional sector later
Card prompt: A circle has radius 20 cm. Calculate its exact full circumference and area. For an optional later-stage G1 extension, a central-angle sector measures 120°; describe its arc and sector area as fractions of the whole.
Meaning and conditions: Notebook heading one: circumference=2πr with length units; circle area=πr² with square units. Only after those are secure, a later-stage sector card can state arc=(θ/360)×2πr and sector area=(θ/360)×πr² for θ in degrees. This is not a claim that every current Secondary 2 G1 class is testing sectors.
One worked example: The complete circumference is 40π cm; the complete area is 400π cm². Sector share 120/360 produces arc (120/360)×40π cm≈41.887902 cm and sector area (120/360)×400π cm²≈418.87902 cm².
When this would be wrong: Using πr² for a curved arc, or 2πr for a covered surface, swaps two physical dimensions. Using diameter as radius in an area calculation causes a fourfold error. The notebook should show a circle with centre, radius and perimeter traced separately.
Check: Each sector amount is 120/360 of its respective full-circle quantity; multiplying by 360/120 would reconstruct the full circumference or full area. The units cm and cm² must remain distinct.
Later retrieval: If radius doubles, circumference doubles to 80π cm, while full area quadruples to 1600π cm². The same linear-versus-square scaling applies to sector arc and sector area at unchanged angle.
131. Card 17: circle first, optional sector later
Card prompt: A circle has radius 6 cm. Calculate its exact full circumference and area. For an optional later-stage G1 extension, a central-angle sector measures 135°; describe its arc and sector area as fractions of the whole.
Meaning and conditions: Notebook heading one: circumference=2πr with length units; circle area=πr² with square units. Only after those are secure, a later-stage sector card can state arc=(θ/360)×2πr and sector area=(θ/360)×πr² for θ in degrees. This is not a claim that every current Secondary 2 G1 class is testing sectors.
One worked example: The complete circumference is 12π cm; the complete area is 36π cm². Sector share 135/360 produces arc (135/360)×12π cm≈14.137167 cm and sector area (135/360)×36π cm²≈42.411501 cm².
When this would be wrong: Using πr² for a curved arc, or 2πr for a covered surface, swaps two physical dimensions. Using diameter as radius in an area calculation causes a fourfold error. The notebook should show a circle with centre, radius and perimeter traced separately.
Check: Each sector amount is 135/360 of its respective full-circle quantity; multiplying by 360/135 would reconstruct the full circumference or full area. The units cm and cm² must remain distinct.
Later retrieval: If radius doubles, circumference doubles to 24π cm, while full area quadruples to 144π cm². The same linear-versus-square scaling applies to sector arc and sector area at unchanged angle.
132. Card 18: circle first, optional sector later
Card prompt: A circle has radius 11 cm. Calculate its exact full circumference and area. For an optional later-stage G1 extension, a central-angle sector measures 150°; describe its arc and sector area as fractions of the whole.
Meaning and conditions: Notebook heading one: circumference=2πr with length units; circle area=πr² with square units. Only after those are secure, a later-stage sector card can state arc=(θ/360)×2πr and sector area=(θ/360)×πr² for θ in degrees. This is not a claim that every current Secondary 2 G1 class is testing sectors.
One worked example: The complete circumference is 22π cm; the complete area is 121π cm². Sector share 150/360 produces arc (150/360)×22π cm≈28.797933 cm and sector area (150/360)×121π cm²≈158.38863 cm².
When this would be wrong: Using πr² for a curved arc, or 2πr for a covered surface, swaps two physical dimensions. Using diameter as radius in an area calculation causes a fourfold error. The notebook should show a circle with centre, radius and perimeter traced separately.
Check: Each sector amount is 150/360 of its respective full-circle quantity; multiplying by 360/150 would reconstruct the full circumference or full area. The units cm and cm² must remain distinct.
Later retrieval: If radius doubles, circumference doubles to 44π cm, while full area quadruples to 484π cm². The same linear-versus-square scaling applies to sector arc and sector area at unchanged angle.
133. Card 19: circle first, optional sector later
Card prompt: A circle has radius 16 cm. Calculate its exact full circumference and area. For an optional later-stage G1 extension, a central-angle sector measures 180°; describe its arc and sector area as fractions of the whole.
Meaning and conditions: Notebook heading one: circumference=2πr with length units; circle area=πr² with square units. Only after those are secure, a later-stage sector card can state arc=(θ/360)×2πr and sector area=(θ/360)×πr² for θ in degrees. This is not a claim that every current Secondary 2 G1 class is testing sectors.
One worked example: The complete circumference is 32π cm; the complete area is 256π cm². Sector share 180/360 produces arc (180/360)×32π cm≈50.265482 cm and sector area (180/360)×256π cm²≈402.12386 cm².
When this would be wrong: Using πr² for a curved arc, or 2πr for a covered surface, swaps two physical dimensions. Using diameter as radius in an area calculation causes a fourfold error. The notebook should show a circle with centre, radius and perimeter traced separately.
Check: Each sector amount is 180/360 of its respective full-circle quantity; multiplying by 360/180 would reconstruct the full circumference or full area. The units cm and cm² must remain distinct.
Later retrieval: If radius doubles, circumference doubles to 64π cm, while full area quadruples to 1024π cm². The same linear-versus-square scaling applies to sector arc and sector area at unchanged angle.
134. Card 20: circle first, optional sector later
Card prompt: A circle has radius 2 cm. Calculate its exact full circumference and area. For an optional later-stage G1 extension, a central-angle sector measures 240°; describe its arc and sector area as fractions of the whole.
Meaning and conditions: Notebook heading one: circumference=2πr with length units; circle area=πr² with square units. Only after those are secure, a later-stage sector card can state arc=(θ/360)×2πr and sector area=(θ/360)×πr² for θ in degrees. This is not a claim that every current Secondary 2 G1 class is testing sectors.
One worked example: The complete circumference is 4π cm; the complete area is 4π cm². Sector share 240/360 produces arc (240/360)×4π cm≈8.37758 cm and sector area (240/360)×4π cm²≈8.37758 cm².
When this would be wrong: Using πr² for a curved arc, or 2πr for a covered surface, swaps two physical dimensions. Using diameter as radius in an area calculation causes a fourfold error. The notebook should show a circle with centre, radius and perimeter traced separately.
Check: Each sector amount is 240/360 of its respective full-circle quantity; multiplying by 360/240 would reconstruct the full circumference or full area. The units cm and cm² must remain distinct.
Later retrieval: If radius doubles, circumference doubles to 8π cm, while full area quadruples to 16π cm². The same linear-versus-square scaling applies to sector arc and sector area at unchanged angle.
135. Card 21: circle first, optional sector later
Card prompt: A circle has radius 7 cm. Calculate its exact full circumference and area. For an optional later-stage G1 extension, a central-angle sector measures 30°; describe its arc and sector area as fractions of the whole.
Meaning and conditions: Notebook heading one: circumference=2πr with length units; circle area=πr² with square units. Only after those are secure, a later-stage sector card can state arc=(θ/360)×2πr and sector area=(θ/360)×πr² for θ in degrees. This is not a claim that every current Secondary 2 G1 class is testing sectors.
One worked example: The complete circumference is 14π cm; the complete area is 49π cm². Sector share 30/360 produces arc (30/360)×14π cm≈3.665191 cm and sector area (30/360)×49π cm²≈12.82817 cm².
When this would be wrong: Using πr² for a curved arc, or 2πr for a covered surface, swaps two physical dimensions. Using diameter as radius in an area calculation causes a fourfold error. The notebook should show a circle with centre, radius and perimeter traced separately.
Check: Each sector amount is 30/360 of its respective full-circle quantity; multiplying by 360/30 would reconstruct the full circumference or full area. The units cm and cm² must remain distinct.
Later retrieval: If radius doubles, circumference doubles to 28π cm, while full area quadruples to 196π cm². The same linear-versus-square scaling applies to sector arc and sector area at unchanged angle.
136. Card 22: circle first, optional sector later
Card prompt: A circle has radius 12 cm. Calculate its exact full circumference and area. For an optional later-stage G1 extension, a central-angle sector measures 45°; describe its arc and sector area as fractions of the whole.
Meaning and conditions: Notebook heading one: circumference=2πr with length units; circle area=πr² with square units. Only after those are secure, a later-stage sector card can state arc=(θ/360)×2πr and sector area=(θ/360)×πr² for θ in degrees. This is not a claim that every current Secondary 2 G1 class is testing sectors.
One worked example: The complete circumference is 24π cm; the complete area is 144π cm². Sector share 45/360 produces arc (45/360)×24π cm≈9.424778 cm and sector area (45/360)×144π cm²≈56.548668 cm².
When this would be wrong: Using πr² for a curved arc, or 2πr for a covered surface, swaps two physical dimensions. Using diameter as radius in an area calculation causes a fourfold error. The notebook should show a circle with centre, radius and perimeter traced separately.
Check: Each sector amount is 45/360 of its respective full-circle quantity; multiplying by 360/45 would reconstruct the full circumference or full area. The units cm and cm² must remain distinct.
Later retrieval: If radius doubles, circumference doubles to 48π cm, while full area quadruples to 576π cm². The same linear-versus-square scaling applies to sector arc and sector area at unchanged angle.
137. Card 23: circle first, optional sector later
Card prompt: A circle has radius 17 cm. Calculate its exact full circumference and area. For an optional later-stage G1 extension, a central-angle sector measures 60°; describe its arc and sector area as fractions of the whole.
Meaning and conditions: Notebook heading one: circumference=2πr with length units; circle area=πr² with square units. Only after those are secure, a later-stage sector card can state arc=(θ/360)×2πr and sector area=(θ/360)×πr² for θ in degrees. This is not a claim that every current Secondary 2 G1 class is testing sectors.
One worked example: The complete circumference is 34π cm; the complete area is 289π cm². Sector share 60/360 produces arc (60/360)×34π cm≈17.802358 cm and sector area (60/360)×289π cm²≈151.320046 cm².
When this would be wrong: Using πr² for a curved arc, or 2πr for a covered surface, swaps two physical dimensions. Using diameter as radius in an area calculation causes a fourfold error. The notebook should show a circle with centre, radius and perimeter traced separately.
Check: Each sector amount is 60/360 of its respective full-circle quantity; multiplying by 360/60 would reconstruct the full circumference or full area. The units cm and cm² must remain distinct.
Later retrieval: If radius doubles, circumference doubles to 68π cm, while full area quadruples to 1156π cm². The same linear-versus-square scaling applies to sector arc and sector area at unchanged angle.
138. Card 24: circle first, optional sector later
Card prompt: A circle has radius 3 cm. Calculate its exact full circumference and area. For an optional later-stage G1 extension, a central-angle sector measures 72°; describe its arc and sector area as fractions of the whole.
Meaning and conditions: Notebook heading one: circumference=2πr with length units; circle area=πr² with square units. Only after those are secure, a later-stage sector card can state arc=(θ/360)×2πr and sector area=(θ/360)×πr² for θ in degrees. This is not a claim that every current Secondary 2 G1 class is testing sectors.
One worked example: The complete circumference is 6π cm; the complete area is 9π cm². Sector share 72/360 produces arc (72/360)×6π cm≈3.769911 cm and sector area (72/360)×9π cm²≈5.654867 cm².
When this would be wrong: Using πr² for a curved arc, or 2πr for a covered surface, swaps two physical dimensions. Using diameter as radius in an area calculation causes a fourfold error. The notebook should show a circle with centre, radius and perimeter traced separately.
Check: Each sector amount is 72/360 of its respective full-circle quantity; multiplying by 360/72 would reconstruct the full circumference or full area. The units cm and cm² must remain distinct.
Later retrieval: If radius doubles, circumference doubles to 12π cm, while full area quadruples to 36π cm². The same linear-versus-square scaling applies to sector arc and sector area at unchanged angle.
139. Card 25: circle first, optional sector later
Card prompt: A circle has radius 8 cm. Calculate its exact full circumference and area. For an optional later-stage G1 extension, a central-angle sector measures 90°; describe its arc and sector area as fractions of the whole.
Meaning and conditions: Notebook heading one: circumference=2πr with length units; circle area=πr² with square units. Only after those are secure, a later-stage sector card can state arc=(θ/360)×2πr and sector area=(θ/360)×πr² for θ in degrees. This is not a claim that every current Secondary 2 G1 class is testing sectors.
One worked example: The complete circumference is 16π cm; the complete area is 64π cm². Sector share 90/360 produces arc (90/360)×16π cm≈12.566371 cm and sector area (90/360)×64π cm²≈50.265482 cm².
When this would be wrong: Using πr² for a curved arc, or 2πr for a covered surface, swaps two physical dimensions. Using diameter as radius in an area calculation causes a fourfold error. The notebook should show a circle with centre, radius and perimeter traced separately.
Check: Each sector amount is 90/360 of its respective full-circle quantity; multiplying by 360/90 would reconstruct the full circumference or full area. The units cm and cm² must remain distinct.
Later retrieval: If radius doubles, circumference doubles to 32π cm, while full area quadruples to 256π cm². The same linear-versus-square scaling applies to sector arc and sector area at unchanged angle.
140. Card 26: circle first, optional sector later
Card prompt: A circle has radius 13 cm. Calculate its exact full circumference and area. For an optional later-stage G1 extension, a central-angle sector measures 120°; describe its arc and sector area as fractions of the whole.
Meaning and conditions: Notebook heading one: circumference=2πr with length units; circle area=πr² with square units. Only after those are secure, a later-stage sector card can state arc=(θ/360)×2πr and sector area=(θ/360)×πr² for θ in degrees. This is not a claim that every current Secondary 2 G1 class is testing sectors.
One worked example: The complete circumference is 26π cm; the complete area is 169π cm². Sector share 120/360 produces arc (120/360)×26π cm≈27.227136 cm and sector area (120/360)×169π cm²≈176.976386 cm².
When this would be wrong: Using πr² for a curved arc, or 2πr for a covered surface, swaps two physical dimensions. Using diameter as radius in an area calculation causes a fourfold error. The notebook should show a circle with centre, radius and perimeter traced separately.
Check: Each sector amount is 120/360 of its respective full-circle quantity; multiplying by 360/120 would reconstruct the full circumference or full area. The units cm and cm² must remain distinct.
Later retrieval: If radius doubles, circumference doubles to 52π cm, while full area quadruples to 676π cm². The same linear-versus-square scaling applies to sector arc and sector area at unchanged angle.
141. Card 27: circle first, optional sector later
Card prompt: A circle has radius 18 cm. Calculate its exact full circumference and area. For an optional later-stage G1 extension, a central-angle sector measures 135°; describe its arc and sector area as fractions of the whole.
Meaning and conditions: Notebook heading one: circumference=2πr with length units; circle area=πr² with square units. Only after those are secure, a later-stage sector card can state arc=(θ/360)×2πr and sector area=(θ/360)×πr² for θ in degrees. This is not a claim that every current Secondary 2 G1 class is testing sectors.
One worked example: The complete circumference is 36π cm; the complete area is 324π cm². Sector share 135/360 produces arc (135/360)×36π cm≈42.411501 cm and sector area (135/360)×324π cm²≈381.703507 cm².
When this would be wrong: Using πr² for a curved arc, or 2πr for a covered surface, swaps two physical dimensions. Using diameter as radius in an area calculation causes a fourfold error. The notebook should show a circle with centre, radius and perimeter traced separately.
Check: Each sector amount is 135/360 of its respective full-circle quantity; multiplying by 360/135 would reconstruct the full circumference or full area. The units cm and cm² must remain distinct.
Later retrieval: If radius doubles, circumference doubles to 72π cm, while full area quadruples to 1296π cm². The same linear-versus-square scaling applies to sector arc and sector area at unchanged angle.
142. Card 28: circle first, optional sector later
Card prompt: A circle has radius 4 cm. Calculate its exact full circumference and area. For an optional later-stage G1 extension, a central-angle sector measures 150°; describe its arc and sector area as fractions of the whole.
Meaning and conditions: Notebook heading one: circumference=2πr with length units; circle area=πr² with square units. Only after those are secure, a later-stage sector card can state arc=(θ/360)×2πr and sector area=(θ/360)×πr² for θ in degrees. This is not a claim that every current Secondary 2 G1 class is testing sectors.
One worked example: The complete circumference is 8π cm; the complete area is 16π cm². Sector share 150/360 produces arc (150/360)×8π cm≈10.471976 cm and sector area (150/360)×16π cm²≈20.943951 cm².
When this would be wrong: Using πr² for a curved arc, or 2πr for a covered surface, swaps two physical dimensions. Using diameter as radius in an area calculation causes a fourfold error. The notebook should show a circle with centre, radius and perimeter traced separately.
Check: Each sector amount is 150/360 of its respective full-circle quantity; multiplying by 360/150 would reconstruct the full circumference or full area. The units cm and cm² must remain distinct.
Later retrieval: If radius doubles, circumference doubles to 16π cm, while full area quadruples to 64π cm². The same linear-versus-square scaling applies to sector arc and sector area at unchanged angle.
Cuboids, prisms and cylinders
In cuboids, prisms and cylinders, a notebook card should name the question that triggers the formula and the quantity it calculates. Read the worked example as one illustration of the relationship, not as fixed numbers to memorise. Pay attention to units, assumptions and a reverse check. If two formulas use the same letter, define that letter again in the local context.
143. Card 1: cuboid volume versus surface area
Card prompt: An ideal closed cuboid has dimensions 3 cm × 2 cm × 4 cm. Use a formula notebook to find its volume and total area of the six outside faces, and check their different units.
Meaning and conditions: Notebook card: cuboid volume=length×width×height, which multiplies three lengths and yields cm³. A separate card says closed cuboid surface area=2(lw+lh+wh) for all six faces, yielding cm². The two formulas describe interior space versus exterior covering.
One worked example: Volume=3×2×4=24 cm³. Surface area=2(6+12+8)=52 cm². A net would show two matching faces of each dimension pair, explaining the factor two.
When this would be wrong: A child who uses 24 as an area or 52 as a volume has chosen a formula for a different quantity. An open-top box would also lack one exterior face, so the closed-box card does not automatically apply to every container.
Check: For volume, divide by one known dimension to recover an area, then by another to recover the remaining length. For surface area, sum all six face areas directly; the result must match 52.
Later retrieval: If only height increased to 5 cm, volume would rise by 6 cm³ while total surface area would rise by 2(3+2)=10 cm². A useful notebook includes this changed-dimension explanation.
144. Card 2: cuboid volume versus surface area
Card prompt: An ideal closed cuboid has dimensions 6 cm × 7 cm × 11 cm. Use a formula notebook to find its volume and total area of the six outside faces, and check their different units.
Meaning and conditions: Notebook card: cuboid volume=length×width×height, which multiplies three lengths and yields cm³. A separate card says closed cuboid surface area=2(lw+lh+wh) for all six faces, yielding cm². The two formulas describe interior space versus exterior covering.
One worked example: Volume=6×7×11=462 cm³. Surface area=2(42+66+77)=370 cm². A net would show two matching faces of each dimension pair, explaining the factor two.
When this would be wrong: A child who uses 462 as an area or 370 as a volume has chosen a formula for a different quantity. An open-top box would also lack one exterior face, so the closed-box card does not automatically apply to every container.
Check: For volume, divide by one known dimension to recover an area, then by another to recover the remaining length. For surface area, sum all six face areas directly; the result must match 370.
Later retrieval: If only height increased to 12 cm, volume would rise by 42 cm³ while total surface area would rise by 2(6+7)=26 cm². A useful notebook includes this changed-dimension explanation.
145. Card 3: cuboid volume versus surface area
Card prompt: An ideal closed cuboid has dimensions 9 cm × 12 cm × 4 cm. Use a formula notebook to find its volume and total area of the six outside faces, and check their different units.
Meaning and conditions: Notebook card: cuboid volume=length×width×height, which multiplies three lengths and yields cm³. A separate card says closed cuboid surface area=2(lw+lh+wh) for all six faces, yielding cm². The two formulas describe interior space versus exterior covering.
One worked example: Volume=9×12×4=432 cm³. Surface area=2(108+36+48)=384 cm². A net would show two matching faces of each dimension pair, explaining the factor two.
When this would be wrong: A child who uses 432 as an area or 384 as a volume has chosen a formula for a different quantity. An open-top box would also lack one exterior face, so the closed-box card does not automatically apply to every container.
Check: For volume, divide by one known dimension to recover an area, then by another to recover the remaining length. For surface area, sum all six face areas directly; the result must match 384.
Later retrieval: If only height increased to 5 cm, volume would rise by 108 cm³ while total surface area would rise by 2(9+12)=42 cm². A useful notebook includes this changed-dimension explanation.
146. Card 4: cuboid volume versus surface area
Card prompt: An ideal closed cuboid has dimensions 12 cm × 4 cm × 11 cm. Use a formula notebook to find its volume and total area of the six outside faces, and check their different units.
Meaning and conditions: Notebook card: cuboid volume=length×width×height, which multiplies three lengths and yields cm³. A separate card says closed cuboid surface area=2(lw+lh+wh) for all six faces, yielding cm². The two formulas describe interior space versus exterior covering.
One worked example: Volume=12×4×11=528 cm³. Surface area=2(48+132+44)=448 cm². A net would show two matching faces of each dimension pair, explaining the factor two.
When this would be wrong: A child who uses 528 as an area or 448 as a volume has chosen a formula for a different quantity. An open-top box would also lack one exterior face, so the closed-box card does not automatically apply to every container.
Check: For volume, divide by one known dimension to recover an area, then by another to recover the remaining length. For surface area, sum all six face areas directly; the result must match 448.
Later retrieval: If only height increased to 12 cm, volume would rise by 48 cm³ while total surface area would rise by 2(12+4)=32 cm². A useful notebook includes this changed-dimension explanation.
147. Card 5: cuboid volume versus surface area
Card prompt: An ideal closed cuboid has dimensions 15 cm × 9 cm × 4 cm. Use a formula notebook to find its volume and total area of the six outside faces, and check their different units.
Meaning and conditions: Notebook card: cuboid volume=length×width×height, which multiplies three lengths and yields cm³. A separate card says closed cuboid surface area=2(lw+lh+wh) for all six faces, yielding cm². The two formulas describe interior space versus exterior covering.
One worked example: Volume=15×9×4=540 cm³. Surface area=2(135+60+36)=462 cm². A net would show two matching faces of each dimension pair, explaining the factor two.
When this would be wrong: A child who uses 540 as an area or 462 as a volume has chosen a formula for a different quantity. An open-top box would also lack one exterior face, so the closed-box card does not automatically apply to every container.
Check: For volume, divide by one known dimension to recover an area, then by another to recover the remaining length. For surface area, sum all six face areas directly; the result must match 462.
Later retrieval: If only height increased to 5 cm, volume would rise by 135 cm³ while total surface area would rise by 2(15+9)=48 cm². A useful notebook includes this changed-dimension explanation.
148. Card 6: cuboid volume versus surface area
Card prompt: An ideal closed cuboid has dimensions 3 cm × 14 cm × 11 cm. Use a formula notebook to find its volume and total area of the six outside faces, and check their different units.
Meaning and conditions: Notebook card: cuboid volume=length×width×height, which multiplies three lengths and yields cm³. A separate card says closed cuboid surface area=2(lw+lh+wh) for all six faces, yielding cm². The two formulas describe interior space versus exterior covering.
One worked example: Volume=3×14×11=462 cm³. Surface area=2(42+33+154)=458 cm². A net would show two matching faces of each dimension pair, explaining the factor two.
When this would be wrong: A child who uses 462 as an area or 458 as a volume has chosen a formula for a different quantity. An open-top box would also lack one exterior face, so the closed-box card does not automatically apply to every container.
Check: For volume, divide by one known dimension to recover an area, then by another to recover the remaining length. For surface area, sum all six face areas directly; the result must match 458.
Later retrieval: If only height increased to 12 cm, volume would rise by 42 cm³ while total surface area would rise by 2(3+14)=34 cm². A useful notebook includes this changed-dimension explanation.
149. Card 7: cuboid volume versus surface area
Card prompt: An ideal closed cuboid has dimensions 6 cm × 6 cm × 4 cm. Use a formula notebook to find its volume and total area of the six outside faces, and check their different units.
Meaning and conditions: Notebook card: cuboid volume=length×width×height, which multiplies three lengths and yields cm³. A separate card says closed cuboid surface area=2(lw+lh+wh) for all six faces, yielding cm². The two formulas describe interior space versus exterior covering.
One worked example: Volume=6×6×4=144 cm³. Surface area=2(36+24+24)=168 cm². A net would show two matching faces of each dimension pair, explaining the factor two.
When this would be wrong: A child who uses 144 as an area or 168 as a volume has chosen a formula for a different quantity. An open-top box would also lack one exterior face, so the closed-box card does not automatically apply to every container.
Check: For volume, divide by one known dimension to recover an area, then by another to recover the remaining length. For surface area, sum all six face areas directly; the result must match 168.
Later retrieval: If only height increased to 5 cm, volume would rise by 36 cm³ while total surface area would rise by 2(6+6)=24 cm². A useful notebook includes this changed-dimension explanation.
150. Card 8: cuboid volume versus surface area
Card prompt: An ideal closed cuboid has dimensions 9 cm × 11 cm × 11 cm. Use a formula notebook to find its volume and total area of the six outside faces, and check their different units.
Meaning and conditions: Notebook card: cuboid volume=length×width×height, which multiplies three lengths and yields cm³. A separate card says closed cuboid surface area=2(lw+lh+wh) for all six faces, yielding cm². The two formulas describe interior space versus exterior covering.
One worked example: Volume=9×11×11=1089 cm³. Surface area=2(99+99+121)=638 cm². A net would show two matching faces of each dimension pair, explaining the factor two.
When this would be wrong: A child who uses 1089 as an area or 638 as a volume has chosen a formula for a different quantity. An open-top box would also lack one exterior face, so the closed-box card does not automatically apply to every container.
Check: For volume, divide by one known dimension to recover an area, then by another to recover the remaining length. For surface area, sum all six face areas directly; the result must match 638.
Later retrieval: If only height increased to 12 cm, volume would rise by 99 cm³ while total surface area would rise by 2(9+11)=40 cm². A useful notebook includes this changed-dimension explanation.
151. Card 9: cuboid volume versus surface area
Card prompt: An ideal closed cuboid has dimensions 12 cm × 3 cm × 4 cm. Use a formula notebook to find its volume and total area of the six outside faces, and check their different units.
Meaning and conditions: Notebook card: cuboid volume=length×width×height, which multiplies three lengths and yields cm³. A separate card says closed cuboid surface area=2(lw+lh+wh) for all six faces, yielding cm². The two formulas describe interior space versus exterior covering.
One worked example: Volume=12×3×4=144 cm³. Surface area=2(36+48+12)=192 cm². A net would show two matching faces of each dimension pair, explaining the factor two.
When this would be wrong: A child who uses 144 as an area or 192 as a volume has chosen a formula for a different quantity. An open-top box would also lack one exterior face, so the closed-box card does not automatically apply to every container.
Check: For volume, divide by one known dimension to recover an area, then by another to recover the remaining length. For surface area, sum all six face areas directly; the result must match 192.
Later retrieval: If only height increased to 5 cm, volume would rise by 36 cm³ while total surface area would rise by 2(12+3)=30 cm². A useful notebook includes this changed-dimension explanation.
152. Card 10: cuboid volume versus surface area
Card prompt: An ideal closed cuboid has dimensions 15 cm × 8 cm × 11 cm. Use a formula notebook to find its volume and total area of the six outside faces, and check their different units.
Meaning and conditions: Notebook card: cuboid volume=length×width×height, which multiplies three lengths and yields cm³. A separate card says closed cuboid surface area=2(lw+lh+wh) for all six faces, yielding cm². The two formulas describe interior space versus exterior covering.
One worked example: Volume=15×8×11=1320 cm³. Surface area=2(120+165+88)=746 cm². A net would show two matching faces of each dimension pair, explaining the factor two.
When this would be wrong: A child who uses 1320 as an area or 746 as a volume has chosen a formula for a different quantity. An open-top box would also lack one exterior face, so the closed-box card does not automatically apply to every container.
Check: For volume, divide by one known dimension to recover an area, then by another to recover the remaining length. For surface area, sum all six face areas directly; the result must match 746.
Later retrieval: If only height increased to 12 cm, volume would rise by 120 cm³ while total surface area would rise by 2(15+8)=46 cm². A useful notebook includes this changed-dimension explanation.
153. Card 11: cuboid volume versus surface area
Card prompt: An ideal closed cuboid has dimensions 3 cm × 13 cm × 4 cm. Use a formula notebook to find its volume and total area of the six outside faces, and check their different units.
Meaning and conditions: Notebook card: cuboid volume=length×width×height, which multiplies three lengths and yields cm³. A separate card says closed cuboid surface area=2(lw+lh+wh) for all six faces, yielding cm². The two formulas describe interior space versus exterior covering.
One worked example: Volume=3×13×4=156 cm³. Surface area=2(39+12+52)=206 cm². A net would show two matching faces of each dimension pair, explaining the factor two.
When this would be wrong: A child who uses 156 as an area or 206 as a volume has chosen a formula for a different quantity. An open-top box would also lack one exterior face, so the closed-box card does not automatically apply to every container.
Check: For volume, divide by one known dimension to recover an area, then by another to recover the remaining length. For surface area, sum all six face areas directly; the result must match 206.
Later retrieval: If only height increased to 5 cm, volume would rise by 39 cm³ while total surface area would rise by 2(3+13)=32 cm². A useful notebook includes this changed-dimension explanation.
154. Card 12: cuboid volume versus surface area
Card prompt: An ideal closed cuboid has dimensions 6 cm × 5 cm × 11 cm. Use a formula notebook to find its volume and total area of the six outside faces, and check their different units.
Meaning and conditions: Notebook card: cuboid volume=length×width×height, which multiplies three lengths and yields cm³. A separate card says closed cuboid surface area=2(lw+lh+wh) for all six faces, yielding cm². The two formulas describe interior space versus exterior covering.
One worked example: Volume=6×5×11=330 cm³. Surface area=2(30+66+55)=302 cm². A net would show two matching faces of each dimension pair, explaining the factor two.
When this would be wrong: A child who uses 330 as an area or 302 as a volume has chosen a formula for a different quantity. An open-top box would also lack one exterior face, so the closed-box card does not automatically apply to every container.
Check: For volume, divide by one known dimension to recover an area, then by another to recover the remaining length. For surface area, sum all six face areas directly; the result must match 302.
Later retrieval: If only height increased to 12 cm, volume would rise by 30 cm³ while total surface area would rise by 2(6+5)=22 cm². A useful notebook includes this changed-dimension explanation.
155. Card 13: cuboid volume versus surface area
Card prompt: An ideal closed cuboid has dimensions 9 cm × 10 cm × 4 cm. Use a formula notebook to find its volume and total area of the six outside faces, and check their different units.
Meaning and conditions: Notebook card: cuboid volume=length×width×height, which multiplies three lengths and yields cm³. A separate card says closed cuboid surface area=2(lw+lh+wh) for all six faces, yielding cm². The two formulas describe interior space versus exterior covering.
One worked example: Volume=9×10×4=360 cm³. Surface area=2(90+36+40)=332 cm². A net would show two matching faces of each dimension pair, explaining the factor two.
When this would be wrong: A child who uses 360 as an area or 332 as a volume has chosen a formula for a different quantity. An open-top box would also lack one exterior face, so the closed-box card does not automatically apply to every container.
Check: For volume, divide by one known dimension to recover an area, then by another to recover the remaining length. For surface area, sum all six face areas directly; the result must match 332.
Later retrieval: If only height increased to 5 cm, volume would rise by 90 cm³ while total surface area would rise by 2(9+10)=38 cm². A useful notebook includes this changed-dimension explanation.
156. Card 14: cuboid volume versus surface area
Card prompt: An ideal closed cuboid has dimensions 12 cm × 2 cm × 11 cm. Use a formula notebook to find its volume and total area of the six outside faces, and check their different units.
Meaning and conditions: Notebook card: cuboid volume=length×width×height, which multiplies three lengths and yields cm³. A separate card says closed cuboid surface area=2(lw+lh+wh) for all six faces, yielding cm². The two formulas describe interior space versus exterior covering.
One worked example: Volume=12×2×11=264 cm³. Surface area=2(24+132+22)=356 cm². A net would show two matching faces of each dimension pair, explaining the factor two.
When this would be wrong: A child who uses 264 as an area or 356 as a volume has chosen a formula for a different quantity. An open-top box would also lack one exterior face, so the closed-box card does not automatically apply to every container.
Check: For volume, divide by one known dimension to recover an area, then by another to recover the remaining length. For surface area, sum all six face areas directly; the result must match 356.
Later retrieval: If only height increased to 12 cm, volume would rise by 24 cm³ while total surface area would rise by 2(12+2)=28 cm². A useful notebook includes this changed-dimension explanation.
157. Card 15: cuboid volume versus surface area
Card prompt: An ideal closed cuboid has dimensions 15 cm × 7 cm × 4 cm. Use a formula notebook to find its volume and total area of the six outside faces, and check their different units.
Meaning and conditions: Notebook card: cuboid volume=length×width×height, which multiplies three lengths and yields cm³. A separate card says closed cuboid surface area=2(lw+lh+wh) for all six faces, yielding cm². The two formulas describe interior space versus exterior covering.
One worked example: Volume=15×7×4=420 cm³. Surface area=2(105+60+28)=386 cm². A net would show two matching faces of each dimension pair, explaining the factor two.
When this would be wrong: A child who uses 420 as an area or 386 as a volume has chosen a formula for a different quantity. An open-top box would also lack one exterior face, so the closed-box card does not automatically apply to every container.
Check: For volume, divide by one known dimension to recover an area, then by another to recover the remaining length. For surface area, sum all six face areas directly; the result must match 386.
Later retrieval: If only height increased to 5 cm, volume would rise by 105 cm³ while total surface area would rise by 2(15+7)=44 cm². A useful notebook includes this changed-dimension explanation.
158. Card 16: cuboid volume versus surface area
Card prompt: An ideal closed cuboid has dimensions 3 cm × 12 cm × 11 cm. Use a formula notebook to find its volume and total area of the six outside faces, and check their different units.
Meaning and conditions: Notebook card: cuboid volume=length×width×height, which multiplies three lengths and yields cm³. A separate card says closed cuboid surface area=2(lw+lh+wh) for all six faces, yielding cm². The two formulas describe interior space versus exterior covering.
One worked example: Volume=3×12×11=396 cm³. Surface area=2(36+33+132)=402 cm². A net would show two matching faces of each dimension pair, explaining the factor two.
When this would be wrong: A child who uses 396 as an area or 402 as a volume has chosen a formula for a different quantity. An open-top box would also lack one exterior face, so the closed-box card does not automatically apply to every container.
Check: For volume, divide by one known dimension to recover an area, then by another to recover the remaining length. For surface area, sum all six face areas directly; the result must match 402.
Later retrieval: If only height increased to 12 cm, volume would rise by 36 cm³ while total surface area would rise by 2(3+12)=30 cm². A useful notebook includes this changed-dimension explanation.
159. Card 17: cuboid volume versus surface area
Card prompt: An ideal closed cuboid has dimensions 6 cm × 4 cm × 4 cm. Use a formula notebook to find its volume and total area of the six outside faces, and check their different units.
Meaning and conditions: Notebook card: cuboid volume=length×width×height, which multiplies three lengths and yields cm³. A separate card says closed cuboid surface area=2(lw+lh+wh) for all six faces, yielding cm². The two formulas describe interior space versus exterior covering.
One worked example: Volume=6×4×4=96 cm³. Surface area=2(24+24+16)=128 cm². A net would show two matching faces of each dimension pair, explaining the factor two.
When this would be wrong: A child who uses 96 as an area or 128 as a volume has chosen a formula for a different quantity. An open-top box would also lack one exterior face, so the closed-box card does not automatically apply to every container.
Check: For volume, divide by one known dimension to recover an area, then by another to recover the remaining length. For surface area, sum all six face areas directly; the result must match 128.
Later retrieval: If only height increased to 5 cm, volume would rise by 24 cm³ while total surface area would rise by 2(6+4)=20 cm². A useful notebook includes this changed-dimension explanation.
160. Card 18: cuboid volume versus surface area
Card prompt: An ideal closed cuboid has dimensions 9 cm × 9 cm × 11 cm. Use a formula notebook to find its volume and total area of the six outside faces, and check their different units.
Meaning and conditions: Notebook card: cuboid volume=length×width×height, which multiplies three lengths and yields cm³. A separate card says closed cuboid surface area=2(lw+lh+wh) for all six faces, yielding cm². The two formulas describe interior space versus exterior covering.
One worked example: Volume=9×9×11=891 cm³. Surface area=2(81+99+99)=558 cm². A net would show two matching faces of each dimension pair, explaining the factor two.
When this would be wrong: A child who uses 891 as an area or 558 as a volume has chosen a formula for a different quantity. An open-top box would also lack one exterior face, so the closed-box card does not automatically apply to every container.
Check: For volume, divide by one known dimension to recover an area, then by another to recover the remaining length. For surface area, sum all six face areas directly; the result must match 558.
Later retrieval: If only height increased to 12 cm, volume would rise by 81 cm³ while total surface area would rise by 2(9+9)=36 cm². A useful notebook includes this changed-dimension explanation.
161. Card 19: cuboid volume versus surface area
Card prompt: An ideal closed cuboid has dimensions 12 cm × 14 cm × 4 cm. Use a formula notebook to find its volume and total area of the six outside faces, and check their different units.
Meaning and conditions: Notebook card: cuboid volume=length×width×height, which multiplies three lengths and yields cm³. A separate card says closed cuboid surface area=2(lw+lh+wh) for all six faces, yielding cm². The two formulas describe interior space versus exterior covering.
One worked example: Volume=12×14×4=672 cm³. Surface area=2(168+48+56)=544 cm². A net would show two matching faces of each dimension pair, explaining the factor two.
When this would be wrong: A child who uses 672 as an area or 544 as a volume has chosen a formula for a different quantity. An open-top box would also lack one exterior face, so the closed-box card does not automatically apply to every container.
Check: For volume, divide by one known dimension to recover an area, then by another to recover the remaining length. For surface area, sum all six face areas directly; the result must match 544.
Later retrieval: If only height increased to 5 cm, volume would rise by 168 cm³ while total surface area would rise by 2(12+14)=52 cm². A useful notebook includes this changed-dimension explanation.
162. Card 20: cuboid volume versus surface area
Card prompt: An ideal closed cuboid has dimensions 15 cm × 6 cm × 11 cm. Use a formula notebook to find its volume and total area of the six outside faces, and check their different units.
Meaning and conditions: Notebook card: cuboid volume=length×width×height, which multiplies three lengths and yields cm³. A separate card says closed cuboid surface area=2(lw+lh+wh) for all six faces, yielding cm². The two formulas describe interior space versus exterior covering.
One worked example: Volume=15×6×11=990 cm³. Surface area=2(90+165+66)=642 cm². A net would show two matching faces of each dimension pair, explaining the factor two.
When this would be wrong: A child who uses 990 as an area or 642 as a volume has chosen a formula for a different quantity. An open-top box would also lack one exterior face, so the closed-box card does not automatically apply to every container.
Check: For volume, divide by one known dimension to recover an area, then by another to recover the remaining length. For surface area, sum all six face areas directly; the result must match 642.
Later retrieval: If only height increased to 12 cm, volume would rise by 90 cm³ while total surface area would rise by 2(15+6)=42 cm². A useful notebook includes this changed-dimension explanation.
163. Card 21: cuboid volume versus surface area
Card prompt: An ideal closed cuboid has dimensions 3 cm × 11 cm × 4 cm. Use a formula notebook to find its volume and total area of the six outside faces, and check their different units.
Meaning and conditions: Notebook card: cuboid volume=length×width×height, which multiplies three lengths and yields cm³. A separate card says closed cuboid surface area=2(lw+lh+wh) for all six faces, yielding cm². The two formulas describe interior space versus exterior covering.
One worked example: Volume=3×11×4=132 cm³. Surface area=2(33+12+44)=178 cm². A net would show two matching faces of each dimension pair, explaining the factor two.
When this would be wrong: A child who uses 132 as an area or 178 as a volume has chosen a formula for a different quantity. An open-top box would also lack one exterior face, so the closed-box card does not automatically apply to every container.
Check: For volume, divide by one known dimension to recover an area, then by another to recover the remaining length. For surface area, sum all six face areas directly; the result must match 178.
Later retrieval: If only height increased to 5 cm, volume would rise by 33 cm³ while total surface area would rise by 2(3+11)=28 cm². A useful notebook includes this changed-dimension explanation.
164. Card 22: cuboid volume versus surface area
Card prompt: An ideal closed cuboid has dimensions 6 cm × 3 cm × 11 cm. Use a formula notebook to find its volume and total area of the six outside faces, and check their different units.
Meaning and conditions: Notebook card: cuboid volume=length×width×height, which multiplies three lengths and yields cm³. A separate card says closed cuboid surface area=2(lw+lh+wh) for all six faces, yielding cm². The two formulas describe interior space versus exterior covering.
One worked example: Volume=6×3×11=198 cm³. Surface area=2(18+66+33)=234 cm². A net would show two matching faces of each dimension pair, explaining the factor two.
When this would be wrong: A child who uses 198 as an area or 234 as a volume has chosen a formula for a different quantity. An open-top box would also lack one exterior face, so the closed-box card does not automatically apply to every container.
Check: For volume, divide by one known dimension to recover an area, then by another to recover the remaining length. For surface area, sum all six face areas directly; the result must match 234.
Later retrieval: If only height increased to 12 cm, volume would rise by 18 cm³ while total surface area would rise by 2(6+3)=18 cm². A useful notebook includes this changed-dimension explanation.
165. Card 23: cuboid volume versus surface area
Card prompt: An ideal closed cuboid has dimensions 9 cm × 8 cm × 4 cm. Use a formula notebook to find its volume and total area of the six outside faces, and check their different units.
Meaning and conditions: Notebook card: cuboid volume=length×width×height, which multiplies three lengths and yields cm³. A separate card says closed cuboid surface area=2(lw+lh+wh) for all six faces, yielding cm². The two formulas describe interior space versus exterior covering.
One worked example: Volume=9×8×4=288 cm³. Surface area=2(72+36+32)=280 cm². A net would show two matching faces of each dimension pair, explaining the factor two.
When this would be wrong: A child who uses 288 as an area or 280 as a volume has chosen a formula for a different quantity. An open-top box would also lack one exterior face, so the closed-box card does not automatically apply to every container.
Check: For volume, divide by one known dimension to recover an area, then by another to recover the remaining length. For surface area, sum all six face areas directly; the result must match 280.
Later retrieval: If only height increased to 5 cm, volume would rise by 72 cm³ while total surface area would rise by 2(9+8)=34 cm². A useful notebook includes this changed-dimension explanation.
166. Card 24: cuboid volume versus surface area
Card prompt: An ideal closed cuboid has dimensions 12 cm × 13 cm × 11 cm. Use a formula notebook to find its volume and total area of the six outside faces, and check their different units.
Meaning and conditions: Notebook card: cuboid volume=length×width×height, which multiplies three lengths and yields cm³. A separate card says closed cuboid surface area=2(lw+lh+wh) for all six faces, yielding cm². The two formulas describe interior space versus exterior covering.
One worked example: Volume=12×13×11=1716 cm³. Surface area=2(156+132+143)=862 cm². A net would show two matching faces of each dimension pair, explaining the factor two.
When this would be wrong: A child who uses 1716 as an area or 862 as a volume has chosen a formula for a different quantity. An open-top box would also lack one exterior face, so the closed-box card does not automatically apply to every container.
Check: For volume, divide by one known dimension to recover an area, then by another to recover the remaining length. For surface area, sum all six face areas directly; the result must match 862.
Later retrieval: If only height increased to 12 cm, volume would rise by 156 cm³ while total surface area would rise by 2(12+13)=50 cm². A useful notebook includes this changed-dimension explanation.
167. Card 25: cuboid volume versus surface area
Card prompt: An ideal closed cuboid has dimensions 15 cm × 5 cm × 4 cm. Use a formula notebook to find its volume and total area of the six outside faces, and check their different units.
Meaning and conditions: Notebook card: cuboid volume=length×width×height, which multiplies three lengths and yields cm³. A separate card says closed cuboid surface area=2(lw+lh+wh) for all six faces, yielding cm². The two formulas describe interior space versus exterior covering.
One worked example: Volume=15×5×4=300 cm³. Surface area=2(75+60+20)=310 cm². A net would show two matching faces of each dimension pair, explaining the factor two.
When this would be wrong: A child who uses 300 as an area or 310 as a volume has chosen a formula for a different quantity. An open-top box would also lack one exterior face, so the closed-box card does not automatically apply to every container.
Check: For volume, divide by one known dimension to recover an area, then by another to recover the remaining length. For surface area, sum all six face areas directly; the result must match 310.
Later retrieval: If only height increased to 5 cm, volume would rise by 75 cm³ while total surface area would rise by 2(15+5)=40 cm². A useful notebook includes this changed-dimension explanation.
168. Card 26: cuboid volume versus surface area
Card prompt: An ideal closed cuboid has dimensions 3 cm × 10 cm × 11 cm. Use a formula notebook to find its volume and total area of the six outside faces, and check their different units.
Meaning and conditions: Notebook card: cuboid volume=length×width×height, which multiplies three lengths and yields cm³. A separate card says closed cuboid surface area=2(lw+lh+wh) for all six faces, yielding cm². The two formulas describe interior space versus exterior covering.
One worked example: Volume=3×10×11=330 cm³. Surface area=2(30+33+110)=346 cm². A net would show two matching faces of each dimension pair, explaining the factor two.
When this would be wrong: A child who uses 330 as an area or 346 as a volume has chosen a formula for a different quantity. An open-top box would also lack one exterior face, so the closed-box card does not automatically apply to every container.
Check: For volume, divide by one known dimension to recover an area, then by another to recover the remaining length. For surface area, sum all six face areas directly; the result must match 346.
Later retrieval: If only height increased to 12 cm, volume would rise by 30 cm³ while total surface area would rise by 2(3+10)=26 cm². A useful notebook includes this changed-dimension explanation.
169. Card 27: cuboid volume versus surface area
Card prompt: An ideal closed cuboid has dimensions 6 cm × 2 cm × 4 cm. Use a formula notebook to find its volume and total area of the six outside faces, and check their different units.
Meaning and conditions: Notebook card: cuboid volume=length×width×height, which multiplies three lengths and yields cm³. A separate card says closed cuboid surface area=2(lw+lh+wh) for all six faces, yielding cm². The two formulas describe interior space versus exterior covering.
One worked example: Volume=6×2×4=48 cm³. Surface area=2(12+24+8)=88 cm². A net would show two matching faces of each dimension pair, explaining the factor two.
When this would be wrong: A child who uses 48 as an area or 88 as a volume has chosen a formula for a different quantity. An open-top box would also lack one exterior face, so the closed-box card does not automatically apply to every container.
Check: For volume, divide by one known dimension to recover an area, then by another to recover the remaining length. For surface area, sum all six face areas directly; the result must match 88.
Later retrieval: If only height increased to 5 cm, volume would rise by 12 cm³ while total surface area would rise by 2(6+2)=16 cm². A useful notebook includes this changed-dimension explanation.
170. Card 28: cuboid volume versus surface area
Card prompt: An ideal closed cuboid has dimensions 9 cm × 7 cm × 11 cm. Use a formula notebook to find its volume and total area of the six outside faces, and check their different units.
Meaning and conditions: Notebook card: cuboid volume=length×width×height, which multiplies three lengths and yields cm³. A separate card says closed cuboid surface area=2(lw+lh+wh) for all six faces, yielding cm². The two formulas describe interior space versus exterior covering.
One worked example: Volume=9×7×11=693 cm³. Surface area=2(63+99+77)=478 cm². A net would show two matching faces of each dimension pair, explaining the factor two.
When this would be wrong: A child who uses 693 as an area or 478 as a volume has chosen a formula for a different quantity. An open-top box would also lack one exterior face, so the closed-box card does not automatically apply to every container.
Check: For volume, divide by one known dimension to recover an area, then by another to recover the remaining length. For surface area, sum all six face areas directly; the result must match 478.
Later retrieval: If only height increased to 12 cm, volume would rise by 63 cm³ while total surface area would rise by 2(9+7)=32 cm². A useful notebook includes this changed-dimension explanation.
Means, frequencies and probability
In means, frequencies and probability, a notebook card should name the question that triggers the formula and the quantity it calculates. Read the worked example as one illustration of the relationship, not as fixed numbers to memorise. Pay attention to units, assumptions and a reverse check. If two formulas use the same letter, define that letter again in the local context.
171. Card 1: weighted mean from frequencies
Card prompt: An exact-value table contains score 2 with frequency 1, and score 3 with frequency 2. Find the mean using the appropriate formula and identify what each symbol represents.
Meaning and conditions: Notebook heading: mean = total of all observations / number of observations. For a value–frequency table, total is Σ(value×frequency); count is Σfrequency. Explain the sigma notation in ordinary words if it is unfamiliar: multiply each value by how many times it occurs, add those contributions and divide by all observed entries.
One worked example: Total score=2×1+3×2=8. Total frequency=1+2=3. Mean=8/3≈2.666667. This differs from simply averaging the two printed score labels when their frequencies differ.
When this would be wrong: Dividing (2+3) by two pretends the two distinct score values occur equally often. A formula card that forgets the frequency column cannot reconstruct the true dataset mean.
Check: The unrounded fraction 8/3 lies between 2 and 3 and multiplying it by 3 restores the total score 8. If a display rounds, expect a small residual in a numeric check.
Later retrieval: If one extra observation of value 3 is added, total becomes 11 across 4 observations. New mean is (11)/(4)≈2.75. Record the changed denominator, not just the new numerator.
172. Card 2: weighted mean from frequencies
Card prompt: An exact-value table contains score 5 with frequency 8, and score 8 with frequency 3. Find the mean using the appropriate formula and identify what each symbol represents.
Meaning and conditions: Notebook heading: mean = total of all observations / number of observations. For a value–frequency table, total is Σ(value×frequency); count is Σfrequency. Explain the sigma notation in ordinary words if it is unfamiliar: multiply each value by how many times it occurs, add those contributions and divide by all observed entries.
One worked example: Total score=5×8+8×3=64. Total frequency=8+3=11. Mean=64/11≈5.818182. This differs from simply averaging the two printed score labels when their frequencies differ.
When this would be wrong: Dividing (5+8) by two pretends the two distinct score values occur equally often. A formula card that forgets the frequency column cannot reconstruct the true dataset mean.
Check: The unrounded fraction 64/11 lies between 5 and 8 and multiplying it by 11 restores the total score 64. If a display rounds, expect a small residual in a numeric check.
Later retrieval: If one extra observation of value 8 is added, total becomes 72 across 12 observations. New mean is (72)/(12)≈6. Record the changed denominator, not just the new numerator.
173. Card 3: weighted mean from frequencies
Card prompt: An exact-value table contains score 8 with frequency 6, and score 13 with frequency 4. Find the mean using the appropriate formula and identify what each symbol represents.
Meaning and conditions: Notebook heading: mean = total of all observations / number of observations. For a value–frequency table, total is Σ(value×frequency); count is Σfrequency. Explain the sigma notation in ordinary words if it is unfamiliar: multiply each value by how many times it occurs, add those contributions and divide by all observed entries.
One worked example: Total score=8×6+13×4=100. Total frequency=6+4=10. Mean=100/10≈10. This differs from simply averaging the two printed score labels when their frequencies differ.
When this would be wrong: Dividing (8+13) by two pretends the two distinct score values occur equally often. A formula card that forgets the frequency column cannot reconstruct the true dataset mean.
Check: The unrounded fraction 100/10 lies between 8 and 13 and multiplying it by 10 restores the total score 100. If a display rounds, expect a small residual in a numeric check.
Later retrieval: If one extra observation of value 13 is added, total becomes 113 across 11 observations. New mean is (113)/(11)≈10.272727. Record the changed denominator, not just the new numerator.
174. Card 4: weighted mean from frequencies
Card prompt: An exact-value table contains score 11 with frequency 4, and score 5 with frequency 5. Find the mean using the appropriate formula and identify what each symbol represents.
Meaning and conditions: Notebook heading: mean = total of all observations / number of observations. For a value–frequency table, total is Σ(value×frequency); count is Σfrequency. Explain the sigma notation in ordinary words if it is unfamiliar: multiply each value by how many times it occurs, add those contributions and divide by all observed entries.
One worked example: Total score=11×4+5×5=69. Total frequency=4+5=9. Mean=69/9≈7.666667. This differs from simply averaging the two printed score labels when their frequencies differ.
When this would be wrong: Dividing (11+5) by two pretends the two distinct score values occur equally often. A formula card that forgets the frequency column cannot reconstruct the true dataset mean.
Check: The unrounded fraction 69/9 lies between 5 and 11 and multiplying it by 9 restores the total score 69. If a display rounds, expect a small residual in a numeric check.
Later retrieval: If one extra observation of value 5 is added, total becomes 74 across 10 observations. New mean is (74)/(10)≈7.4. Record the changed denominator, not just the new numerator.
175. Card 5: weighted mean from frequencies
Card prompt: An exact-value table contains score 3 with frequency 2, and score 10 with frequency 6. Find the mean using the appropriate formula and identify what each symbol represents.
Meaning and conditions: Notebook heading: mean = total of all observations / number of observations. For a value–frequency table, total is Σ(value×frequency); count is Σfrequency. Explain the sigma notation in ordinary words if it is unfamiliar: multiply each value by how many times it occurs, add those contributions and divide by all observed entries.
One worked example: Total score=3×2+10×6=66. Total frequency=2+6=8. Mean=66/8≈8.25. This differs from simply averaging the two printed score labels when their frequencies differ.
When this would be wrong: Dividing (3+10) by two pretends the two distinct score values occur equally often. A formula card that forgets the frequency column cannot reconstruct the true dataset mean.
Check: The unrounded fraction 66/8 lies between 3 and 10 and multiplying it by 8 restores the total score 66. If a display rounds, expect a small residual in a numeric check.
Later retrieval: If one extra observation of value 10 is added, total becomes 76 across 9 observations. New mean is (76)/(9)≈8.444444. Record the changed denominator, not just the new numerator.
176. Card 6: weighted mean from frequencies
Card prompt: An exact-value table contains score 6 with frequency 9, and score 15 with frequency 7. Find the mean using the appropriate formula and identify what each symbol represents.
Meaning and conditions: Notebook heading: mean = total of all observations / number of observations. For a value–frequency table, total is Σ(value×frequency); count is Σfrequency. Explain the sigma notation in ordinary words if it is unfamiliar: multiply each value by how many times it occurs, add those contributions and divide by all observed entries.
One worked example: Total score=6×9+15×7=159. Total frequency=9+7=16. Mean=159/16≈9.9375. This differs from simply averaging the two printed score labels when their frequencies differ.
When this would be wrong: Dividing (6+15) by two pretends the two distinct score values occur equally often. A formula card that forgets the frequency column cannot reconstruct the true dataset mean.
Check: The unrounded fraction 159/16 lies between 6 and 15 and multiplying it by 16 restores the total score 159. If a display rounds, expect a small residual in a numeric check.
Later retrieval: If one extra observation of value 15 is added, total becomes 174 across 17 observations. New mean is (174)/(17)≈10.235294. Record the changed denominator, not just the new numerator.
177. Card 7: weighted mean from frequencies
Card prompt: An exact-value table contains score 9 with frequency 7, and score 7 with frequency 8. Find the mean using the appropriate formula and identify what each symbol represents.
Meaning and conditions: Notebook heading: mean = total of all observations / number of observations. For a value–frequency table, total is Σ(value×frequency); count is Σfrequency. Explain the sigma notation in ordinary words if it is unfamiliar: multiply each value by how many times it occurs, add those contributions and divide by all observed entries.
One worked example: Total score=9×7+7×8=119. Total frequency=7+8=15. Mean=119/15≈7.933333. This differs from simply averaging the two printed score labels when their frequencies differ.
When this would be wrong: Dividing (9+7) by two pretends the two distinct score values occur equally often. A formula card that forgets the frequency column cannot reconstruct the true dataset mean.
Check: The unrounded fraction 119/15 lies between 7 and 9 and multiplying it by 15 restores the total score 119. If a display rounds, expect a small residual in a numeric check.
Later retrieval: If one extra observation of value 7 is added, total becomes 126 across 16 observations. New mean is (126)/(16)≈7.875. Record the changed denominator, not just the new numerator.
178. Card 8: weighted mean from frequencies
Card prompt: An exact-value table contains score 12 with frequency 5, and score 12 with frequency 9. Find the mean using the appropriate formula and identify what each symbol represents.
Meaning and conditions: Notebook heading: mean = total of all observations / number of observations. For a value–frequency table, total is Σ(value×frequency); count is Σfrequency. Explain the sigma notation in ordinary words if it is unfamiliar: multiply each value by how many times it occurs, add those contributions and divide by all observed entries.
One worked example: Total score=12×5+12×9=168. Total frequency=5+9=14. Mean=168/14≈12. This differs from simply averaging the two printed score labels when their frequencies differ.
When this would be wrong: Dividing (12+12) by two pretends the two distinct score values occur equally often. A formula card that forgets the frequency column cannot reconstruct the true dataset mean.
Check: The unrounded fraction 168/14 lies between 12 and 12 and multiplying it by 14 restores the total score 168. If a display rounds, expect a small residual in a numeric check.
Later retrieval: If one extra observation of value 12 is added, total becomes 180 across 15 observations. New mean is (180)/(15)≈12. Record the changed denominator, not just the new numerator.
179. Card 9: weighted mean from frequencies
Card prompt: An exact-value table contains score 4 with frequency 3, and score 4 with frequency 10. Find the mean using the appropriate formula and identify what each symbol represents.
Meaning and conditions: Notebook heading: mean = total of all observations / number of observations. For a value–frequency table, total is Σ(value×frequency); count is Σfrequency. Explain the sigma notation in ordinary words if it is unfamiliar: multiply each value by how many times it occurs, add those contributions and divide by all observed entries.
One worked example: Total score=4×3+4×10=52. Total frequency=3+10=13. Mean=52/13≈4. This differs from simply averaging the two printed score labels when their frequencies differ.
When this would be wrong: Dividing (4+4) by two pretends the two distinct score values occur equally often. A formula card that forgets the frequency column cannot reconstruct the true dataset mean.
Check: The unrounded fraction 52/13 lies between 4 and 4 and multiplying it by 13 restores the total score 52. If a display rounds, expect a small residual in a numeric check.
Later retrieval: If one extra observation of value 4 is added, total becomes 56 across 14 observations. New mean is (56)/(14)≈4. Record the changed denominator, not just the new numerator.
180. Card 10: weighted mean from frequencies
Card prompt: An exact-value table contains score 7 with frequency 1, and score 9 with frequency 11. Find the mean using the appropriate formula and identify what each symbol represents.
Meaning and conditions: Notebook heading: mean = total of all observations / number of observations. For a value–frequency table, total is Σ(value×frequency); count is Σfrequency. Explain the sigma notation in ordinary words if it is unfamiliar: multiply each value by how many times it occurs, add those contributions and divide by all observed entries.
One worked example: Total score=7×1+9×11=106. Total frequency=1+11=12. Mean=106/12≈8.833333. This differs from simply averaging the two printed score labels when their frequencies differ.
When this would be wrong: Dividing (7+9) by two pretends the two distinct score values occur equally often. A formula card that forgets the frequency column cannot reconstruct the true dataset mean.
Check: The unrounded fraction 106/12 lies between 7 and 9 and multiplying it by 12 restores the total score 106. If a display rounds, expect a small residual in a numeric check.
Later retrieval: If one extra observation of value 9 is added, total becomes 115 across 13 observations. New mean is (115)/(13)≈8.846154. Record the changed denominator, not just the new numerator.
181. Card 11: weighted mean from frequencies
Card prompt: An exact-value table contains score 10 with frequency 8, and score 14 with frequency 2. Find the mean using the appropriate formula and identify what each symbol represents.
Meaning and conditions: Notebook heading: mean = total of all observations / number of observations. For a value–frequency table, total is Σ(value×frequency); count is Σfrequency. Explain the sigma notation in ordinary words if it is unfamiliar: multiply each value by how many times it occurs, add those contributions and divide by all observed entries.
One worked example: Total score=10×8+14×2=108. Total frequency=8+2=10. Mean=108/10≈10.8. This differs from simply averaging the two printed score labels when their frequencies differ.
When this would be wrong: Dividing (10+14) by two pretends the two distinct score values occur equally often. A formula card that forgets the frequency column cannot reconstruct the true dataset mean.
Check: The unrounded fraction 108/10 lies between 10 and 14 and multiplying it by 10 restores the total score 108. If a display rounds, expect a small residual in a numeric check.
Later retrieval: If one extra observation of value 14 is added, total becomes 122 across 11 observations. New mean is (122)/(11)≈11.090909. Record the changed denominator, not just the new numerator.
182. Card 12: weighted mean from frequencies
Card prompt: An exact-value table contains score 2 with frequency 6, and score 6 with frequency 3. Find the mean using the appropriate formula and identify what each symbol represents.
Meaning and conditions: Notebook heading: mean = total of all observations / number of observations. For a value–frequency table, total is Σ(value×frequency); count is Σfrequency. Explain the sigma notation in ordinary words if it is unfamiliar: multiply each value by how many times it occurs, add those contributions and divide by all observed entries.
One worked example: Total score=2×6+6×3=30. Total frequency=6+3=9. Mean=30/9≈3.333333. This differs from simply averaging the two printed score labels when their frequencies differ.
When this would be wrong: Dividing (2+6) by two pretends the two distinct score values occur equally often. A formula card that forgets the frequency column cannot reconstruct the true dataset mean.
Check: The unrounded fraction 30/9 lies between 2 and 6 and multiplying it by 9 restores the total score 30. If a display rounds, expect a small residual in a numeric check.
Later retrieval: If one extra observation of value 6 is added, total becomes 36 across 10 observations. New mean is (36)/(10)≈3.6. Record the changed denominator, not just the new numerator.
183. Card 13: weighted mean from frequencies
Card prompt: An exact-value table contains score 5 with frequency 4, and score 11 with frequency 4. Find the mean using the appropriate formula and identify what each symbol represents.
Meaning and conditions: Notebook heading: mean = total of all observations / number of observations. For a value–frequency table, total is Σ(value×frequency); count is Σfrequency. Explain the sigma notation in ordinary words if it is unfamiliar: multiply each value by how many times it occurs, add those contributions and divide by all observed entries.
One worked example: Total score=5×4+11×4=64. Total frequency=4+4=8. Mean=64/8≈8. This differs from simply averaging the two printed score labels when their frequencies differ.
When this would be wrong: Dividing (5+11) by two pretends the two distinct score values occur equally often. A formula card that forgets the frequency column cannot reconstruct the true dataset mean.
Check: The unrounded fraction 64/8 lies between 5 and 11 and multiplying it by 8 restores the total score 64. If a display rounds, expect a small residual in a numeric check.
Later retrieval: If one extra observation of value 11 is added, total becomes 75 across 9 observations. New mean is (75)/(9)≈8.333333. Record the changed denominator, not just the new numerator.
184. Card 14: weighted mean from frequencies
Card prompt: An exact-value table contains score 8 with frequency 2, and score 3 with frequency 5. Find the mean using the appropriate formula and identify what each symbol represents.
Meaning and conditions: Notebook heading: mean = total of all observations / number of observations. For a value–frequency table, total is Σ(value×frequency); count is Σfrequency. Explain the sigma notation in ordinary words if it is unfamiliar: multiply each value by how many times it occurs, add those contributions and divide by all observed entries.
One worked example: Total score=8×2+3×5=31. Total frequency=2+5=7. Mean=31/7≈4.428571. This differs from simply averaging the two printed score labels when their frequencies differ.
When this would be wrong: Dividing (8+3) by two pretends the two distinct score values occur equally often. A formula card that forgets the frequency column cannot reconstruct the true dataset mean.
Check: The unrounded fraction 31/7 lies between 3 and 8 and multiplying it by 7 restores the total score 31. If a display rounds, expect a small residual in a numeric check.
Later retrieval: If one extra observation of value 3 is added, total becomes 34 across 8 observations. New mean is (34)/(8)≈4.25. Record the changed denominator, not just the new numerator.
185. Card 15: weighted mean from frequencies
Card prompt: An exact-value table contains score 11 with frequency 9, and score 8 with frequency 6. Find the mean using the appropriate formula and identify what each symbol represents.
Meaning and conditions: Notebook heading: mean = total of all observations / number of observations. For a value–frequency table, total is Σ(value×frequency); count is Σfrequency. Explain the sigma notation in ordinary words if it is unfamiliar: multiply each value by how many times it occurs, add those contributions and divide by all observed entries.
One worked example: Total score=11×9+8×6=147. Total frequency=9+6=15. Mean=147/15≈9.8. This differs from simply averaging the two printed score labels when their frequencies differ.
When this would be wrong: Dividing (11+8) by two pretends the two distinct score values occur equally often. A formula card that forgets the frequency column cannot reconstruct the true dataset mean.
Check: The unrounded fraction 147/15 lies between 8 and 11 and multiplying it by 15 restores the total score 147. If a display rounds, expect a small residual in a numeric check.
Later retrieval: If one extra observation of value 8 is added, total becomes 155 across 16 observations. New mean is (155)/(16)≈9.6875. Record the changed denominator, not just the new numerator.
186. Card 16: weighted mean from frequencies
Card prompt: An exact-value table contains score 3 with frequency 7, and score 13 with frequency 7. Find the mean using the appropriate formula and identify what each symbol represents.
Meaning and conditions: Notebook heading: mean = total of all observations / number of observations. For a value–frequency table, total is Σ(value×frequency); count is Σfrequency. Explain the sigma notation in ordinary words if it is unfamiliar: multiply each value by how many times it occurs, add those contributions and divide by all observed entries.
One worked example: Total score=3×7+13×7=112. Total frequency=7+7=14. Mean=112/14≈8. This differs from simply averaging the two printed score labels when their frequencies differ.
When this would be wrong: Dividing (3+13) by two pretends the two distinct score values occur equally often. A formula card that forgets the frequency column cannot reconstruct the true dataset mean.
Check: The unrounded fraction 112/14 lies between 3 and 13 and multiplying it by 14 restores the total score 112. If a display rounds, expect a small residual in a numeric check.
Later retrieval: If one extra observation of value 13 is added, total becomes 125 across 15 observations. New mean is (125)/(15)≈8.333333. Record the changed denominator, not just the new numerator.
187. Card 17: weighted mean from frequencies
Card prompt: An exact-value table contains score 6 with frequency 5, and score 5 with frequency 8. Find the mean using the appropriate formula and identify what each symbol represents.
Meaning and conditions: Notebook heading: mean = total of all observations / number of observations. For a value–frequency table, total is Σ(value×frequency); count is Σfrequency. Explain the sigma notation in ordinary words if it is unfamiliar: multiply each value by how many times it occurs, add those contributions and divide by all observed entries.
One worked example: Total score=6×5+5×8=70. Total frequency=5+8=13. Mean=70/13≈5.384615. This differs from simply averaging the two printed score labels when their frequencies differ.
When this would be wrong: Dividing (6+5) by two pretends the two distinct score values occur equally often. A formula card that forgets the frequency column cannot reconstruct the true dataset mean.
Check: The unrounded fraction 70/13 lies between 5 and 6 and multiplying it by 13 restores the total score 70. If a display rounds, expect a small residual in a numeric check.
Later retrieval: If one extra observation of value 5 is added, total becomes 75 across 14 observations. New mean is (75)/(14)≈5.357143. Record the changed denominator, not just the new numerator.
188. Card 18: weighted mean from frequencies
Card prompt: An exact-value table contains score 9 with frequency 3, and score 10 with frequency 9. Find the mean using the appropriate formula and identify what each symbol represents.
Meaning and conditions: Notebook heading: mean = total of all observations / number of observations. For a value–frequency table, total is Σ(value×frequency); count is Σfrequency. Explain the sigma notation in ordinary words if it is unfamiliar: multiply each value by how many times it occurs, add those contributions and divide by all observed entries.
One worked example: Total score=9×3+10×9=117. Total frequency=3+9=12. Mean=117/12≈9.75. This differs from simply averaging the two printed score labels when their frequencies differ.
When this would be wrong: Dividing (9+10) by two pretends the two distinct score values occur equally often. A formula card that forgets the frequency column cannot reconstruct the true dataset mean.
Check: The unrounded fraction 117/12 lies between 9 and 10 and multiplying it by 12 restores the total score 117. If a display rounds, expect a small residual in a numeric check.
Later retrieval: If one extra observation of value 10 is added, total becomes 127 across 13 observations. New mean is (127)/(13)≈9.769231. Record the changed denominator, not just the new numerator.
189. Card 19: weighted mean from frequencies
Card prompt: An exact-value table contains score 12 with frequency 1, and score 15 with frequency 10. Find the mean using the appropriate formula and identify what each symbol represents.
Meaning and conditions: Notebook heading: mean = total of all observations / number of observations. For a value–frequency table, total is Σ(value×frequency); count is Σfrequency. Explain the sigma notation in ordinary words if it is unfamiliar: multiply each value by how many times it occurs, add those contributions and divide by all observed entries.
One worked example: Total score=12×1+15×10=162. Total frequency=1+10=11. Mean=162/11≈14.727273. This differs from simply averaging the two printed score labels when their frequencies differ.
When this would be wrong: Dividing (12+15) by two pretends the two distinct score values occur equally often. A formula card that forgets the frequency column cannot reconstruct the true dataset mean.
Check: The unrounded fraction 162/11 lies between 12 and 15 and multiplying it by 11 restores the total score 162. If a display rounds, expect a small residual in a numeric check.
Later retrieval: If one extra observation of value 15 is added, total becomes 177 across 12 observations. New mean is (177)/(12)≈14.75. Record the changed denominator, not just the new numerator.
190. Card 20: weighted mean from frequencies
Card prompt: An exact-value table contains score 4 with frequency 8, and score 7 with frequency 11. Find the mean using the appropriate formula and identify what each symbol represents.
Meaning and conditions: Notebook heading: mean = total of all observations / number of observations. For a value–frequency table, total is Σ(value×frequency); count is Σfrequency. Explain the sigma notation in ordinary words if it is unfamiliar: multiply each value by how many times it occurs, add those contributions and divide by all observed entries.
One worked example: Total score=4×8+7×11=109. Total frequency=8+11=19. Mean=109/19≈5.736842. This differs from simply averaging the two printed score labels when their frequencies differ.
When this would be wrong: Dividing (4+7) by two pretends the two distinct score values occur equally often. A formula card that forgets the frequency column cannot reconstruct the true dataset mean.
Check: The unrounded fraction 109/19 lies between 4 and 7 and multiplying it by 19 restores the total score 109. If a display rounds, expect a small residual in a numeric check.
Later retrieval: If one extra observation of value 7 is added, total becomes 116 across 20 observations. New mean is (116)/(20)≈5.8. Record the changed denominator, not just the new numerator.
191. Card 21: weighted mean from frequencies
Card prompt: An exact-value table contains score 7 with frequency 6, and score 12 with frequency 2. Find the mean using the appropriate formula and identify what each symbol represents.
Meaning and conditions: Notebook heading: mean = total of all observations / number of observations. For a value–frequency table, total is Σ(value×frequency); count is Σfrequency. Explain the sigma notation in ordinary words if it is unfamiliar: multiply each value by how many times it occurs, add those contributions and divide by all observed entries.
One worked example: Total score=7×6+12×2=66. Total frequency=6+2=8. Mean=66/8≈8.25. This differs from simply averaging the two printed score labels when their frequencies differ.
When this would be wrong: Dividing (7+12) by two pretends the two distinct score values occur equally often. A formula card that forgets the frequency column cannot reconstruct the true dataset mean.
Check: The unrounded fraction 66/8 lies between 7 and 12 and multiplying it by 8 restores the total score 66. If a display rounds, expect a small residual in a numeric check.
Later retrieval: If one extra observation of value 12 is added, total becomes 78 across 9 observations. New mean is (78)/(9)≈8.666667. Record the changed denominator, not just the new numerator.
192. Card 22: weighted mean from frequencies
Card prompt: An exact-value table contains score 10 with frequency 4, and score 4 with frequency 3. Find the mean using the appropriate formula and identify what each symbol represents.
Meaning and conditions: Notebook heading: mean = total of all observations / number of observations. For a value–frequency table, total is Σ(value×frequency); count is Σfrequency. Explain the sigma notation in ordinary words if it is unfamiliar: multiply each value by how many times it occurs, add those contributions and divide by all observed entries.
One worked example: Total score=10×4+4×3=52. Total frequency=4+3=7. Mean=52/7≈7.428571. This differs from simply averaging the two printed score labels when their frequencies differ.
When this would be wrong: Dividing (10+4) by two pretends the two distinct score values occur equally often. A formula card that forgets the frequency column cannot reconstruct the true dataset mean.
Check: The unrounded fraction 52/7 lies between 4 and 10 and multiplying it by 7 restores the total score 52. If a display rounds, expect a small residual in a numeric check.
Later retrieval: If one extra observation of value 4 is added, total becomes 56 across 8 observations. New mean is (56)/(8)≈7. Record the changed denominator, not just the new numerator.
193. Card 23: weighted mean from frequencies
Card prompt: An exact-value table contains score 2 with frequency 2, and score 9 with frequency 4. Find the mean using the appropriate formula and identify what each symbol represents.
Meaning and conditions: Notebook heading: mean = total of all observations / number of observations. For a value–frequency table, total is Σ(value×frequency); count is Σfrequency. Explain the sigma notation in ordinary words if it is unfamiliar: multiply each value by how many times it occurs, add those contributions and divide by all observed entries.
One worked example: Total score=2×2+9×4=40. Total frequency=2+4=6. Mean=40/6≈6.666667. This differs from simply averaging the two printed score labels when their frequencies differ.
When this would be wrong: Dividing (2+9) by two pretends the two distinct score values occur equally often. A formula card that forgets the frequency column cannot reconstruct the true dataset mean.
Check: The unrounded fraction 40/6 lies between 2 and 9 and multiplying it by 6 restores the total score 40. If a display rounds, expect a small residual in a numeric check.
Later retrieval: If one extra observation of value 9 is added, total becomes 49 across 7 observations. New mean is (49)/(7)≈7. Record the changed denominator, not just the new numerator.
194. Card 24: weighted mean from frequencies
Card prompt: An exact-value table contains score 5 with frequency 9, and score 14 with frequency 5. Find the mean using the appropriate formula and identify what each symbol represents.
Meaning and conditions: Notebook heading: mean = total of all observations / number of observations. For a value–frequency table, total is Σ(value×frequency); count is Σfrequency. Explain the sigma notation in ordinary words if it is unfamiliar: multiply each value by how many times it occurs, add those contributions and divide by all observed entries.
One worked example: Total score=5×9+14×5=115. Total frequency=9+5=14. Mean=115/14≈8.214286. This differs from simply averaging the two printed score labels when their frequencies differ.
When this would be wrong: Dividing (5+14) by two pretends the two distinct score values occur equally often. A formula card that forgets the frequency column cannot reconstruct the true dataset mean.
Check: The unrounded fraction 115/14 lies between 5 and 14 and multiplying it by 14 restores the total score 115. If a display rounds, expect a small residual in a numeric check.
Later retrieval: If one extra observation of value 14 is added, total becomes 129 across 15 observations. New mean is (129)/(15)≈8.6. Record the changed denominator, not just the new numerator.
195. Card 25: weighted mean from frequencies
Card prompt: An exact-value table contains score 8 with frequency 7, and score 6 with frequency 6. Find the mean using the appropriate formula and identify what each symbol represents.
Meaning and conditions: Notebook heading: mean = total of all observations / number of observations. For a value–frequency table, total is Σ(value×frequency); count is Σfrequency. Explain the sigma notation in ordinary words if it is unfamiliar: multiply each value by how many times it occurs, add those contributions and divide by all observed entries.
One worked example: Total score=8×7+6×6=92. Total frequency=7+6=13. Mean=92/13≈7.076923. This differs from simply averaging the two printed score labels when their frequencies differ.
When this would be wrong: Dividing (8+6) by two pretends the two distinct score values occur equally often. A formula card that forgets the frequency column cannot reconstruct the true dataset mean.
Check: The unrounded fraction 92/13 lies between 6 and 8 and multiplying it by 13 restores the total score 92. If a display rounds, expect a small residual in a numeric check.
Later retrieval: If one extra observation of value 6 is added, total becomes 98 across 14 observations. New mean is (98)/(14)≈7. Record the changed denominator, not just the new numerator.
196. Card 26: weighted mean from frequencies
Card prompt: An exact-value table contains score 11 with frequency 5, and score 11 with frequency 7. Find the mean using the appropriate formula and identify what each symbol represents.
Meaning and conditions: Notebook heading: mean = total of all observations / number of observations. For a value–frequency table, total is Σ(value×frequency); count is Σfrequency. Explain the sigma notation in ordinary words if it is unfamiliar: multiply each value by how many times it occurs, add those contributions and divide by all observed entries.
One worked example: Total score=11×5+11×7=132. Total frequency=5+7=12. Mean=132/12≈11. This differs from simply averaging the two printed score labels when their frequencies differ.
When this would be wrong: Dividing (11+11) by two pretends the two distinct score values occur equally often. A formula card that forgets the frequency column cannot reconstruct the true dataset mean.
Check: The unrounded fraction 132/12 lies between 11 and 11 and multiplying it by 12 restores the total score 132. If a display rounds, expect a small residual in a numeric check.
Later retrieval: If one extra observation of value 11 is added, total becomes 143 across 13 observations. New mean is (143)/(13)≈11. Record the changed denominator, not just the new numerator.
197. Card 27: weighted mean from frequencies
Card prompt: An exact-value table contains score 3 with frequency 3, and score 3 with frequency 8. Find the mean using the appropriate formula and identify what each symbol represents.
Meaning and conditions: Notebook heading: mean = total of all observations / number of observations. For a value–frequency table, total is Σ(value×frequency); count is Σfrequency. Explain the sigma notation in ordinary words if it is unfamiliar: multiply each value by how many times it occurs, add those contributions and divide by all observed entries.
One worked example: Total score=3×3+3×8=33. Total frequency=3+8=11. Mean=33/11≈3. This differs from simply averaging the two printed score labels when their frequencies differ.
When this would be wrong: Dividing (3+3) by two pretends the two distinct score values occur equally often. A formula card that forgets the frequency column cannot reconstruct the true dataset mean.
Check: The unrounded fraction 33/11 lies between 3 and 3 and multiplying it by 11 restores the total score 33. If a display rounds, expect a small residual in a numeric check.
Later retrieval: If one extra observation of value 3 is added, total becomes 36 across 12 observations. New mean is (36)/(12)≈3. Record the changed denominator, not just the new numerator.
Building and retrieving a personal notebook
In building and retrieving a personal notebook, a notebook card should name the question that triggers the formula and the quantity it calculates. Read the worked example as one illustration of the relationship, not as fixed numbers to memorise. Pay attention to units, assumptions and a reverse check. If two formulas use the same letter, define that letter again in the local context.
198. Write one question at the top of each card
Card prompt: A formula notebook entry simply says ‘area = base times height’. Is that enough?
Meaning and conditions: A practical formula notebook should explain the question type, the symbols and their units, and the assumptions that make the relationship valid. A card is for understanding and later retrieval, not simply for decorating a page with equations.
One worked example: Not for every shape. Identify whether the shape is a rectangle, parallelogram or triangle and what ‘height’ means, then write the correct formula with a sketch.
When this would be wrong: A generic card can encourage using bh for a triangle when ½bh is required.
Check: Make the card’s first line a question like ‘Area of which figure?’.
Later retrieval: Write a changed-number practice prompt beside this rule and hide the full working. On the next suitable day, ask the pupil to choose the correct relationship independently and to explain one condition or limit. Make the card’s first line a question like ‘Area of which figure?’.
199. Define every symbol locally
Card prompt: A card uses b in y=mx+b and A=½bh. Does b have one fixed meaning?
Meaning and conditions: A practical formula notebook should explain the question type, the symbols and their units, and the assumptions that make the relationship valid. A card is for understanding and later retrieval, not simply for decorating a page with equations.
One worked example: No. In a line rule b is often y-intercept; in triangle area it is base length. The heading and definitions provide context.
When this would be wrong: Letters do not carry one universal meaning across all mathematics.
Check: Write ‘b=intercept’ and ‘b=base’ on their respective cards.
Later retrieval: Write a changed-number practice prompt beside this rule and hide the full working. On the next suitable day, ask the pupil to choose the correct relationship independently and to explain one condition or limit. Write ‘b=intercept’ and ‘b=base’ on their respective cards.
200. Show one worked example, not ten copied ones
Card prompt: A card contains 12 identical substituted answers. Is that necessary?
Meaning and conditions: A practical formula notebook should explain the question type, the symbols and their units, and the assumptions that make the relationship valid. A card is for understanding and later retrieval, not simply for decorating a page with equations.
One worked example: Not usually. One carefully explained example and one changed-number retrieval prompt can be more useful.
When this would be wrong: Copying many steps may become a page-count goal instead of understanding.
Check: Cover the worked example and attempt a changed case.
Later retrieval: Write a changed-number practice prompt beside this rule and hide the full working. On the next suitable day, ask the pupil to choose the correct relationship independently and to explain one condition or limit. Cover the worked example and attempt a changed case.
201. Add a dimensional check
Card prompt: A formula card for volume shows 4×3×2=24 but no unit. What should be written?
Meaning and conditions: A practical formula notebook should explain the question type, the symbols and their units, and the assumptions that make the relationship valid. A card is for understanding and later retrieval, not simply for decorating a page with equations.
One worked example: If inputs are centimetres, output is 24 cm³; the three length factors create cubic units.
When this would be wrong: An unlabelled numerical result may be confused with surface area.
Check: Use cm³ beside volume and cm² beside surface area.
Later retrieval: Write a changed-number practice prompt beside this rule and hide the full working. On the next suitable day, ask the pupil to choose the correct relationship independently and to explain one condition or limit. Use cm³ beside volume and cm² beside surface area.
202. Record the condition under which a formula works
Card prompt: A speed formula card states d=st without saying speed is constant. Is it always a real journey law?
Meaning and conditions: A practical formula notebook should explain the question type, the symbols and their units, and the assumptions that make the relationship valid. A card is for understanding and later retrieval, not simply for decorating a page with equations.
One worked example: The equation can describe distance from a constant speed s over time t, while average speed uses total distance/time. State the model assumption.
When this would be wrong: Using a constant-rate formula for variable instantaneous speed without qualification can mislead.
Check: Label ‘constant speed model’ or ‘average over interval’.
Later retrieval: Write a changed-number practice prompt beside this rule and hide the full working. On the next suitable day, ask the pupil to choose the correct relationship independently and to explain one condition or limit. Label ‘constant speed model’ or ‘average over interval’.
203. Distinguish exact and approximate results
Card prompt: A circle-area card writes π=3.14. Should it say exactly equal?
Meaning and conditions: A practical formula notebook should explain the question type, the symbols and their units, and the assumptions that make the relationship valid. A card is for understanding and later retrieval, not simply for decorating a page with equations.
One worked example: No. π is an exact constant and 3.14 is an approximation. Keep π until requested final rounding.
When this would be wrong: Premature rounding can affect multiple later calculation steps.
Check: Use the ≈ sign with decimal approximations.
Later retrieval: Write a changed-number practice prompt beside this rule and hide the full working. On the next suitable day, ask the pupil to choose the correct relationship independently and to explain one condition or limit. Use the ≈ sign with decimal approximations.
204. Make a reverse-check line
Card prompt: A card says rectangle area=A=lw. How can the student check a calculated width?
Meaning and conditions: A practical formula notebook should explain the question type, the symbols and their units, and the assumptions that make the relationship valid. A card is for understanding and later retrieval, not simply for decorating a page with equations.
One worked example: Multiply the recovered width by the stated length and reproduce the original area.
When this would be wrong: Remembering a formula does not guarantee that it was rearranged or applied correctly.
Check: Write ‘check: length×found width=given area’.
Later retrieval: Write a changed-number practice prompt beside this rule and hide the full working. On the next suitable day, ask the pupil to choose the correct relationship independently and to explain one condition or limit. Write ‘check: length×found width=given area’.
205. Separately label derived versus supplied formulae
Card prompt: A note includes a later-stage sector formula but the school’s current chapter only covers circle area. How should it be labelled?
Meaning and conditions: A practical formula notebook should explain the question type, the symbols and their units, and the assumptions that make the relationship valid. A card is for understanding and later retrieval, not simply for decorating a page with equations.
One worked example: Mark ‘optional next-stage extension’ and keep current school-required concepts clearly separated.
When this would be wrong: Treating all online formula examples as examinable this term can confuse the pupil.
Check: Keep a ‘current school topic’ column.
Later retrieval: Write a changed-number practice prompt beside this rule and hide the full working. On the next suitable day, ask the pupil to choose the correct relationship independently and to explain one condition or limit. Keep a ‘current school topic’ column.
206. Formula names should be descriptive
Card prompt: A card heading simply says ‘Formula 7’. Is that helpful for retrieval?
Meaning and conditions: A practical formula notebook should explain the question type, the symbols and their units, and the assumptions that make the relationship valid. A card is for understanding and later retrieval, not simply for decorating a page with equations.
One worked example: A heading such as ‘Perimeter of a rectangle’ states the problem type and output.
When this would be wrong: Number-only headings make a pupil rely on positional memory.
Check: Ask the learner to name the formula from a question with no formula number.
Later retrieval: Write a changed-number practice prompt beside this rule and hide the full working. On the next suitable day, ask the pupil to choose the correct relationship independently and to explain one condition or limit. Ask the learner to name the formula from a question with no formula number.
207. One small sketch can explain a factor
Card prompt: Why does triangle area have ½?
Meaning and conditions: A practical formula notebook should explain the question type, the symbols and their units, and the assumptions that make the relationship valid. A card is for understanding and later retrieval, not simply for decorating a page with equations.
One worked example: Two congruent copies of a triangle can form a corresponding parallelogram with base b and perpendicular height h, explaining half of bh.
When this would be wrong: Memorising ‘divide by two’ without a shape picture can lead to using it on every polygon.
Check: Draw a base and perpendicular height to show the two-copy argument.
Later retrieval: Write a changed-number practice prompt beside this rule and hide the full working. On the next suitable day, ask the pupil to choose the correct relationship independently and to explain one condition or limit. Draw a base and perpendicular height to show the two-copy argument.
208. Do not substitute before identifying the requested unknown
Card prompt: A question asks for height but a formula notebook only has A=½bh. What is the first step?
Meaning and conditions: A practical formula notebook should explain the question type, the symbols and their units, and the assumptions that make the relationship valid. A card is for understanding and later retrieval, not simply for decorating a page with equations.
One worked example: Identify h as unknown and rearrange or use inverse steps before putting numbers in.
When this would be wrong: Substituting all values randomly without knowing which symbol is unknown may result in wrong formula entry.
Check: Write ‘unknown: h; inputs: area and base’.
Later retrieval: Write a changed-number practice prompt beside this rule and hide the full working. On the next suitable day, ask the pupil to choose the correct relationship independently and to explain one condition or limit. Write ‘unknown: h; inputs: area and base’.
209. Not every ratio is part of a whole
Card prompt: A card says share = part/other×total for A:B. Is it generally correct?
Meaning and conditions: A practical formula notebook should explain the question type, the symbols and their units, and the assumptions that make the relationship valid. A card is for understanding and later retrieval, not simply for decorating a page with equations.
One worked example: No. If A:B=a:b, A/whole=a/(a+b), not a/b.
When this would be wrong: A part-to-part ratio differs from a part-to-whole fraction.
Check: Write both quantities and count combined ratio parts.
Later retrieval: Write a changed-number practice prompt beside this rule and hide the full working. On the next suitable day, ask the pupil to choose the correct relationship independently and to explain one condition or limit. Write both quantities and count combined ratio parts.
210. Formula selection comes before arithmetic
Card prompt: A rectangle question asks for outside edging length. Should the student use A=lw?
Meaning and conditions: A practical formula notebook should explain the question type, the symbols and their units, and the assumptions that make the relationship valid. A card is for understanding and later retrieval, not simply for decorating a page with equations.
One worked example: No. Use perimeter P=2(l+w), because edging follows boundary length.
When this would be wrong: Formula recall without interpreting the requested quantity can cause systematic errors.
Check: Underline ‘edging’ and predict length units.
Later retrieval: Write a changed-number practice prompt beside this rule and hide the full working. On the next suitable day, ask the pupil to choose the correct relationship independently and to explain one condition or limit. Underline ‘edging’ and predict length units.
211. A formula card should not assert a grade guarantee
Card prompt: Does completing a personal notebook guarantee a top SEC grade?
Meaning and conditions: A practical formula notebook should explain the question type, the symbols and their units, and the assumptions that make the relationship valid. A card is for understanding and later retrieval, not simply for decorating a page with equations.
One worked example: No. A notebook can support retrieval and error checking but does not by itself measure all skills or future examination performance.
When this would be wrong: Turning a study aid into a promise exceeds the evidence.
Check: Use unseen school-aligned questions to assess progress.
Later retrieval: Write a changed-number practice prompt beside this rule and hide the full working. On the next suitable day, ask the pupil to choose the correct relationship independently and to explain one condition or limit. Use unseen school-aligned questions to assess progress.
212. Separate the source and the student’s explanation
Card prompt: The notebook copies a teacher-issued formula. What additional note helps?
Meaning and conditions: A practical formula notebook should explain the question type, the symbols and their units, and the assumptions that make the relationship valid. A card is for understanding and later retrieval, not simply for decorating a page with equations.
One worked example: Add the student’s own explanation of what each symbol measures and one original example, while respecting the source.
When this would be wrong: A copied formula without meaning may not transfer to new stories.
Check: Explain the unit of every input aloud.
Later retrieval: Write a changed-number practice prompt beside this rule and hide the full working. On the next suitable day, ask the pupil to choose the correct relationship independently and to explain one condition or limit. Explain the unit of every input aloud.
213. A notebook should be revised after a mistake
Card prompt: A pupil repeatedly confuses circumference and area. What should change?
Meaning and conditions: A practical formula notebook should explain the question type, the symbols and their units, and the assumptions that make the relationship valid. A card is for understanding and later retrieval, not simply for decorating a page with equations.
One worked example: Add a short ‘length around / region inside’ contrast with cm and cm², then retest using new radii.
When this would be wrong: Copying the same two formulas without identifying the confusion leaves the gap unaddressed.
Check: Compare an exact perimeter and an area with their separate units.
Later retrieval: Write a changed-number practice prompt beside this rule and hide the full working. On the next suitable day, ask the pupil to choose the correct relationship independently and to explain one condition or limit. Compare an exact perimeter and an area with their separate units.
214. Formula cards may include algebraic derivations
Card prompt: A card says y=mx+b and gives y=11 at x=2 with m=3. What is b?
Meaning and conditions: A practical formula notebook should explain the question type, the symbols and their units, and the assumptions that make the relationship valid. A card is for understanding and later retrieval, not simply for decorating a page with equations.
One worked example: b=11−3×2=5. A short rearrangement demonstrates the symbol’s role.
When this would be wrong: Declaring b=11 treats the observed output as the intercept.
Check: Substitute x=0 into y=3x+5.
Later retrieval: Write a changed-number practice prompt beside this rule and hide the full working. On the next suitable day, ask the pupil to choose the correct relationship independently and to explain one condition or limit. Substitute x=0 into y=3x+5.
215. One formula can produce many outputs
Card prompt: Does A=lw mean every rectangle with length five has equal area?
Meaning and conditions: A practical formula notebook should explain the question type, the symbols and their units, and the assumptions that make the relationship valid. A card is for understanding and later retrieval, not simply for decorating a page with equations.
One worked example: No. Width also matters. The formula is a relation, not a fixed numeric answer.
When this would be wrong: Treating one known variable as enough information creates guesses.
Check: 5×2 and 5×4 yield different areas.
Later retrieval: Write a changed-number practice prompt beside this rule and hide the full working. On the next suitable day, ask the pupil to choose the correct relationship independently and to explain one condition or limit. 5×2 and 5×4 yield different areas.
216. A volume unit card should distinguish litres
Card prompt: What is the useful link from cm³ to mL?
Meaning and conditions: A practical formula notebook should explain the question type, the symbols and their units, and the assumptions that make the relationship valid. A card is for understanding and later retrieval, not simply for decorating a page with equations.
One worked example: 1 cm³=1 mL and 1,000 mL=1 L. It is a volume conversion, not a square-area conversion.
When this would be wrong: Confusing cm² with mL changes dimensions.
Check: Convert 2,500 cm³ to 2.5 L.
Later retrieval: Write a changed-number practice prompt beside this rule and hide the full working. On the next suitable day, ask the pupil to choose the correct relationship independently and to explain one condition or limit. Convert 2,500 cm³ to 2.5 L.
217. Keep a worked example small and correct
Card prompt: A card includes a long worked problem with one incorrect sign. Should it remain?
Meaning and conditions: A practical formula notebook should explain the question type, the symbols and their units, and the assumptions that make the relationship valid. A card is for understanding and later retrieval, not simply for decorating a page with equations.
One worked example: No. Correct the first invalid transformation before treating the card as a reusable reference.
When this would be wrong: A neat-looking incorrect example can reinforce an error across future practice.
Check: Substitute the answer into the original expression.
Later retrieval: Write a changed-number practice prompt beside this rule and hide the full working. On the next suitable day, ask the pupil to choose the correct relationship independently and to explain one condition or limit. Substitute the answer into the original expression.
218. Use both forward and reverse questions
Card prompt: A child can find price after a 20% discount but not original price from the sale price. What should be added?
Meaning and conditions: A practical formula notebook should explain the question type, the symbols and their units, and the assumptions that make the relationship valid. A card is for understanding and later retrieval, not simply for decorating a page with equations.
One worked example: A reverse card: sale=0.8×original, hence original=sale/0.8.
When this would be wrong: One-way memorisation may not show relational understanding.
Check: A $72 sale at 20% off comes from $90.
Later retrieval: Write a changed-number practice prompt beside this rule and hide the full working. On the next suitable day, ask the pupil to choose the correct relationship independently and to explain one condition or limit. A $72 sale at 20% off comes from $90.
219. Include a boundary and sign check
Card prompt: The formula gives P(event)=7/6. What should the pupil notice?
Meaning and conditions: A practical formula notebook should explain the question type, the symbols and their units, and the assumptions that make the relationship valid. A card is for understanding and later retrieval, not simply for decorating a page with equations.
One worked example: A probability cannot exceed one. Check numerator count and denominator of sample space.
When this would be wrong: A device display does not certify a probability model.
Check: Return to 0≤P≤1.
Later retrieval: Write a changed-number practice prompt beside this rule and hide the full working. On the next suitable day, ask the pupil to choose the correct relationship independently and to explain one condition or limit. Return to 0≤P≤1.
220. Mark formulas by prerequisite
Card prompt: A later quadratic rule uses negative squaring but the learner struggles with signed multiplication. What next?
Meaning and conditions: A practical formula notebook should explain the question type, the symbols and their units, and the assumptions that make the relationship valid. A card is for understanding and later retrieval, not simply for decorating a page with equations.
One worked example: Repair signed arithmetic before adding the advanced formula. The notebook’s order should follow actual prerequisite needs.
When this would be wrong: An advanced formula may amplify an earlier weakness.
Check: Complete a changed negative-number question independently first.
Later retrieval: Write a changed-number practice prompt beside this rule and hide the full working. On the next suitable day, ask the pupil to choose the correct relationship independently and to explain one condition or limit. Complete a changed negative-number question independently first.
221. Use one card for a mistaken unit conversion
Card prompt: How should cm² to m² be noted?
Meaning and conditions: A practical formula notebook should explain the question type, the symbols and their units, and the assumptions that make the relationship valid. A card is for understanding and later retrieval, not simply for decorating a page with equations.
One worked example: 1 m²=10,000 cm² because 100 cm along two dimensions gives 100² square centimetres.
When this would be wrong: Writing 1 m²=100 cm² uses a length factor only once.
Check: Reverse convert 2 m² to 20,000 cm².
Later retrieval: Write a changed-number practice prompt beside this rule and hide the full working. On the next suitable day, ask the pupil to choose the correct relationship independently and to explain one condition or limit. Reverse convert 2 m² to 20,000 cm².
222. Use one card for a cubic conversion
Card prompt: How should cm³ to m³ be noted?
Meaning and conditions: A practical formula notebook should explain the question type, the symbols and their units, and the assumptions that make the relationship valid. A card is for understanding and later retrieval, not simply for decorating a page with equations.
One worked example: 1 m³=1,000,000 cm³ because 100³ cubic centimetres fill the metre cube.
When this would be wrong: Area conversion factor 10,000 is not sufficient for volume.
Check: 0.01 m³ is 10,000 cm³.
Later retrieval: Write a changed-number practice prompt beside this rule and hide the full working. On the next suitable day, ask the pupil to choose the correct relationship independently and to explain one condition or limit. 0.01 m³ is 10,000 cm³.
223. A formula does not fix ambiguous diagram labels
Card prompt: A triangle diagram gives a slanted side seven but no perpendicular height. Can A=½×base×7 always be used?
Meaning and conditions: A practical formula notebook should explain the question type, the symbols and their units, and the assumptions that make the relationship valid. A card is for understanding and later retrieval, not simply for decorating a page with equations.
One worked example: No. The seven must be perpendicular height to the chosen base for that substitution.
When this would be wrong: Assuming any vertex-to-edge side is the altitude changes area.
Check: Look for a right-angle marker or statement.
Later retrieval: Write a changed-number practice prompt beside this rule and hide the full working. On the next suitable day, ask the pupil to choose the correct relationship independently and to explain one condition or limit. Look for a right-angle marker or statement.
224. A calculator reminder belongs beside a grouped formula
Card prompt: A mean card says sum readings divided by count. What entry reminder helps?
Meaning and conditions: A practical formula notebook should explain the question type, the symbols and their units, and the assumptions that make the relationship valid. A card is for understanding and later retrieval, not simply for decorating a page with equations.
One worked example: Use parentheses around the entire sum before dividing, for example (3+5+7)/3.
When this would be wrong: Typing 3+5+7/3 divides only the last term under standard precedence.
Check: Mean of three, five and seven is five.
Later retrieval: Write a changed-number practice prompt beside this rule and hide the full working. On the next suitable day, ask the pupil to choose the correct relationship independently and to explain one condition or limit. Mean of three, five and seven is five.
225. Syllabus year and paper rules must be verified
Card prompt: Is a formula seen on a 2027 K110 source automatically the exact supplied formula sheet for a future cohort?
Meaning and conditions: A practical formula notebook should explain the question type, the symbols and their units, and the assumptions that make the relationship valid. A card is for understanding and later retrieval, not simply for decorating a page with equations.
One worked example: No. The exam’s own year and instructions govern. Keep source date and use school guidance.
When this would be wrong: Assuming a later or different cohort uses identical paper provisions can mislead.
Check: Consult the actual official syllabus and paper materials for the student’s year.
Later retrieval: Write a changed-number practice prompt beside this rule and hide the full working. On the next suitable day, ask the pupil to choose the correct relationship independently and to explain one condition or limit. Consult the actual official syllabus and paper materials for the student’s year.
226. Formula without context can be misleading
Card prompt: Is the line ‘P=2πr’ enough to know what P measures?
Meaning and conditions: A practical formula notebook should explain the question type, the symbols and their units, and the assumptions that make the relationship valid. A card is for understanding and later retrieval, not simply for decorating a page with equations.
One worked example: Only if labelled: here it could represent circle perimeter/circumference for radius r. Definitions prevent ambiguity.
When this would be wrong: A symbol like P can elsewhere mean probability or payment.
Check: Write ‘circumference (cm)’ above the formula.
Later retrieval: Write a changed-number practice prompt beside this rule and hide the full working. On the next suitable day, ask the pupil to choose the correct relationship independently and to explain one condition or limit. Write ‘circumference (cm)’ above the formula.
227. Use errors as notebook prompts
Card prompt: A pupil loses the minus in y=−2x+3. What note helps?
Meaning and conditions: A practical formula notebook should explain the question type, the symbols and their units, and the assumptions that make the relationship valid. A card is for understanding and later retrieval, not simply for decorating a page with equations.
One worked example: Add a signed-substitution example with x=−4, yielding y=11, and a first-error reminder.
When this would be wrong: An extra generic formula page would not target the sign issue.
Check: Check −2(−4)=+8.
Later retrieval: Write a changed-number practice prompt beside this rule and hide the full working. On the next suitable day, ask the pupil to choose the correct relationship independently and to explain one condition or limit. Check −2(−4)=+8.
228. Model assumption belongs with direct proportion
Card prompt: A cost model C=kn assumes what?
Meaning and conditions: A practical formula notebook should explain the question type, the symbols and their units, and the assumptions that make the relationship valid. A card is for understanding and later retrieval, not simply for decorating a page with equations.
One worked example: No fixed fee and constant per-item rate k over the stated range. With a fixed charge, C=F+kn instead.
When this would be wrong: Misclassifying a fixed-fee line as direct proportion can distort ratios.
Check: Check value at n=0.
Later retrieval: Write a changed-number practice prompt beside this rule and hide the full working. On the next suitable day, ask the pupil to choose the correct relationship independently and to explain one condition or limit. Check value at n=0.
229. A good notebook remains short enough to retrieve
Card prompt: Should a pupil copy every worked example in a 40,000-word guide into one notebook?
Meaning and conditions: A practical formula notebook should explain the question type, the symbols and their units, and the assumptions that make the relationship valid. A card is for understanding and later retrieval, not simply for decorating a page with equations.
One worked example: No. Select the current formula, a definition, one meaningful example, one common mistake and one changed-number retest.
When this would be wrong: Large repetitive notebooks can become difficult to use in revision.
Check: Aim for a concise card that can be explained without the model.
Later retrieval: Write a changed-number practice prompt beside this rule and hide the full working. On the next suitable day, ask the pupil to choose the correct relationship independently and to explain one condition or limit. Aim for a concise card that can be explained without the model.
230. Classify the units on a graph rule
Card prompt: A line uses time seconds horizontally and distance centimetres vertically. What are units of m in y=mx+b?
Meaning and conditions: A practical formula notebook should explain the question type, the symbols and their units, and the assumptions that make the relationship valid. A card is for understanding and later retrieval, not simply for decorating a page with equations.
One worked example: cm/s for the gradient; b has cm units for starting distance.
When this would be wrong: Treating m as unitless loses physical meaning.
Check: Rise centimetres divided by run seconds.
Later retrieval: Write a changed-number practice prompt beside this rule and hide the full working. On the next suitable day, ask the pupil to choose the correct relationship independently and to explain one condition or limit. Rise centimetres divided by run seconds.
231. One card cannot replace the teacher’s examples
Card prompt: A school teacher uses a specific diagram convention. Should a student discard it for an internet notebook?
Meaning and conditions: A practical formula notebook should explain the question type, the symbols and their units, and the assumptions that make the relationship valid. A card is for understanding and later retrieval, not simply for decorating a page with equations.
One worked example: No. Use the actual school terminology and teacher instructions; a personal card is a supplementary explanation.
When this would be wrong: Conflicting diagram labels can confuse otherwise valid knowledge.
Check: Match the source and requested notation.
Later retrieval: Write a changed-number practice prompt beside this rule and hide the full working. On the next suitable day, ask the pupil to choose the correct relationship independently and to explain one condition or limit. Match the source and requested notation.
232. Use an explanation of why formula applies
Card prompt: A prism volume card says V=Ah. What does A mean?
Meaning and conditions: A practical formula notebook should explain the question type, the symbols and their units, and the assumptions that make the relationship valid. A card is for understanding and later retrieval, not simply for decorating a page with equations.
One worked example: Area of the uniform cross-section perpendicular to the prism length/height h; it must be appropriately defined.
When this would be wrong: Using arbitrary side area instead of base or cross-sectional area changes volume.
Check: If A=12 cm² and h=5 cm, volume is 60 cm³.
Later retrieval: Write a changed-number practice prompt beside this rule and hide the full working. On the next suitable day, ask the pupil to choose the correct relationship independently and to explain one condition or limit. If A=12 cm² and h=5 cm, volume is 60 cm³.
233. A notebook is a learning aid, not an assessment record
Card prompt: A pupil has a complete neat formula card but cannot solve one unseen question. Is the topic mastered?
Meaning and conditions: A practical formula notebook should explain the question type, the symbols and their units, and the assumptions that make the relationship valid. A card is for understanding and later retrieval, not simply for decorating a page with equations.
One worked example: Not demonstrated. A changed independent question is needed to test actual use.
When this would be wrong: Neat presentation can conceal uncertain method selection.
Check: Record first-error and delayed retest separately.
Later retrieval: Write a changed-number practice prompt beside this rule and hide the full working. On the next suitable day, ask the pupil to choose the correct relationship independently and to explain one condition or limit. Record first-error and delayed retest separately.
234. The same formula may be written equivalently
Card prompt: Are P=2(l+w) and P=2l+2w equivalent for a rectangle?
Meaning and conditions: A practical formula notebook should explain the question type, the symbols and their units, and the assumptions that make the relationship valid. A card is for understanding and later retrieval, not simply for decorating a page with equations.
One worked example: Yes. Distribution makes them identical expressions.
When this would be wrong: Treating differently formatted formulas as different physical laws.
Check: Substitute l=3,w=4 to get fourteen both ways.
Later retrieval: Write a changed-number practice prompt beside this rule and hide the full working. On the next suitable day, ask the pupil to choose the correct relationship independently and to explain one condition or limit. Substitute l=3,w=4 to get fourteen both ways.
235. A ratio card can contain an explicit unknown unit
Card prompt: If a:b=2:3 and total is 40, what does one part equal?
Meaning and conditions: A practical formula notebook should explain the question type, the symbols and their units, and the assumptions that make the relationship valid. A card is for understanding and later retrieval, not simply for decorating a page with equations.
One worked example: Five equal parts total forty, so one part eight; shares sixteen and twenty-four.
When this would be wrong: Interpreting ratio labels as actual item counts ignores scale.
Check: 16+24=40 and 16:24=2:3.
Later retrieval: Write a changed-number practice prompt beside this rule and hide the full working. On the next suitable day, ask the pupil to choose the correct relationship independently and to explain one condition or limit. 16+24=40 and 16:24=2:3.
236. An equation formula cannot be divided by zero
Card prompt: In x=(y−b)/m, what restriction matters?
Meaning and conditions: A practical formula notebook should explain the question type, the symbols and their units, and the assumptions that make the relationship valid. A card is for understanding and later retrieval, not simply for decorating a page with equations.
One worked example: m≠0. If m=0, the line is constant y=b and x is not uniquely determined from y=b.
When this would be wrong: Blind division by zero is invalid.
Check: State the coefficient before isolating a variable.
Later retrieval: Write a changed-number practice prompt beside this rule and hide the full working. On the next suitable day, ask the pupil to choose the correct relationship independently and to explain one condition or limit. State the coefficient before isolating a variable.
237. Diagram-based understanding survives lost memory
Card prompt: If a pupil forgets trapezium area formula, what model can rebuild it?
Meaning and conditions: A practical formula notebook should explain the question type, the symbols and their units, and the assumptions that make the relationship valid. A card is for understanding and later retrieval, not simply for decorating a page with equations.
One worked example: Two copies of the trapezium can form a parallelogram with base equal to sum of the parallel sides and the same height, so A=½(a+b)h.
When this would be wrong: Trying an unrelated perimeter formula as a guess is not justified.
Check: Check for a=4,b=6,h=3, area fifteen.
Later retrieval: Write a changed-number practice prompt beside this rule and hide the full working. On the next suitable day, ask the pupil to choose the correct relationship independently and to explain one condition or limit. Check for a=4,b=6,h=3, area fifteen.
238. Retrieve a rule before reading the card
Card prompt: Why hide a formula’s answer during practice?
Meaning and conditions: A practical formula notebook should explain the question type, the symbols and their units, and the assumptions that make the relationship valid. A card is for understanding and later retrieval, not simply for decorating a page with equations.
One worked example: To test whether the learner can recall and choose the relationship independently rather than merely recognise a familiar display.
When this would be wrong: Constant visible models can create false fluency.
Check: Show the card after the attempt, then retest with changed quantities.
Later retrieval: Write a changed-number practice prompt beside this rule and hide the full working. On the next suitable day, ask the pupil to choose the correct relationship independently and to explain one condition or limit. Show the card after the attempt, then retest with changed quantities.
239. Prioritise the next school chapter
Card prompt: A notebook contains arcs, cylinders and advanced identities, but school is teaching linear equations. What should be revised?
Meaning and conditions: A practical formula notebook should explain the question type, the symbols and their units, and the assumptions that make the relationship valid. A card is for understanding and later retrieval, not simply for decorating a page with equations.
One worked example: Prioritise the current linear-equation prerequisites and relevant teacher-issued materials; reserve optional extensions separately.
When this would be wrong: A long list of hard formulas is not automatically better preparation.
Check: Choose the school-relevant card and one changed equation.
Later retrieval: Write a changed-number practice prompt beside this rule and hide the full working. On the next suitable day, ask the pupil to choose the correct relationship independently and to explain one condition or limit. Choose the school-relevant card and one changed equation.
240. Use a reverse denominator check
Card prompt: A fraction card has A=(b+c)/d. What should be entered?
Meaning and conditions: A practical formula notebook should explain the question type, the symbols and their units, and the assumptions that make the relationship valid. A card is for understanding and later retrieval, not simply for decorating a page with equations.
One worked example: Group the numerator (b+c) and divide the whole sum by nonzero d.
When this would be wrong: Typing b+c/d divides only c under ordinary precedence.
Check: For b=2,c=4,d=3, result two.
Later retrieval: Write a changed-number practice prompt beside this rule and hide the full working. On the next suitable day, ask the pupil to choose the correct relationship independently and to explain one condition or limit. For b=2,c=4,d=3, result two.
241. Record one source without claiming completeness
Card prompt: The notebook cites MOE G1 and 2027 K110. Is it an official complete formula list for all future cohorts?
Meaning and conditions: A practical formula notebook should explain the question type, the symbols and their units, and the assumptions that make the relationship valid. A card is for understanding and later retrieval, not simply for decorating a page with equations.
One worked example: No. It is a self-made learning aid; official exam documents and school guidance control exact requirements.
When this would be wrong: Calling a personal notebook the examination’s official list would be misleading.
Check: Compare against the correct syllabus year and teacher notes.
Later retrieval: Write a changed-number practice prompt beside this rule and hide the full working. On the next suitable day, ask the pupil to choose the correct relationship independently and to explain one condition or limit. Compare against the correct syllabus year and teacher notes.
242. Use a mini glossary
Card prompt: What is the difference between h in triangle area and h in a time-height graph?
Meaning and conditions: A practical formula notebook should explain the question type, the symbols and their units, and the assumptions that make the relationship valid. A card is for understanding and later retrieval, not simply for decorating a page with equations.
One worked example: They may denote perpendicular height of a triangle versus vertical dependent quantity or coordinate; notation is contextual.
When this would be wrong: One letter can have different mathematical roles between chapters.
Check: Define h in the local card.
Later retrieval: Write a changed-number practice prompt beside this rule and hide the full working. On the next suitable day, ask the pupil to choose the correct relationship independently and to explain one condition or limit. Define h in the local card.
243. A useful final page lists next steps
Card prompt: What should the end of a small notebook contain?
Meaning and conditions: A practical formula notebook should explain the question type, the symbols and their units, and the assumptions that make the relationship valid. A card is for understanding and later retrieval, not simply for decorating a page with equations.
One worked example: A short list of secure formulas, first-error reminders and one or two unmastered school-relevant relationships to retest.
When this would be wrong: A large static formula catalogue with no retrieval plan may not support progress.
Check: Update after each genuine changed-number check.
Later retrieval: Write a changed-number practice prompt beside this rule and hide the full working. On the next suitable day, ask the pupil to choose the correct relationship independently and to explain one condition or limit. Update after each genuine changed-number check.
What a three-pupil tutorial could do with these cards
The unchanged eduKateSG Clementi small-group Maths reference describes 90-minute tutorials for up to three students near Sixth Avenue MRT. A suitable G1 lesson could have one student build a rate card with units, another distinguish area from perimeter, and a third explain a graph rule. The teacher can check understanding by hiding the card and asking for the correct formula on an unseen question. The format reference does not establish a current class vacancy or guarantee grades.
- 10 minutes: retrieve one current formula from memory and explain its symbols.
- 20 minutes: derive or visualise one relationship with a diagram or unit model.
- 25 minutes: solve differentiated school-relevant practice independently.
- 15 minutes: discuss one common formula-selection error per learner.
- 10 minutes: write a concise five-line notebook card.
- 10 minutes: set one changed-number delayed retrieval question and explain the next lesson’s focus.
Five manageable home sessions
- Day one: choose just one current formula and define every symbol.
- Day two: add one short numerical example with correct units.
- Day three: write one misleading use of that formula and explain why it is wrong.
- Day four: solve a changed-number question without looking at the card.
- Day five: review the first error and update the card only if it improves the learner’s next independent decision.
Parents do not need a huge workbook to supervise this process. They can ask, ‘What does each symbol mean?’, ‘What kind of quantity will the answer measure?’ and ‘What changes if one side or input doubles?’ The tutor can provide topic-specific guidance when the parent is unsure. The notebook should stay short enough to be read, retrieved and revised within the child’s school and CCA commitments.
Frequently asked questions
Should a pupil memorise every formula in this guide?
No. Select the current school-required or prerequisite formulas and understand when they apply. Optional later-stage examples should be clearly separated.
Will an exam give a formula sheet?
This depends on the assessment and examination year. Check the relevant official syllabus and teacher instructions rather than assuming all papers supply the same items.
Can one letter mean different things on different cards?
Yes. For example b can mean a triangle’s base or a linear graph’s intercept. Define symbols locally.
What is the most important part of a formula card?
The relationship’s meaning and when it applies, along with one independent way to check the result. A copied equation alone is not evidence of mastery.
How many examples belong on one card?
Often one clear worked example, one warning and one changed-number retest are enough. Adjust to the learner’s needs.
How can a tutor tell whether the notebook helped?
Remove the card, give a changed school-relevant question and ask the pupil to choose, explain, apply and check the correct relation independently.
Continue the Secondary 2 G1 Maths pathway
- Formula substitution and units
- Changing the subject of a formula
- Sense-checking answers
- Calculator entry and checking
- Four-week mastery checks
Official references and reader notes
- MOE: G1 Mathematics by secondary level
- SEAB 2027 SEC G1 K110 Mathematics
- SEAB: 2027 K110 Mathematics subject and formulae guidance
- eduKateSG immutable three-pupil tutorial reference
Reader note: This is a personal study-aid method and an original mathematical example bank, not an official examination formula list, a promise of current class opening or a guarantee of marks. Exact syllabus and formula provisions depend on the pupil’s present school work and official graduation year. Confirm teaching availability, fees and placement directly with the centre.
Bring an existing formula notebook or one repeated formula-selection mistake to eduKate Singapore and ask how a tutor would turn it into one concise question–meaning–check card with an independent follow-up.