
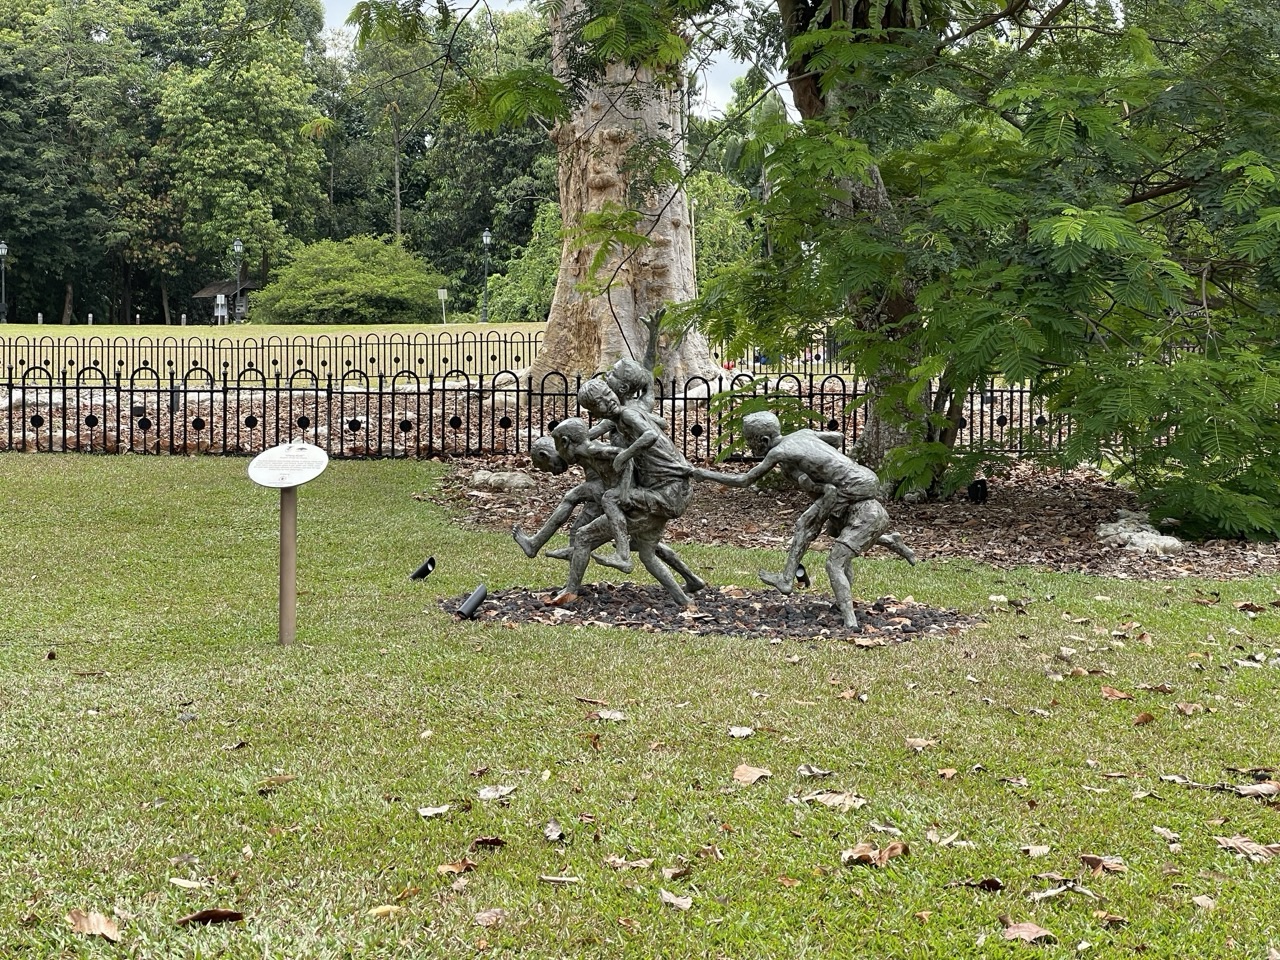
Singapore Botanic Gardens photography works best when you choose a small area for the kind of image you want: heritage forms near Tanglin, lakeside and plant studies from the Bukit Timah side, or a focused visit to a particular collection. Check the official map and current notices, then leave time to look at the light instead of rushing between every landmark.
The Gardens’ current space-use page says casual photography sessions, including family portraits and graduations, do not require submission. Filming for documentaries and media uses the permit application route, with submissions required at least 14 days before use. Business activity and exclusive use are separate questions, so clarify your actual project with the Gardens when it extends beyond an ordinary casual session.
This guide helps Bukit Timah families, phone photographers and visitors make better pictures while keeping the landscape available to everyone. It offers editorial exercises in composition, light and time budgeting. These are not official photo trails, a permit decision for an individual project or a promise of empty backgrounds and particular blooms. Respect collection boundaries, wildlife and the people whose outing happens to share your frame.
| Question | Useful action |
|---|---|
| Casual family or graduation session? | Read the official casual-session guidance and shared-space rules. |
| Documentary or media filming? | Use the official application route and plan for its minimum lead time. |
| Special setup or business activity? | Clarify the specific arrangement with the Gardens. |
| Preferred scene unavailable? | Use a verified nearby alternative or simplify the photographic brief. |
eduKateSG · Bukit Timah neighbourhood guides
Choose your reading route
Understand the visit · Plan arrival · Choose activities · Solve practical problems · Read ten quick answers
Chapters 6–10
6. Photograph the heritage landscape
8. Photograph plants thoughtfully
Choose a subject before a landmark list
Begin with one intention: a family portrait, the shape of a mature tree, a close view of a leaf, or a sequence showing a garden walk. Each intention suggests different positions, timing and equipment. Without that decision, a long list of famous spots can become a journey in which you repeatedly arrive, take a hurried picture and leave. A clear subject lets you notice a suitable scene even when it is not the landmark you expected. The Gardens offers many visual possibilities, but a successful outing may produce only a handful of carefully chosen images. Quality begins with deciding what the viewer should notice.
Write a small photographic brief
For an informal visit, a one-sentence brief is enough: ‘Show our family enjoying a quiet garden morning without blocking the path.’ Add two or three image ideas that serve it, such as a walking view, a portrait and a plant detail. This gives the photographer and companions the same expectation. It also makes a change of location easier because the purpose survives even when a particular background is unavailable. For a school activity, ask pupils to explain the brief in their own words. An image becomes more deliberate when the person taking it can say why that subject and setting belong together.
Use the map to reduce unnecessary travel
Locate the intended subjects on the official Gardens map before selecting an entrance. The Bukit Timah and Tanglin sides are different arrival decisions, while Gallop and individual collections introduce further connections. Choose a cluster that fits your available time and the group’s comfortable distance. A scene that looks close in a social photograph may require more travel than expected. Treat movement, setup and waiting as part of the visit. A compact route also makes it easier to respond to rain or an occupied background. Instead of hurrying across the grounds for one picture, you can work thoughtfully with the area you chose.
Keep one alternative background ready
A landmark may be busy, temporarily inaccessible or visually different from an older photograph. Select a second type of scene that still fits your brief: a permitted path under trees, a view of water from a public position or a plant detail. Check that the alternative is actually reachable and open. An alternative should simplify the outing, not send the group on an unplanned cross-garden march. Discuss it before people are tired or waiting in formal clothes. The creative advantage is useful too: you stop treating one background as the only possible image and begin seeing how light, spacing and gesture can carry the photograph.
Read the official distinction accurately
The Gardens’ space-use page explicitly says casual sessions, with family portraits and graduations as examples, do not require submission. That is more useful than a blanket statement that every photograph needs a permit. At the same time, it does not provide a universal answer for every organised production. Read the current page in relation to what you intend to do, including the group, equipment, purpose and any intended use of space. If your activity differs materially from a casual session, ask a specific question before arranging it. A clear description of the project helps the Gardens direct you to the appropriate requirements.
Keep other permissions separate
Being able to take casual photographs does not reserve a location, allow furniture to be installed or authorise a business activity. The Gardens lists separate rules about obstructing access, conducting business and exclusive use of shelters. A photographic plan should satisfy all the relevant conditions, rather than treating one sentence about casual sessions as permission for everything around them. If the shoot depends on a setup, dedicated space or a commercial arrangement, clarify those elements. Keep any required confirmation available on the day. Practical preparation reduces the chance that companions arrive expecting a private set in a landscape that remains open for shared public enjoyment.
Describe the project rather than guessing its category
The official page directs filming for documentaries and media to a filming/photography application, with submissions at least 14 days before use. If your project may fall into that route, prepare a clear account of the purpose, date, location, people and equipment. Ask about uncertainties early enough for the answer to affect the plan. Do not infer approval from submitting a form, paying another supplier or receiving no immediate objection. This guide is a planning aid, not a decision on an individual application. Use the Gardens’ current instructions and any project-specific conditions as the authoritative reference for what you may do.
Work backwards from the intended date
A minimum lead time is a constraint to plan around, not a guarantee of approval within that period. Leave room for questions and changes before committing to arrangements that cannot easily move. If the preferred date is too close for the relevant process, consider a different date or a genuinely casual alternative that meets the official guidance. Do not relabel the same production simply to avoid the requirements. A workable schedule includes permissions, participant availability, weather alternatives and the actual session. The photograph is the final visible result of those decisions, so resolve them before the group reaches the chosen location.
Use Bukit Timah Gate for a northern plan
The official visitor information identifies Botanic Gardens MRT, on the Circle and Downtown lines, for the Bukit Timah Entrance. That can suit an outing built around the northern landscape after checking the exact map connections. Name the entrance when arranging a meeting and allow time for the final approach from transport. If participants carry clothes, cameras or other personal items, keep the arrival sequence simple. A person who comes from a different direction should not have to guess which part of the Gardens you meant. The first photograph will be easier when everyone arrives at the same place with enough time to settle.
Use Tanglin or another entrance when it reduces travel
Napier MRT on the Thomson–East Coast Line serves the Tanglin Entrance, according to the official visitor page. It may fit a heritage-focused photography plan more directly than starting at the northern gate. Other entrances may suit particular collections, but compare their actual approach and departure rather than selecting by name alone. If driving, check the relevant parking zone and the journey from it to your intended scene. Choose the complete plan with the least unnecessary movement for your group. A convenient entrance is one that works for the subjects, mobility needs and return arrangement together, not simply the first gate a map search suggests.
Let a structure organise the image
The Bandstand and other heritage features can give a photograph a clear shape. Look at the relationship between the structure, the surrounding space and the people in your frame. A wider view can show how a landmark belongs to the landscape, while a closer view can emphasise a repeated form or detail. Choose your position from permitted public space and leave access clear. An attractive building does not need to fill every image from the same central angle. Ask what the image should communicate: the scale of the place, a family moment or the way a path leads towards a familiar shape.
Check actual availability before promising a location
The current space-use page states that the Bandstand is unavailable for wedding solemnisations from 10 November 2026 to 10 January 2027. That is a specific event-use notice; it should not be rewritten as a general closure of all photography without further information. Check the current notices and your own intended use before arranging a session around it. More broadly, a public landmark can be occupied or affected by maintenance even when an older guide shows a clear view. Promise your companions a thoughtful session, not exclusive access to a background you have not reserved. Keep the alternative scene ready.
Show scale without entering planting areas
A mature tree can feel very different when photographed alone and when a person stands at a respectful public viewpoint nearby. Use that relationship to show scale while keeping the group on permitted surfaces. Avoid placing people among roots, beds or protected planting for an apparently more natural portrait. You can change your own position along the path to adjust the overlap between subject and trunk. Check what is behind a person’s head and shoulders before taking the picture. Small changes in viewpoint often improve clarity more than asking the subject to move into an unsuitable area. The landscape can remain intact while the composition becomes stronger.
Use a path as a visual connection
A curving path can lead the viewer into the frame, but it is also a real route used by other people. Work from a position that leaves passage clear, and stop when someone needs to pass. For a walking portrait, let the group move a short distance naturally rather than repeatedly occupying the full width. Look for a foreground, a main subject and a background that work together. If all three compete, simplify the frame. A good path photograph need not be empty; ordinary public use can be part of the story when photographed respectfully and without making strangers the unintended focus.
Find shape before searching for rare flowers
Leaf edges, branching patterns, bark and the arrangement of stems offer strong subjects even when the expected flower is absent. Look at the shape first, then decide whether colour or texture is the main feature. A plain background can help a small detail stand out. Move your own viewpoint within permitted space rather than pulling the plant towards the camera. Do not promise a particular bloom based on an older image; living collections change. This approach makes the outing rewarding across different conditions. You are learning to notice what is present today, rather than treating the landscape as an incomplete version of a saved photograph.
Keep labels and captions accurate
If you photograph a plant label for reference, check that it corresponds to the plant in your image. A nearby sign can be misassigned when several subjects grow close together. Keep the reference frame with the final photograph until you are confident of the identification. If uncertain, describe the visible feature rather than inventing a species name. The same care applies to captions about heritage structures and sculptures. A precise caption can be brief: what is shown, where it was photographed and a verified contextual detail. Accuracy makes a modest image more useful for readers, students and your own later understanding of the visit.
Look for a clear relationship
From a permitted public viewpoint, a lake can provide reflection, open space or a visual contrast with trees. Decide which relationship matters before filling the frame with everything around you. A reflection may become stronger when the horizon is placed deliberately; a person beside the water may need more room in the frame to convey the setting. Watch where the group stands and keep attention on actual movement, not only the screen. The photograph does not require reaching a precarious edge or entering habitat. A safe position with an intelligible composition is more useful than a dramatic angle that makes the outing harder to manage.
Accept movement and changing conditions
Water, leaves and birds do not remain still for your plan. A reflection can disappear with a breeze, and a promising arrangement may change while you adjust the camera. Take a thoughtful frame when the relationship works, then allow the scene to move on. If the expected image does not happen, look for another feature rather than trying to control the environment. This is a helpful lesson for children: the photographer chooses a viewpoint and a moment, but does not own the scene. A good garden image can show the actual conditions of the day, including ripples or cloud, instead of pretending every visit offers the same postcard.
Look at faces and backgrounds separately
A bright background can make a face appear dark in a phone photograph. Before changing many settings, see whether a nearby permitted position gives more even light or a less distracting background. Ask the subject to move only when that movement is comfortable and appropriate. Take a test picture, inspect it and adjust one thing at a time. This approach is easier for beginners than memorising a long list of camera rules. The main question is whether the viewer can see what matters. If the face is the subject, light and framing should help it remain clear without requiring the person to hold an uncomfortable pose.
Use shade as a visual choice
Shade can give a softer appearance, but different shaded places still have different backgrounds and directions of light. Look rather than assuming any tree canopy will produce the same result. For a plant study, compare a detail in even light with one that has stronger contrast. Choose the effect that supports your intention. These are photographic suggestions, not a forecast of what a particular spot will look like at a fixed hour. Weather and season alter conditions. Learn to recognise a useful scene on arrival, and keep the group’s comfort and route ahead of a rigid demand to reproduce an image made under different light.
Make movement and waiting visible
Imagine a family has a 90-minute visit. Allocate 15 minutes to arrival and orientation, 15 to movement between two nearby public viewpoints, 10 to a rest and 15 to departure. That leaves 90 − 15 − 15 − 10 − 15 = 35 minutes for the actual photography. These are illustrative values, not measured Gardens route times. If two settings share that allowance, you might plan roughly 15 minutes at each and retain five minutes of flexibility. The calculation helps explain why a list of six backgrounds can be unrealistic even when the visit sounds long. Every background brings movement and coordination as well as shutter clicks.
Choose a response to delay
Suppose the first background is occupied for 12 minutes. The remaining photography allowance is 35 − 12 = 23 minutes unless the wider plan changes. You can simplify to one setting, use the prepared alternative or extend the agreed visit when everyone is comfortable. Trying to preserve the original list by rushing people is usually a poor exchange. A time budget is useful because it exposes the choice early. The same reasoning transfers to a school photo walk: allow for orientation, instruction and return, then decide how many actual observation tasks fit. Better photographs often come from giving fewer ideas adequate attention.
Ask before directing
Explain the image you are trying to make and invite the person to choose a comfortable position. Check whether standing, sitting or walking works best for them rather than treating a saved pose as mandatory. Families often look more at ease when the photographer gives one simple instruction at a time. Keep the session responsive to children and older relatives, and avoid long waits while you adjust unfamiliar equipment. A technically polished frame is not the only measure of success. A photograph that reflects how people enjoyed the outing can be more meaningful than a formal arrangement achieved through repeated discomfort.
Choose access before the angle
When travelling with a wheelchair, pram or someone who prefers a shorter route, select viewpoints everyone can reach and use. Read the Gardens’ access information and check particular connections where needed. Do not ask a person to wait separately while the rest of the group searches for a more dramatic location. Change the composition around the group rather than changing the group to fit an inaccessible idea. Our wheelchair-access guide offers more detailed planning questions. The result can still be visually strong: framing, background and gesture remain available creative choices. An inclusive photograph begins with a shared experience of the place.
Observe wildlife without directing it
The Gardens prohibits feeding wildlife. Avoid using food, repeated calls or close pursuit to manufacture a scene. If an animal appears, let it choose its distance and keep your group out of its way. A brief sighting can become a simple note or a distant photograph; it need not turn the portrait session into a chase. Children learn from the photographer’s response, so make the respectful decision visible. Explain that the animal is part of a living place and does not have to perform for the camera. Our beginner birdwatching guide develops this distinction between observing behaviour and trying to produce it.
Check pet boundaries before planning a portrait
A dog portrait must use a permitted area and keep the animal controlled. Many Gardens collections and all indoor attractions exclude pets, so a favourite background may not be available for that image. Check the current list before arriving with the dog, and choose a route that avoids restricted connections. Have one adult responsible for handling while another photographs if that fits the group. Do not remove the lead simply to make the picture look cleaner. A relaxed image from an appropriate public path can preserve the memory without requiring an exception to the access rules or an unnecessary disturbance to others.
Use an alternative that is actually open
An indoor collection is only a useful fallback when its opening hours, current notices and access suit your group. Do not borrow the general Gardens schedule for a gallery or assume a dog can enter with you. If rain changes the plan, a shorter session or departure may be more practical than moving everyone across the grounds. Protect equipment according to its own guidance and avoid continuing solely because the group has already travelled. The photographic brief can survive a change: a different background or another date may still achieve it. Keep the decision about conditions separate from disappointment about a missed image.
Respect shared shelters and paths
The Gardens states that shelters cannot be used exclusively for private events, gatherings or exercise, and that visitor access must not be obstructed. Do not turn a shelter into a private changing room or equipment store that prevents others using it. Keep bags, stands and companions out of the main flow. If the group cannot wait without blocking access, reorganise or leave. A public landscape requires a different working style from a hired studio. Smaller equipment choices, a compact group and flexible expectations can make the outing easier, while any project requiring more control should resolve the appropriate arrangements in advance.
Select a coherent small set
After the outing, choose images that do different jobs: establish the place, show the people or activity and reveal a detail. Remove near-duplicates unless they illustrate a meaningful change. Check sharpness and exposure, but also ask whether the image communicates the intended moment. A technically imperfect picture may still be the most expressive record of the visit. Conversely, a clean frame with no clear subject may not earn a place in the final set. This selection exercise teaches visual judgement. You are deciding how a reader experiences the outing rather than simply passing on every frame the camera recorded.
Preserve context when sharing
Caption the location accurately and avoid presenting an old photograph as proof of current access, bloom or opening arrangements. If sharing a suggested route, distinguish your own visit from official guidance. Consider the people who appear in the image, especially children or strangers who are not part of your intended subject. A photograph can be visually appealing without revealing more personal information than necessary. For school work, keep a simple record of where the image came from and who made it. Thoughtful sharing completes the same process that began with the brief: choosing what the image communicates and what the viewer can reasonably infer from it.
Do casual family photographs require a permit submission?
The current official space-use page says casual sessions, including family portraits and graduations, do not require submission. Read that alongside the Gardens’ other rules. It does not reserve a location or authorise obstructing access, installing a setup or conducting business. Clarify any project that extends beyond the described casual activity.
What lead time applies to filming or media applications?
The official page states that submissions are required at least 14 days before use and directs documentaries and media filming to the application route. Plan earlier if you need clarification or arrangements depend on approval. Submission itself should not be treated as a confirmed permission. Follow the current instructions for the actual project.
Which entrance is best for photography?
Choose by the subjects and the complete route. Botanic Gardens MRT serves the Bukit Timah Entrance, while Napier serves Tanglin. A northern plant-and-lake session and a southern heritage session may use different arrivals. Check collection hours and the final approach, especially when the group has mobility needs or a short time window.
Can I rely on the Bandstand for a planned session?
Check current notices and your intended use first. The space-use page specifically lists no wedding solemnisations there from 10 November 2026 to 10 January 2027. That wording should not be expanded into an unverified blanket photography closure. Public use, maintenance and your project’s requirements can still affect whether it suits the plan.
Is a phone enough for a worthwhile photo walk?
Yes. A phone can support deliberate framing, portraits, plant details and a visual story of the visit. Practise choosing a clear subject and inspecting a test frame before adding equipment. Better observation and a more useful viewpoint often make a larger difference than carrying a camera you are still learning to operate.
Can I bring furniture or fly a drone for pictures?
The Gardens’ published rules prohibit setting up tents or furniture, obstructing paths or visitor access, and flying model aircraft or drones. Do not treat casual photography guidance as permission for those activities. If a project depends on a special setup, seek clarification through the appropriate official process before arranging the session.
Are particular flowers guaranteed to be in bloom?
No. A living collection changes, and an older photograph does not establish the display you will find today. Check current attraction information when a particular feature matters, and keep other plant subjects in mind. Leaf form, bark, branching and the relationship between light and shape can all support an interesting photograph.
Can I feed birds for a closer photograph?
No. The Gardens prohibits feeding wildlife. Observe without luring, chasing or rearranging the animal’s behaviour for the camera. Keep your group on permitted paths and give wildlife space. A distant record or a missed photograph is preferable to disturbing the living subject you came to appreciate.
How do I include a wheelchair user in the session?
Choose the route and viewpoints around the person’s access needs and preferences, then compose the photograph there. Check the relevant connections and facilities in advance. Ask before offering physical assistance or directing a pose. An inclusive session keeps the experience shared instead of leaving someone behind while the group pursues a particular angle.
What should we do if the preferred background is unavailable?
Use a prepared, verified alternative that fits the same brief, simplify the session or return another day. Recheck the time budget before adding travel. Do not solve the problem by blocking access, entering a restricted area or pressuring companions to rush. A clear purpose gives you creative options even when one location does not work.
Official sources and further reading
Visitor information checked on 18 October 2026. Opening arrangements and local access can change. Suggested timings, sample budgets and learning activities in this guide are eduKate editorial examples, not official tours or guarantees.
Singapore Botanic Gardens: Use our Space — Casual photography, application lead times, Bandstand solemnisation notice and shared-space rules.
Singapore Botanic Gardens: Visitor Information — Entrances, maps, attraction schedules, access and pet boundaries.
Singapore Botanic Gardens: Heritage Trees and Landscapes — Official background for landscape subjects; verify captions against the relevant feature.
Singapore Botanic Gardens: Plant Collections and Gardens — Collection context for choosing a subject without assuming a particular bloom.
Continue with our Bukit Timah things-to-do guide and Bukit Timah Gate arrival guide.
Continue learning: Day 28 Singapore Botanic Gardens vocabulary
Related Touring Singapore vocabulary: For orchid names, the UNESCO World Heritage story and careful visitor observations beyond photo composition, explore Top 100 Singapore Vocabulary Words | Day 28: Singapore Botanic Gardens, UNESCO and Orchids. The Touring Singapore master hub connects this subject to the other numbered days. This is further reading, not a replacement for any current venue or access advice.