
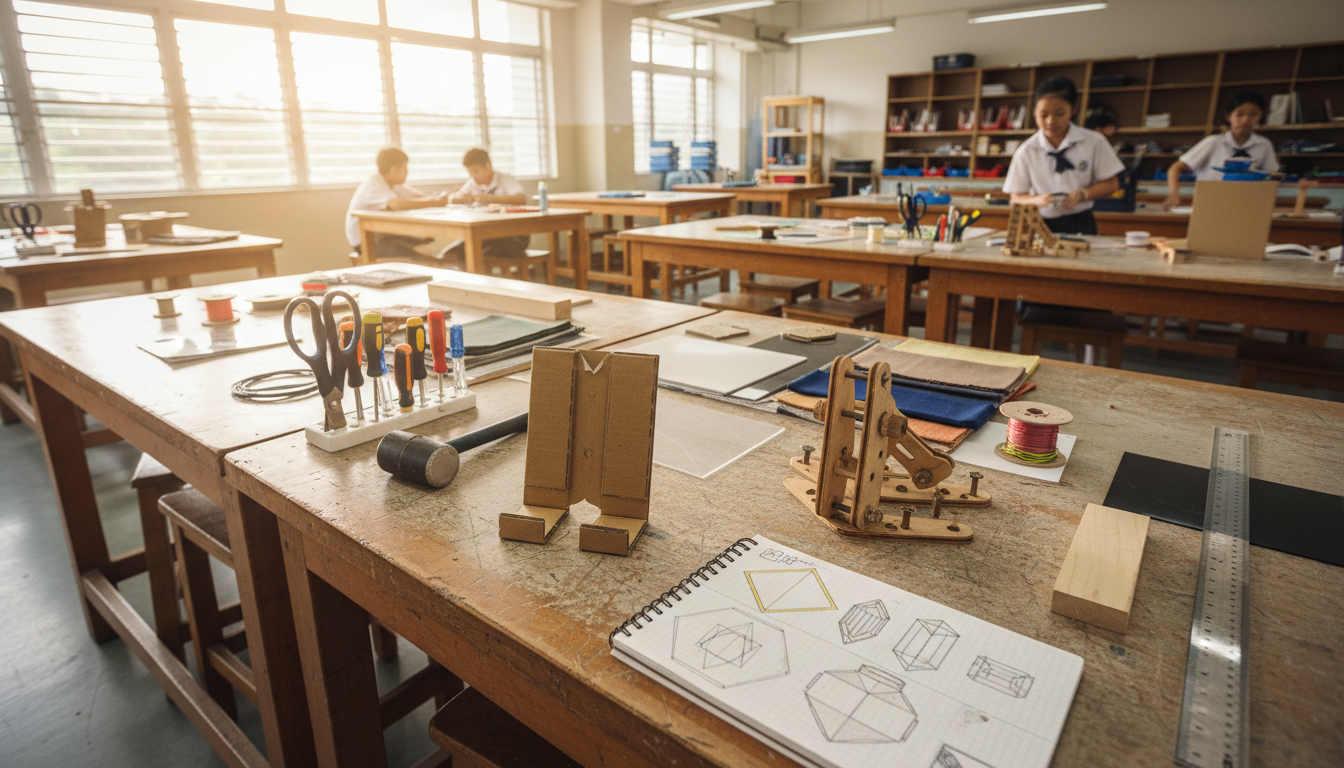
Secondary 2 Design and Technology (D&T) vocabulary gives Singapore students the words to explain a real problem, understand the person using a product, sketch ideas, test a mechanism, select materials and improve a prototype. Below are 200 practical terms with plain-English meanings, organised by the way actual design projects unfold. The purpose is not to memorise impressive technical jargon: it is to make better design choices and explain them clearly.
These 200 terms are independently selected by eduKateSG; they are not an official MOE or SEAB compulsory word list. MOE’s published lower-secondary D&T framework emphasises learning through design-and-make projects, sketching, mock-ups and user evaluation. Schools differ in the examples, materials, mechanisms, electronics and assessments they use, so not every extension term on this page is necessarily examined in Secondary 2. Follow the student’s current school brief and workshop safety rules.
Quick information:
- Words 1–40: defining the problem and understanding the user;
- words 41–80: drawings, dimensions and mechanisms;
- words 81–120: basic circuits, materials and workshop processes;
- words 121–160: prototypes, testing and evaluation;
- words 161–200: safety, sustainability, product systems and design in daily life.
Top 200 Secondary 2 Design and Technology vocabulary words and meanings
1. Starting a design project with a real problem — words 1–20
For each word, ask: Where would it appear in a real design folder, sketch, prototype, workshop or user test? Build understanding through the task.
- design — Deliberate planning and making to address a need or opportunity.
- design process — An iterative approach to understanding needs, generating ideas, making and testing.
- design problem — A difficulty or unmet need that a design may address.
- design situation — The real context in which a design need arises.
- design brief — A concise statement of the problem, user and intended design direction.
- design specification — A set of measurable or observable requirements for a proposed solution.
- design requirement — A condition that a design should satisfy.
- design constraint — A limit such as time, space, budget or material availability.
- criterion — A standard used to judge an idea or final result.
- feasibility — Whether an idea can realistically be made and used within the constraints.
- ideation — The process of generating possible design ideas.
- concept — An early idea showing how a possible solution could work.
- solution — A proposed response to the defined design need.
- iteration — Repeating a design cycle after learning from earlier attempts.
- refinement — Improving a design’s details to address weaknesses.
- decision matrix — A table comparing ideas against stated selection criteria.
- research — Gathering relevant information to guide a design decision.
- benchmarking — Comparing an idea with existing products or performance standards.
- design intent — The purpose or experience a designer is trying to achieve.
- design opportunity — An area where a useful improvement or new approach may be possible.
2. Understanding people, users and their needs — words 21–40
For each word, ask: Where would it appear in a real design folder, sketch, prototype, workshop or user test? Build understanding through the task.
- user — The person who will actually interact with the proposed solution.
- stakeholder — Anyone significantly affected by or involved in a design decision.
- user needs — Tasks, conditions or difficulties that the design should address.
- user experience — How a person perceives and feels about using a product or service.
- empathy — Understanding another person’s experience without assuming it matches one’s own.
- accessibility — How easily people with differing abilities can use an object or service.
- inclusivity — Designing for participation by people with varied needs and backgrounds.
- ergonomics — Fitting products and tasks to people’s capabilities and limitations.
- anthropometrics — Measurements of human body dimensions used to inform design.
- observation — Watching how a task occurs in its actual setting.
- interview — Asking users questions to understand experiences and requirements.
- questionnaire — A structured list of questions used to gather responses.
- persona — A fictional but research-grounded representation of a user type.
- scenario — A specific example of a person using a product in context.
- usability — How easily and effectively intended users can carry out a task.
- comfort — How pleasant or physically tolerable a product feels in use.
- reach — The distance a user can comfortably extend a body part to access something.
- grip — The way the hand holds an object or control.
- pain point — A specific frustration or difficulty experienced by a user.
- user feedback — Comments or observed responses from users during design or testing.
3. Sketching, visual communication and planning — words 41–60
For each word, ask: Where would it appear in a real design folder, sketch, prototype, workshop or user test? Build understanding through the task.
- freehand sketch — A drawing made without precision drafting tools to communicate an idea.
- thumbnail sketch — A quick small drawing exploring possible arrangements.
- isometric drawing — A three-dimensional-looking view drawn on axes at equal angular relationships.
- oblique drawing — A three-dimensional representation with a front face shown in true shape.
- orthographic projection — A set of related two-dimensional views of a three-dimensional object.
- plan view — A view showing an object or space from above.
- front elevation — The view of an object as seen directly from its front.
- side elevation — The view of an object as seen directly from one side.
- dimension — A numerical measurement specifying an object’s size or position.
- annotation — A short note explaining an important feature on a drawing.
- rendering — Applying tones, textures or colour to communicate the appearance of a design.
- perspective drawing — A drawing representing spatial depth and visual convergence.
- line weight — The thickness of lines used to distinguish edges, features and emphasis.
- exploded view — A drawing showing parts separated to clarify their assembly.
- section view — A drawing revealing interior details by imagining a cut through an object.
- scale drawing — A representation made in a consistent size ratio to the real object.
- visualisation — Forming or communicating a mental picture of a proposed design.
- modelling — Creating a simplified representation of a design or its behaviour.
- storyboard — A sequence of sketches showing how a user might interact with a product.
- presentation board — An organised visual display explaining a design idea and process.
4. Simple mechanisms, movement and forces — words 61–80
For each word, ask: Where would it appear in a real design folder, sketch, prototype, workshop or user test? Build understanding through the task.
- mechanism — An arrangement of parts that transmits or changes motion and force.
- linkage — Connected rigid parts that transmit movement between joints.
- lever — A rigid bar that rotates about a support to apply a force.
- fulcrum — The support or pivot around which a lever turns.
- pivot — A joint or point allowing rotation.
- gear — A toothed wheel transmitting rotation or force to another part.
- gear ratio — A relationship between gear sizes or rotations affecting output motion.
- pulley — A wheel guiding a rope or belt to transmit movement or force.
- belt drive — A mechanism transmitting rotation through a belt between pulleys.
- cam — A shaped moving part used to produce a particular follower motion.
- follower — A part moved by contact with a cam or similar mechanism.
- crank — An arm or rotating part converting motion between forms.
- slider — A part constrained to move along a straight path.
- rotation — Movement around an axis.
- reciprocating motion — Repeated back-and-forth movement along a path.
- oscillation — Repeated movement about a position or between states.
- mechanical advantage — The ratio showing how a mechanism multiplies applied force.
- friction — A force opposing sliding or attempted sliding between surfaces.
- torque — The turning effect of a force about an axis.
- motion transfer — Transmission of motion from one moving component to another.
5. Basic electrical design and simple circuits — words 81–100
For each word, ask: Where would it appear in a real design folder, sketch, prototype, workshop or user test? Build understanding through the task.
- circuit — A connected arrangement through which electrical current can flow.
- closed circuit — A complete conducting path allowing current to flow.
- open circuit — A broken or disconnected path preventing ordinary current flow.
- current — The rate of electric charge flow.
- voltage — Electric potential difference between two points.
- resistance — Opposition to electric current in a component.
- conductor — A material that allows electric current to flow relatively easily.
- insulator — A material that resists ordinary electric current flow.
- switch — A component used to control whether a circuit path is open or closed.
- battery — An electrical energy source using chemical reactions.
- LED — A light-emitting diode that produces light when correctly powered.
- resistor — A component designed to provide a specified electrical resistance.
- series circuit — Components connected along a single current path.
- parallel circuit — A circuit with separate branches between common connection points.
- polarity — The orientation of positive and negative connections where it matters.
- input — A signal, action or energy entering a system.
- output — A signal, action or energy delivered by a system.
- sensor — A component detecting a physical condition and producing a response signal.
- actuator — A device converting a control signal or energy into a physical action.
- short circuit — An unintended low-resistance path that can cause unsafe current.
6. Materials, properties and safe workshop methods — words 101–120
For each word, ask: Where would it appear in a real design folder, sketch, prototype, workshop or user test? Build understanding through the task.
- material — A substance selected for making a product or component.
- property — A characteristic describing how a material behaves or appears.
- strength — The ability to withstand applied forces without failure.
- stiffness — Resistance to bending or deformation under an applied load.
- flexibility — The capacity to bend or change shape without breaking.
- toughness — Ability to absorb energy before fracturing.
- hardness — Resistance to local scratching, indentation or wear.
- density — Mass per unit volume of a material.
- durability — Ability to remain usable through wear or environmental exposure.
- timber — Wood used as an engineering or construction material.
- plywood — A board made from bonded layers of wood veneer.
- acrylic — A transparent or coloured plastic often used for sheet components.
- thermoplastic — A polymer that softens when heated and can be reshaped appropriately.
- metal — A material group often selected for conductivity, stiffness or strength.
- composite — A material combining distinct constituents to gain useful properties.
- measuring — Determining a dimension using a suitable instrument.
- marking out — Transferring cutting or drilling locations onto a workpiece.
- cutting — Removing or separating material with an appropriate tool.
- drilling — Producing a round hole using a rotating cutting tool.
- finishing — Treating surfaces and edges for appearance, protection or safe use.
7. Prototypes, joints and getting ideas into physical form — words 121–140
For each word, ask: Where would it appear in a real design folder, sketch, prototype, workshop or user test? Build understanding through the task.
- prototype — An early version used to test how a design might work.
- mock-up — A quick representation used to explore form, layout or a user interaction.
- scale model — A model built to a defined ratio relative to actual size.
- proof of concept — A demonstration that a key principle can work.
- test rig — A setup built to examine the performance of a component or idea.
- jig — A device guiding a tool or operation to improve consistency.
- fixture — A device holding a workpiece securely during a process.
- assembly — The process of joining components into a working product.
- joint — The connection between two or more parts.
- tolerance — The permitted variation from a specified dimension.
- fit — The way two components locate or move relative to one another.
- fabrication — Producing parts from materials through making processes.
- adhesive bonding — Joining parts by using a suitable glue or bonding agent.
- fastener — A component used to hold parts together.
- nut and bolt — A threaded fastening pair that can join parts securely.
- slot — A narrow opening allowing insertion, adjustment or movement.
- hinge — A joint designed to allow controlled rotation.
- fold — A bend in a sheet or flexible material to create form or movement.
- cardboard engineering — Using cut, folded or layered cardboard to prototype structures.
- build sequence — The planned order in which components are made and assembled.
8. Testing, evidence, evaluation and improvement — words 141–160
For each word, ask: Where would it appear in a real design folder, sketch, prototype, workshop or user test? Build understanding through the task.
- testing — Checking whether a design meets a stated requirement under defined conditions.
- performance — How well a product or component carries out a task.
- functionality — Whether a design provides the intended useful operations.
- effectiveness — The degree to which a solution achieves its intended goal.
- efficiency — How economically a product uses time, energy or other resources.
- reliability — The likelihood of consistent operation under stated conditions.
- repeatability — Whether the same test produces similar results under similar conditions.
- measurement error — The difference between a measured value and the reference or true value.
- calibration — Checking and adjusting an instrument against known standards.
- evaluation — A reasoned judgement comparing results against design criteria.
- success criterion — A measurable standard indicating whether a design has met its aim.
- failure mode — A specific way a component or product can stop performing correctly.
- user trial — A structured opportunity for intended users to try a design.
- trade-off — Accepting a disadvantage in one aspect to improve another.
- improvement — A useful change made in response to identified weaknesses.
- redesign — Reworking the concept or construction to better meet requirements.
- verification — Checking that a product matches its specified design requirements.
- validation — Checking that a solution actually addresses the real user need.
- documentation — A record of decisions, drawings, construction and evidence.
- reflection — Review of what worked, what failed and how future attempts might improve.
9. Safety, ethics and responsible material choices — words 161–180
For each word, ask: Where would it appear in a real design folder, sketch, prototype, workshop or user test? Build understanding through the task.
- lifecycle — The stages a product passes through from material extraction to disposal.
- sustainability — Making choices that support long-term environmental and social wellbeing.
- embodied energy — Energy used to extract, process, manufacture and transport a material or product.
- waste — Material discarded because it is not immediately used or wanted.
- reuse — Using an item again without remanufacturing it into raw material.
- repairability — How readily a product can be fixed when it fails.
- recyclability — The practical potential for a material to be recovered and reprocessed.
- disassembly — Taking a product apart to replace, inspect or recover components.
- material efficiency — Using as little suitable material as possible without sacrificing function.
- resource efficiency — Obtaining useful results while reducing unnecessary resource inputs.
- low-impact design — Design aiming to minimise harmful effects across its life.
- planned obsolescence — Design or marketing that deliberately limits useful product life.
- safety factor — An engineering margin between expected load and material or component capacity.
- hazard — Something with the potential to cause harm.
- risk assessment — Identifying hazards and judging likelihood and consequences before work.
- safeguarding — Measures protecting users or workers from avoidable harm.
- ethical design — Design choices considering fairness, privacy and the effects on people.
- universal design — Designing environments and products to be usable by as many people as practical.
- maintenance — Regular action needed to keep a product operating properly.
- disposal — The process of dealing with an item at the end of its use.
10. Design literacy in everyday Singapore life — words 181–200
For each word, ask: Where would it appear in a real design folder, sketch, prototype, workshop or user test? Build understanding through the task.
- problem solving — Identifying a need and developing a justified response.
- systems thinking — Considering how connected parts and decisions affect a whole.
- prototyping culture — A willingness to test early, learn from failure and improve.
- collaboration — People combining different skills and perspectives towards a goal.
- communication — Clearly sharing needs, choices, sketches and outcomes.
- product — A physical or digital item intended to deliver value.
- service — An activity designed to meet another person’s need.
- interface — A point where a person or component interacts with a system.
- affordance — A feature suggesting how an object can be used.
- feedback loop — A cycle in which results inform later adjustments.
- automation — Using control systems to perform tasks with limited direct operation.
- manufacturing — Production of useful goods from materials and components.
- quality control — Checking that outputs consistently meet specified requirements.
- productivity — Useful output achieved relative to labour or other resources.
- budgeting — Planning available money and expenditure for a project.
- cost estimate — An approximate calculation of expected expenditure.
- unit cost — The cost associated with one unit of a product.
- lead time — The duration from requesting work or material to its availability.
- technical literacy — Understanding and using basic technical ideas and representations.
- design literacy — Recognising how objects and systems are shaped by needs and choices.
How Design and Technology works: first solve the right problem
Imagine a student who sees a crowded school desk and immediately decides to make a bigger pencil holder. The idea sounds useful, but the real problem may be that notebooks, a tablet and a water bottle compete for the same limited space. Making a larger holder could make the situation worse. Design begins with understanding the user, not choosing an object to build because it looks attractive.
Suppose Alicia is a Secondary 2 student asked to improve the study experience of a classmate who uses a small shared table. Alicia observes how items are placed, asks which tasks are most frustrating and identifies the available space. She discovers that the classmate needs a stable place to position a phone for viewing assignment instructions. Her design brief can now specify a simple support for a phone in a limited space. That is much clearer than “make something cool”.
Good design involves a chain: understand a real need, write measurable requirements, generate different ideas, make quick models, test with the user, and improve where evidence shows a weakness. An elegant final object is useful only when it performs its intended job safely and appropriately.
Worked example 1 — From problem statement to design specification
A design brief might say: “Develop a compact desktop stand that holds a phone in a stable viewing position for a student working on a small desk.” This identifies a user, an activity and an outcome. The specification should then make the requirements testable. For an example prototype, the group might decide that the stand must fit within a 15 cm by 15 cm footprint, support a selected phone model, avoid scratching it, and remain stable during ordinary touch-screen use on a level surface.
These numerical targets are project-specific examples, not universal standards or MOE dimensions. The real class should measure its intended device and workspace. A good specification also considers material and time constraints. If the available cardboard is thin, the student’s first fold may buckle under load. That result is not evidence that all cardboard structures fail. It suggests that shape, bracing, thickness or material selection must change.
Notice how requirements differ from solutions. “Must keep the phone stable” describes an outcome. “Must be built from three cardboard triangles” prescribes a construction method. The first leaves room for alternative ideas. The second is appropriate only if the material or form is genuinely a constraint imposed by the task.
Worked example 2 — Observe before interviewing a user
Users often have useful needs they find hard to describe. A student may say “I need a larger desk” because they assume that is the only fix. Observation might show that charging cables tangle, books slide and there is no clear place for small objects. A designer should separate the person’s stated preference from the underlying difficulty.
A helpful interview question is: “Can you show me the last time this was inconvenient?” This invites a concrete story rather than asking the person to predict an ideal product. Follow-up questions might explore how often the issue occurs, what temporary solutions are used and what features would cause annoyance. Do not assume all users have the same hand size, reach, vision or strength. Ergonomics, accessibility and anthropometrics require attention to real human variation.
When gathering feedback, avoid leading questions such as “You like my design, don’t you?” Ask the user to attempt a task and describe any difficulty. Watching an attempt often reveals more than a compliment. Record the observation respectfully and keep personal information limited to what the project genuinely needs.
Worked example 3 — Sketching communicates decisions, not only beauty
A freehand sketch helps ideas leave the student’s imagination and become discussable. A quick thumbnail can explore three different stand concepts before any material is cut. One may use a folded support, another a slot-and-tab connection, and a third a hinge. The student should annotate why each might work, where the load acts and which dimensions may matter.
Different drawing types answer different questions. A perspective sketch makes the object easier to visualise. An orthographic drawing allows front, side and plan views to show dimensions. An exploded view clarifies how parts fit together. A section view can expose hidden joints. A polished shaded rendering is not a substitute for a working drawing when someone needs to manufacture the parts.
Suppose the student draws a stand 20 cm wide and labels it 10 cm on the dimension line. The attractive appearance does not fix the contradiction. In a scale drawing, measured distances must follow a consistent ratio. Check whether the drawing shows the dimensions of the actual intended product or merely a rough idea. The label tells the maker what to build.
Worked example 4 — A mechanism transfers motion and force
Consider a simple cardboard toy with a rotating crank and a moving character. The handle turns in rotary motion. A linkage or crank-and-slider arrangement can transform that motion into back-and-forth movement. The important question is not whether the toy contains many parts, but how the parts transmit motion in the intended way.
Draw the pivot points and ask which parts are allowed to rotate, slide or remain fixed. If a linkage binds, the student should check hole position, joint clearance and whether the pieces are aligned. A small change in geometry can change the path of motion. Testing with a quick mock-up is often more revealing than memorising a diagram without building it.
Gears and pulleys provide other motion-transfer possibilities. Gear ratio relates the sizes or tooth counts of meshing gears to their rotational speeds. For example, if a driving gear has 10 teeth and the driven gear has 20 teeth, the driven gear normally turns at half the rotational speed of the driver in a simple two-gear arrangement, ignoring losses and assuming compatible gearing. The trade-off is an increase in torque at the output under ideal conditions. Real friction and structural limits still matter.
Worked example 5 — The difference between a mechanism and a structure
A structure is designed primarily to support loads and keep a shape; a mechanism is designed primarily to transmit or transform motion. A phone stand may include both: a rigid triangular support and a folding hinge. The triangle improves stability and stiffness. The hinge allows controlled movement. Students should not call every moving part a “motor” or every rigid part a “mechanism”.
When discussing structure, identify where weight is applied and how forces travel into the desk or base. A very thin upright section can bend even if its material is reasonably strong. Adding a fold or rib may increase stiffness without using much more material. This is why strength and stiffness are not synonyms. A material can resist permanent failure but still flex too much for the intended task.
Design is usually about trade-offs. A thicker panel may feel sturdier but be heavier and use more material. A stronger joint may be difficult to repair. The best choice depends on the project brief, user needs and evidence from testing.
Worked example 6 — A simple LED circuit without unsafe shortcuts
Imagine a small educational display using a low-voltage battery, a switch, an LED and an appropriate current-limiting resistor. The circuit works when its conducting path is complete and components are connected correctly. The LED has polarity: connecting it backwards in a simple DC circuit may stop it lighting. A resistor helps limit current to a suitable level when chosen correctly for the components.
A student should not interpret “the bulb is brighter” as proof that every electrical connection is safe. Incorrect battery combinations, short circuits, unsuitable components and exposed conductors can damage parts or cause heating. Use school-approved low-voltage kits under supervision. Do not experiment with household mains electricity, damaged battery packs or unfamiliar power supplies as part of a home D&T assignment.
Learn the vocabulary by describing function: the battery supplies electrical energy, the switch opens or closes the path, the resistor limits current and the LED provides light. Once these roles are clear, the student can trace faults systematically instead of randomly replacing components.
Worked example 7 — Choosing a material is a reasoned decision
Cardboard is inexpensive and easy to cut for a mock-up, but it may soften or deform in damp conditions. Plywood can offer useful stiffness and durability when appropriately designed, though edges require suitable finishing. Acrylic can look clean and transparent, but brittle behaviour or stress concentration can make it unsuitable for some thin or highly loaded joints. The correct choice depends on the demands of the object, not a simple ranking of “best materials”.
Suppose two concept stands share the same shape. One uses thick layered cardboard; the other uses a sheet plastic. A fair comparison should specify dimensions and test conditions. If the plastic stand is thicker, a performance difference cannot be attributed solely to the material. Ask what variables were changed and what the load test actually demonstrates.
Material selection also affects repairability, recyclability and disposal. A permanently glued assembly may be quick to produce but difficult to disassemble. A mechanical fastener may allow repairs while adding bulk or cost. Good students can explain the choice they made and acknowledge the disadvantages they accepted.
Worked example 8 — What a good prototype test looks like
A quick mock-up helps test an idea before a refined version is made. For the phone stand, the student may build three cardboard alternatives in one lesson. Rather than selecting the neatest one, the student defines a simple test: can each support the same selected phone, at the same angle, on a similar surface, while the user performs a normal touch gesture? Record any slipping, bending or obstruction.
If one concept tilts backwards, the result points to a possible issue with base width, load position or joint stiffness. A redesign might widen the support or alter the folding geometry. Then test again under the same conditions. This creates evidence that the improvement actually addresses the weakness.
The distinction between verification and validation is useful. Verification asks whether the product matches the agreed specification, such as fitting within a maximum footprint. Validation asks whether the specification and resulting product solve the user’s real difficulty. A stand can meet every drawing dimension yet still be awkward to use in the intended study space.
Worked example 9 — Design for people who are often overlooked
A school may design a common storage system and assume all students have similar height, hand strength and vision. In reality, a high latch may be inconvenient for shorter users, and small labels may be hard to read. Universal design encourages a broader range of people to use a product where practical. It is not a claim that one design can meet every possible requirement without compromise.
Try a simple challenge: make an opening mechanism easy to operate with one hand while keeping the contents secure. The group might compare a tiny rotating knob, a large lever and a magnetic closure. Each has trade-offs in usability, security, cost and maintenance. The appropriate choice emerges from the user’s context and careful testing, not from the designer’s first preference.
In Singapore’s shared public environments, accessible routes, clear signage and usable everyday equipment affect students, caregivers, older residents and people with disabilities. Design learning can make students more attentive to those differences. It also teaches that empathy must be supported by consultation rather than guessing how someone else experiences a place.
Worked example 10 — Responsible design and environmental claims
Calling a product “eco-friendly” because it contains one recycled component is too vague. We should ask how much material is used, how long the product lasts, whether it is repairable, how it is transported and what happens when it is discarded. A product that fails quickly may create more waste than a durable alternative even if its initial packaging looks attractive.
Think about a school project that uses discarded cardboard. Reuse can be beneficial, and it can encourage creativity. Yet the final object still needs to meet safety and performance requirements. A beautiful recycled structure that collapses during ordinary use has not fulfilled its purpose. Design requires both responsibility and function.
The lifecycle perspective also matters when deciding between a permanent joint and a removable one. A removable fastener may simplify replacing a damaged part, but it adds components and may need maintenance. Students should state a specific environmental or user benefit and test whether it is achieved, rather than relying on a broad label.
How to present a D&T project clearly
Begin the folder or presentation with the user problem and evidence. Explain why the selected problem matters. Show two or three distinct sketches, identifying what each could improve and what remains uncertain. State the selection criteria before announcing a preferred concept; otherwise the decision can look like a preference invented after the fact.
For the chosen concept, include dimensions, appropriate drawings, key material decisions and a safe construction plan. Photograph or describe the prototype only as necessary to explain the relevant test. Record actual findings, including awkward failures and unexpected observations. End with an evaluation that distinguishes requirements met from problems remaining. “I am happy with my project” is a feeling, not sufficient performance evidence.
A strong reflection includes one specific decision that changed because of testing. For example: “The first cardboard support slipped during normal tapping, so I increased the depth of the base and repeated the same user trial. The revised version remained stable during the observed test, although it still occupies more desk space than intended.” This is more informative than “I improved my design a lot”.
Common D&T words that students confuse
- Design brief / specification: the brief frames the problem; the specification sets testable criteria.
- User need / designer preference: what the user needs is not automatically what the designer thinks looks attractive.
- Mock-up / final product: a quick representation may test one idea without being durable.
- Strength / stiffness: resistance to failure differs from resistance to deformation.
- Accuracy / tolerance: a measured result and its acceptable variation are distinct.
- Testing / evaluation: testing generates findings; evaluation judges them against criteria.
- Verification / validation: meeting specifications differs from solving the real user problem.
- Hazard / risk: a potential source of harm differs from the likelihood and consequences of harm.
- Ergonomics / anthropometrics: fitting tasks to people is broader than measuring body dimensions.
- Iteration / repetition: purposeful iteration uses feedback to change the next attempt.
A four-week Secondary 2 Design and Technology vocabulary plan
Week 1 — Understand the need and ask better questions
Choose 40 words from groups one and two. Observe one simple inconvenience at school or home, following appropriate permission and privacy boundaries. Write a short design brief, list three testable requirements and three constraints. Ask another person to try the existing process, then compare your assumptions with what they actually experience.
Week 2 — Sketch, dimension and understand movement
Choose words 41–80. Draw three different concepts with annotations. Use one drawing to show overall form and another to show dimensions or joint positions. Build a very low-risk paper or cardboard movement model if approved. Explain where the motion begins, how it transfers and what might cause a mechanism to jam.
Week 3 — Materials, circuits and prototype making
Choose words 81–140 relevant to the school’s actual project. Explore how material shape influences stiffness using teacher-approved methods. Where electrical work is part of the course, use only supervised, low-voltage educational kits. Construct a simple prototype and keep a record of the decisions, safe methods and problems encountered.
Week 4 — Test, improve and communicate the result
Choose words 141–200. Define three success criteria and test the prototype under specified conditions. Invite suitable user feedback, revise one weakness and repeat the test. Present the original problem, the key decision, the evidence for improvement and the limitation that remains. Retest the vocabulary in a fresh design situation rather than copying the glossary again.
Frequently asked questions about Secondary 2 D&T
Are these 200 official MOE Design and Technology exam words?
No. This is an independent learning glossary with foundational and extension terms. Check the school’s specific brief, materials and assessment criteria.
What is the most important D&T skill?
Identifying a real user need and improving a solution through evidence. Sketching, making and technical knowledge support that larger design process.
Do students need to be good at drawing?
They need to communicate ideas clearly. Quick annotated sketches, readable dimensions and sensible layouts matter more than making every early concept look like finished artwork.
Why do schools ask students to make mock-ups?
A mock-up helps uncover practical problems early, before time and materials are spent on a more refined construction.
Can students use household electricity for home D&T?
No. Household mains electricity and unsafe battery assemblies are not appropriate unsupervised school projects. Follow the teacher’s specified equipment and safety requirements.
Is D&T mainly for students who want to become engineers?
No. It develops problem-solving, visual communication, making, user awareness and responsible decision-making relevant to many future studies and everyday tasks.
How should we evaluate a prototype fairly?
Compare it with the original measurable requirements under similar test conditions. State strengths and weaknesses, then describe a specific improvement and its evidence.
What if the prototype fails?
A safe and well-documented failure can reveal exactly what needs redesign. The key is to learn from it, avoid repeating unsafe methods and show how the next attempt changed.
Official framework and further eduKateSG reading
MOE’s 2017 Lower Secondary Design and Technology syllabus reference explains design-and-make learning, sketching and user-oriented evaluation. Its cover uses older course labels; check current MOE Full SBB information and the student’s present school brief for applicable expectations. a Singapore secondary school’s published D&T programme example illustrates how mechanisms and integrated projects can be arranged, but a different school may organise lessons differently.
For broader language and connected reasoning, visit the eduKateSG Vocabulary Hub, Secondary 2 academic vocabulary and Secondary 2 Mathematics vocabulary for dimensions and reasoning. These provide complementary skills; this guide is specifically about design decisions, mechanisms, materials and testing.