
Two detail images can make the same shape look very different in size. One may show a hand at twice the enlargement of the other. Placing them side by side without checking scale can create a composition that the artwork never had.
The short answer is to identify corresponding features, establish whether the images share a simple transformation, compare them at a common scale and keep the unseen parts visibly unknown. A successful alignment can recover relationships within the photographed regions. It does not automatically recover the entire artwork, its physical size, surface or intended meaning.
This guide extends Visual Arts through an original image-reading exercise. It connects with Learning That Transfers into Life and the How X Works hub. All coordinates below describe an invented flat design. They are teaching data, not measurements of the featured sculpture or a documented artwork. You can follow the reasoning with paper rectangles; image-editing software is optional.
eduKateSG · Visual Arts
Find your next learning step
Compare detail images without treating their displayed sizes or missing corners as properties of the whole artwork.
ROUTE 1 · CHAPTERS 1–4
Understand the partial view
Read the key distinctions and define the question.
ROUTE 2 · CHAPTERS 5–8
Recover scale and position
Follow the original worked case step by step.
ROUTE 3 · CHAPTERS 9–12
Check the evidence limits
Inspect assumptions, roles and unresolved questions.
ROUTE 4 · CHAPTERS 13–16
Practise and revise
Apply the method under changed conditions.
ROUTE 5 · CHAPTERS 17–20
Read further and verify
Chapter contents
Understand the partial view · Chapters 1–4
Recover scale and position · Chapters 5–8
Check the evidence limits · Chapters 9–12
Practise and revise · Chapters 13–16
Read further and verify · Chapters 17–20
CHAPTER 1 OF 20 · Understand the partial view
1. Decide which composition you are trying to understand
A detail image is a view of part of something. Before interpreting its arrangement, name that something. Are you discussing the photograph as an independent composition, the region of an artwork it records, or the larger artwork? These questions can produce different defensible answers.
Suppose a detail centres a hand beside a doorway. The hand may occupy half the reproduced image while occupying only a small part of the full work. Saying that the artist made the hand dominate the whole composition would outrun the evidence. Saying that the detail makes the hand prominent describes the reproduction more accurately.
This distinction does not make details inferior. They allow close looking at marks, connections and small decisions. Their usefulness depends on matching the claim to the view. A detail can answer a local question exceptionally well while leaving an overall relationship unresolved.
Start a notebook page with the object of the claim: this detail, the recorded region, or the whole work. Then identify the feature supporting it. If you move between these levels, explain why. The small act of naming the level prevents a confident paragraph from quietly changing its subject halfway through.
The same habit helps when a teacher provides only selected illustrations. Work carefully with the available evidence and ask for an overview when the question needs one. You can give a strong account of a limited view without pretending the limitation has disappeared.
CHAPTER 2 OF 20 · Understand the partial view
2. Separate a crop from an enlargement
Cropping changes the selected boundary. Uniform enlargement changes the displayed size of everything within that boundary by the same factor. Stretching changes horizontal and vertical proportions differently. Rotation changes orientation. A reproduction can combine several operations, so appearance alone may not identify what happened.
Imagine a square mark photographed in a rectangular detail. Enlarging the detail uniformly keeps the mark square. Stretching the detail sideways makes the mark wider. Cropping may remove part of the mark altogether. These are different changes and require different explanations.
For composition, the consequences matter. A larger displayed hand is not evidence of a larger hand in the source if its detail was enlarged more. A shape that appears elongated may reflect the reproduction chain rather than the maker’s decision. Check the relationship before attributing it to the artist.
The existing Art guide on cropping and meaning develops the interpretive effect of changing boundaries. Here the narrower task is comparing several partial views whose reproduction scales differ. We must establish their geometric relationship before using them together as evidence.
Keep a simple record of any known operations. A supplied caption might state detail, rotated view or enlarged section. That is valuable information, but it still needs to match the actual image. If the operations are unknown, describe the comparison as provisional rather than inventing a production history.
CHAPTER 3 OF 20 · Understand the partial view
3. Define the coordinate convention before calculating
Our invented design is flat. Detail A is displayed as a rectangle 600 pixels wide and 400 pixels high. Detail B is 300 pixels wide and 200 pixels high. For this exercise, coordinates start at each image’s top-left corner. Horizontal values increase to the right and vertical values increase downwards.
A point labelled (500, 200) in A lies 500 pixels right and 200 pixels down from A’s origin. It is not a measurement in centimetres. Nor does it locate the point within the whole artwork unless another relationship supplies that information.
For simplicity, assume both images are upright, unmirrored, undistorted views of the same plane. Only uniform enlargement and translation separate their coordinate systems. These assumptions make a manageable first problem. Later chapters change them.
Coordinates here describe ideal positions on image boundaries, so an image width of 600 spans from coordinate 0 to boundary coordinate 600. Actual pixel indexing in software can use different conventions. The exercise concerns geometric distances, not an instruction for manipulating a particular file format.
Write these conditions beside the data. Otherwise a correct calculation may be applied to a photograph taken at an angle, where the simple model does not fit. Mathematical control includes recognising the conditions that make the calculation relevant. We begin with a clean relationship so that a later failure has an identifiable cause.
CHAPTER 4 OF 20 · Understand the partial view
4. Find corresponding features rather than similar-looking decorations
To align two details, locate features that genuinely correspond. A distinctive corner, a crossing line or an irregular mark can be more useful than a repeated decorative circle. Two similar circles may be different members of a pattern.
In our supplied data, P and Q are confirmed corresponding points. P appears at (500, 200) in A and (50, 50) in B. Q appears at (400, 300) in A and (0, 100) in B. The correspondence is a condition of the fictional exercise; it is not something a real viewer should assume from labels invented afterwards.
Begin by looking at the arrangement around each candidate. Does the neighbouring line turn in the same direction? Is a small irregularity present in both? Does the sequence of adjacent forms agree? Context helps distinguish an actual match from a convenient resemblance.
A mistaken correspondence can produce a neat but false reconstruction. Numerical precision does not rescue an incorrect identification. If several matches are possible, retain them as alternatives and seek another discriminating feature.
For a classroom exercise, the teacher can supply reliable correspondences first, then offer a new pair containing repeated motifs. The learner’s task changes from arithmetic to evidence selection. That progression is useful: first understand what the method does, then learn when the information permits its use. Do not merge those learning difficulties into one unexplained demand to make the pictures fit.
CHAPTER 5 OF 20 · Recover scale and position
5. Recover the relative scale from two points
Compare the displacement from P to Q. In A it is 100 pixels left and 100 pixels down. In B it is 50 pixels left and 50 pixels down. Both components in A are twice those in B. Under our stated upright, uniform-scaling assumptions, A therefore represents shared distances at twice B’s displayed scale.
We should enlarge B by a factor of two when expressing it in A’s pixel-based coordinate system. B’s displayed width becomes 600 and its height becomes 400 in that system. This does not mean we have discovered the artwork’s physical dimensions.
| Relationship | In A | In B | A relative to B |
|---|---|---|---|
| P to Q, horizontal | 100 pixels left | 50 pixels left | Twice as large |
| P to Q, vertical | 100 pixels down | 50 pixels down | Twice as large |
| Detail rectangle | 600 by 400 | 300 by 200 | B becomes 600 by 400 after scaling |
Why use two points? One matched point can locate an alignment once scale is known, but by itself it does not determine scale. Many differently enlarged versions can place one point at the same location. The distance between two distinct points supplies an additional constraint.
In a real image, measurement noise and distortion complicate this ideal comparison. A pair establishes a candidate transformation under a model. It should be checked against further features. Learning the exact case first gives you a clear expectation against which those complications can be recognised.
CHAPTER 6 OF 20 · Recover scale and position
6. Recover the offset after correcting scale
Once B is enlarged by two, P has scaled coordinates (100, 100). To place it at A’s P, (500, 200), move the enlarged B 400 pixels right and 100 pixels down in A’s coordinate system. The rule is xA = 2xB + 400 and yA = 2yB + 100.
Check Q independently within the supplied pair. Its B position (0, 100) becomes (400, 300), which agrees with A. The rule satisfies both correspondences. The two images can now be described in one shared frame.
Do the operations in an intelligible order. Scaling changes distances from B’s origin. Translation then places that scaled origin within A’s frame. Merely moving B until one feature overlaps, while leaving its size unchanged, would misalign the second feature.
You can reproduce this with paper. Draw B twice as large on a separate sheet, mark P and Q, then place the sheet’s origin 400 units right and 100 units down on a common drawing. Use a convenient reduced drawing scale so the exercise fits a page.
The answer is a relationship between reproductions. Calling the offset the artist’s actual spacing in millimetres would be incorrect. Without a physical scale reference or reliable object dimensions, the calculation remains in the chosen image-coordinate units. That limit belongs beside the result, where a later reader can see it.
CHAPTER 7 OF 20 · Recover scale and position
7. Describe the covered region without inventing a complete rectangle
In A coordinates, A covers horizontal 0 to 600 and vertical 0 to 400. The transformed B covers horizontal 400 to 1000 and vertical 100 to 500. Their overlap is the rectangle from horizontal 400 to 600 and vertical 100 to 400.
The smallest rectangle enclosing both views is 1000 by 500. But that enclosing rectangle includes areas neither detail records. Above B’s right-hand portion and below A’s left-hand portion, information is absent. Filling those areas with white would not prove that the artwork contains white there.
This is a common reconstruction error. A tidy rectangular canvas makes a presentation look finished, so its blank corners begin to feel like part of the source. Label them unrecorded, or represent their boundary clearly. Appearance should not turn missing evidence into a visual assertion.
The observed union has area 420,000 square coordinate units: 240,000 from A plus 240,000 from transformed B minus the 60,000 overlap. The enclosing rectangle has area 500,000. Thus 80,000 inside that enclosure is unrecorded. These are geometric areas in the comparison frame, not measurements of paint or physical support.
The arithmetic helps explain the shape of the evidence. It does not establish where the artwork itself ends. Both details might sit within a much larger work. Coverage of an enclosing rectangle and coverage of the original artwork are separate questions.
CHAPTER 8 OF 20 · Recover scale and position
8. Test a third feature before trusting the alignment
Suppose another confirmed correspondence R appears at (550, 250) in A and (75, 75) in B. Applying the rule gives (550, 250), so R agrees. It provides a useful check beyond the two points used to determine the transformation.
Now imagine a different record placing R at (80, 75) in B. The same rule predicts (560, 250), ten pixels away horizontally from the A position. Do not silently move R or adjust one image locally until the discrepancy disappears. First ask whether the match, measurement or model is wrong.
A small residual might reflect imprecise point selection. A systematic pattern could indicate stretching, perspective or another transformation. The significance of ten pixels depends on image resolution and the question. There is no universal tolerance supplied by this fictional case.
Keep the predicted and observed positions together. That makes the check reproducible and prevents the final composite from hiding how well it actually fits. An attractive seam is not an independent test if it was repeatedly adjusted until it looked smooth.
For a learner, explain both outcomes: R supports the candidate alignment in the first dataset; the altered R creates a discrepancy requiring investigation in the second. That statement is stronger than calling one image correct and the other wrong without examining the source of disagreement.
CHAPTER 9 OF 20 · Check the evidence limits
9. Keep physical scale separate from pixel scale
A photograph can be 1200 pixels wide whether it records a small drawing or a large wall. Pixel dimensions describe the digital representation. Physical dimensions require additional evidence, such as reliable object metadata or a documented scale reference in the appropriate plane.
Suppose reliable documentation later states that a particular visible segment is 20 centimetres long. If the segment measures 200 units in our comparison frame under the necessary geometric conditions, it supplies a conversion of ten coordinate units per centimetre. That conversion is new information. It did not emerge from the overlap alone.
Even then, ask what the reference measures. A ruler closer to the camera than the artwork may not share its scale. A frame’s outside dimensions are not automatically the painted surface dimensions. A catalogue can distinguish support, image and framed measurements for good reasons.
Avoid converting the enclosing 1000-by-500 rectangle into the artwork’s size. We have not established that its boundaries coincide with the object’s boundaries. The same conversion can be valid locally while the claimed overall extent remains unsupported.
In Art writing, size matters because a bodily encounter with a work differs from a small reproduction. Acknowledge recorded dimensions when available, but do not simulate certainty through calculations built on the wrong object. Accurate scale language makes interpretation more precise without pretending that numbers recreate the gallery experience.
CHAPTER 10 OF 20 · Check the evidence limits
10. Recognise when perspective breaks the simple method
Our transformation assumes parallel, equally scaled horizontal and vertical relationships. A photograph taken obliquely to a flat artwork can make nearer and farther regions appear at different scales. Uniform enlargement and translation may align one small region while leaving another displaced.
A practical warning sign is inconsistent fit. Corresponding distances near one side require a factor of two, while distances elsewhere require a different factor. That does not immediately identify the cause, but it challenges the simple model. Return to the images and their capture conditions.
A more complex geometric model can sometimes relate photographs of a plane, but it requires suitable correspondences and assumptions. This article does not turn a quick classroom alignment into a conservation-grade reconstruction. A technical specialist may be needed for a consequential documentation task.
Curved surfaces create another complication. A detail of a vessel, folded textile or sculpture is not simply a flat patch that can always be laid beside another view without distortion. Changes in viewpoint reveal and conceal different surfaces. A common scale does not remove that difference.
The learning check is to stop for a reason you can explain. Say that the available views do not support the assumed uniform alignment, identify the mismatch and request a more suitable overview or specialist method. Recognising a model’s failure is useful visual understanding, not failure to finish the exercise.
CHAPTER 11 OF 20 · Check the evidence limits
11. Distinguish rotation, reflection and repeated forms
A rotated detail can make the same diagonal lean in a different displayed direction. A mirrored image reverses orientation. Repeated forms can make an incorrect orientation appear plausible. Before interpreting directional relationships, inspect reliable asymmetries and the documented presentation of the work.
For example, a distinct notch beside a curve can help determine which way a detail belongs. A row of identical circles cannot usually establish that by itself. Text, when genuinely part of the recorded source and reliably reproduced, can provide another clue, but it should not be the only unchecked cue.
Do not infer that an artist reversed a motif merely because two reproductions disagree. One may have been mirrored during publication. Equally, do not assume every disagreement is a reproduction error. The images could record different works, versions or states. Identity comes before alignment.
In the invented coordinate exercise, orientation is explicitly supplied. A changed-context task can remove that assurance and ask the learner to list the extra evidence needed. That is a more demanding question than repeating the previous arithmetic with different numbers.
When communicating an alignment, state any rotation or reflection applied. A viewer should be able to distinguish the original reproduction from your transformed working copy. Preserving that distinction protects the evidential value of both, even when the adjusted version is easier to compare.
CHAPTER 12 OF 20 · Check the evidence limits
12. Return from alignment to visual interpretation
Once two views are aligned, ask what new relationship becomes visible. Perhaps a line that appeared to end at A’s boundary continues towards a form recorded in B. That can change an interpretation of connection, separation or direction within the observed region.
The geometric result does not dictate meaning. It supplies a better account of where recorded features sit relative to one another. Interpretation still requires attention to the actual visual decisions, material, context and purpose. A long connecting line need not mean a journey in every artwork.
Write an observation first: the aligned views show a continuous line between the two recorded forms. Then propose an interpretation and its reason. Finally identify the boundary: the surrounding composition remains partly unrecorded, so the relation’s place in the whole is uncertain.
This sequence helps prevent mathematical language from becoming a substitute for looking. A correct offset is valuable when it clarifies a visual question. It is not automatically the most important fact about an artwork. Choose the detail that matters to the inquiry.
Compare your earlier account with the revised one. Which statement should change because the alignment adds evidence? Which remains valid about the separate detail? The best revision is specific. It explains the new relationship without pretending the learner’s first limited observation was dishonest or that every earlier idea must be discarded.
CHAPTER 13 OF 20 · Practise and revise
13. Keep colour and surface claims within the evidence
Two geometrically aligned images may still have different colour or brightness. Different lighting, capture settings, processing and displays can affect appearance. Matching a line across an overlap does not establish that a colour difference belongs to the artwork.
Suppose the shared region appears warmer in A than in B. That discrepancy is evidence about the reproductions. It does not, by itself, establish that the original surface changed between photographs. Dates, capture conditions and a suitable documentation method would be relevant to that claim.
Avoid using automatic colour adjustment to manufacture an apparently seamless evidential image without recording the intervention. A composite intended as a visual aid should explain which parts were adjusted. An unaltered source view remains valuable for checking what was actually supplied.
Texture needs similar care. An enlarged low-resolution detail can make compression artefacts look like marks. A flat photograph may record shadows that suggest relief without conveying the physical surface fully. Greater displayed size is not the same as greater captured information.
For the learner’s annotation, distinguish geometry from appearance: the locations align under the stated model, while colour differences remain unresolved. That statement preserves two different kinds of evidence instead of using success in one dimension to declare complete fidelity in every other dimension. The wider Art Reproduction guide explains those broader transformations.
CHAPTER 14 OF 20 · Practise and revise
14. Write a reconstruction caption another reader can audit
A useful caption identifies the source views, the purpose of the alignment, the transformation applied and the remaining gaps. It need not become a technical report. It needs enough information to prevent your working reconstruction from being mistaken for an untouched complete image.
For our exercise, a suitable account says that two fictional detail rectangles were aligned using confirmed points P and Q; B was doubled and offset by (400, 100) in A coordinates; R supplied an additional check; the result records only the union of the two views. Physical dimensions and the artwork’s full extent remain unknown.
If you draw the reconstruction, mark the recorded boundary and distinguish unrecorded corners. Keep the source rectangles available alongside it. A reader should be able to return to the evidence rather than depend entirely on your finished arrangement.
Credit actual sources and observe their reuse conditions when working with real images. A transformation does not make someone else’s image yours. A rights statement and a statement of evidential status answer different questions; both may be necessary.
For portfolio development, keep the caption connected to your inquiry. Explain what the reconstruction helped you notice and which next observation would matter. That gives the exercise an artistic purpose. The output is a reasoned aid to looking, not a decorative page of coordinates detached from the work you want to understand.
CHAPTER 15 OF 20 · Practise and revise
15. Repair the most common misleading conclusions
The first misleading conclusion is that equal displayed sizes mean equal source sizes. Repair it by checking common landmarks or reliable scale information. Different enlargements can make a small recorded feature look larger than another without changing the original relationship.
The second is that the union’s enclosing rectangle is the whole artwork. Repair it by separating observed regions, gaps inside the enclosure and unknown regions beyond it. Three boundaries can differ: each detail, the recorded union and the actual object.
The third is that a visually smooth composite proves correctness. Repair it by checking correspondences not used to create the fit. A reconstruction adjusted repeatedly to look plausible needs independent evidence, especially when forms repeat.
The fourth is that geometric agreement proves colour or material fidelity. Repair it by identifying the property being tested. Position, colour, texture, physical scale and context each need their own appropriate evidence.
Finally, avoid treating a limitation as permission for any interpretation. Some claims are supported and others are not. You can still explain an observed local relationship carefully. The aim is a proportionate statement whose scope matches the material available. That habit is more useful than either exaggerated certainty or a declaration that reproductions tell us nothing.
Try a fresh fictional dataset. Detail C is 400 by 300. Detail D is 200 by 150. A confirmed landmark S is at (100, 100) in C and (20, 40) in D. Another T is at (220, 160) in C and (80, 70) in D. Assume the same upright, uniform model.
First decide what information establishes scale. The displacement S to T is (120, 60) in C and (60, 30) in D. The relative scale is two. Then use S to locate D’s scaled origin: (100, 100) minus (40, 80) gives (60, 20).
The transformation is xC = 2xD + 60 and yC = 2yD + 20. Check T: (80, 70) becomes (220, 160). D’s transformed rectangle extends from (60, 20) to (460, 320). It overlaps C but also records regions beyond C’s right and lower boundaries.
Now explain what remains unknown without being prompted. The whole artwork’s boundary, physical size and unrecorded regions remain unresolved. If a learner gives only the transformation, ask them to finish the evidential account. Transfer means choosing the method and preserving its limits in a changed case, rather than merely substituting new values into a remembered formula.
CHAPTER 17 OF 20 · Read further and verify
17. Choose a repair, stabilisation or extension route
If the distinction between crop and scale is unstable, begin with one original drawing and paper windows. Change the window boundary while holding viewing size fixed, then enlarge a fixed crop. Describe what changes in each operation before adding coordinates.
If the arithmetic is secure but the learner forgets scope, practise short paired explanations. One sentence states the aligned relationship. The next states what it cannot establish. Use new shapes and image sizes so that the explanation becomes a habit of reasoning rather than a memorised disclaimer.
For extension, supply three views with one inconsistent correspondence. Ask the learner to identify which assumptions might fail and what further evidence would distinguish the possibilities. Do not require them to invent the cause. A careful diagnostic question is a valid advanced result.
Parents can support the exercise by asking where a claim comes from. Which image shows that feature? How do you know the two marks correspond? What changes when the images share a scale? These questions invite explanation without assigning a permanent label about artistic talent.
Teachers should assess visual attention, choice of evidence and the clarity of the final claim alongside calculation. The goal is an increasingly independent observer who can connect representations and return to the artwork. A neat composite without those reasons is an incomplete learning result, even when its appearance is convincing.
CHAPTER 18 OF 20 · Read further and verify
18. Follow the connected visual learning routes
For the wider subject, return to Visual Arts and Arts. They place this narrow comparison within observing, making, interpreting and revising work.
For framing and spatial relationships, read Cropping Changes Meaning alongside Negative Space Is Not Unused Space. Those articles help explain why a changed boundary or surrounding region matters after its evidential status is clear.
For the reproduction chain, continue with How Art Reproduction Works. For purposeful image-making and source views, use Teaching Photography: Light, Composition and Visual Evidence.
For studio development, Teaching Visual Arts: Observe, Experiment and Explain connects small comparisons with an independent next version. Curatorial Studies extends questions about selection, context and responsible presentation.
Choose the route matching the next question rather than reading every page indiscriminately. If the alignment is uncertain, seek better source evidence. If it is secure but the interpretation is thin, return to visible relationships and context. A reading route becomes useful when it changes the next act of looking or making.
CHAPTER 19 OF 20 · Read further and verify
19. Questions about detail images and original composition
Can two details reveal the entire artwork?
Only if appropriate evidence establishes that their combined coverage includes it. Two overlapping views alone do not establish the object’s outer boundary. An overview or reliable documentation may supply what is missing.
Does enlarging an image reveal more captured detail?
Enlargement makes existing information larger. It does not automatically add recorded information. Inspect the source resolution and avoid treating interpolation or generated additions as original evidence.
Must every Art analysis use coordinates?
No. Use coordinates when they clarify a real comparison. Many visual questions need attentive description and context instead. The method serves the inquiry.
What if the details do not overlap?
You may need another view, reliable layout information or documented measurements. Without a connecting constraint, several relative arrangements can remain possible. Do not choose one merely because it makes an attractive composition.
Can I use an automatically stitched image?
As a working aid, possibly, with appropriate source rights and disclosure. For an evidential claim, check the assumptions, correspondences and altered regions. Software output is a proposed representation, not independent confirmation of its own accuracy.
What is the strongest final answer in this exercise?
Explain the recovered scale and offset, verify a further feature, identify recorded coverage and preserve the unknowns. Then state the particular visual relationship the comparison helps you discuss.
CHAPTER 20 OF 20 · Read further and verify
20. Sources, evidence checks and the next independent task
The IIIF Image API 3.0 specification distinguishes requested image regions, output size and rotation. It supplies an authoritative technical example of why these are separate properties. Our classroom transformation and all numerical datasets are original teaching constructions, not IIIF conformance tests or measurements taken from a museum image.
The Getty guide to the elements of art supports introductory vocabulary for describing visible decisions. Such vocabulary helps you identify a relationship; it does not settle interpretation or authenticate a reconstruction. Source routes checked on 21 October 2026.
Before sharing a comparison, check object identity, corresponding features, transformation assumptions, independent fit, coverage, physical scale claims and image permissions. Keep that check proportionate to the purpose. A classroom sketch and a conservation record require different levels of evidence.
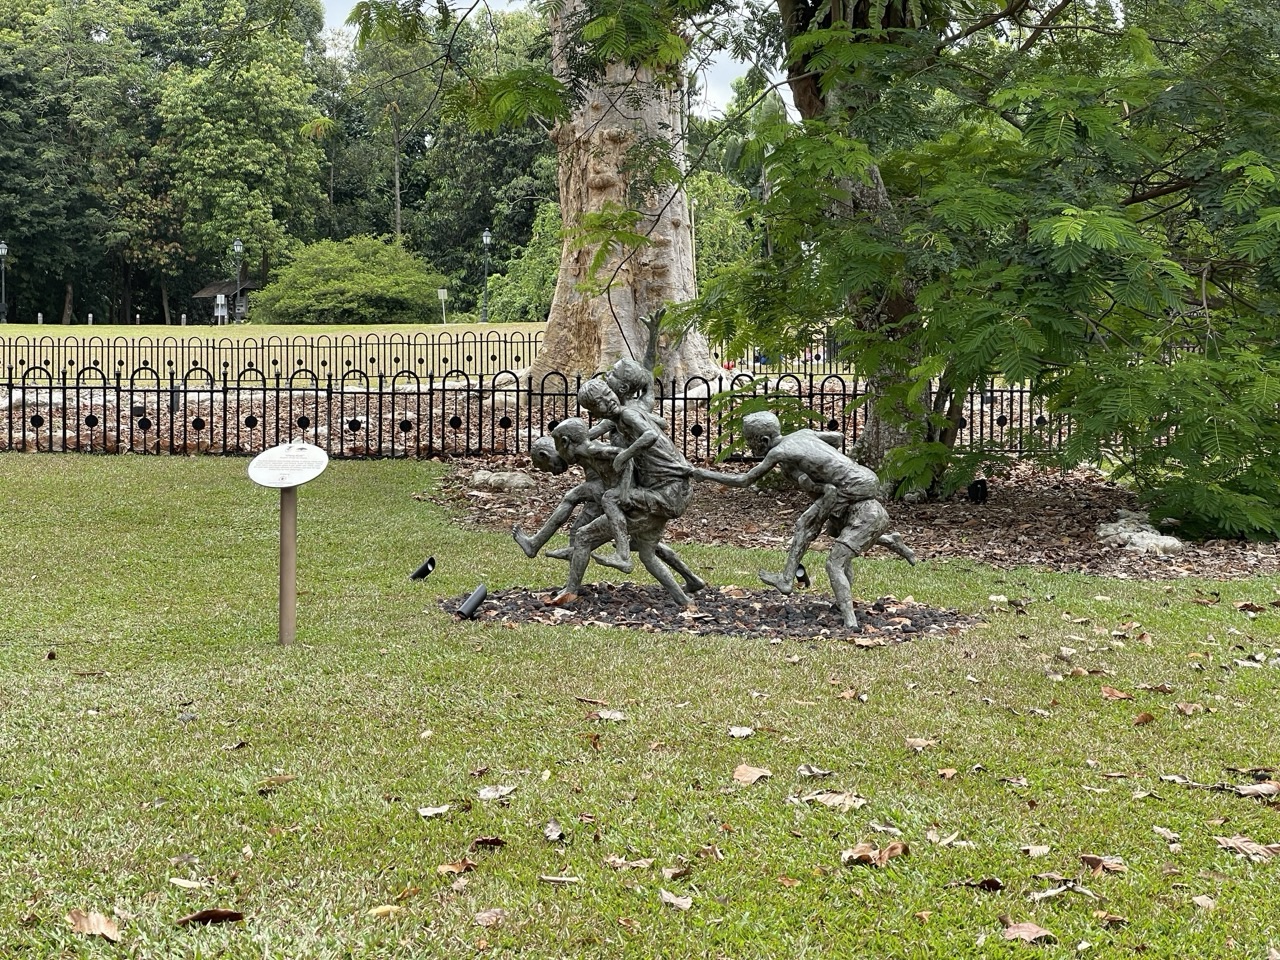
The featured photograph is an illustrative sculpture setting in Singapore Botanic Gardens. It is not the flat design used in the worked exercise, and no reconstruction of that sculpture is claimed.
For your next independent task, compare two details of your own original flat drawing. Keep an overview aside as a later check. Record what the details let you recover before consulting it, then explain which uncertainties the overview resolves. That final comparison makes the learning visible: you can distinguish what you inferred from what new evidence actually established.